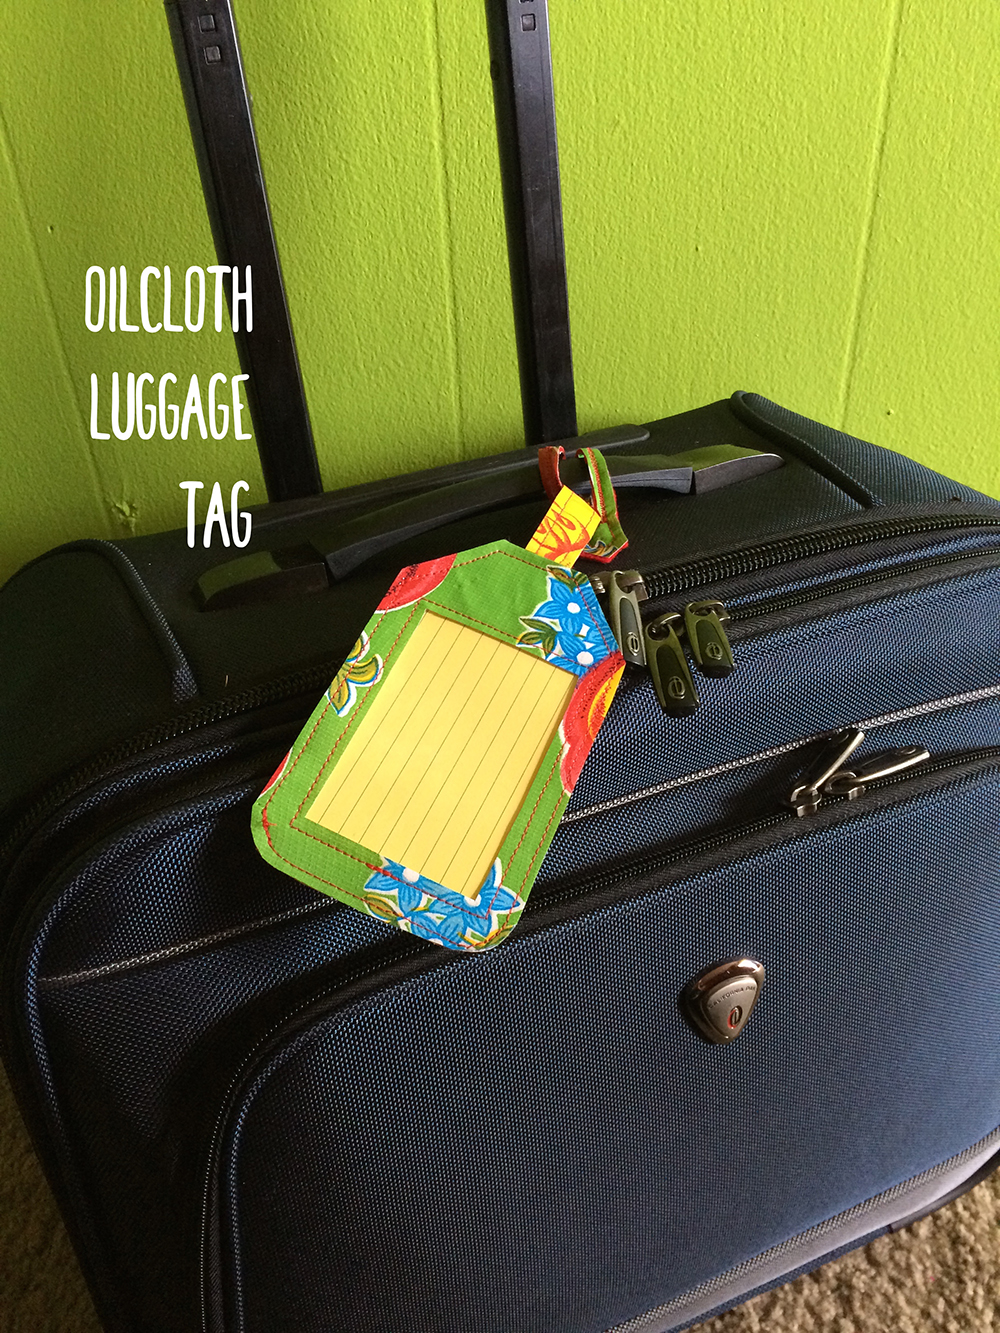
 Vacation season is just around the corner, which means it’s time to dust off the old suitcases. This season, why not fancy up your bag with a personalized luggage tag? Having spent much of the past month on the road, I came home excited to get back to my sewing machine. This fun luggage tag sewing project was the first project I needed to make!
Anything I can do to personalize my bag for traveling is helpful, and this luggage tag will definitely stand out. Made from oilcloth, it’s durable and can stand up to any form of weather. Plus, this is an easy sewing project that even a beginner can tackle!
Pattern Download: Luggage Tag Pattern
Here are the materials and supplies you’ll need to complete this project:
- 1/6” yard of oilcloth (or scraps)
- One 3½” x 6” rectangle of clear vinyl
- One 3” x 9½” rectangle of coordinating felt
- Matching all-purpose thread
- Satin finish tape
- Denim sewing needle
- Removable fabric marker
Cutting the Pieces
 Step 1: Download the Luggage Tag Pattern and print it. Cut out all pieces. Then cut out your fabric pieces according to these guidelines:
- From the oilcloth, cut three tag bodies and two tag straps (TIP: Use a removable marker to trace the pattern onto the oilcloth’s wrong side before cutting out the pieces.)
- From the clear vinyl, cut one tag body
- From the felt, cut one tag strap
 TIP: If the oilcloth is wrinkled, use a hairdryer to smooth it out.
 Step 2: Trace the window template roughly ½” from the upper edge, lower edge, and rounded corner end of one tag body. Cut out the window using sharp tipped scissors.
Sewing the Strap
 Step 3: Place one strap wrong side up on your work surface. Layer over it the felt strap and the remaining oilcloth strap right side up. Use paperclips or fabric clips to hold all the layers together.
TIP: Do not pin oilcloth – it will leave permanent holes.
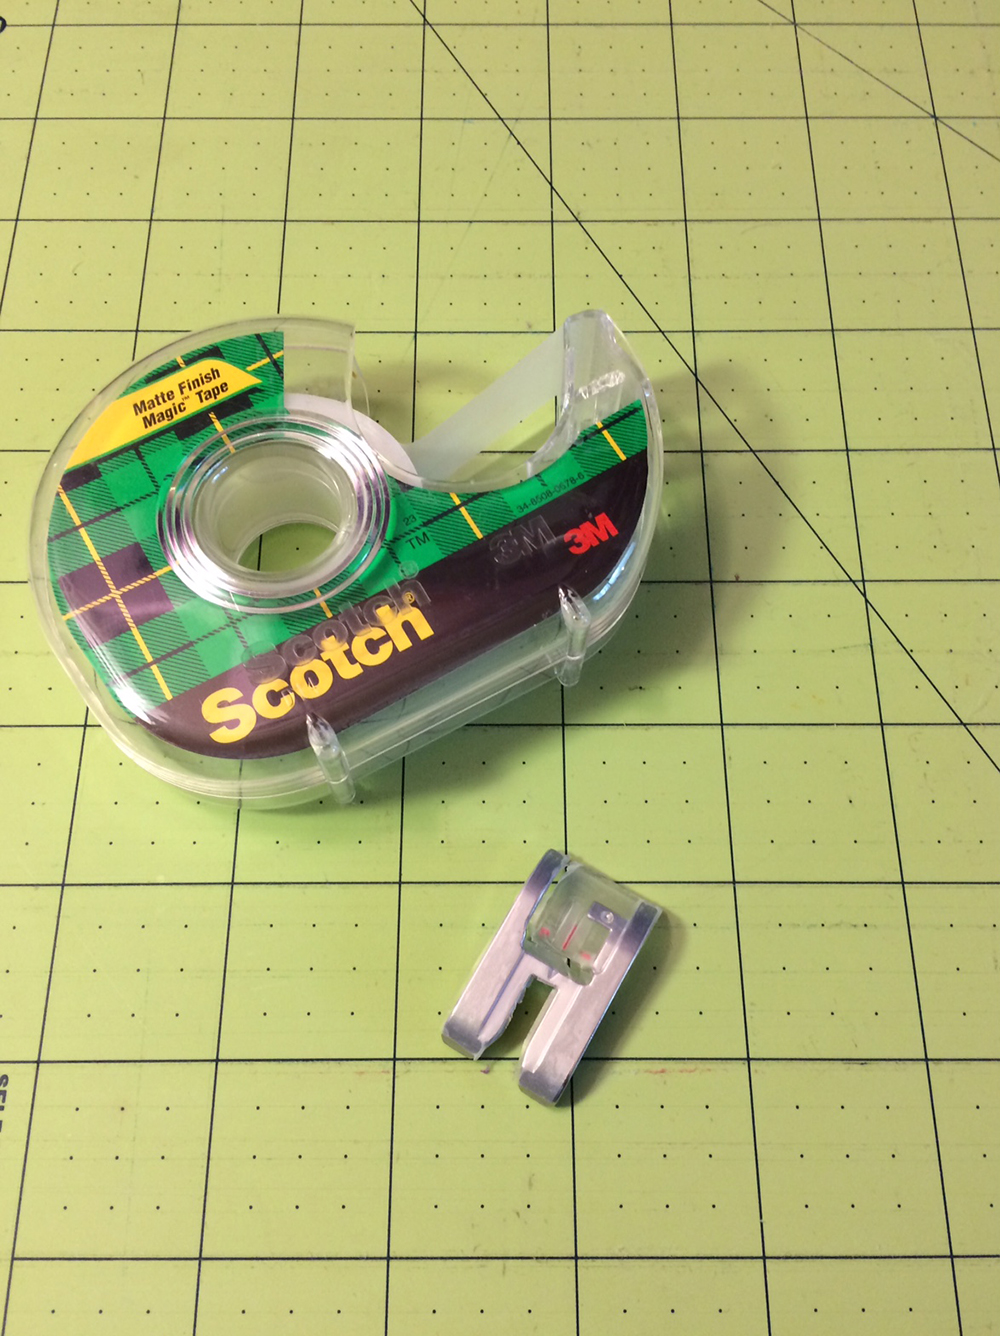 Step 4: Adhere satin finished tape to the underside of your presser foot. This will allow the oilcloth to move smoothly as you stitch. Alternatively, use a Teflon coated presser foot.
 Step 5: Stitch the tag strap’s perimeter. Stitch as close to the edge as you’re comfortable stitching.
 Step 6: Using a removable marker, draw within the lines of the stitching, roughly ½” from the pointed end. The box should be 3½” long by about ¼” wide.
TIP: Heat-removable markers work well on oilcloth as you can blow-dry the ink away. Alternatively, washable markers will work nicely too.
 Step 7: Set the sewing machine to a zigzag stitch that’s 1mm by 1mm. Test out the stitch on a scrap of oilcloth to ensure you like the look, and if not adjust the stitch length and width accordingly. Stitch around the box drawn onto the oilcloth, backstitching at the beginning and end. Then, using a pair of sharp-tipped scissors, carefully cut an opening between the completed stitches.
 Step 8: Place one oilcloth tag body right side up on your work surface. Center the tag strap over the tag body’s upper edge, and tape in place. Using the preset zigzag stitch length and width, stitch around the rounded edge of the tag’s strap. Backstitch at the beginning and end, and remove the tape.
Sewing the Tag Body
 Step 9a: Using fabric clips, clip together the tag body with the window cut out and the clear vinyl. Stitch around the window’s perimeter. Also stitch from one rounded corner to one angled corner. This will be the edge in which you insert your personal information.
Step 9b: Place the two remaining tag bodies wrong sides together and stitch from one rounded corner to one angled corner. Make sure that all tag bodies line up with the stitching on the same edge.
 Step 10: Place all the tag bodies together. The tag with the window should be on top and the tag with the strap attached should be on the bottom. Clip together securely. Stitch from the angled corner’s stitches around to the rounded corner’s stitches. Do not stitch over the previous stitches as this will close the luggage tag off and make it unusable. Move the strap under the tag body as you stitch, so as not to catch it in the stitches.
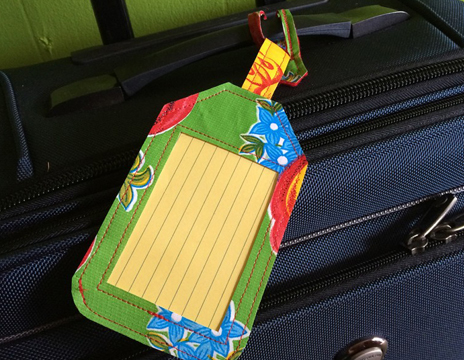
 Step 11: Now cut an index card to fit inside the window, and slide in place.
 And there you have it! To slip the luggage tag onto your bag, simply insert the tag body through the slit created in the tag strap. Be sure to write your personal information on the card, and you’re now ready to jet off on your next travel adventure.
P.S. If you liked this project and enjoy working with oilcloth, be sure to check out these other fun projects that utilize this fun and affordable fabric:
Get in touch! Leave a comment or email editor@nationalsewingcircle.com.
Share tips, start a discussion or ask one of our experts or other students a question.
Already a member? Sign in
14 Responses to “Make a Quick & Easy Oilcloth Luggage Tag”

What mm clear vinyl was used for this project ?
I would like a PDF of the instructions for the luggage tags. Is there something you can send me?
Could someone please fix the links that point to the pattern? One of them just brings up a picture of the luggage tag; when I try to download the other it comes back "Failed - Forbidden".
I'd really like to make some of these luggage tags but I can't seem to get the pattern to load. What am I not doing? Is there a place to purchase the pattern?
I would love the pattern for the oil cloth luggage tag.... thank you so much
Wonderful idea! I loved it.
Would love to have the pattern
I would love a PDF of the directions. Can you add one?
I think I would make the end of the strap triangular as it's easier to sew neatly, and then I would sandwich it in between the layers. The circle is cute, but difficult to do nicely. Just my 2 cents. Love the idea though. I've got some laminated cotton that would work nicely too.
Hi. I printed the pattern for the luggage tag (thank you). Now is there a button to click on in order to get the directions printed out so I can save for when I have time to make the tags? Any help will be welcomed.