 Making something special for a guy in your life is easier than you think. These three projects take at most 30 minutes each and are great to give individually or as a set. I’m always looking for something special to make for my husband, and I quickly realized that handmade items make his day. The time and care that went into the item really shines through. Plus, a handmade gift is one-of-a-kind and will make him feel unique and loved.
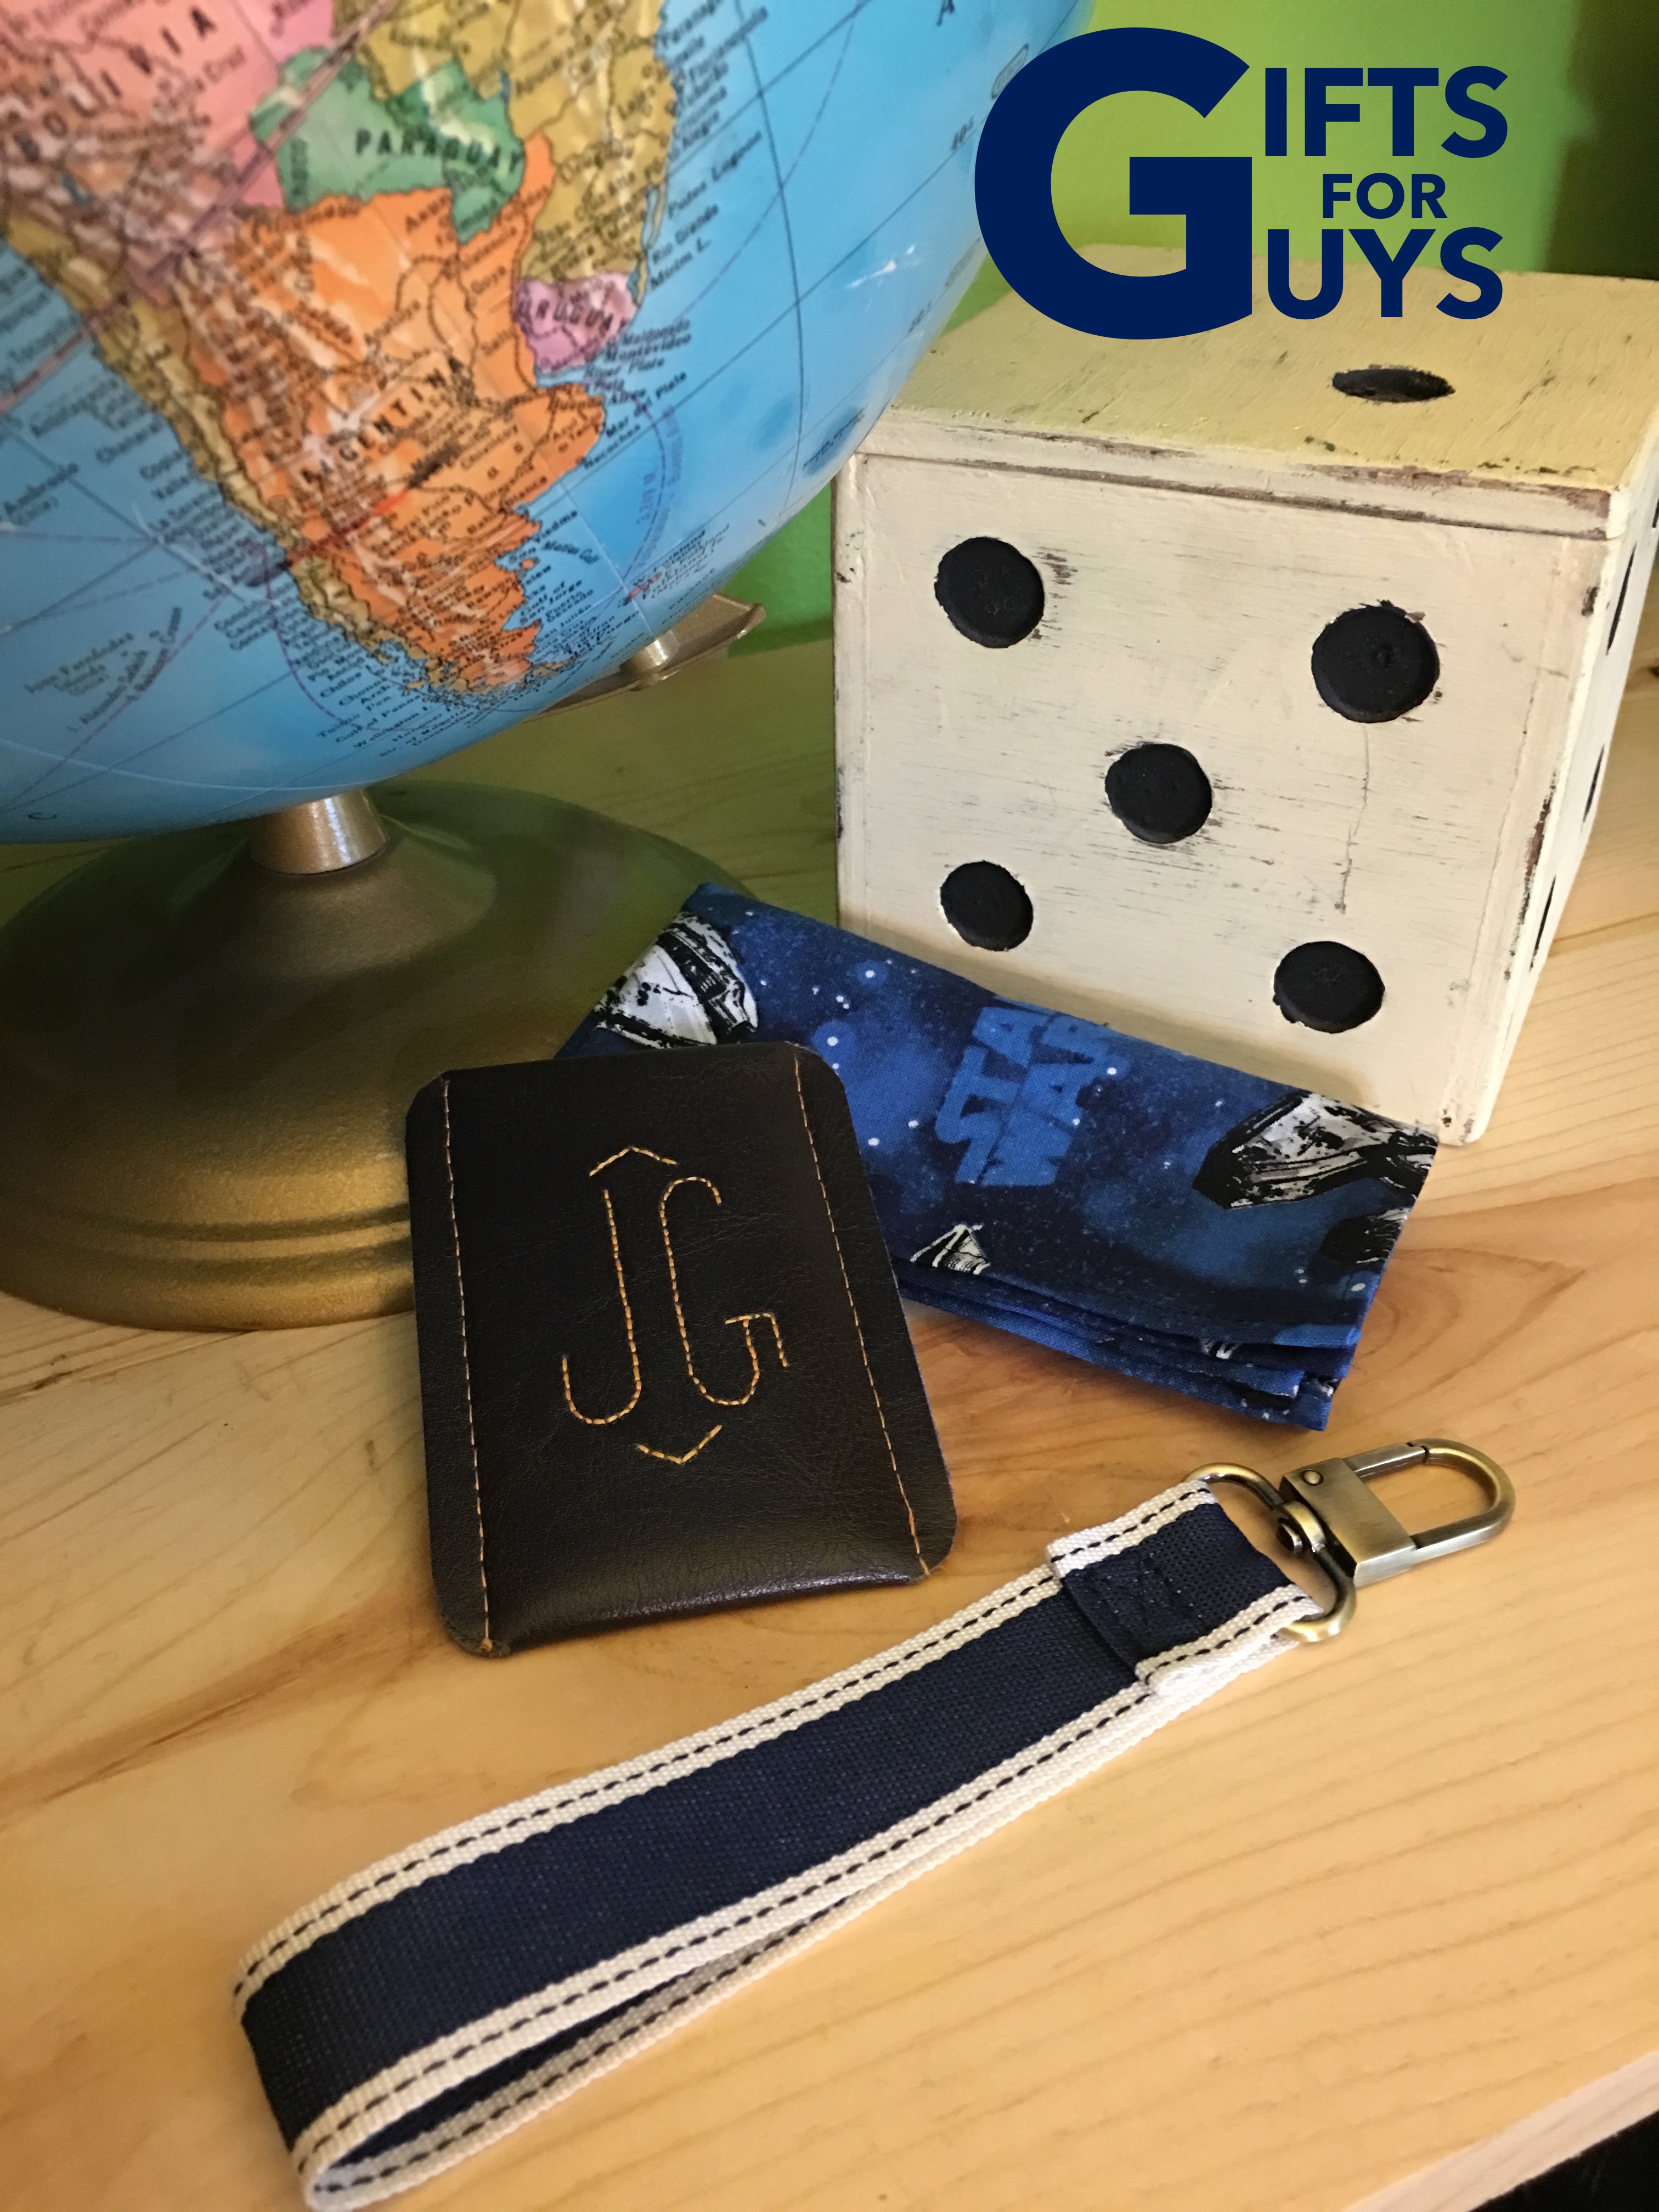
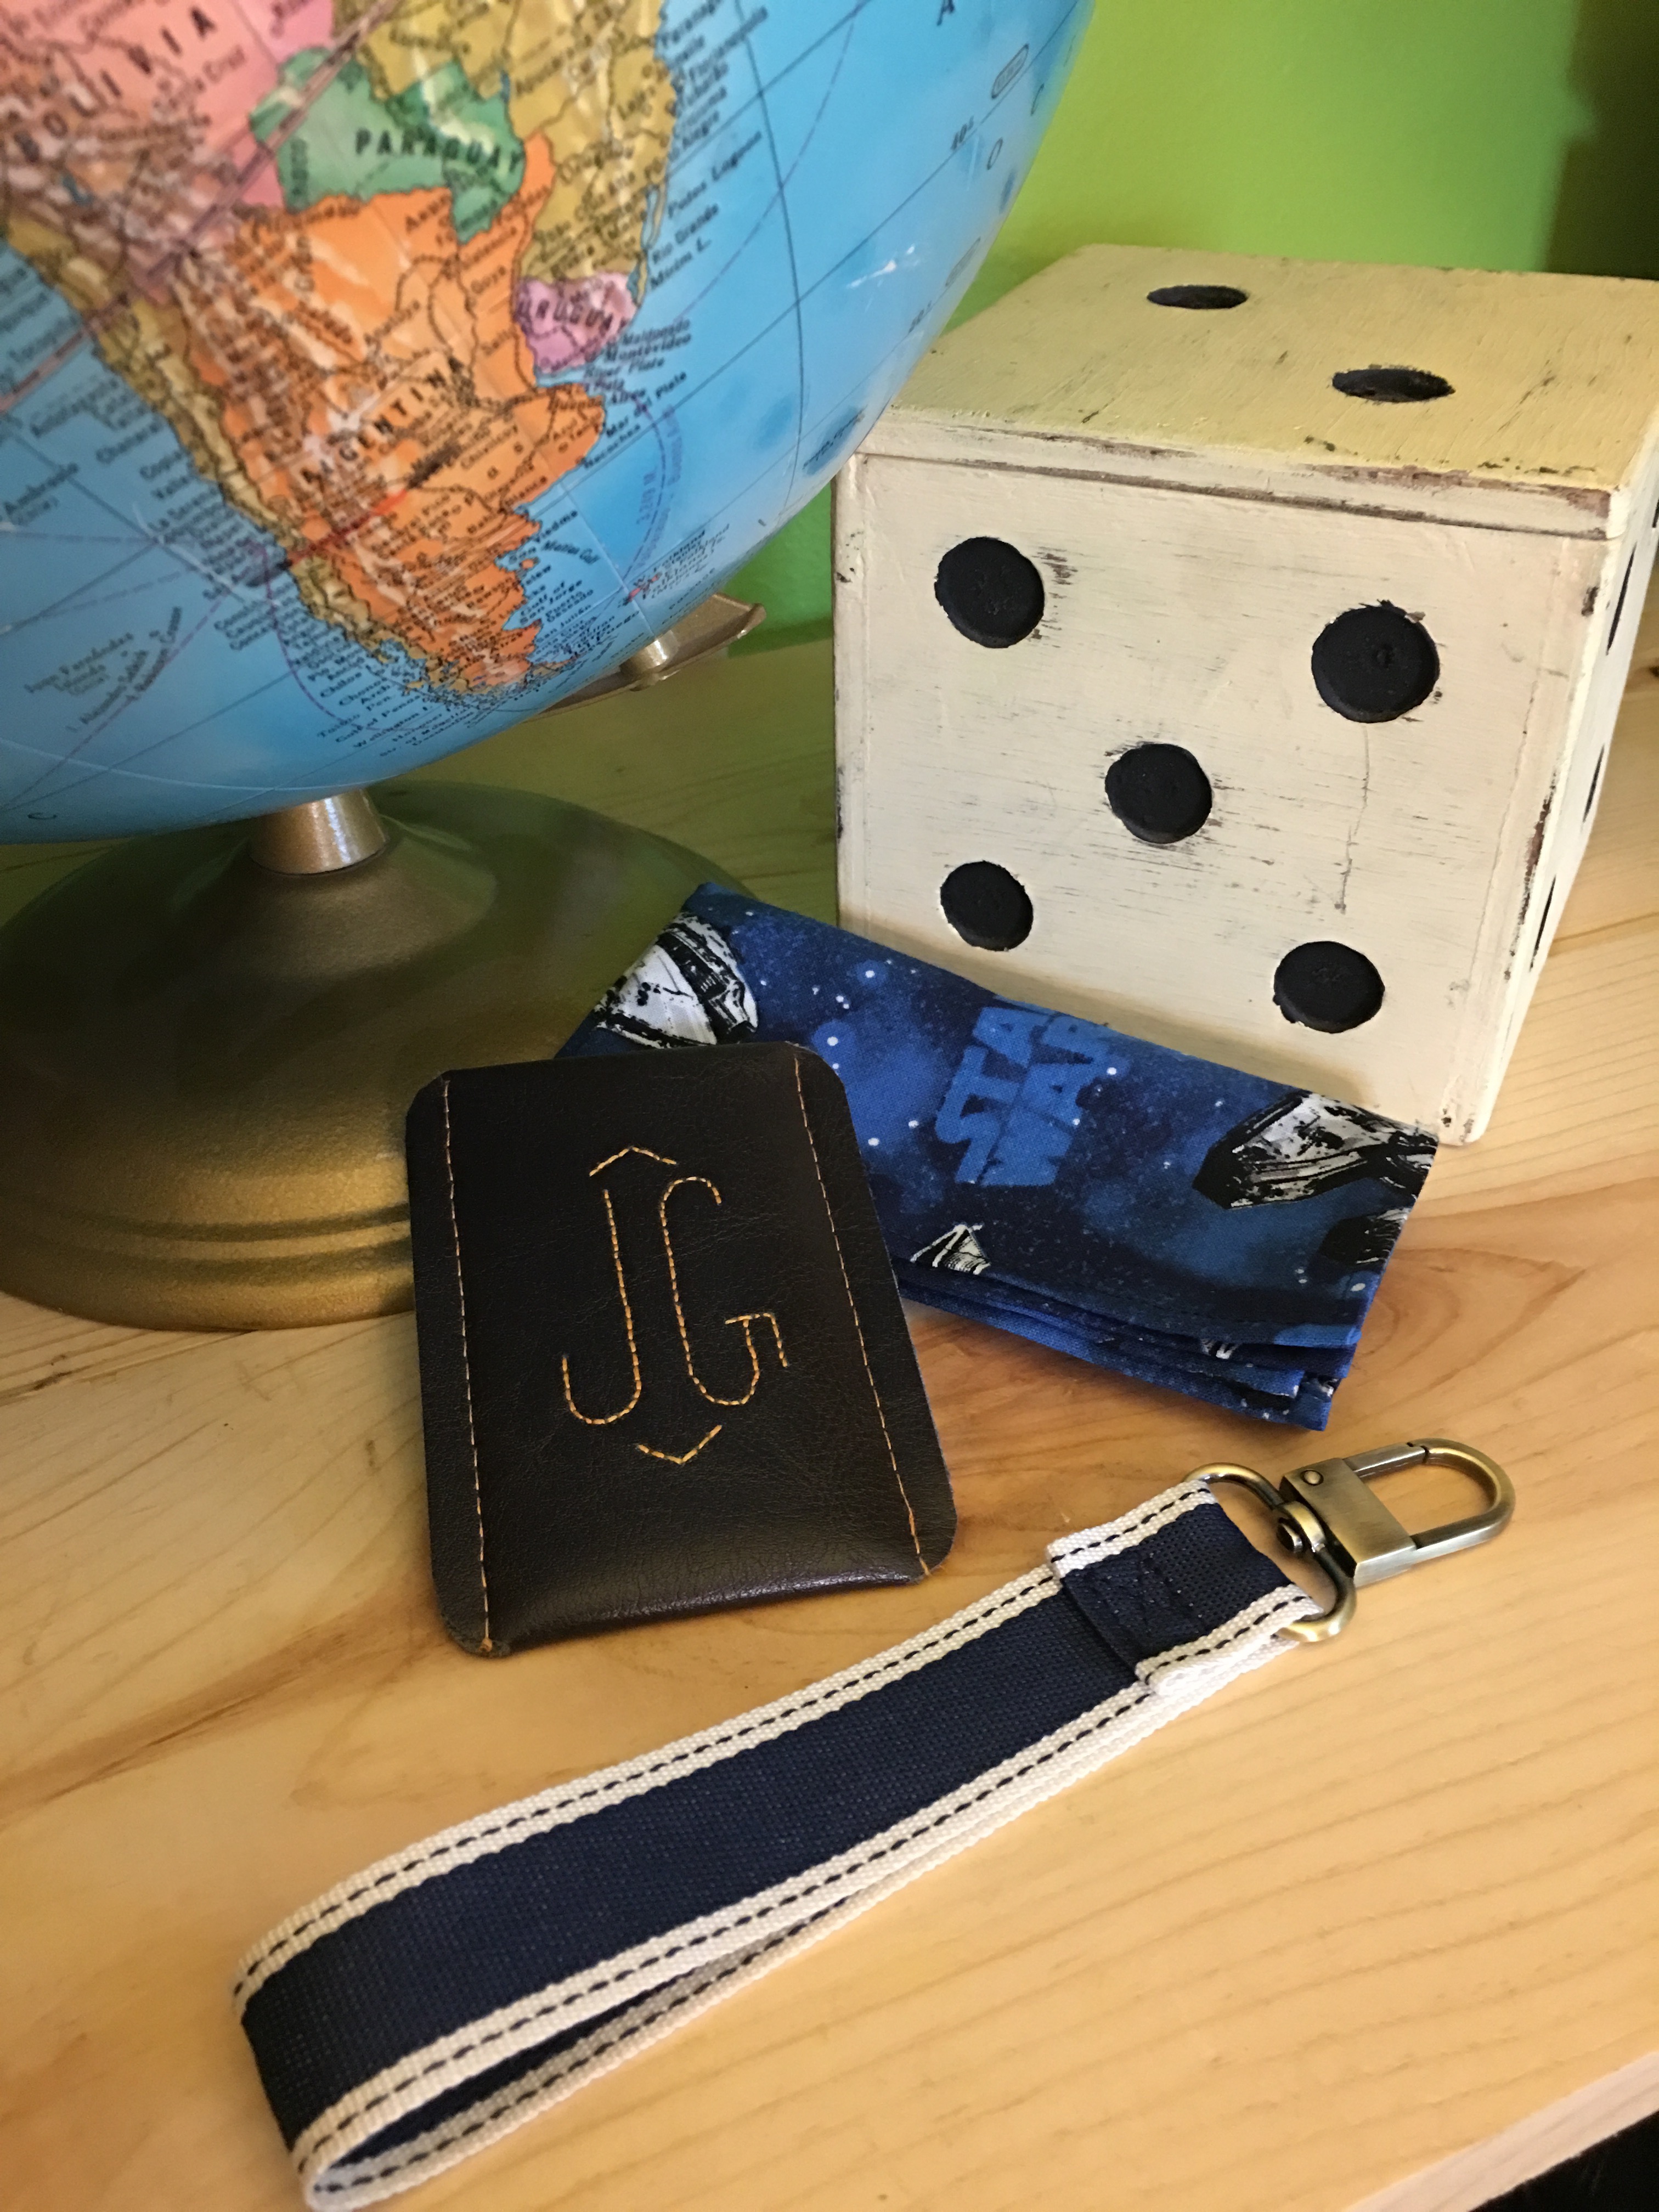
Learn how to make a key fob in just five minutes, a handkerchief in 15 minutes, and a simple wallet in 30 minutes.
Five-Minute Key Fob
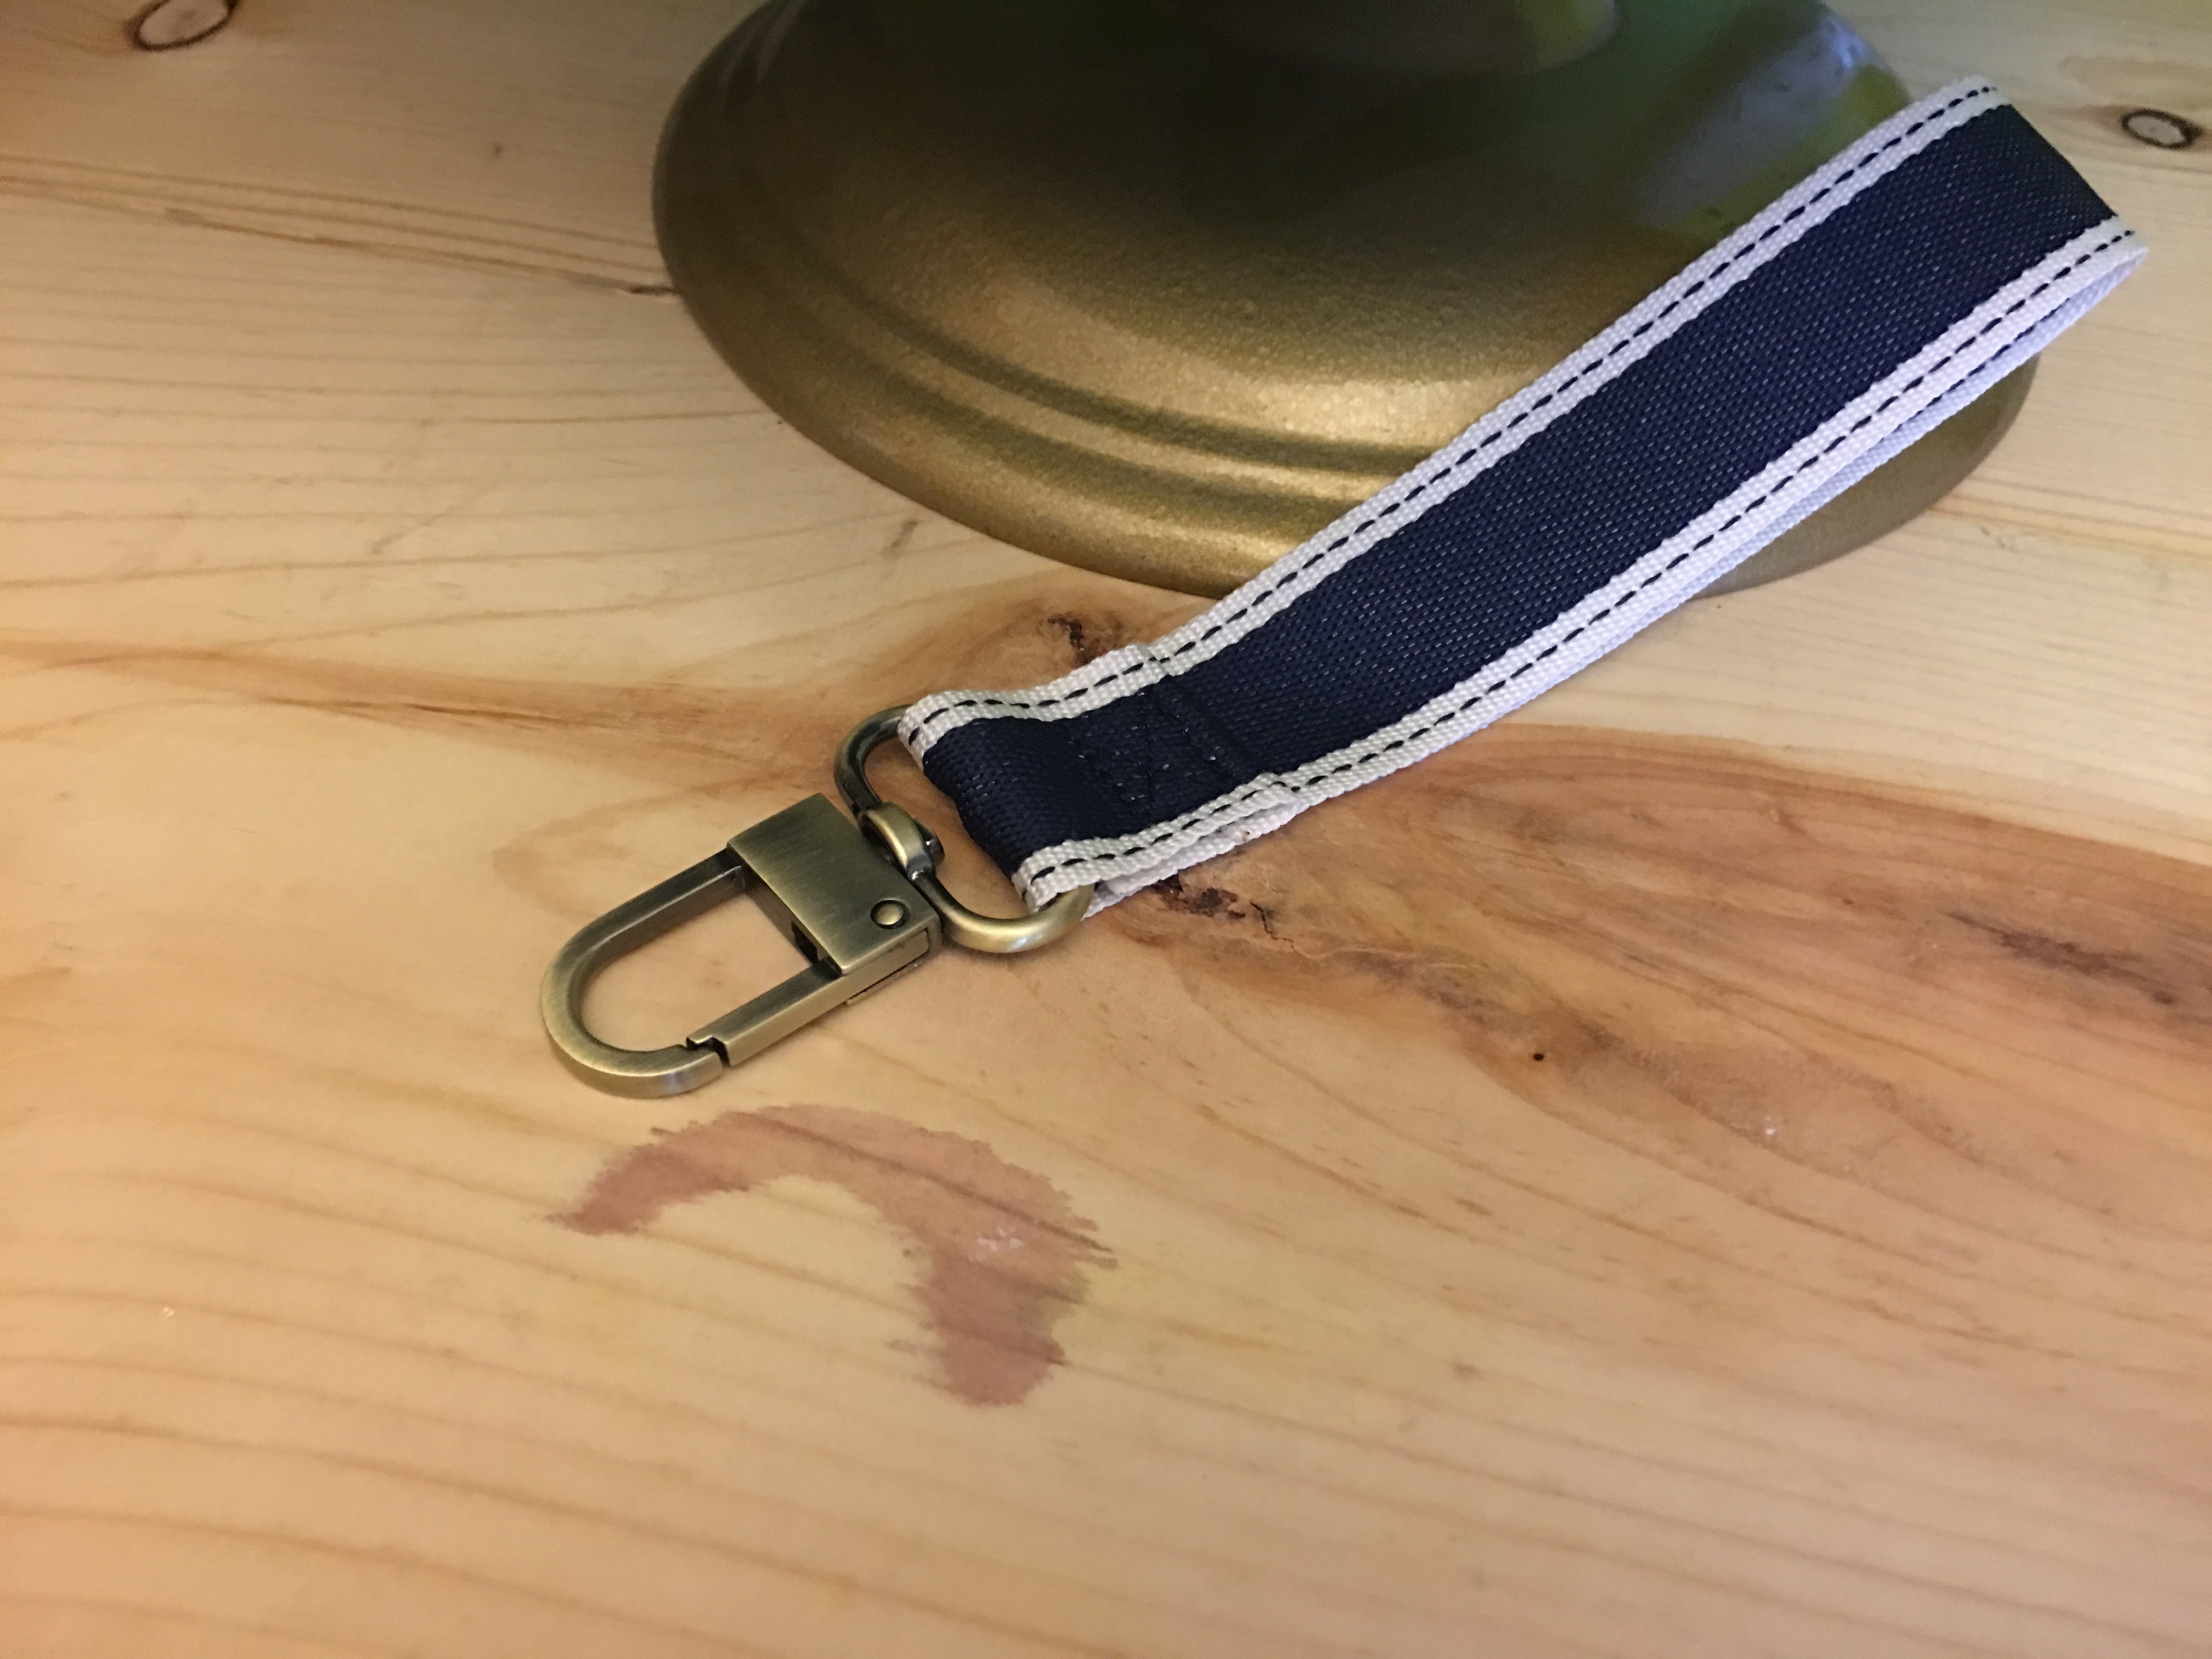
Key fobs are decorative additions to key rings. They’re also highly functional as they provide a handle for your keys. This key fob is incredibly simple and can be made in just five minutes.Here are the materials and supplies you’ll need to complete this project:
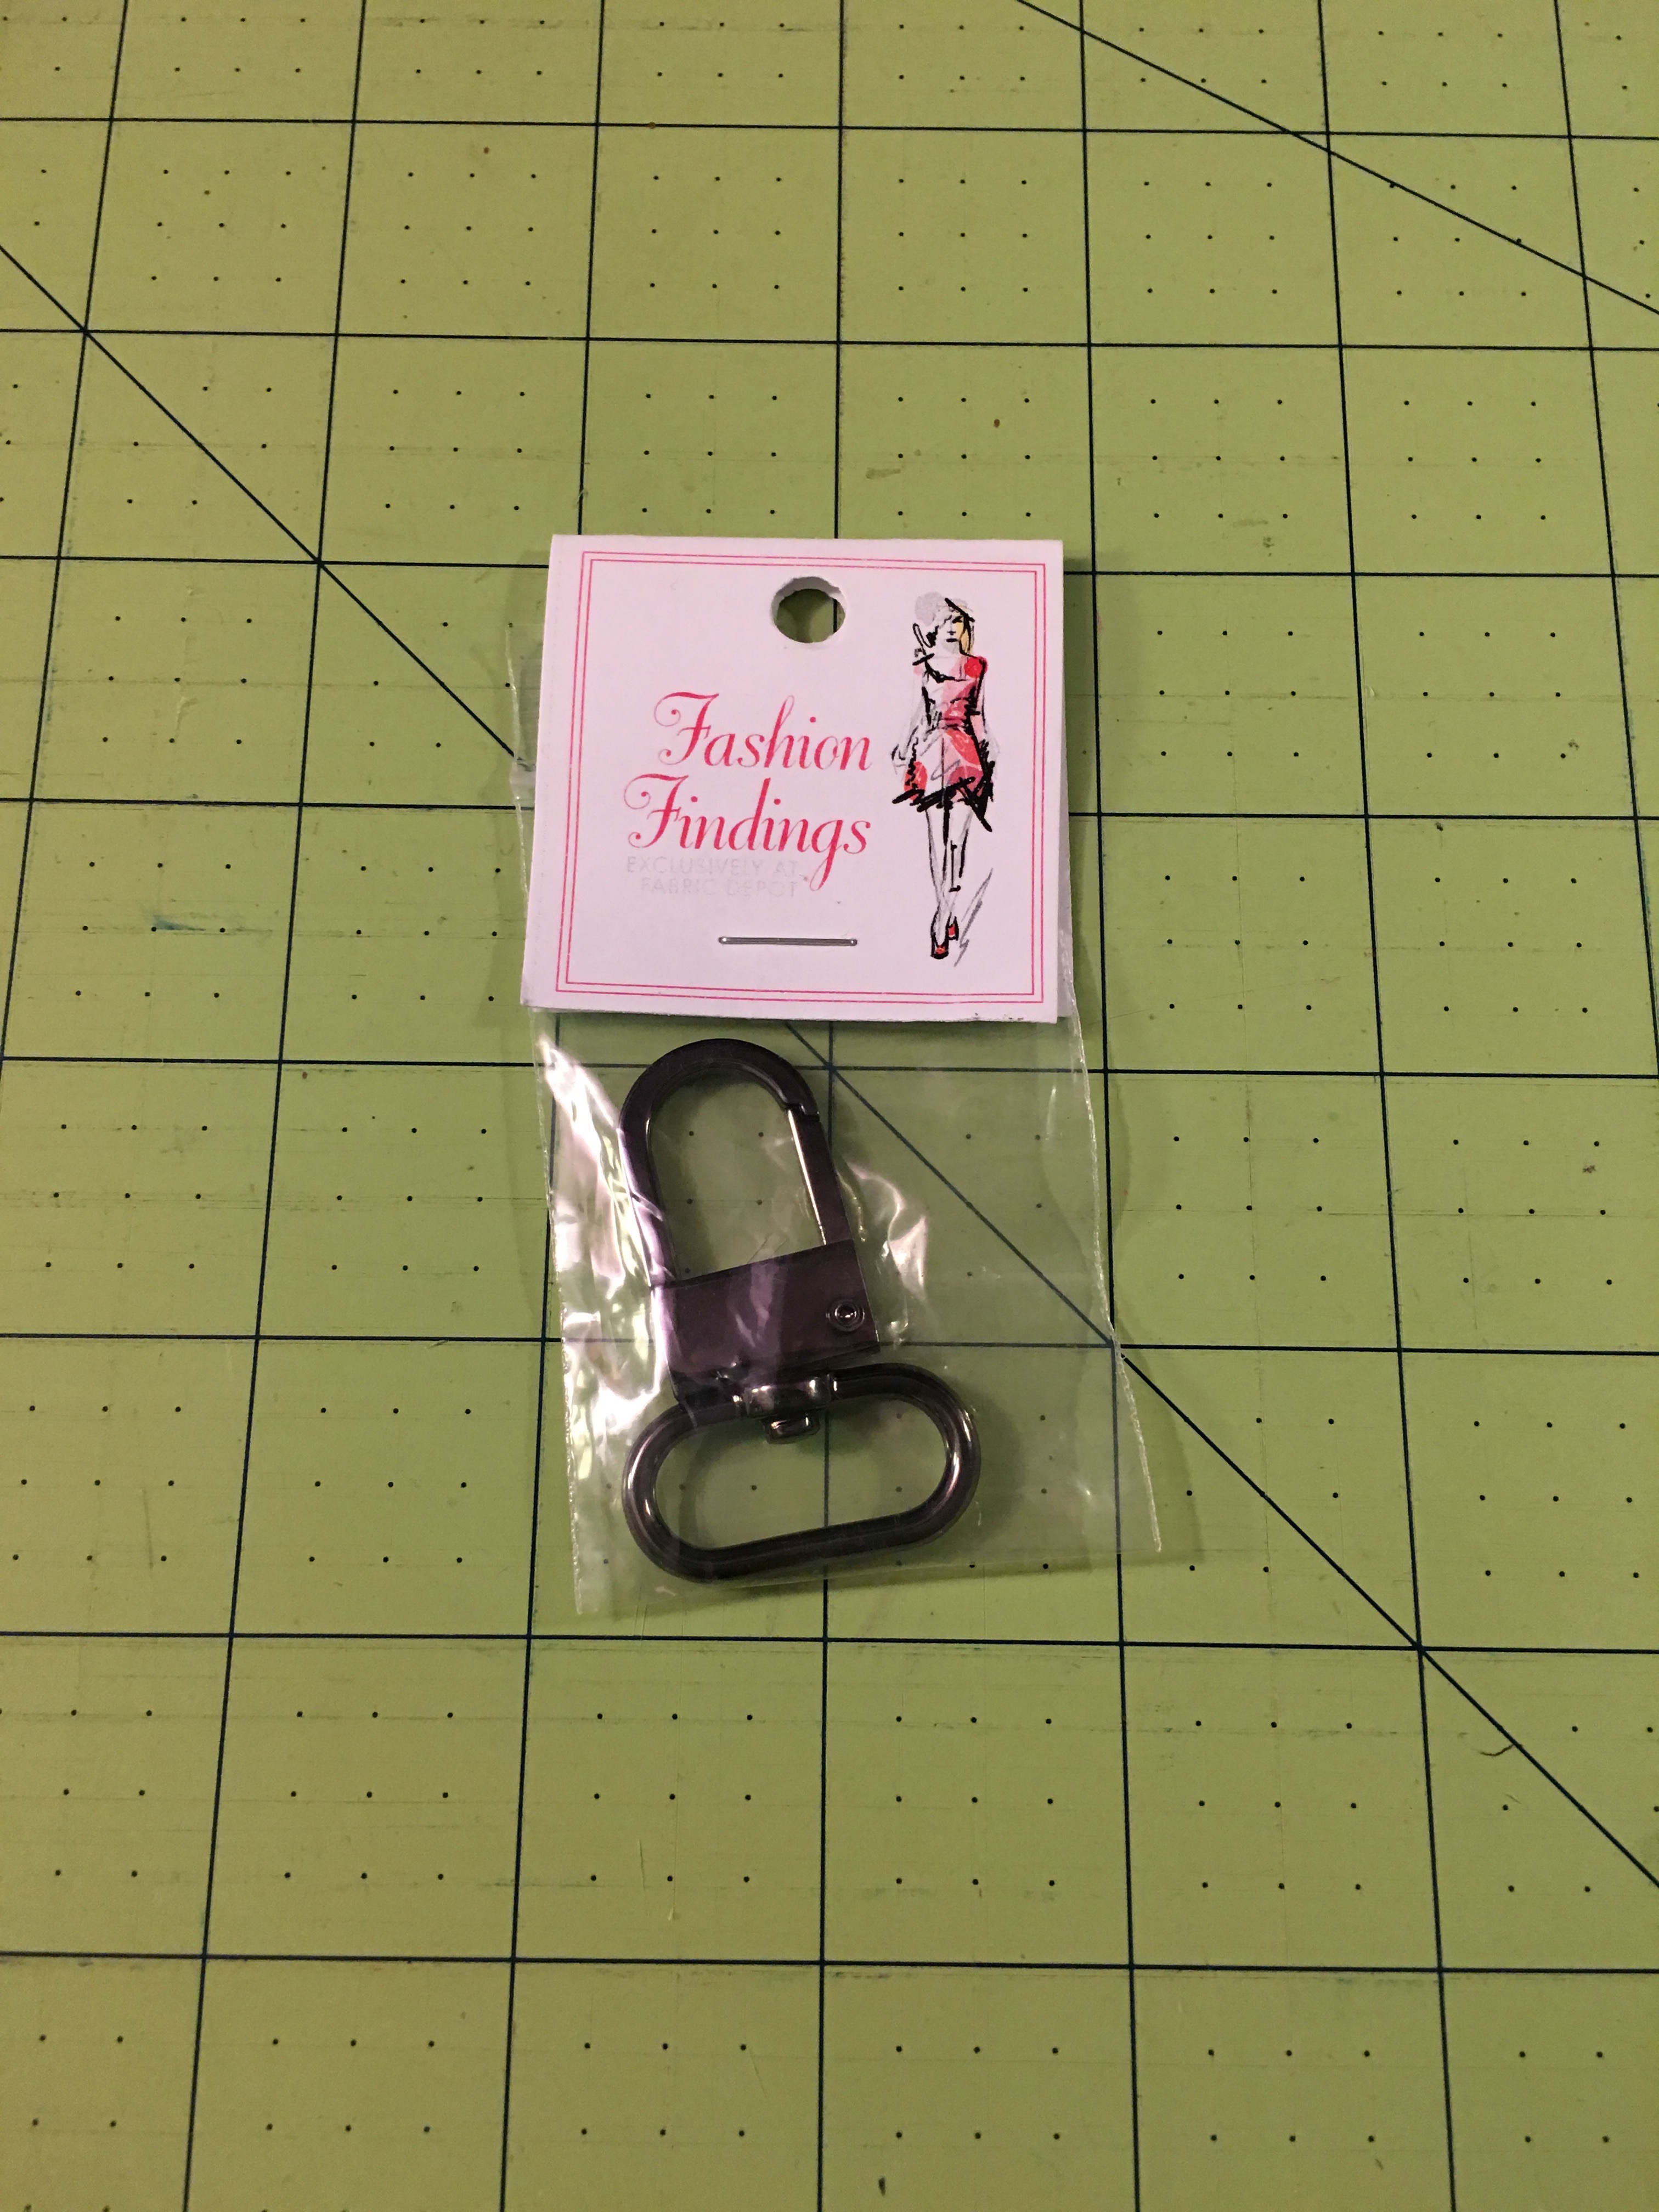
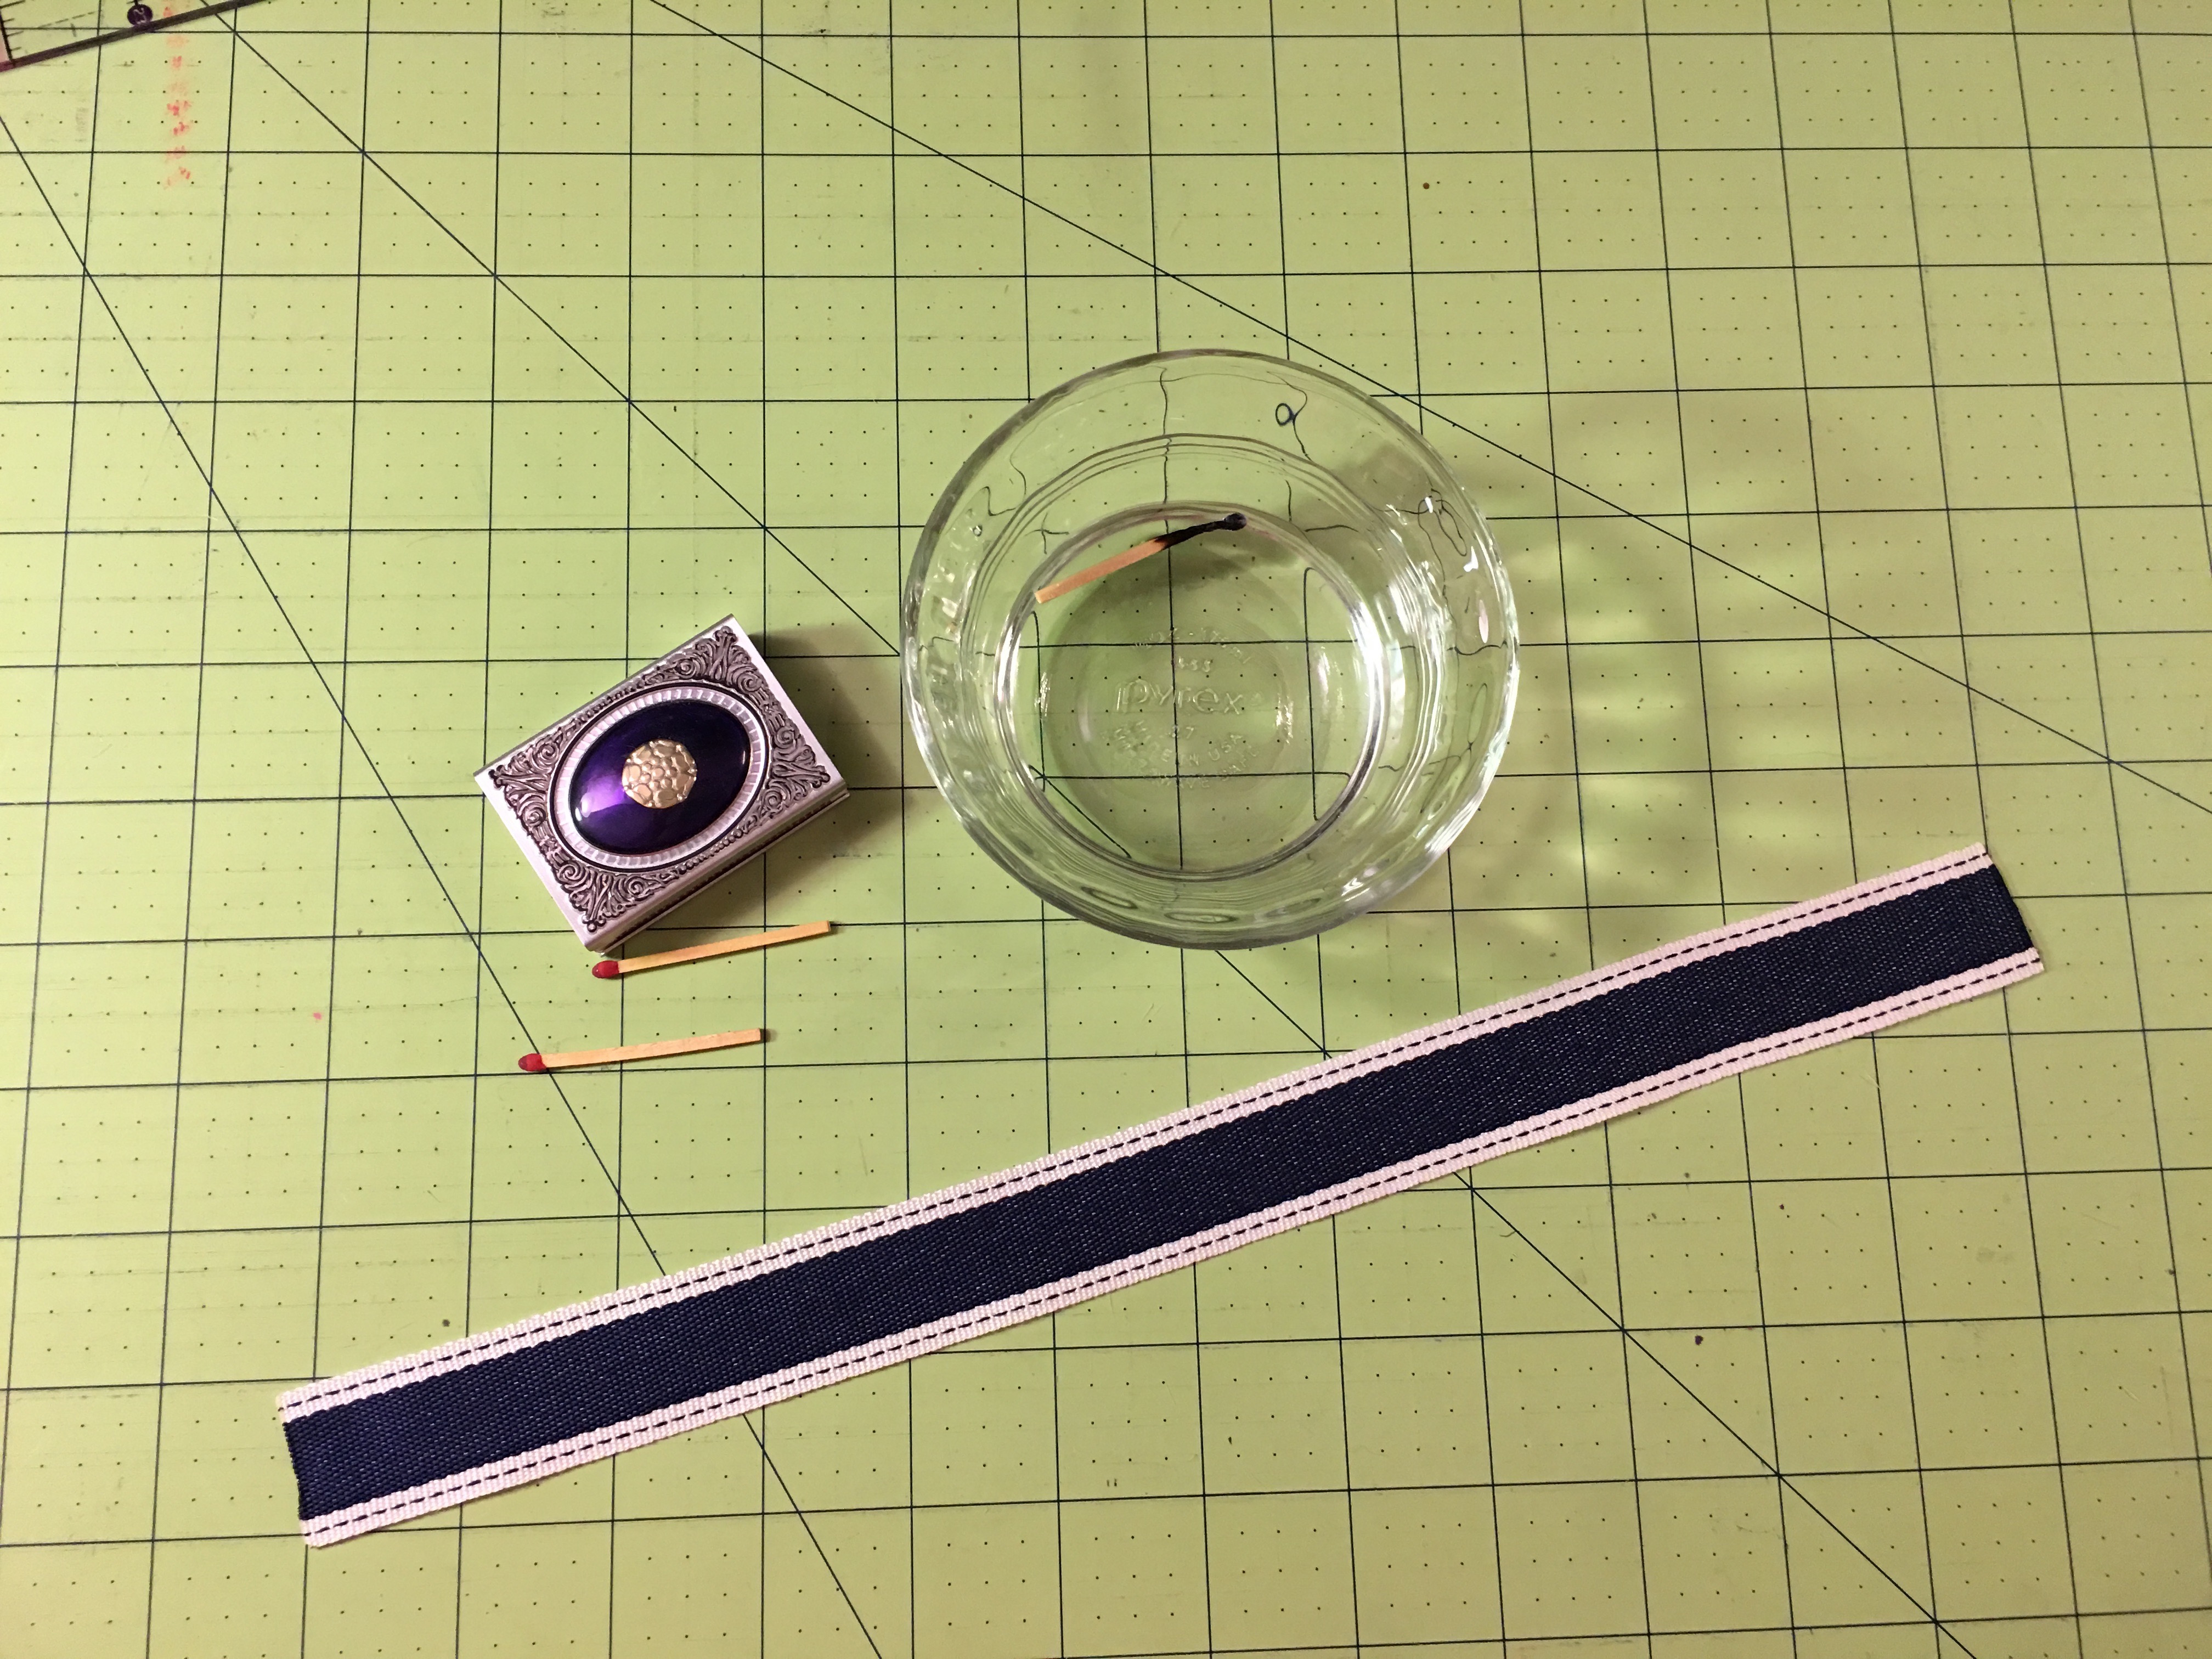
• 14” of 1” ribbon, twill tape, or cotton webbing • One 1” swivel lever hook (see “Findings” below for details) • Matching all-purpose thread • Matches or a lighter (optional)
Findings
Step 1: Key fob hardware sets come in many different forms. Personally, I prefer the swivel lever hook option. These come in several metallic finishes and sizes. The size indicator in the name refers to the ribbon opening’s width. It will also inform as to the widest possible ribbon that can be inserted into the loop.
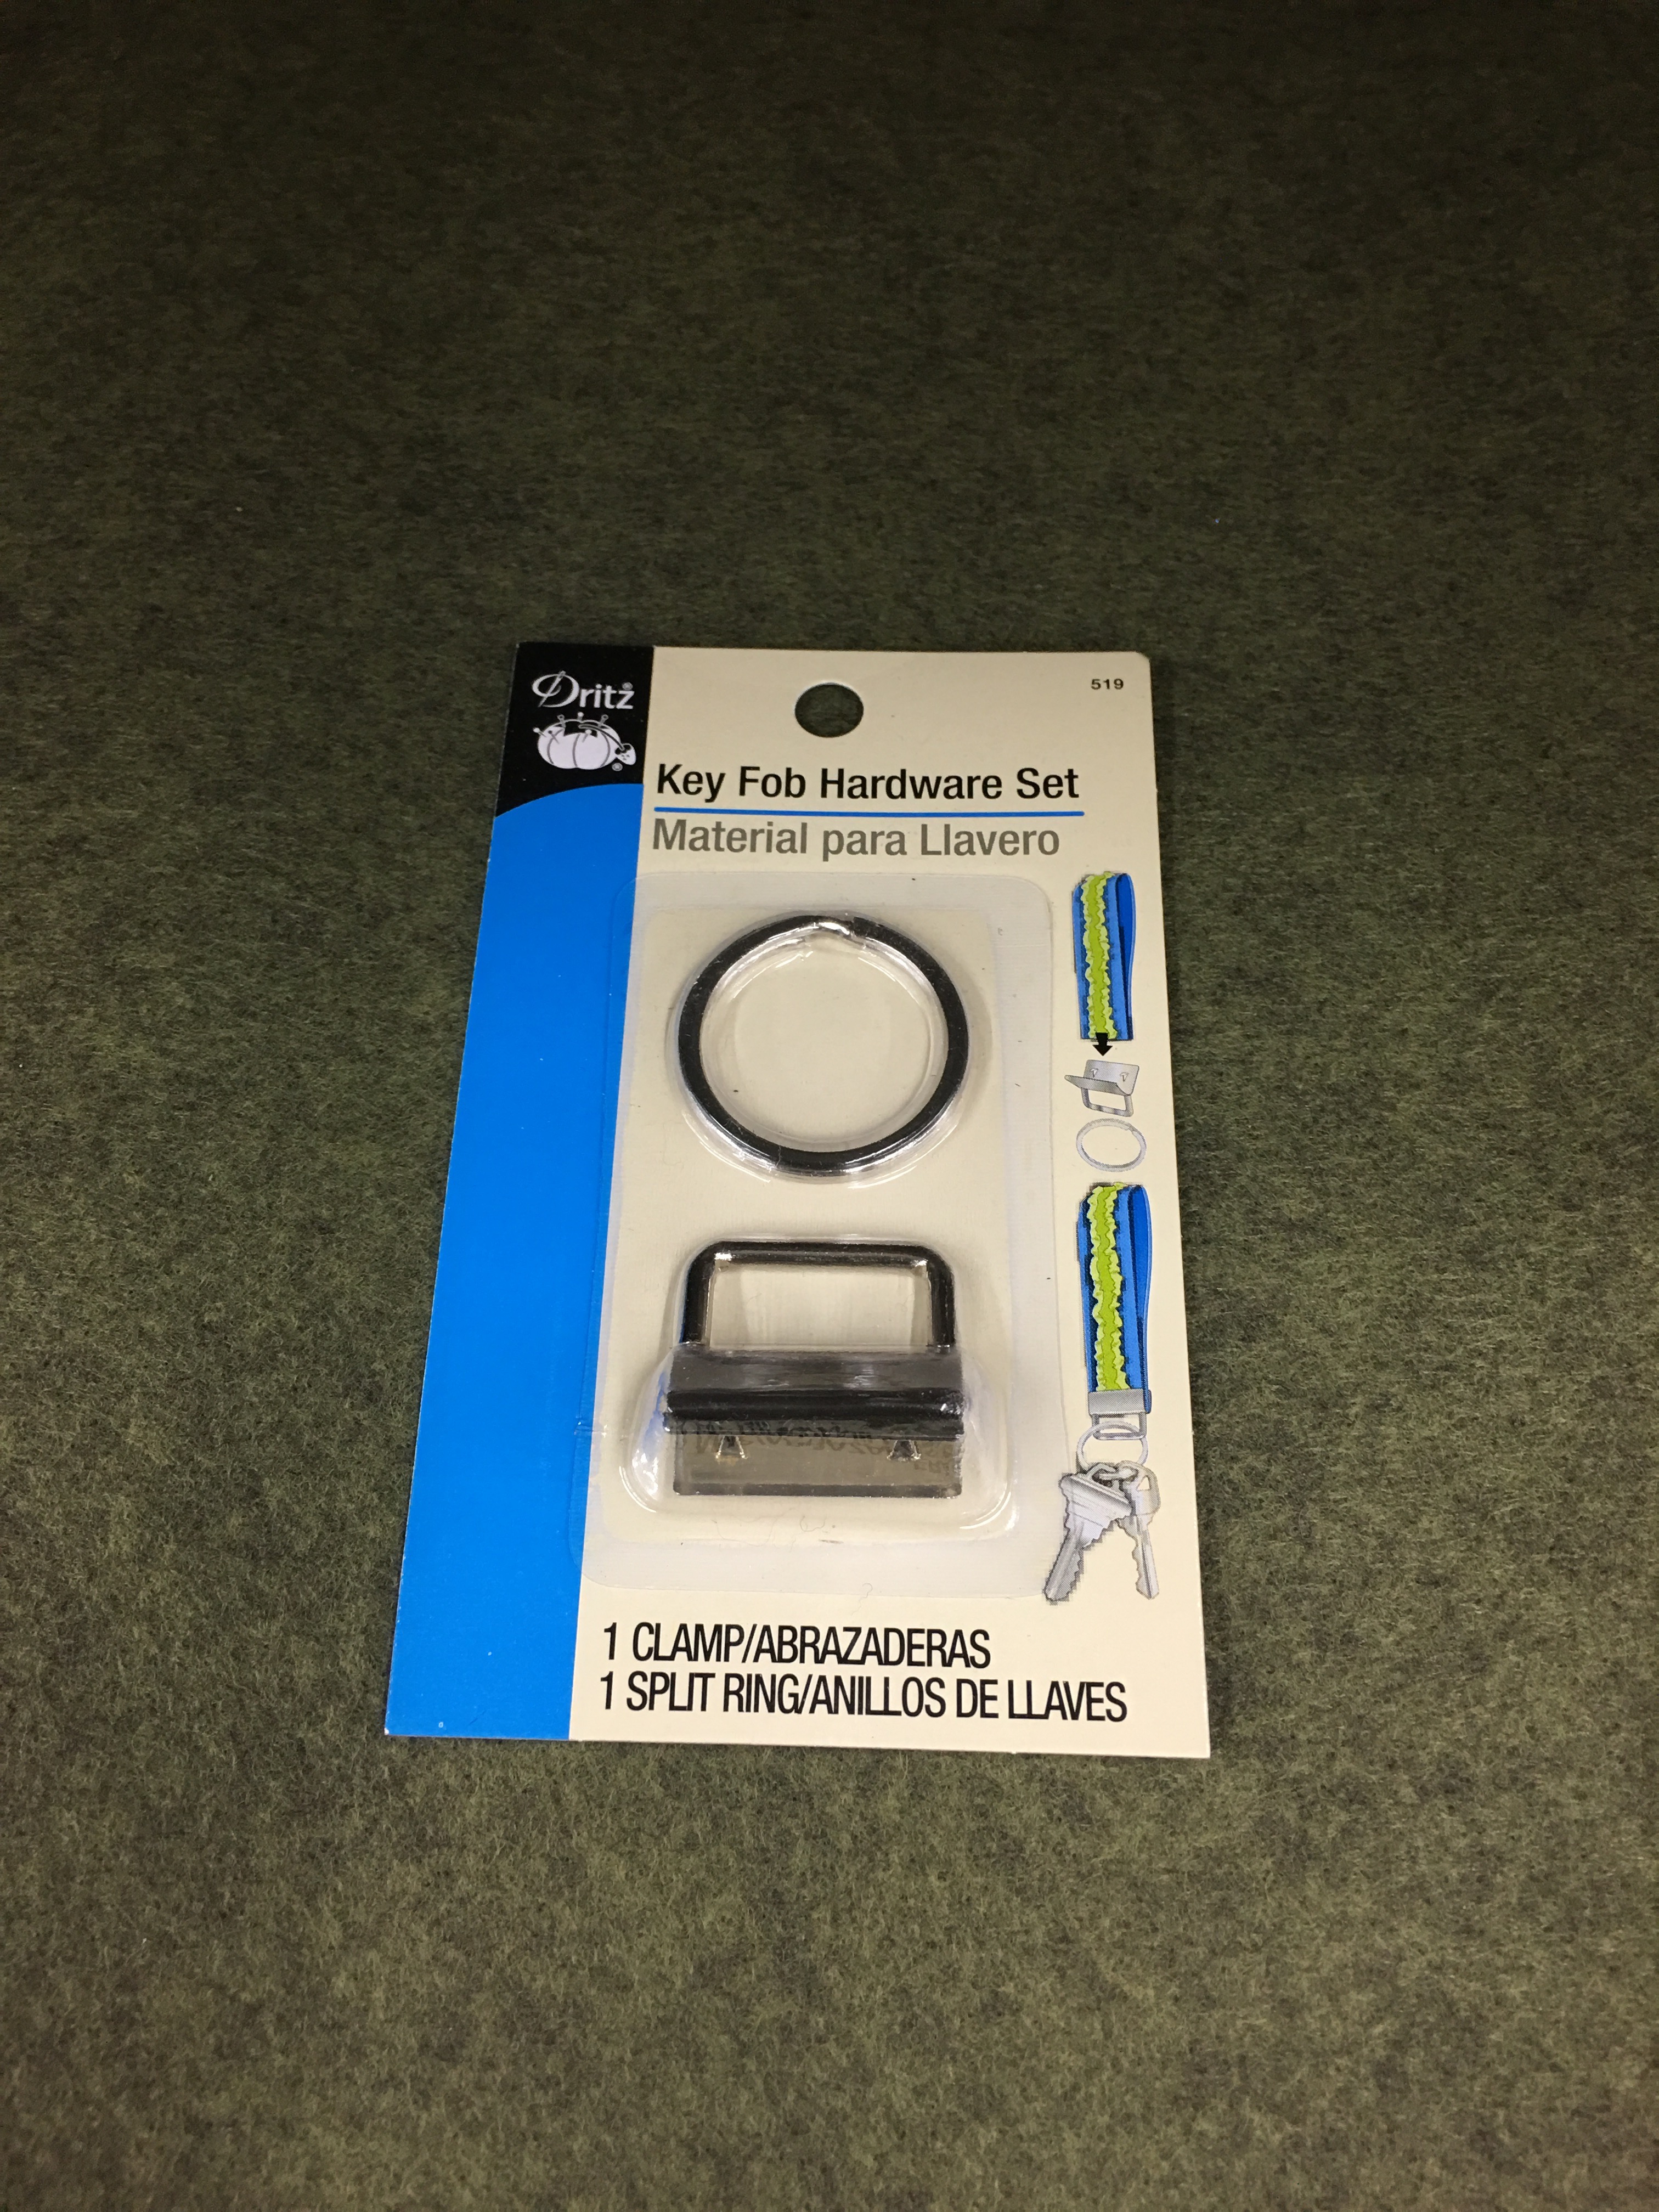 TIP: To make this project easier, purchase a key fob hardware set. There’s little to no sewing involved as the ribbon is pinched inside the clasp.
Prepping
Step 2: If the selected ribbon is synthetic, sear the ends using a flame source such as matches or a lighter. To do so, run the ribbon’s end carefully over the flame source, melting the ends just enough to keep it from fraying. If using matches always keep a bowl of water nearby to extinguish the matches immediately. Be sure to do this using parental supervision (if necessary) and in a well ventilated area.
Construction
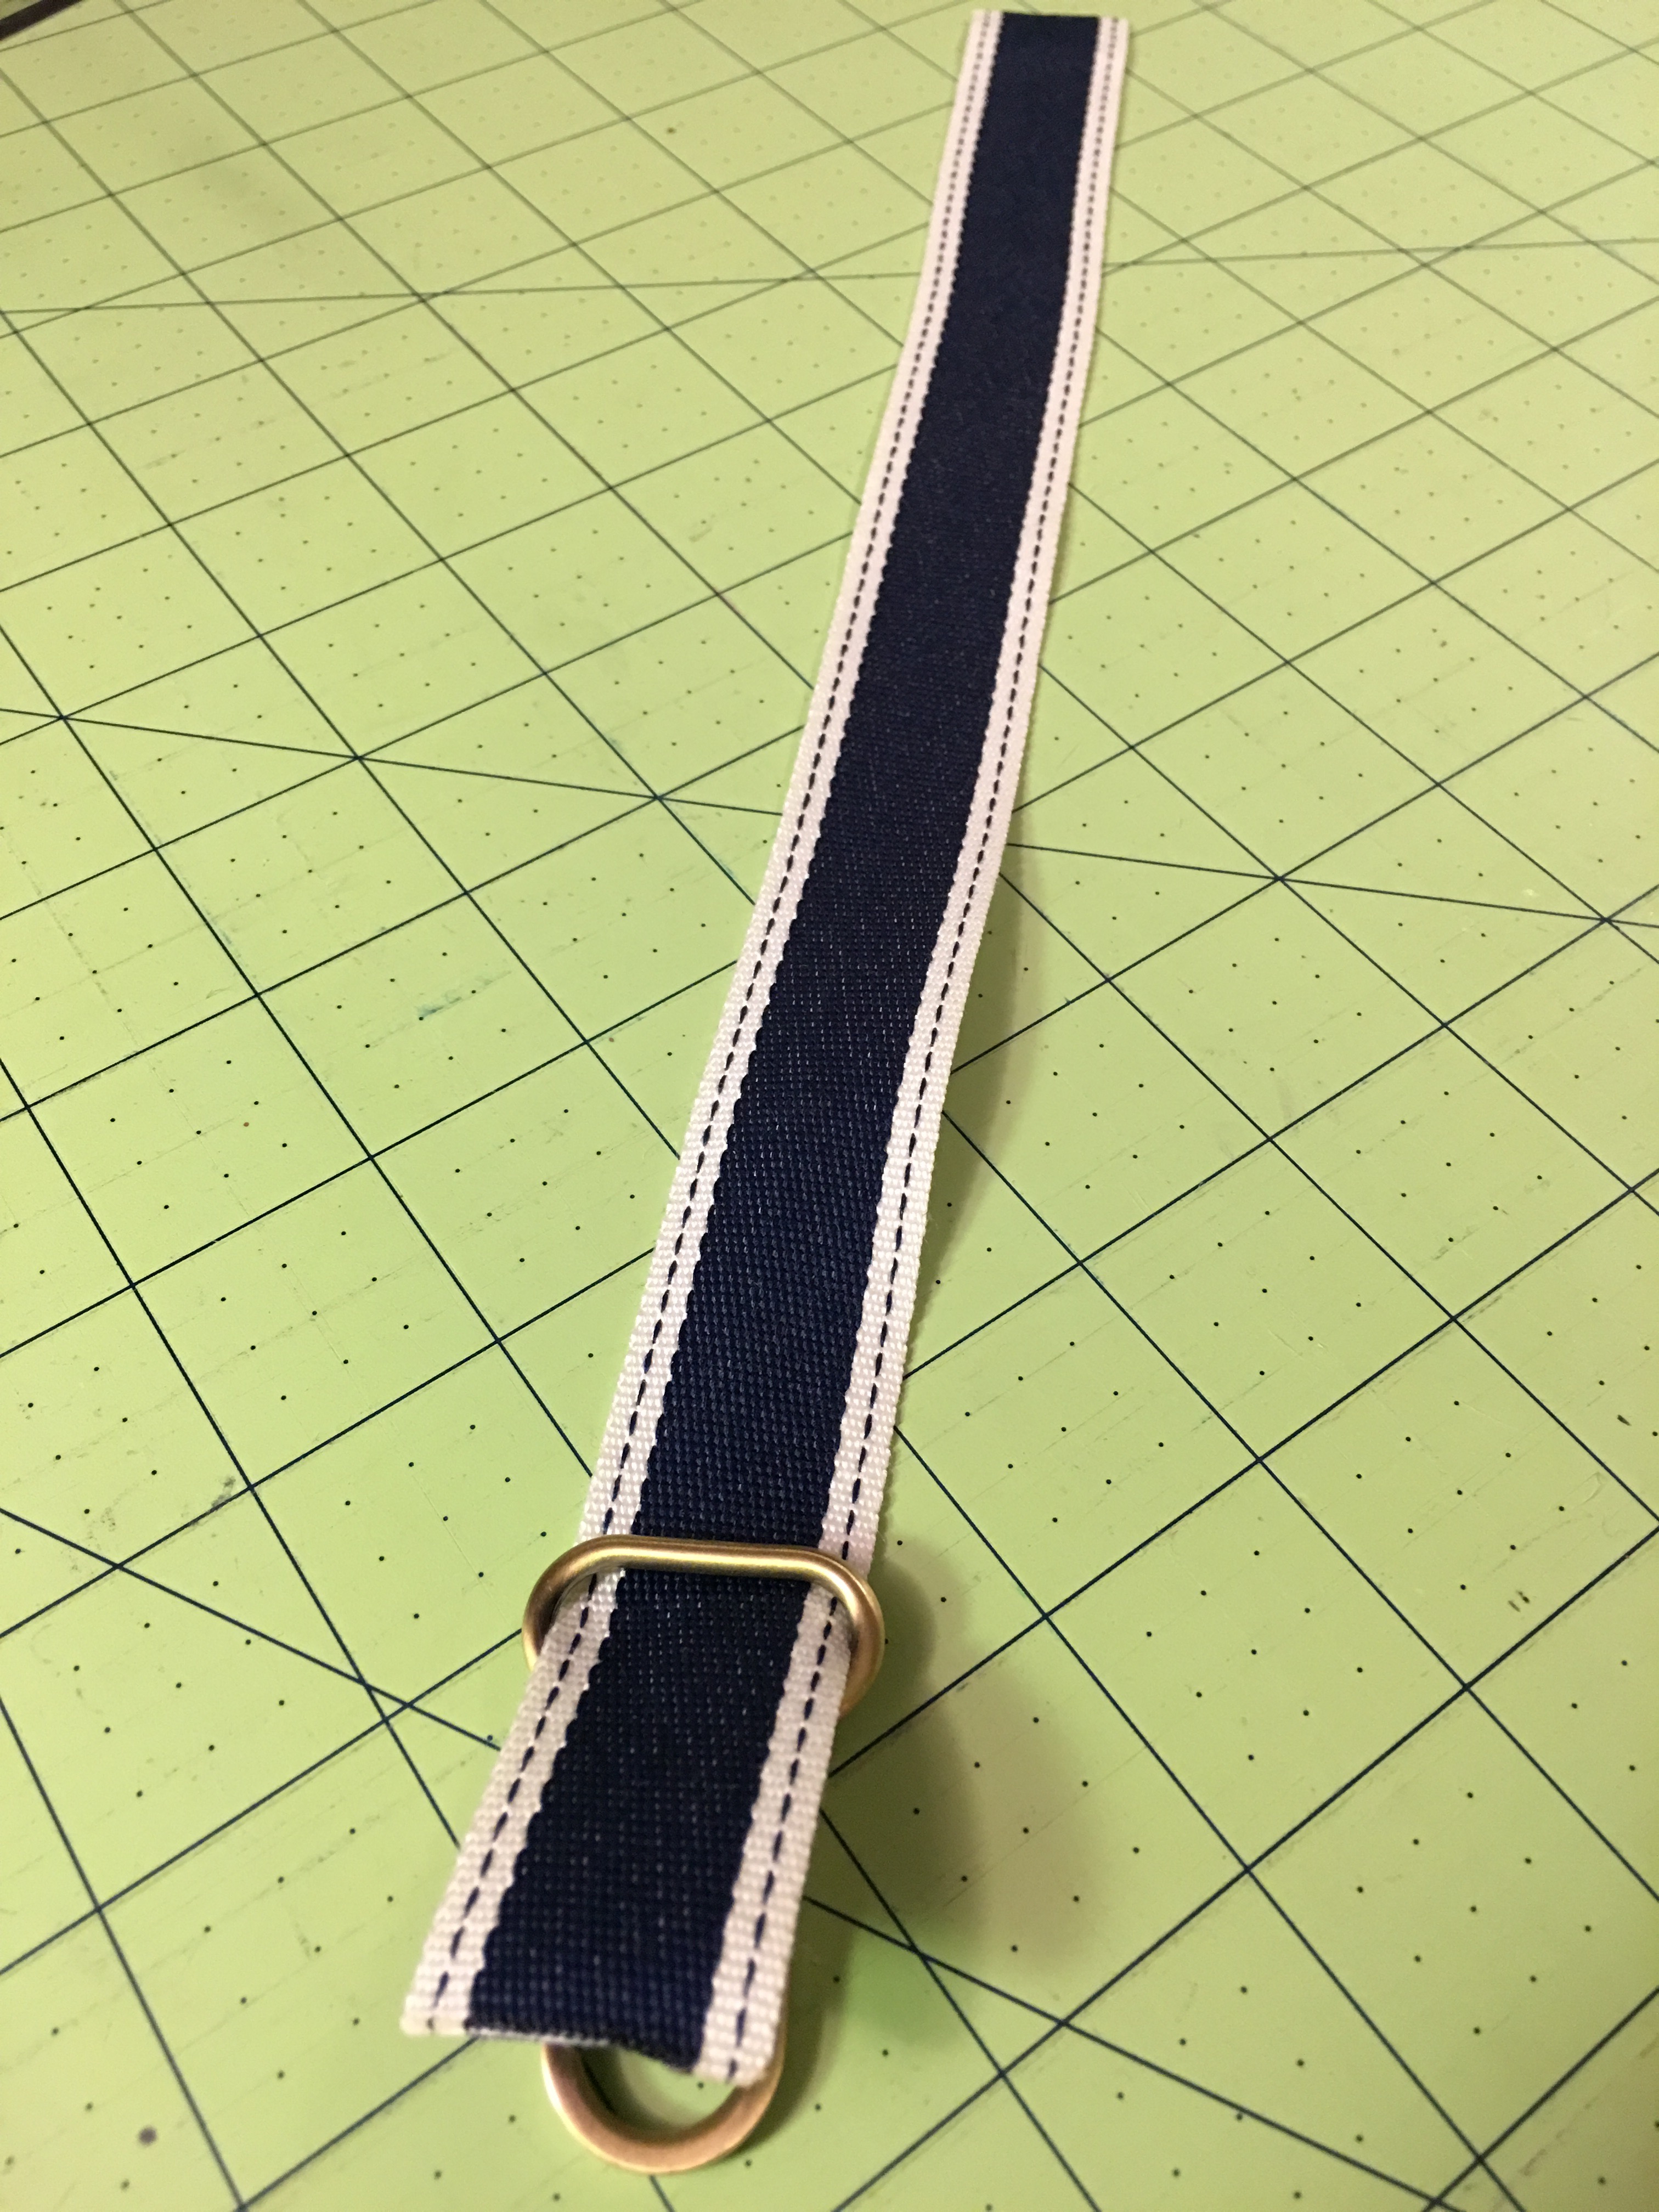
Step 3a: Insert one end of ribbon through the ring on the hardware. Pull the ribbon so that 2” are through the ring.
 Step 3b: Fold the remaining length of ribbon (not the 2”) in half. Place the end ¼” from the ring.
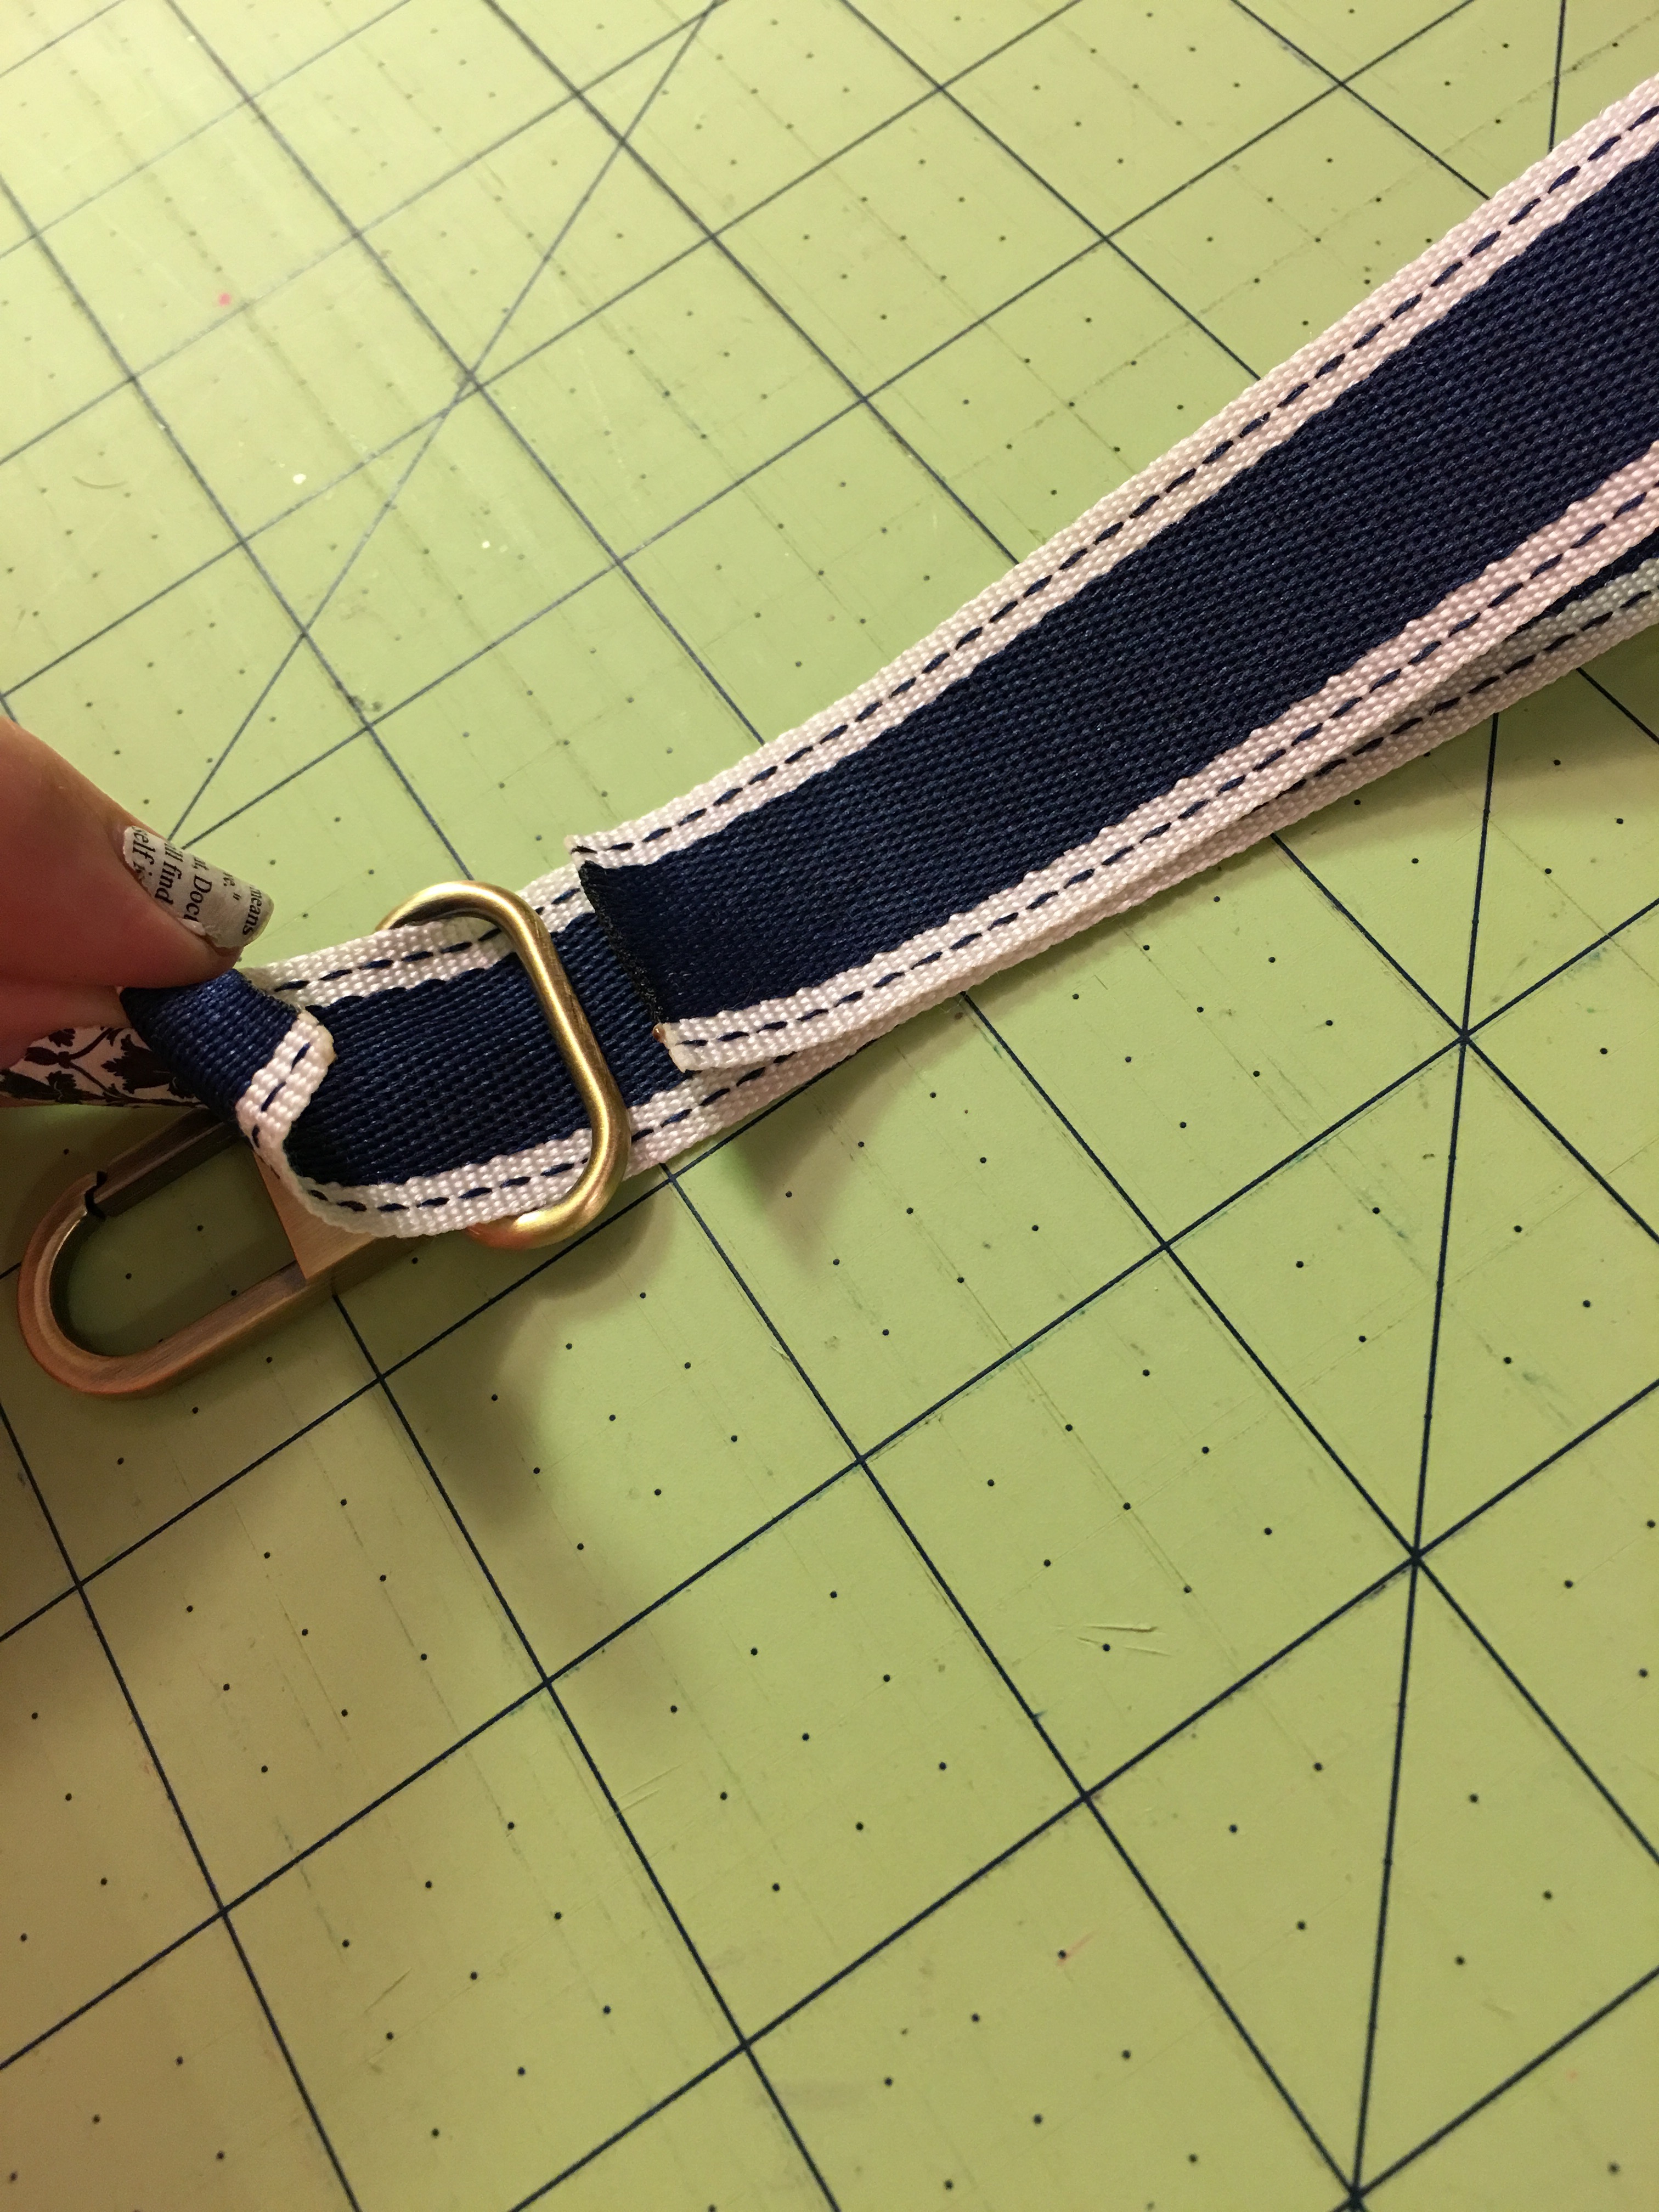 Step 3c: Fold over ¼” of the ribbon end that’s through the ring. Finger press to crease.
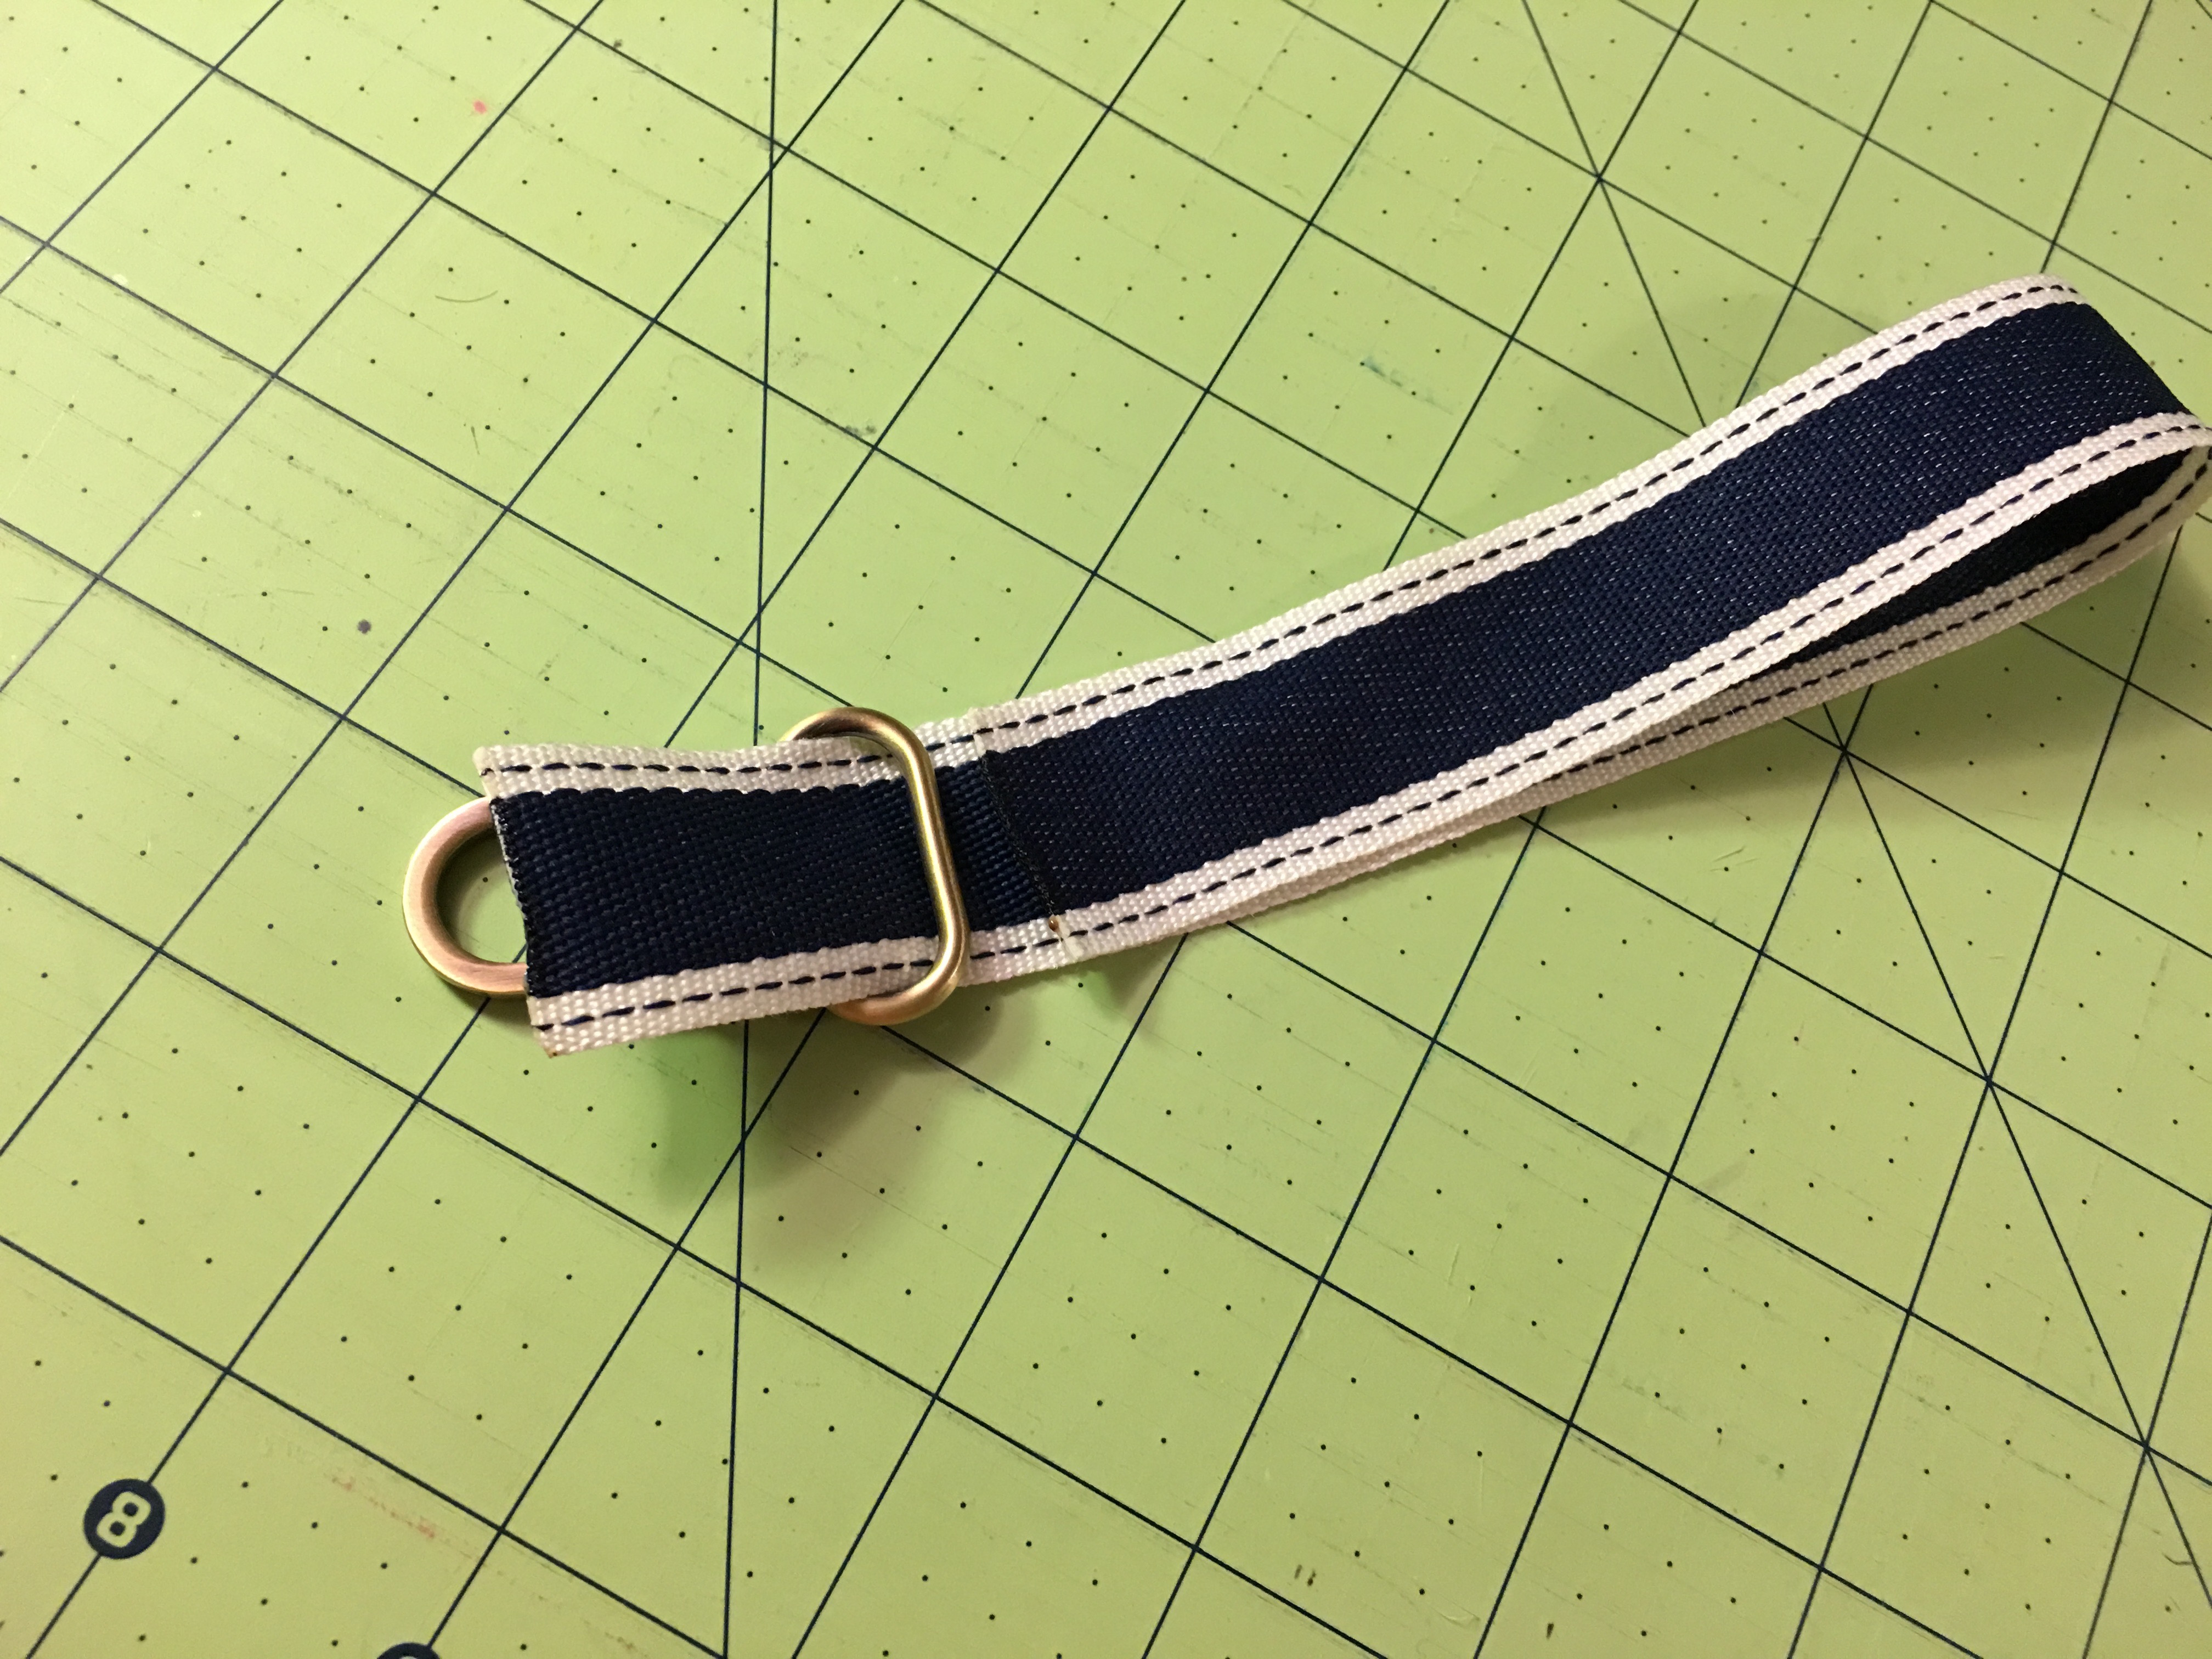
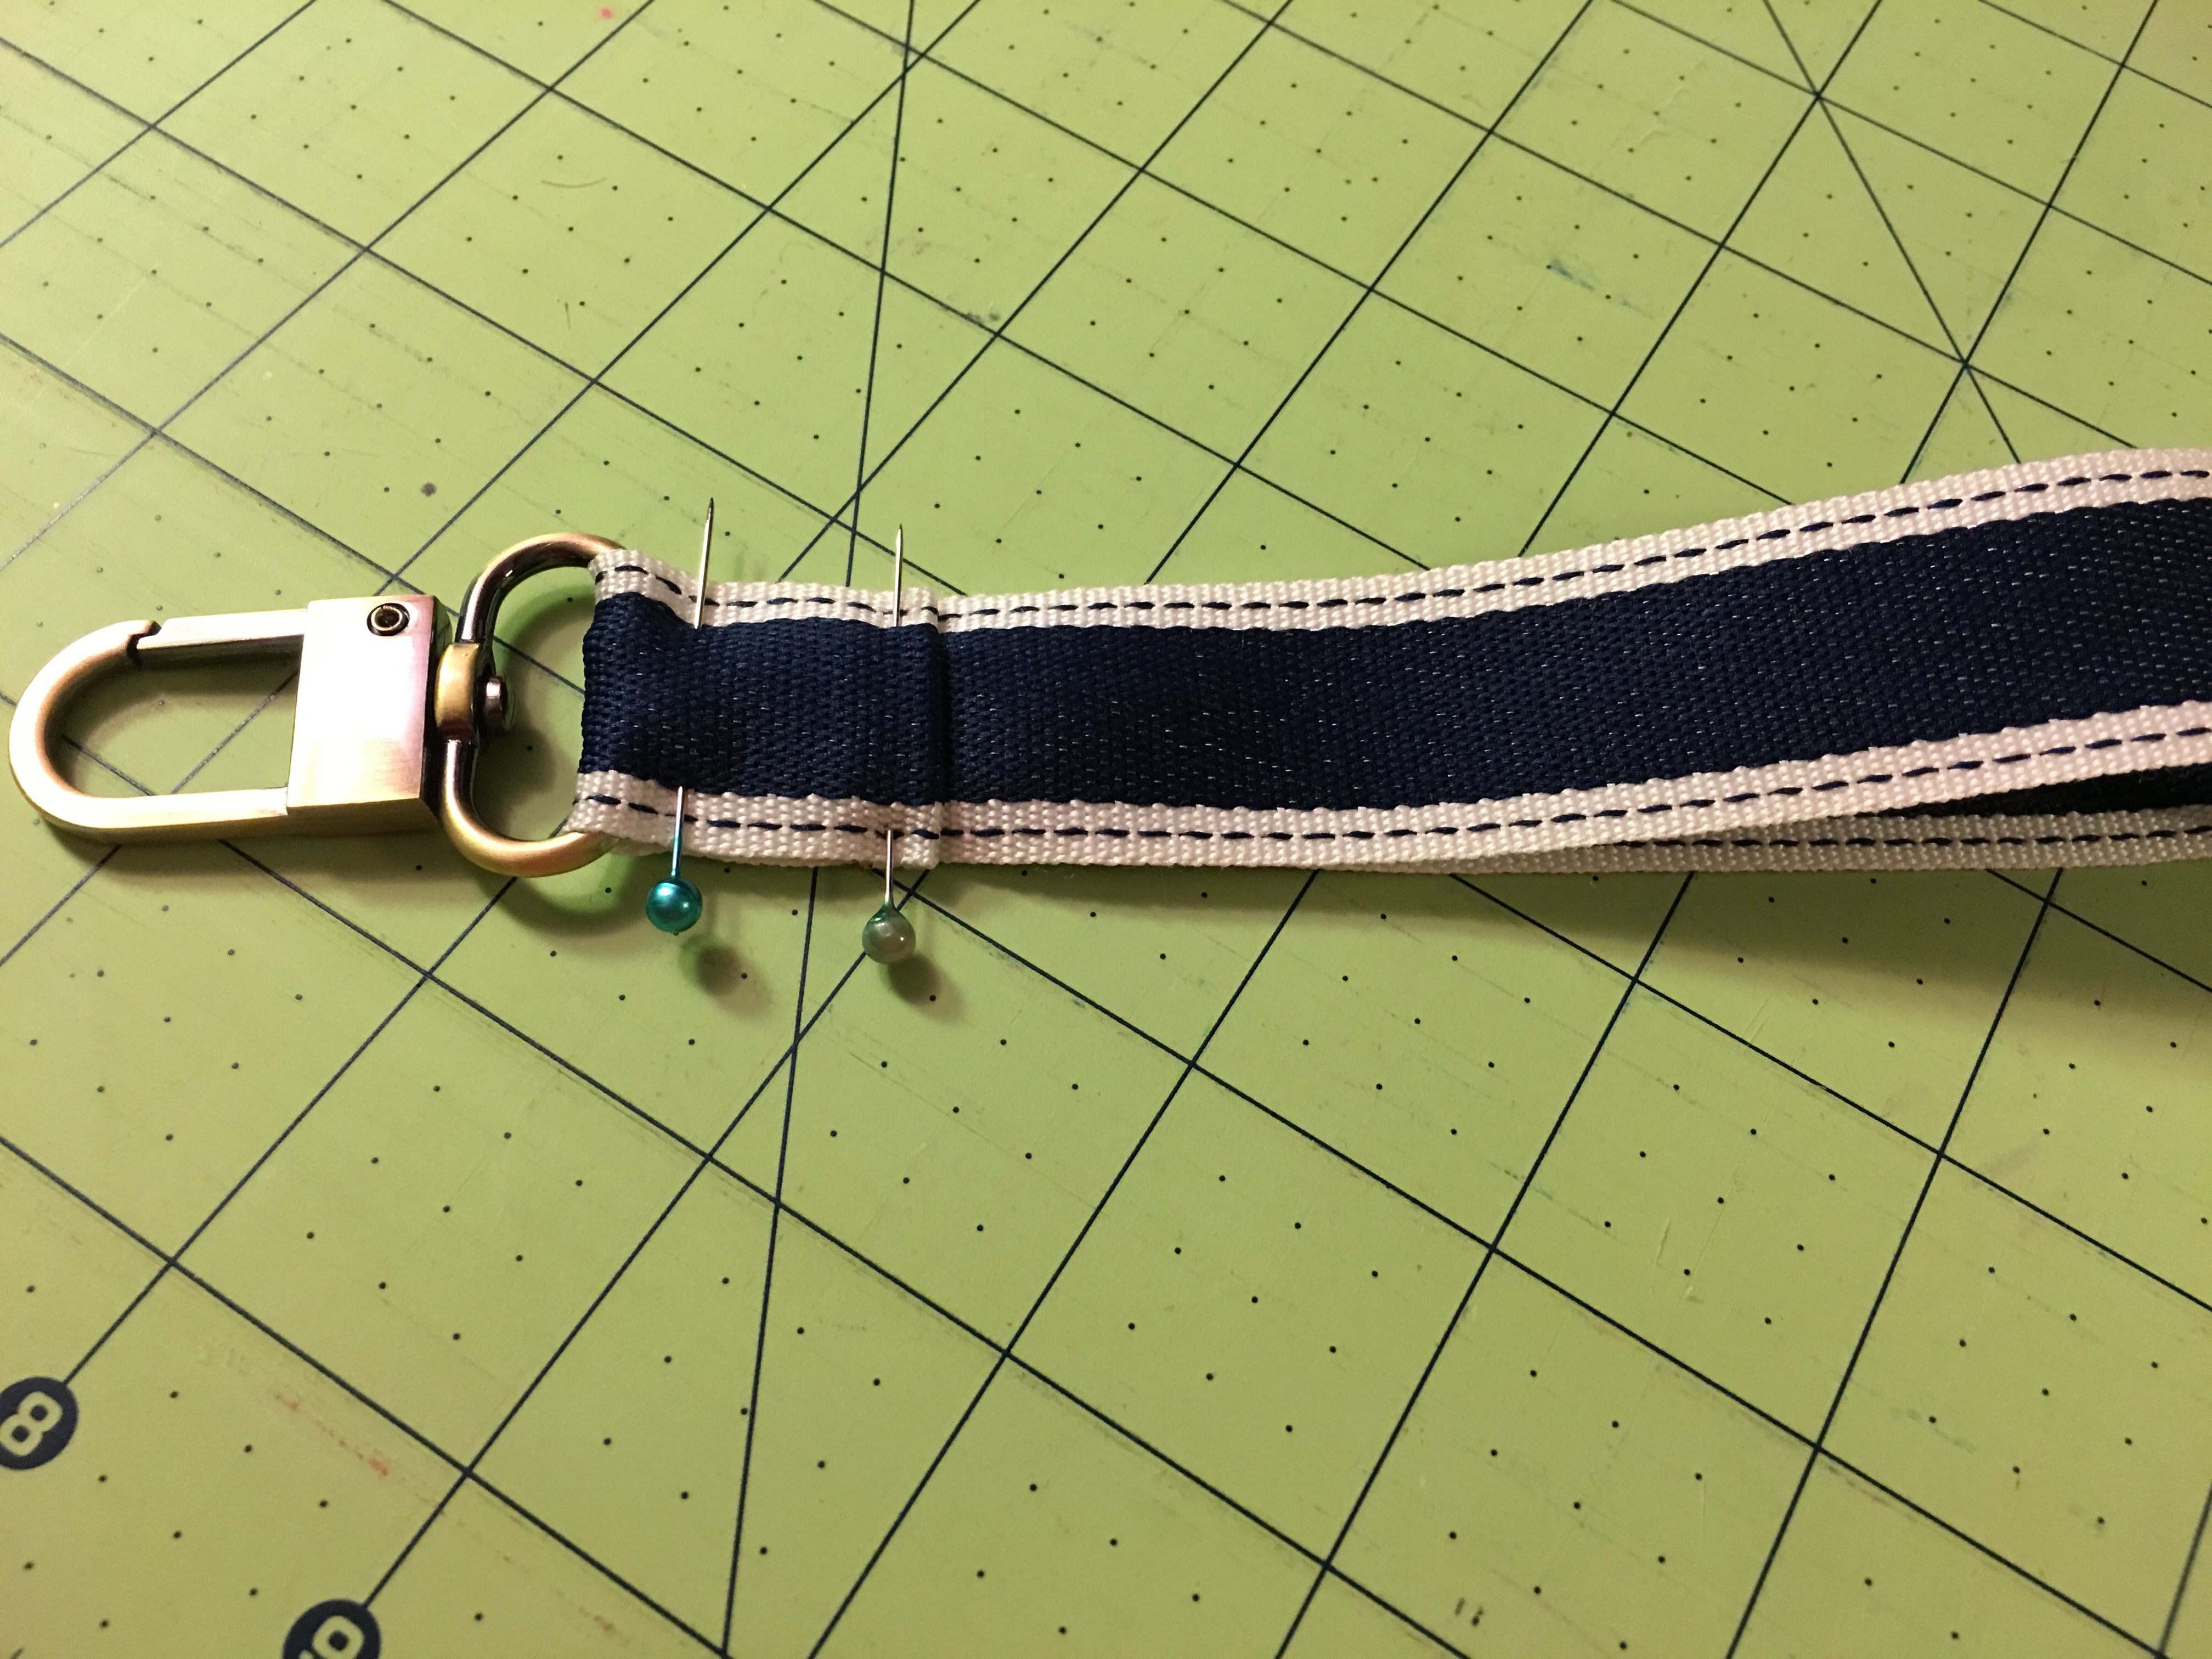 Step 3d: Fold the end that’s through the ring back over the remaining end. Pin in place.
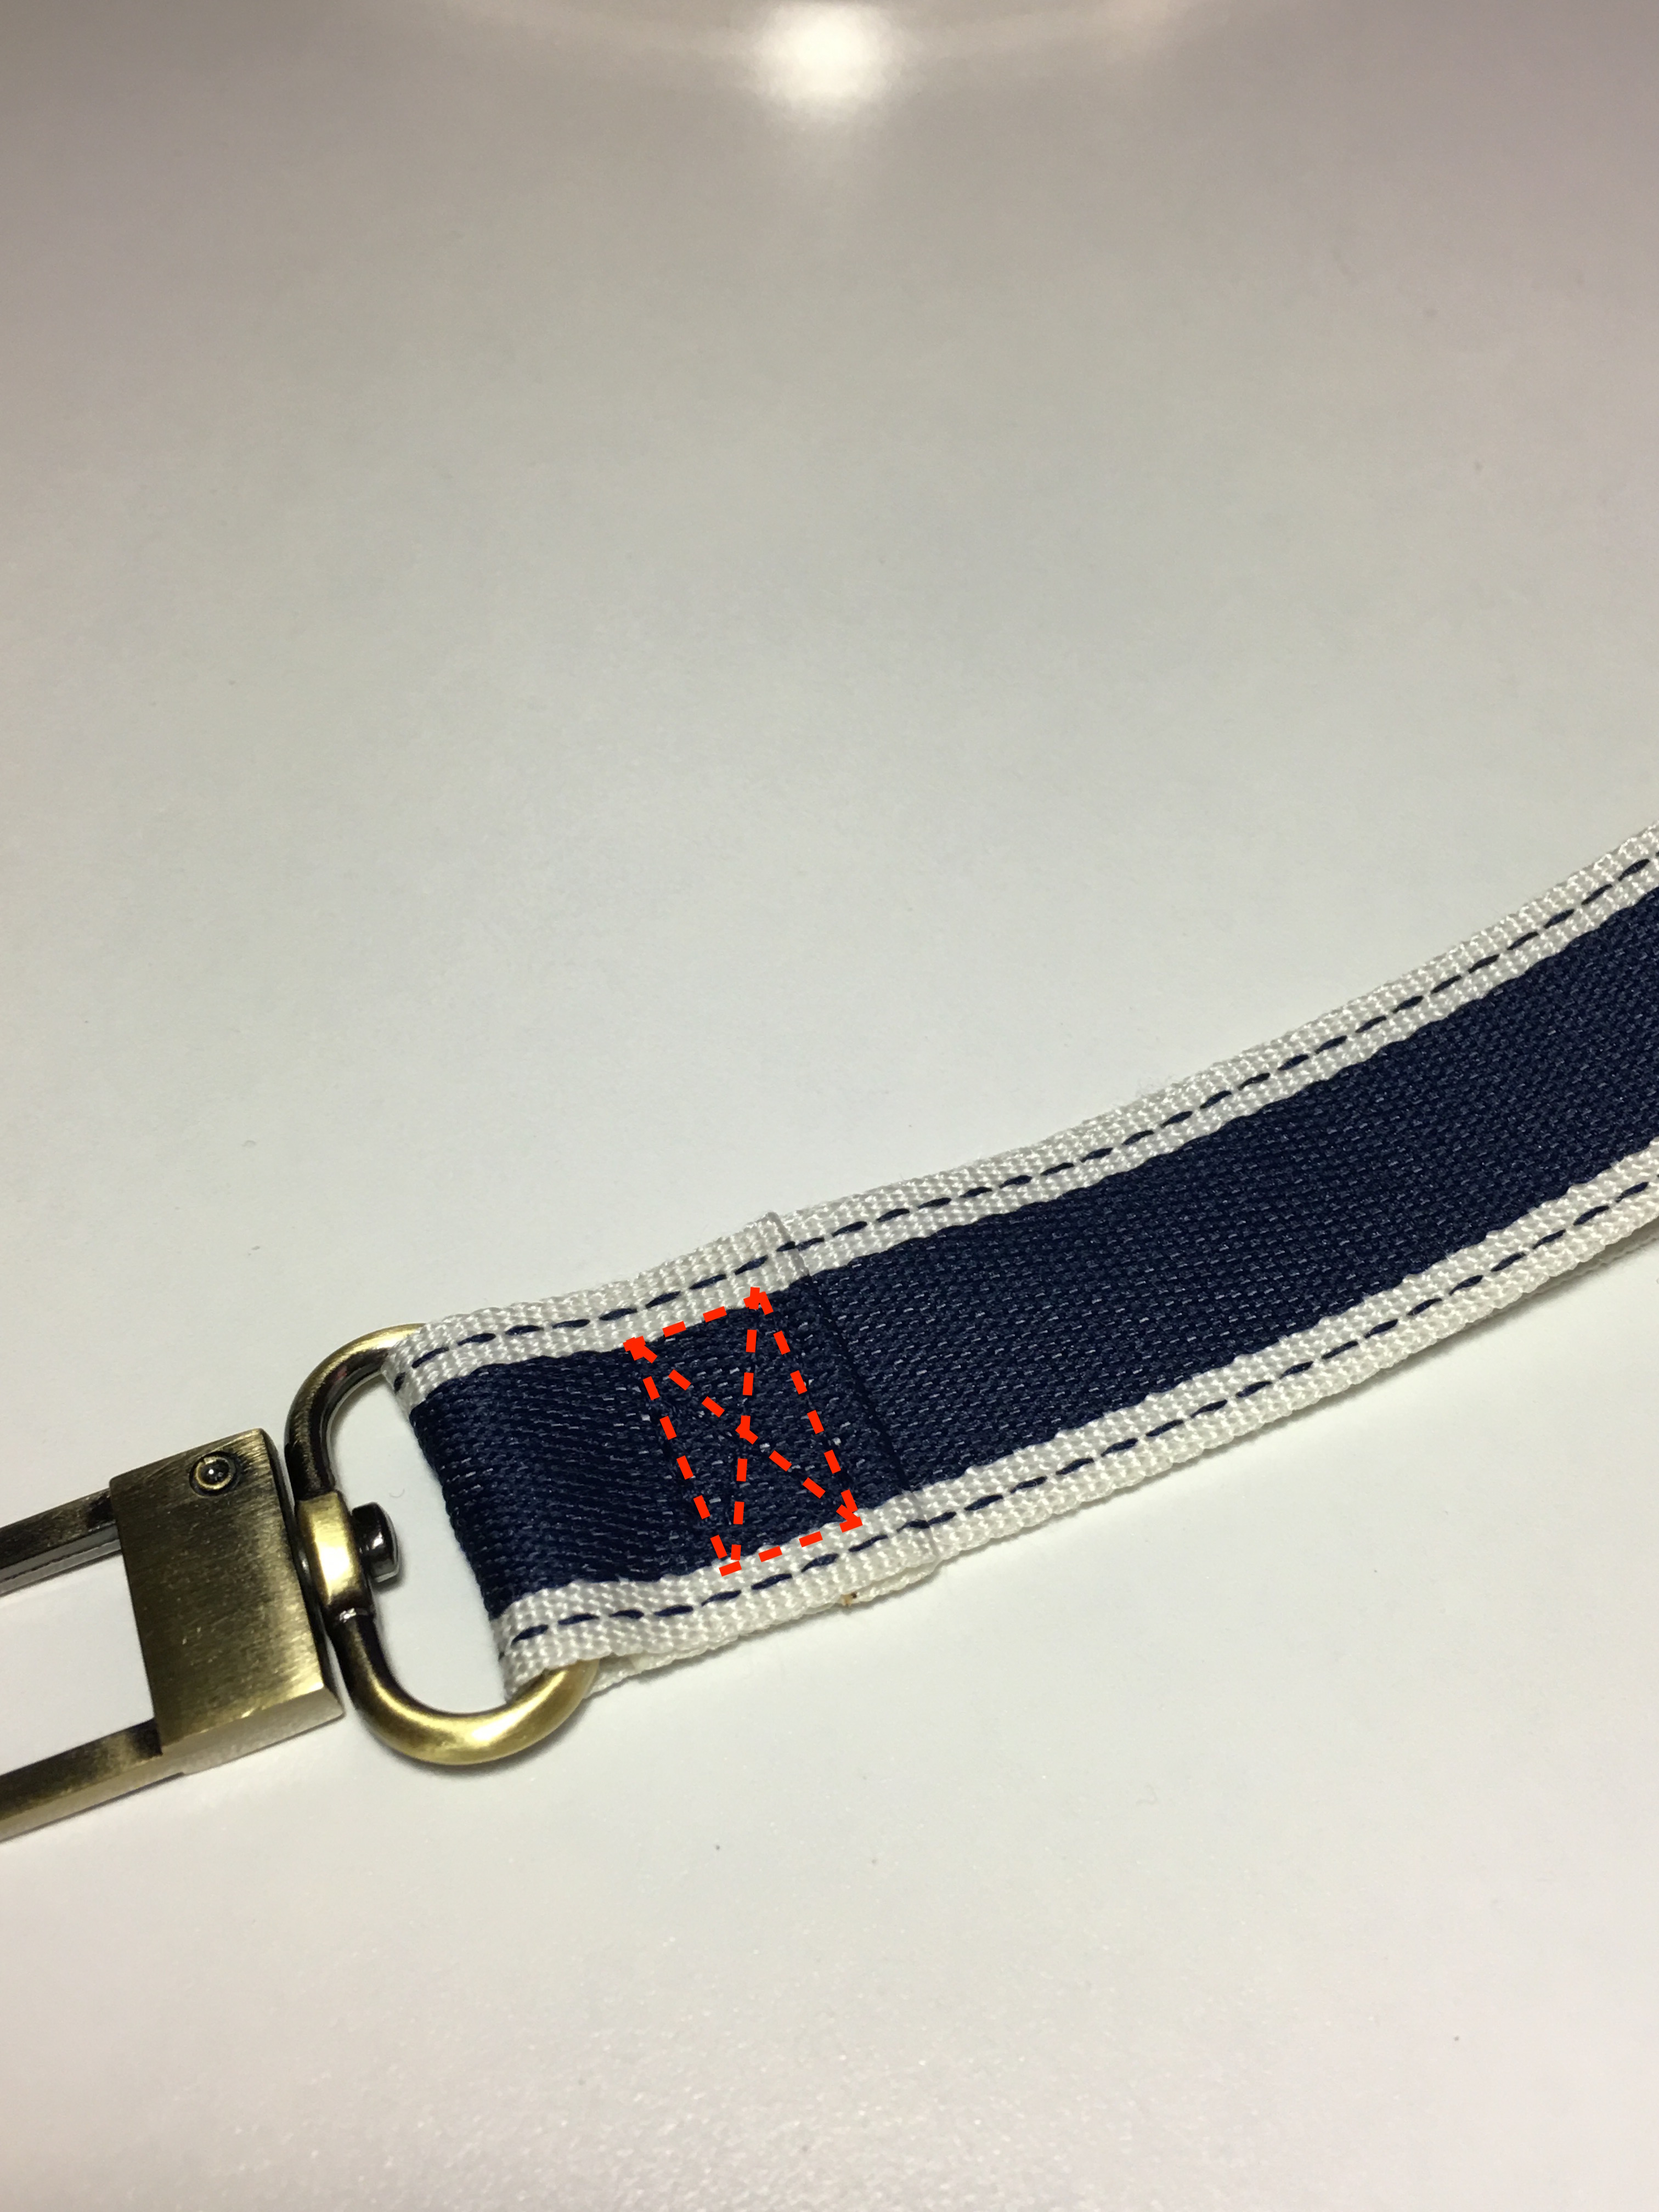 Step 3e: Stitch in place. Use a box with an “X” through it as a stitch pattern to ensure the key fob’s longevity.
TIP: Add an additional 10 minutes to this project and embroider a monogram or message on the ribbon. Stitch out the monogram before attaching the ribbon to the hardware.
Now wrap up the key fob in a box or small bag, or include it with the handkerchief and wallet to make a handsome gift set. The lucky fella to receive this key fob is sure to think of you every time he uses his keys.
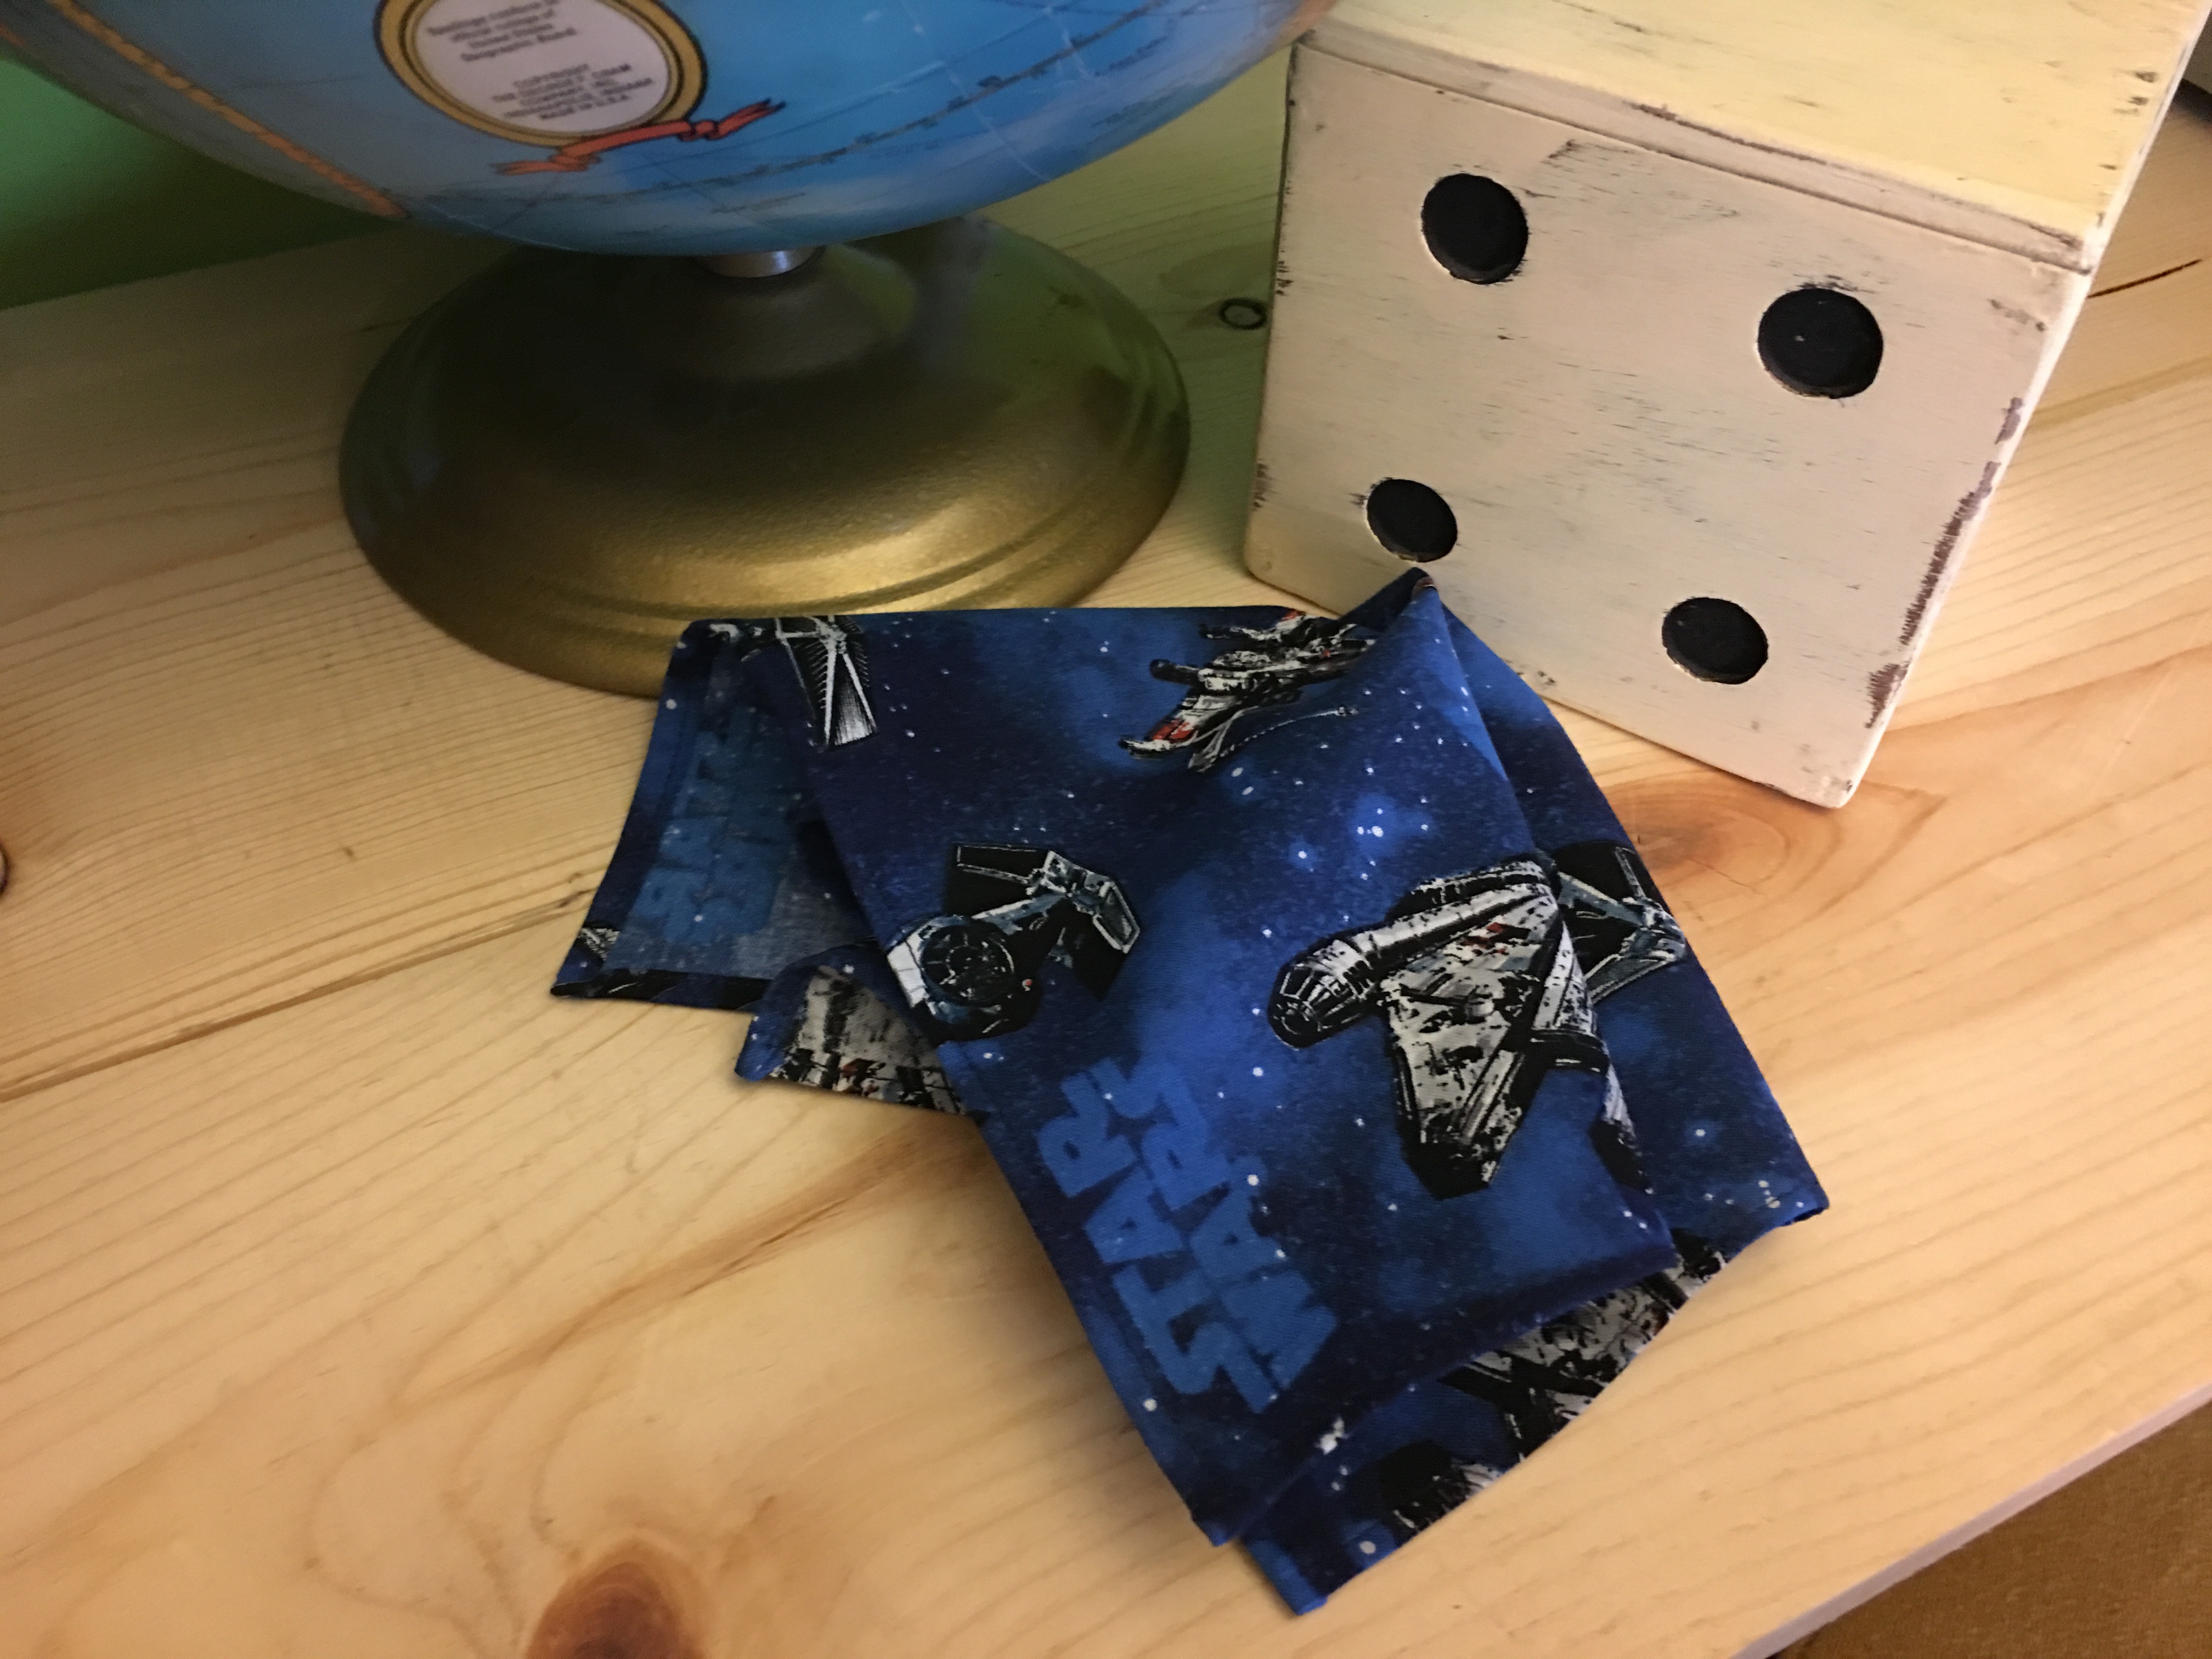
15-Minute Handkerchiefs
Handkerchiefs are by far the classiest way to blow your nose. They’re also handy to have around for all sorts of other reasons. Besides, they’re a great way to give a personalized gift to someone you care about.
• 14” x 14” square of soft cotton • Matching all-purpose thread • Removable fabric marker • Acrylic ruler • Iron
Marking
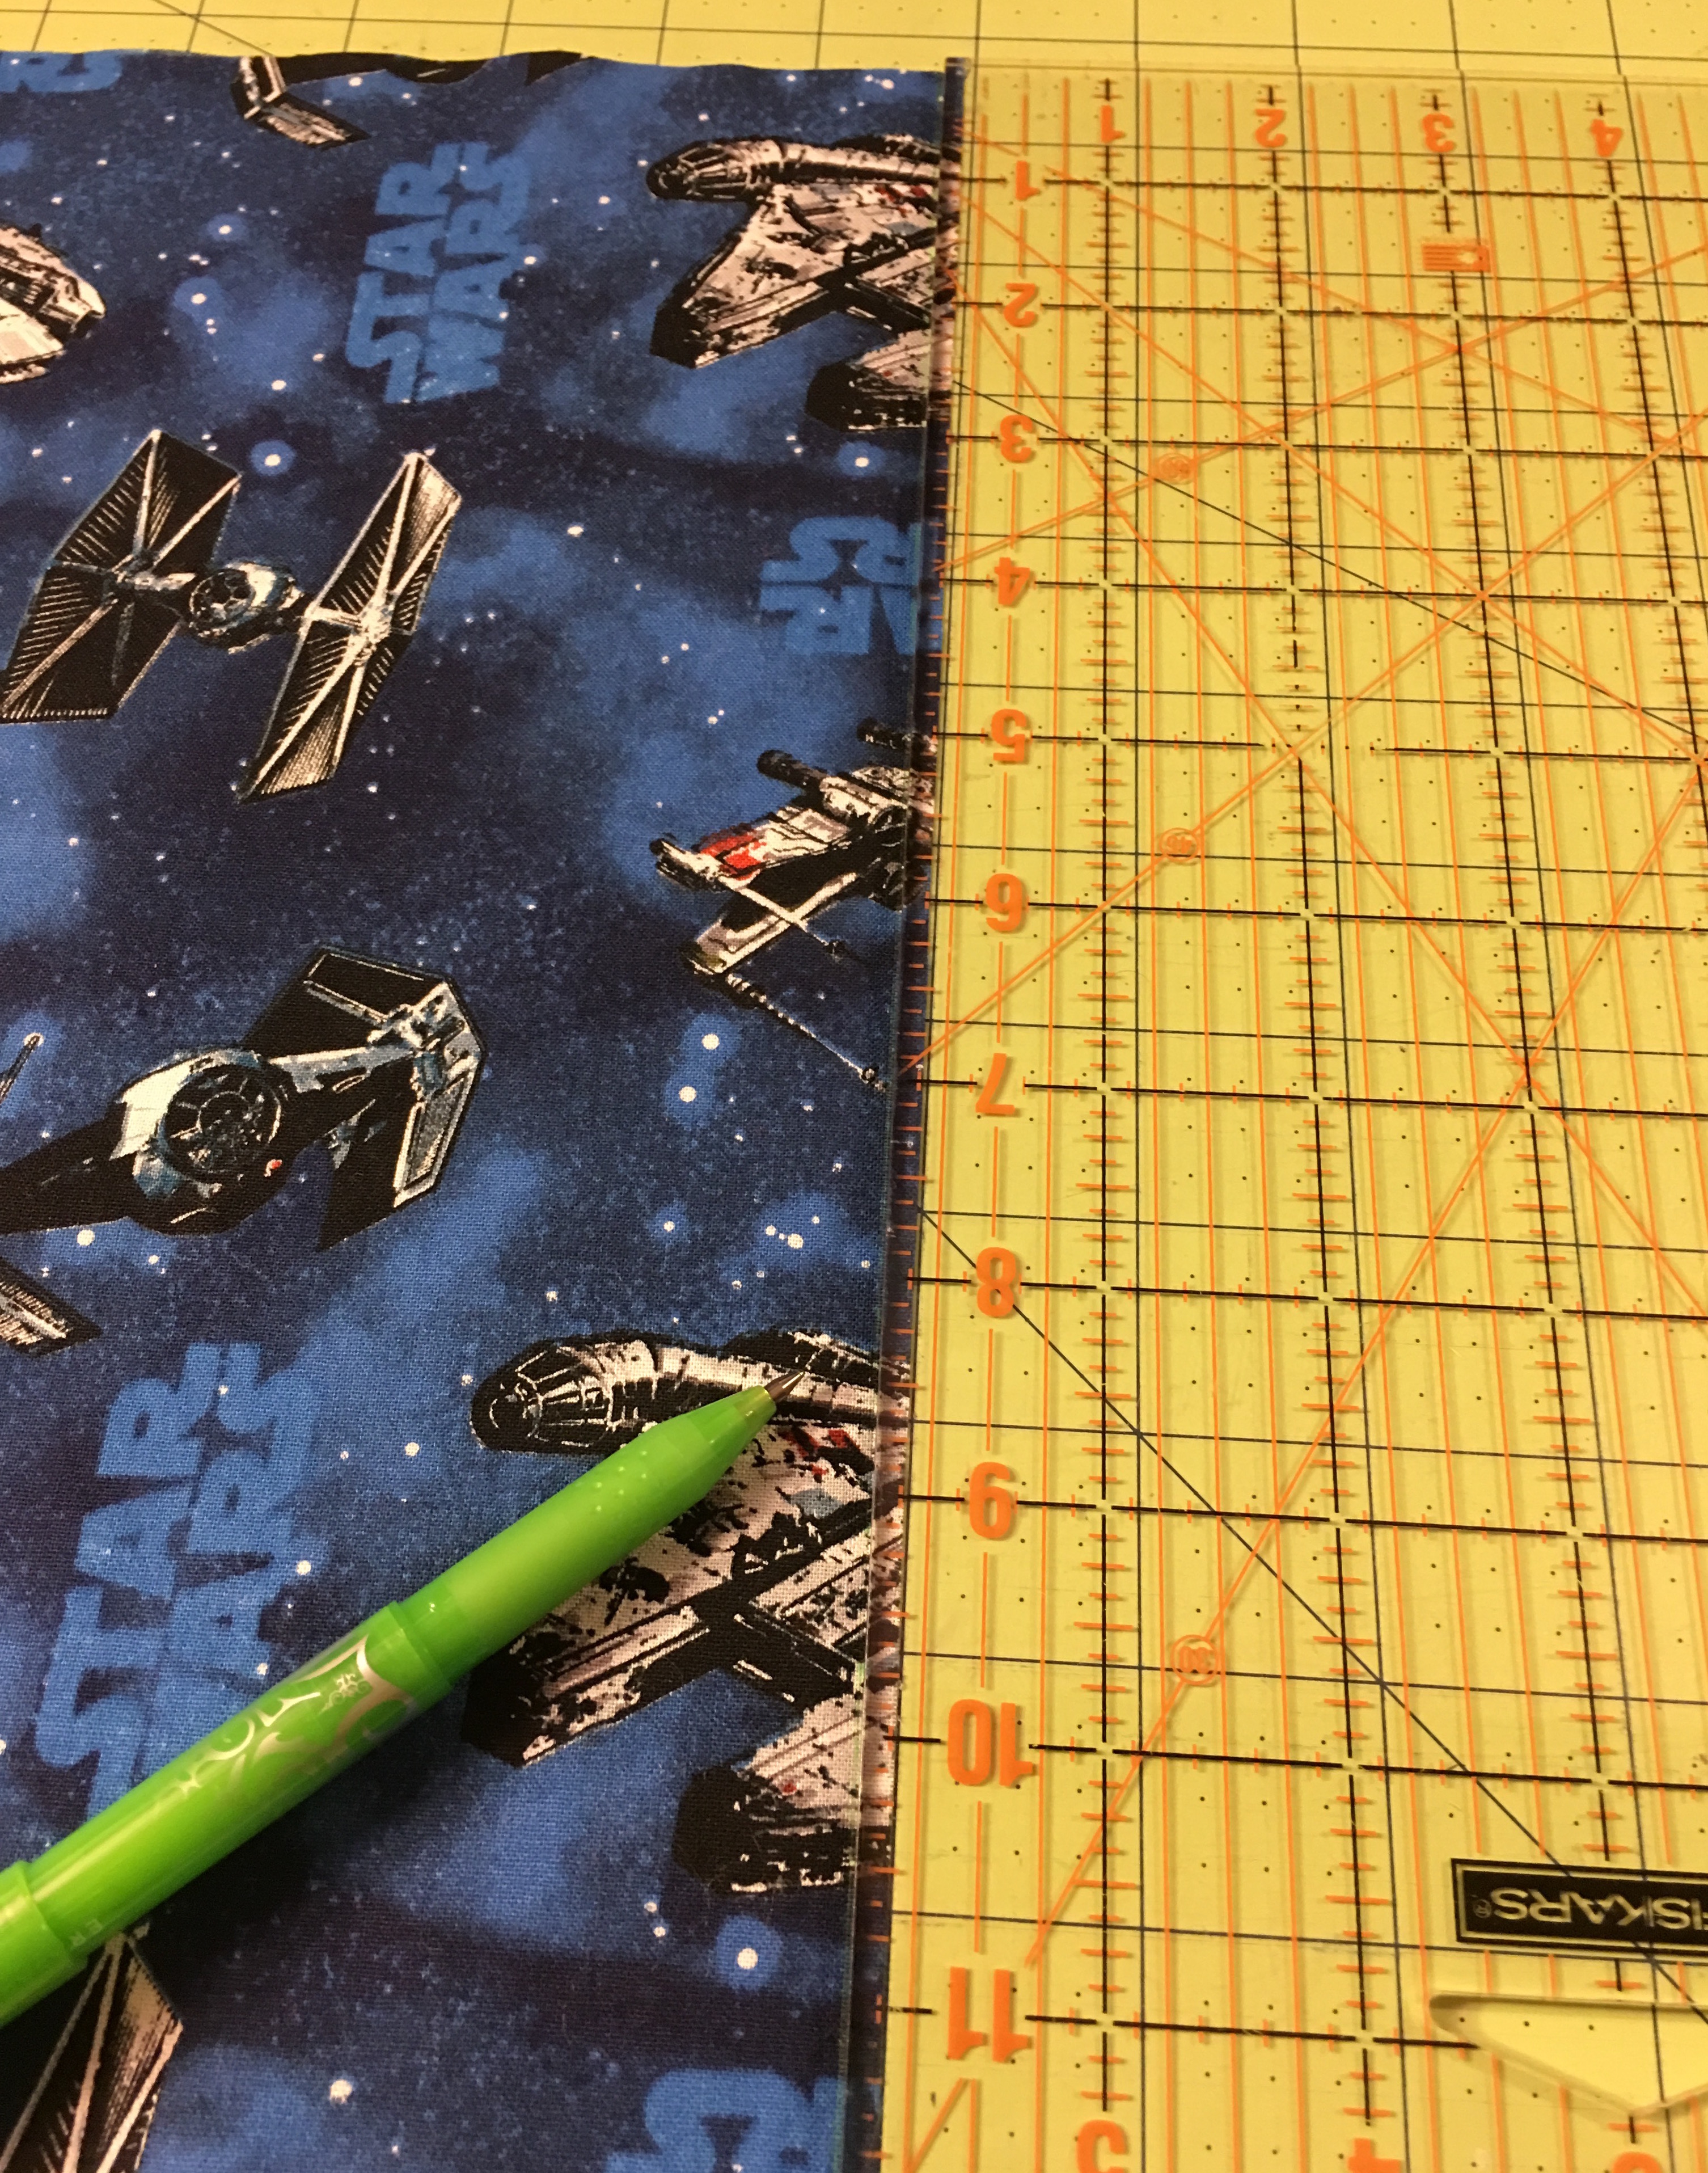
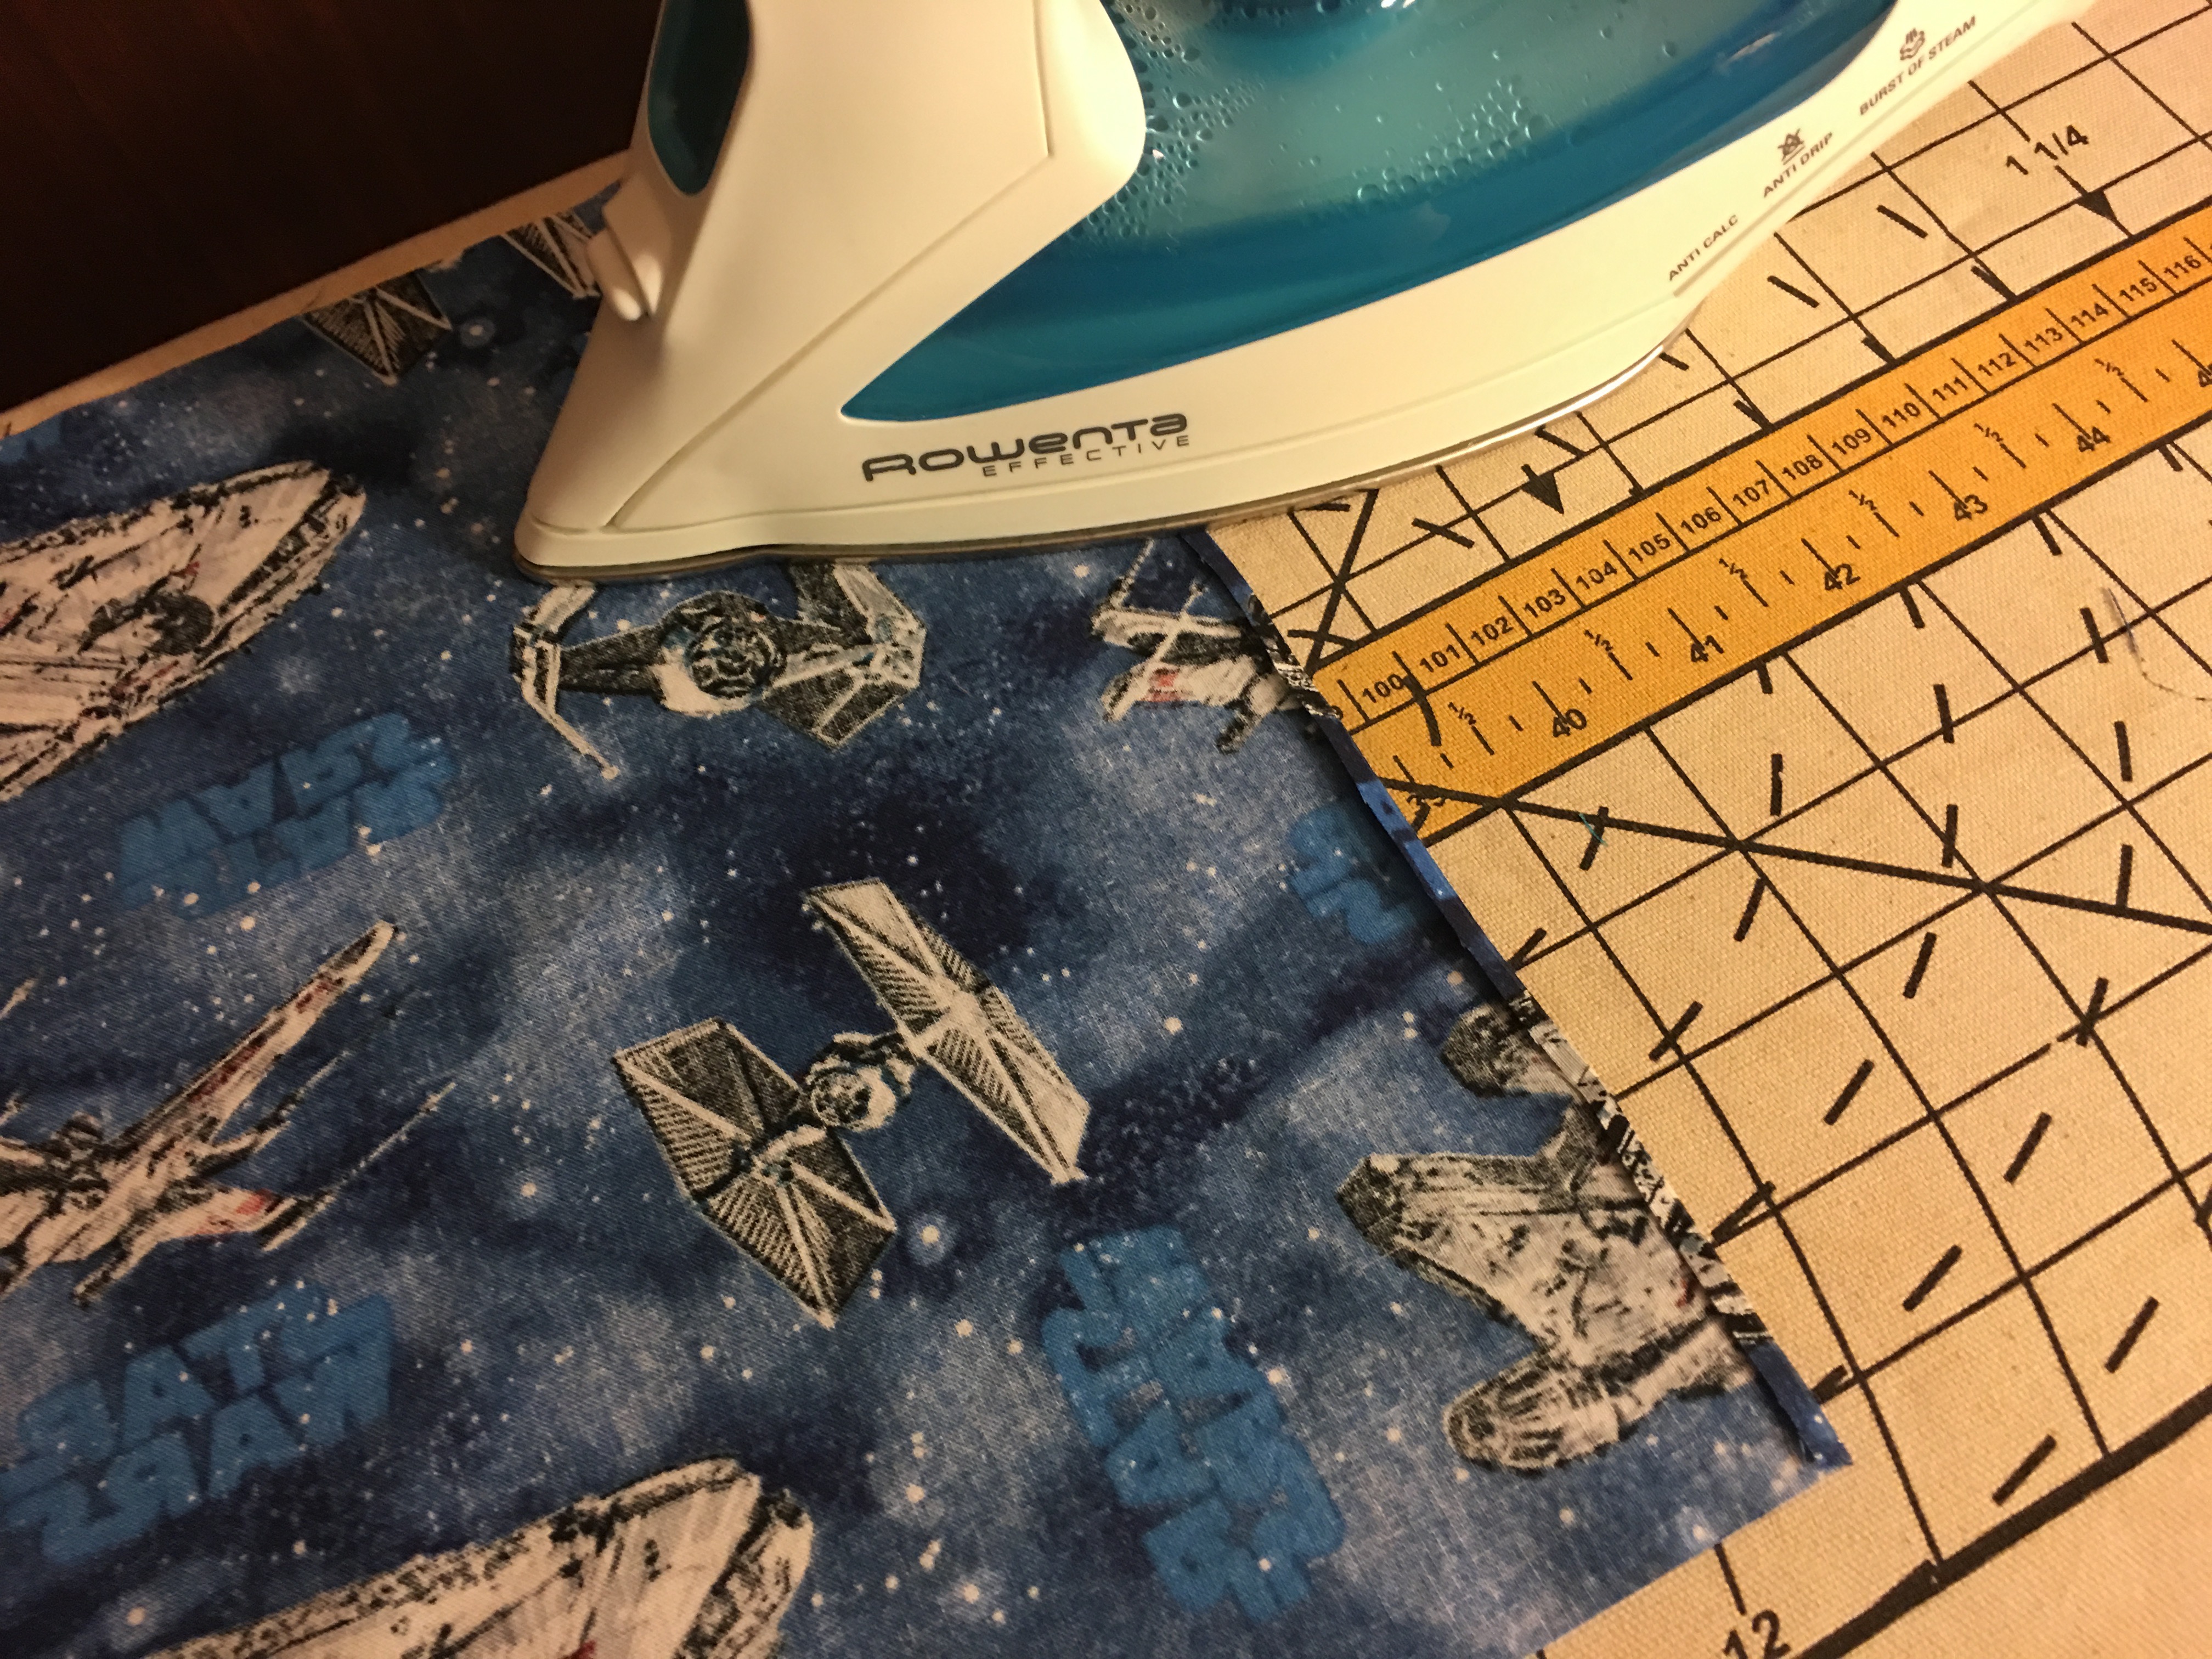
Step 1: On the fabric’s right side, mark 1/8” along all edges. These marks will be used to press the edges in. The marks will be folded up inside edge, so don’t worry if they become permanent when pressed.
TIP: If you have a rolled edge foot, this project is much easier. No need to mark or press the edges up. Simply run the fabric through the rolled edge foot after cutting.
Pressing
Step 2a: Fold right side to wrong side along the marked lines, pressing as you go. Be careful not to burn fingertips. Allow each edge to cool. For corners, simply fold over as you go; folding the next edge will create a slightly thicker lump at the corner, but will be fine for this quick gift.
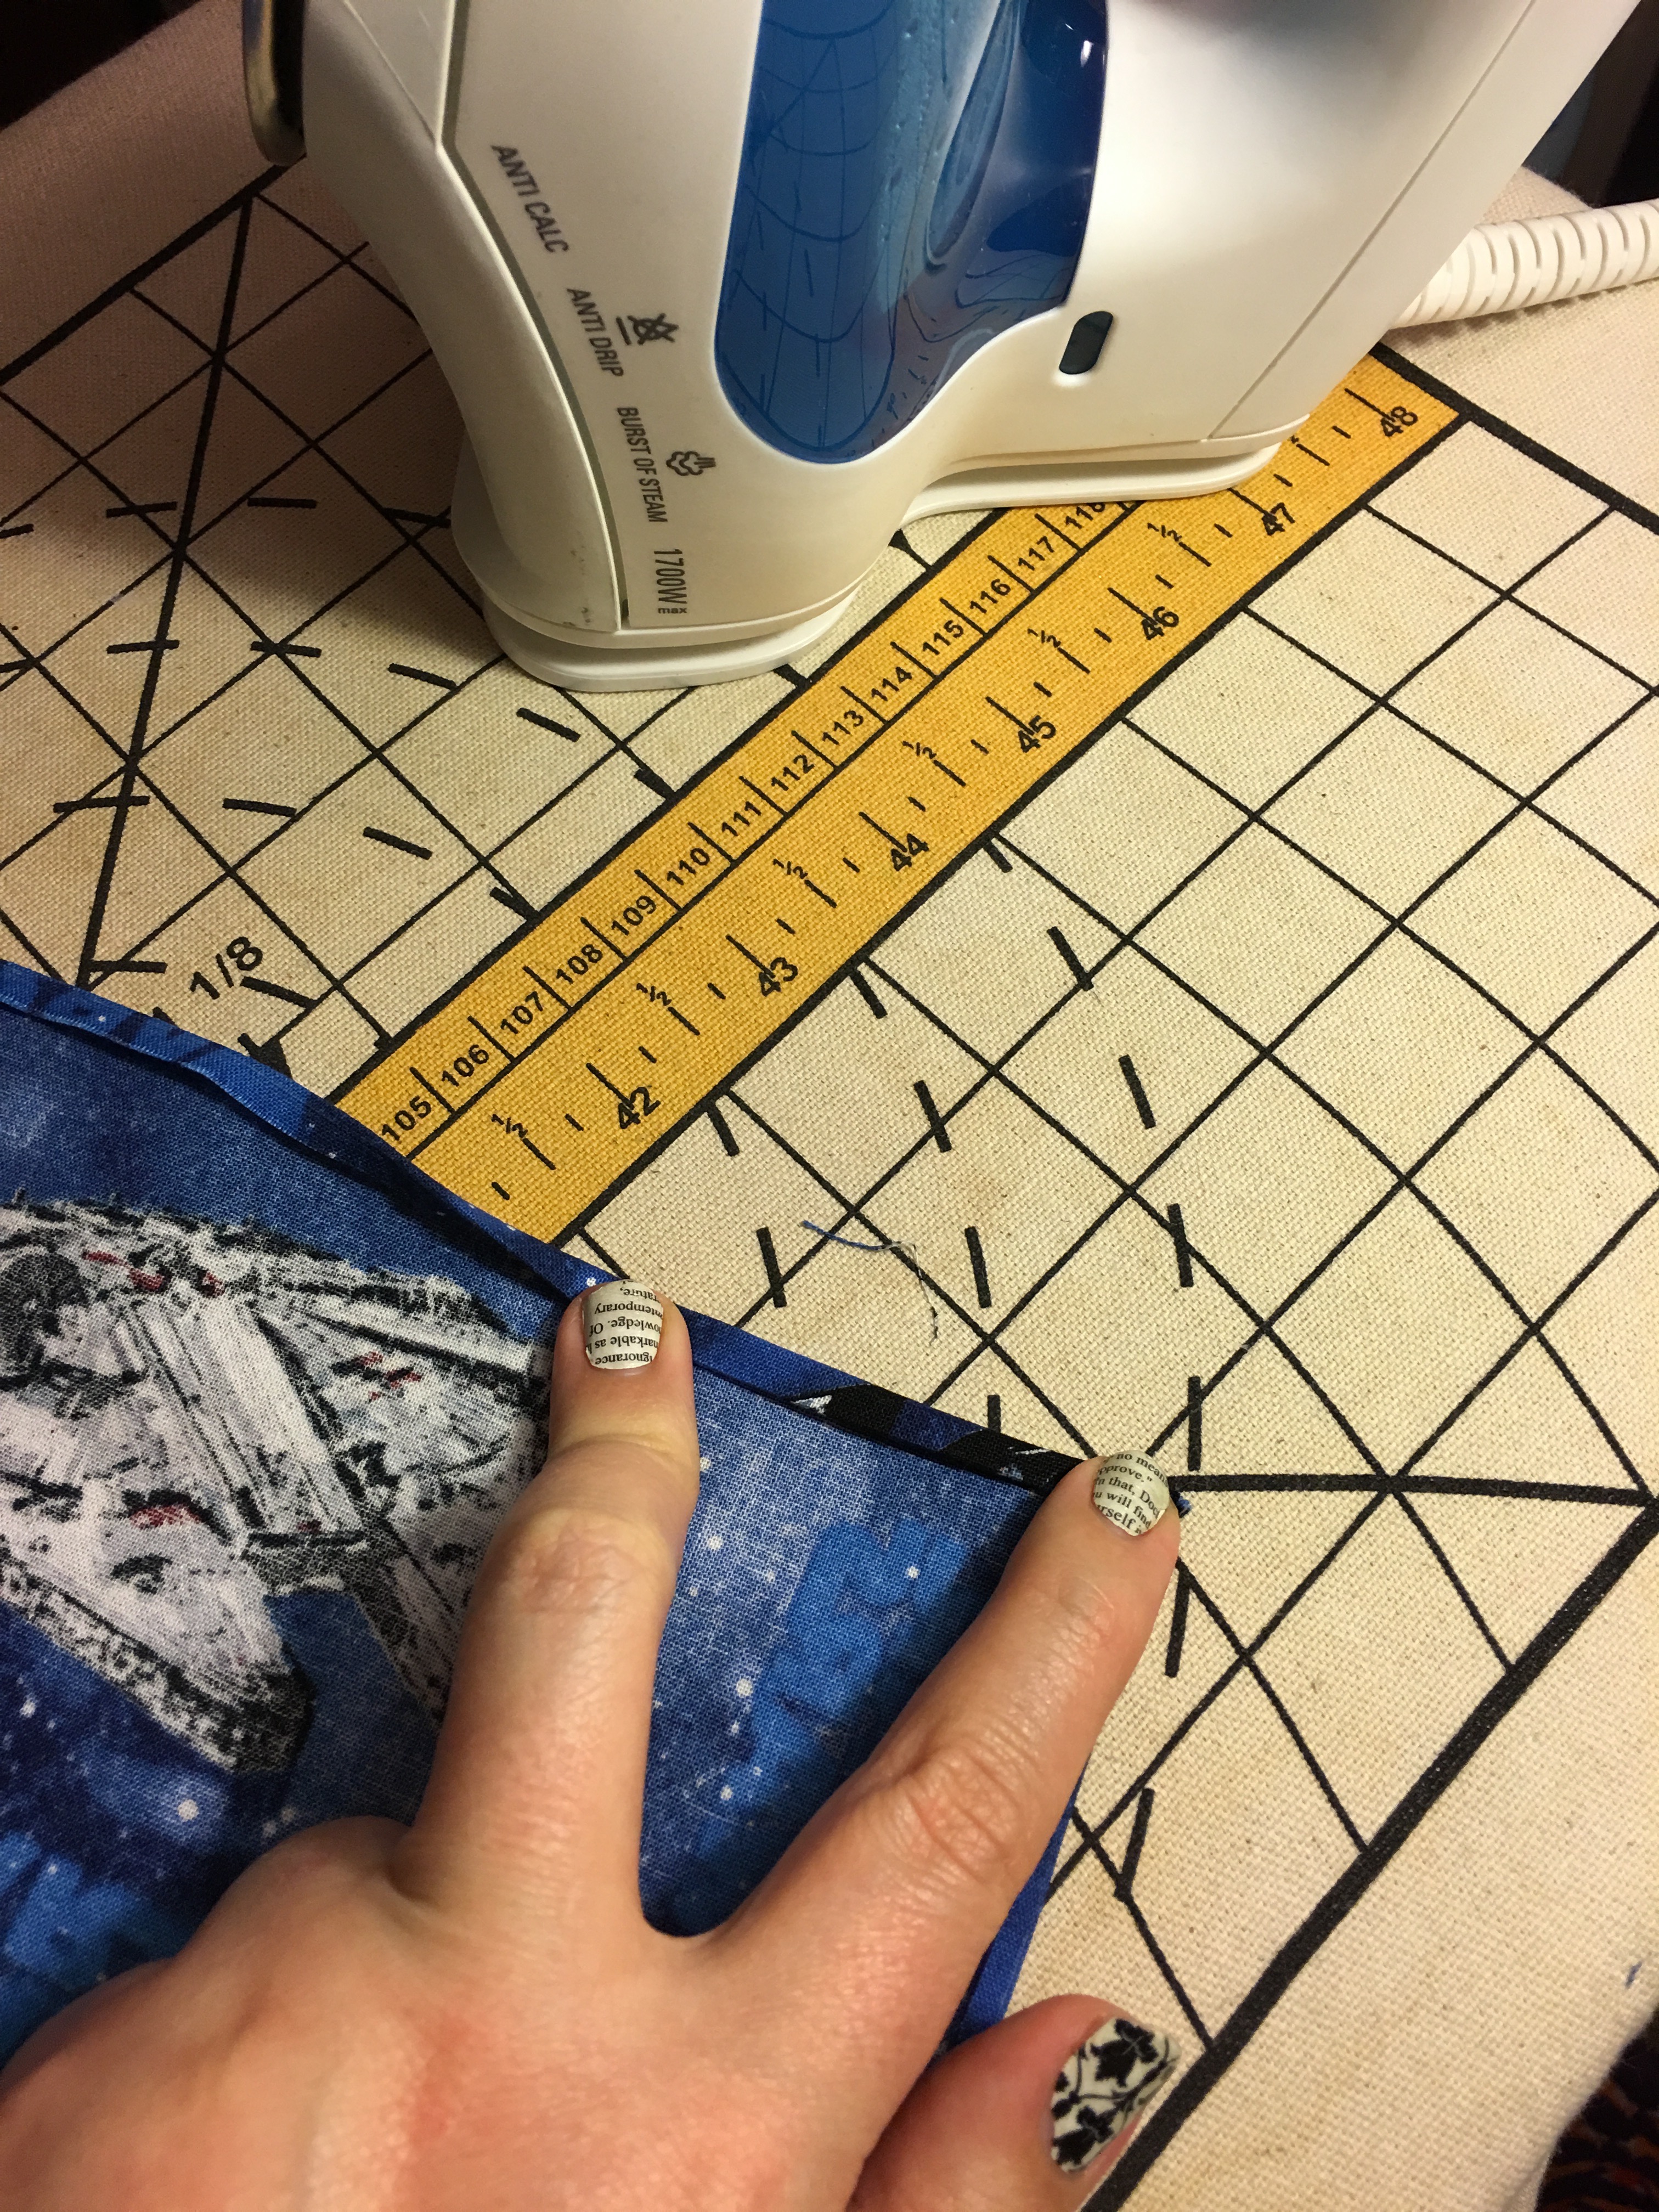 Step 2b: Fold over 1/8” again right side to wrong side, pressing as you go. Allow all the edges to cool. Treat the corners the same way while folding these edges.
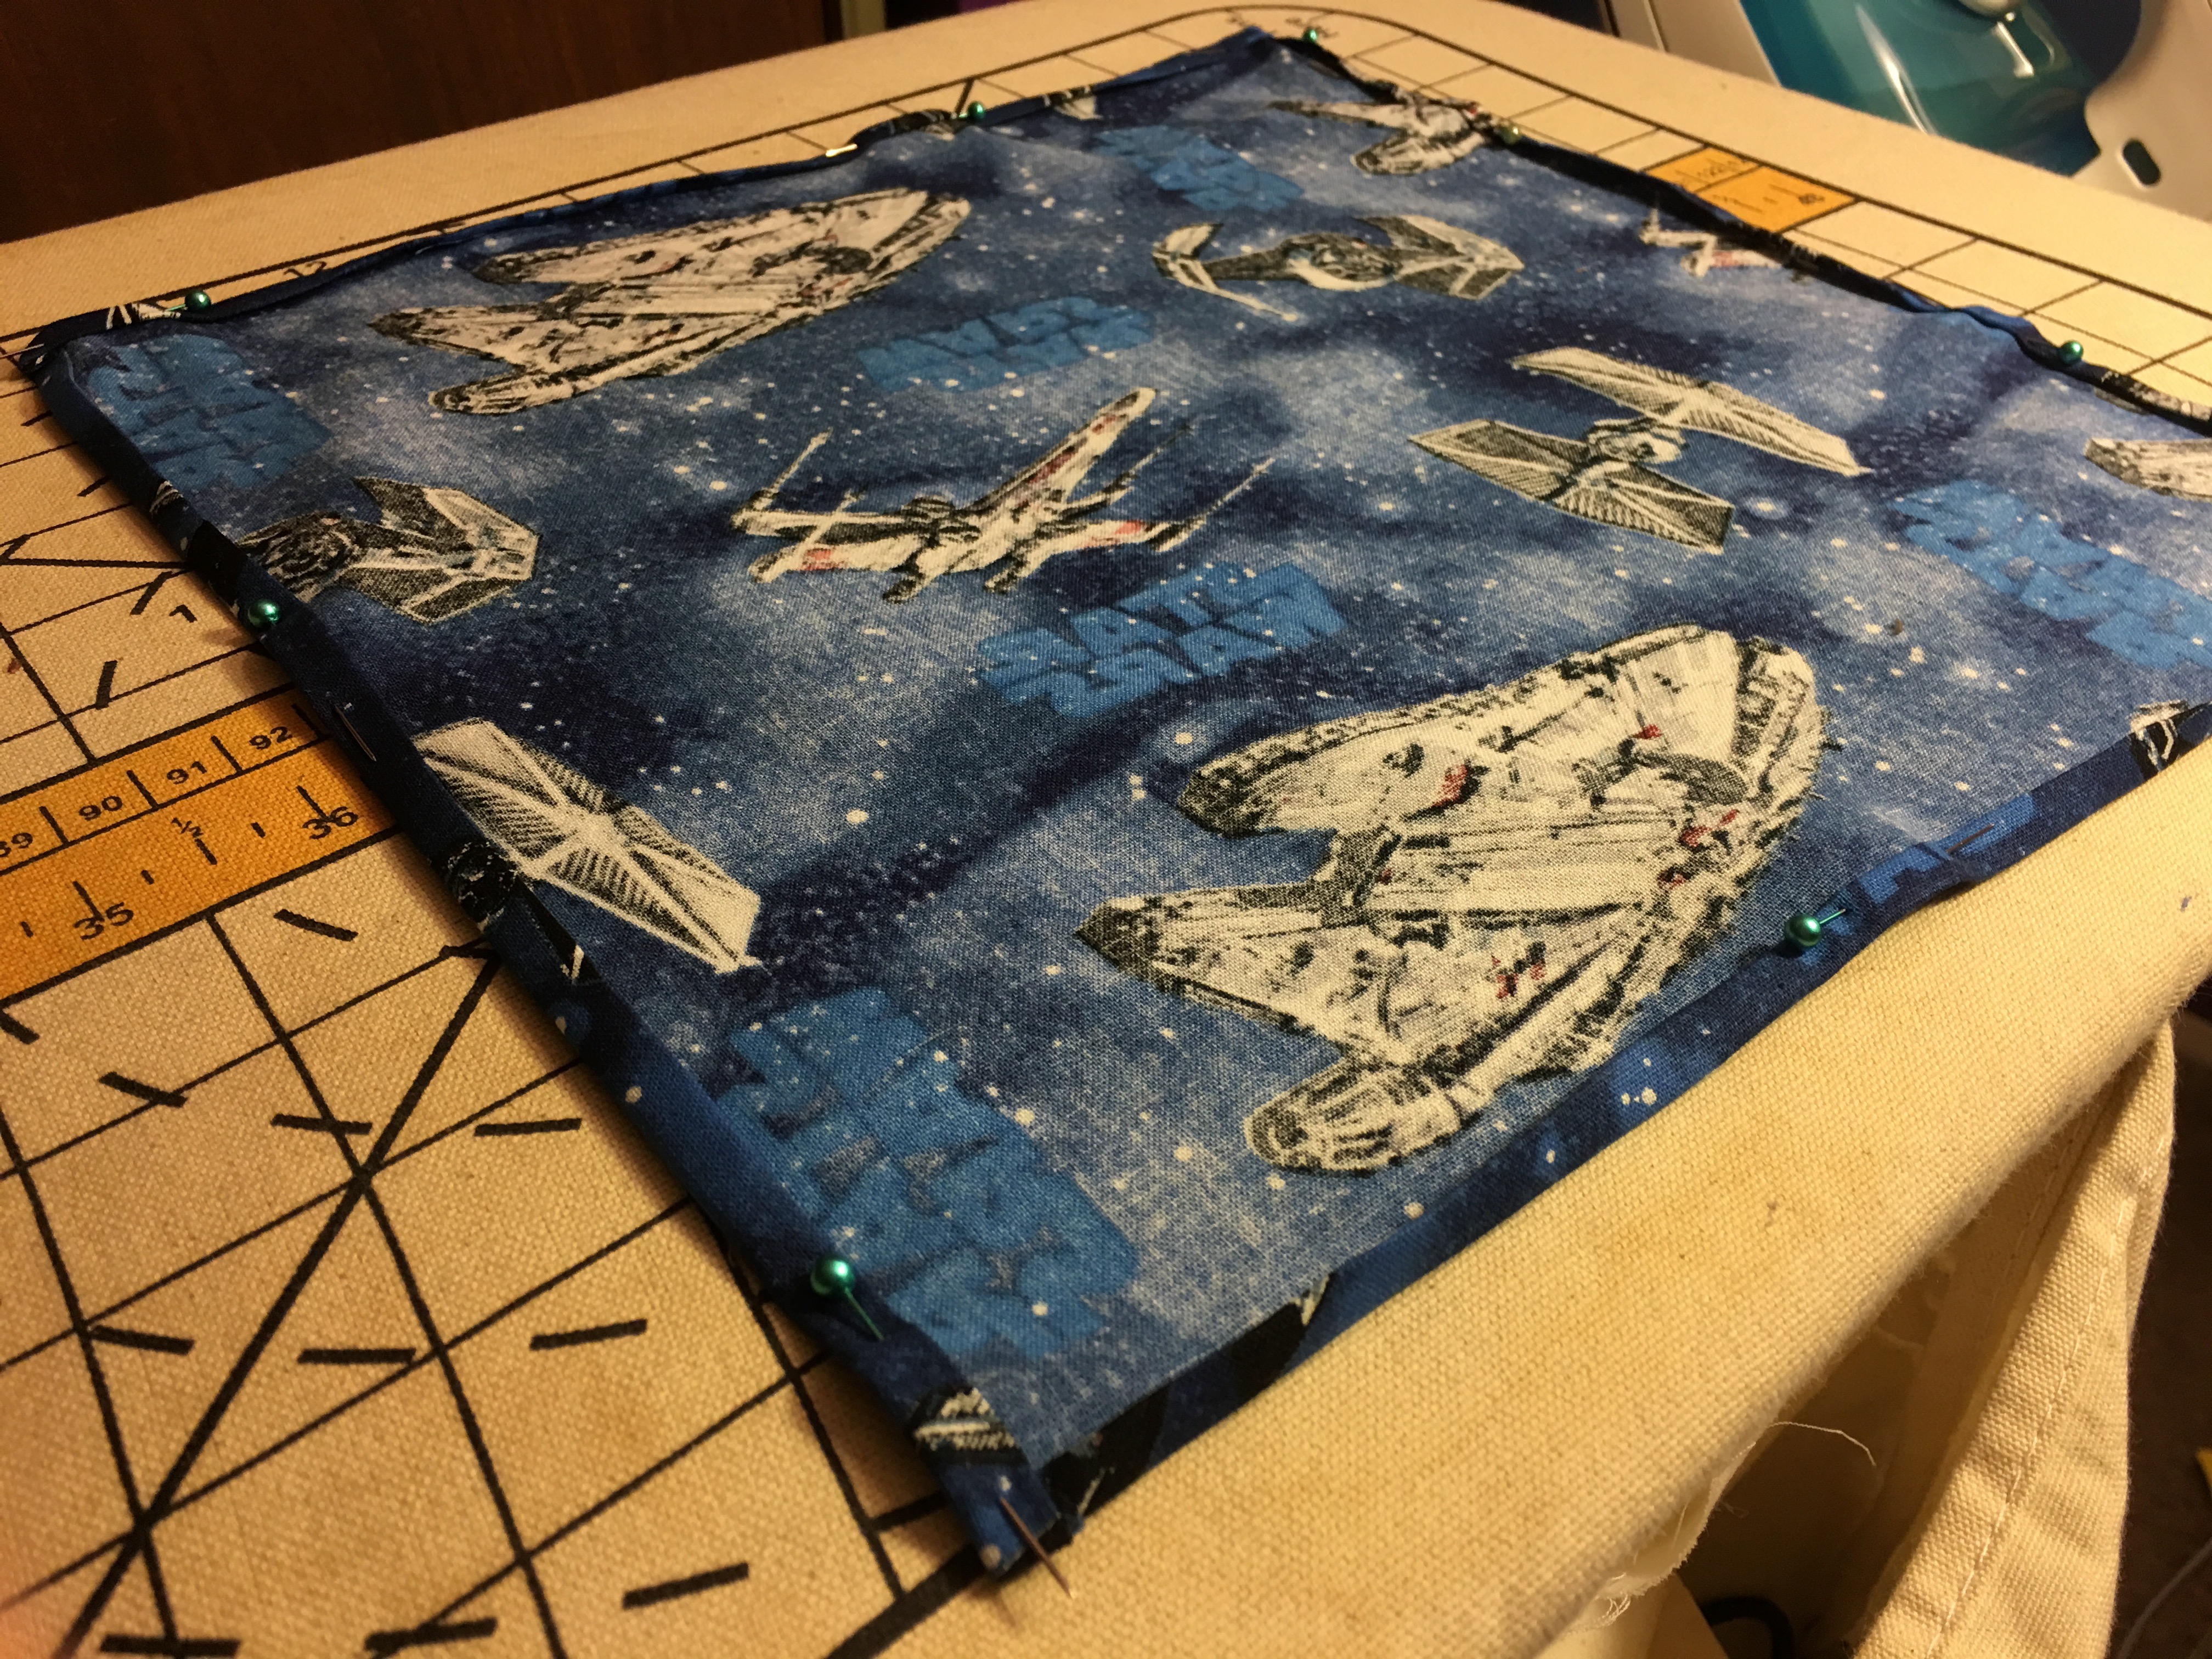 Step 2c: Pin the edges in place. Make sure to pin the corners carefully.
Sewing
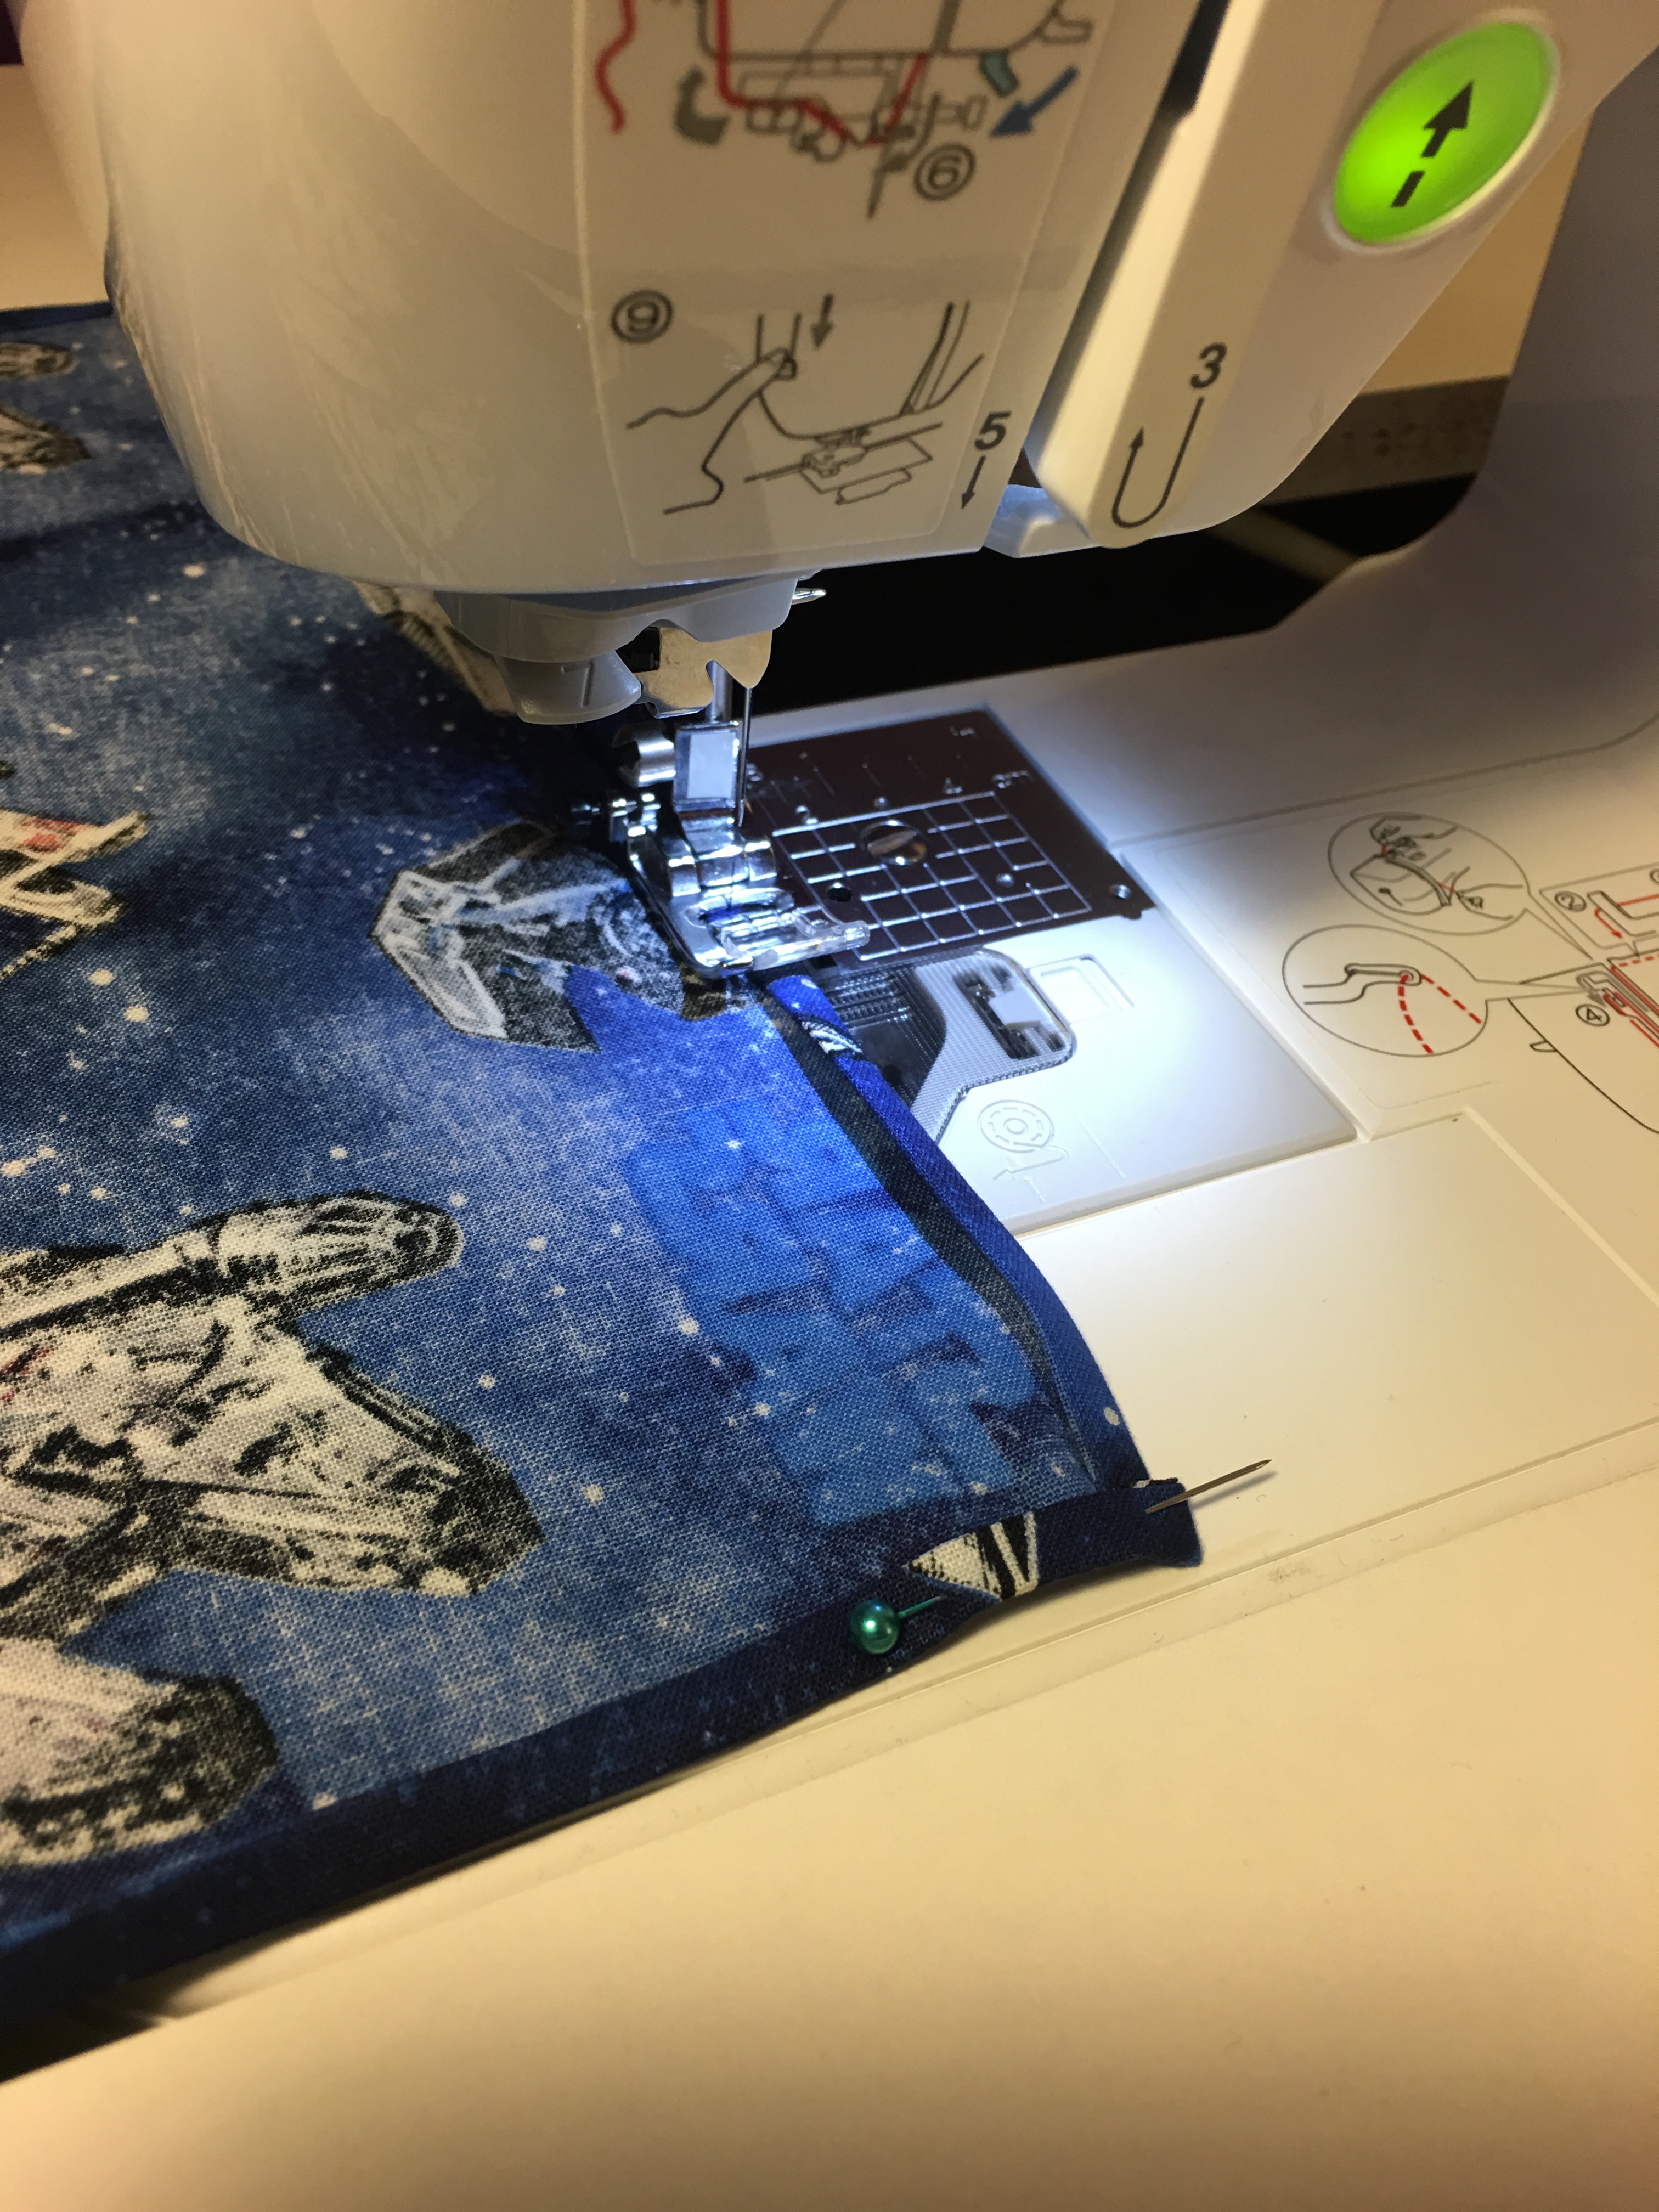
Step 3: Carefully sew along the folded edges, stitching close to the fold. Sew all four edges, pivoting at the corners. For best results, begin stitching along one side instead of at a corner.
Make more than one handkerchief out of matching fabrics to create a set. Consider monogramming the handkerchiefs before pressing and sewing.
30-Minute Simple Wallet
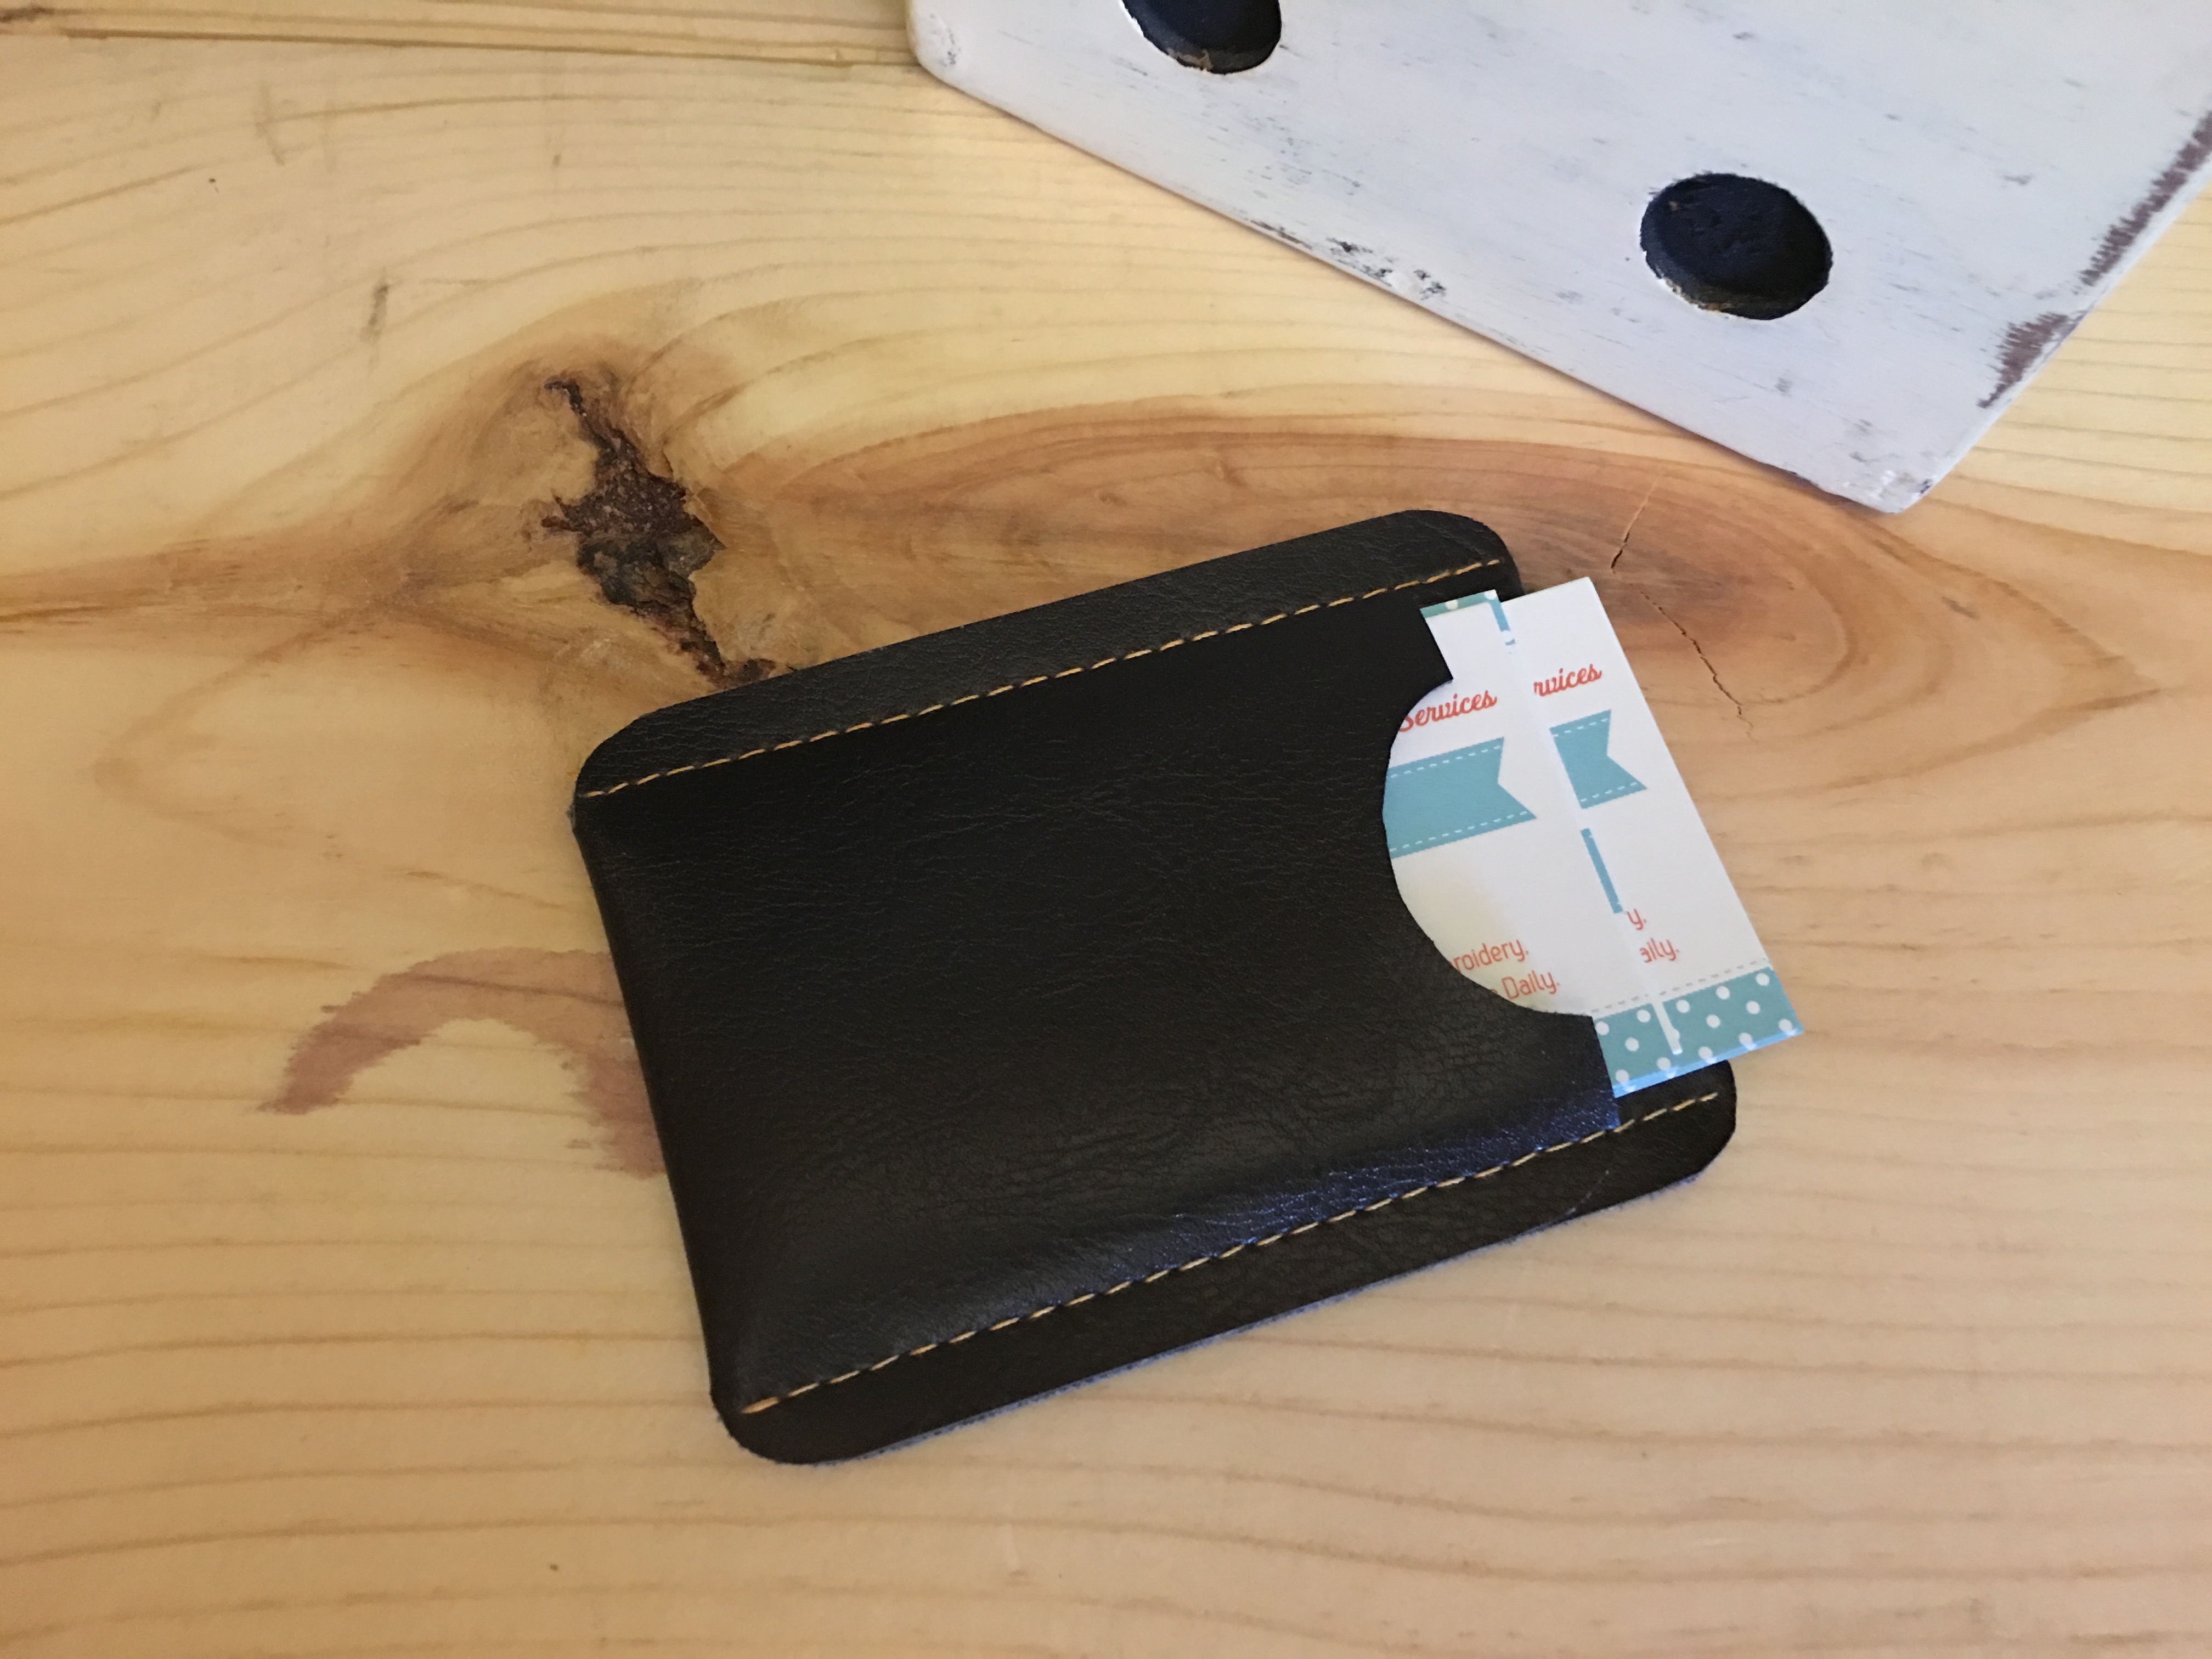
This little wallet is highly personalized and incredibly classy. Whether it’s used to hold business cards or credit cards and an ID, it’s sure to come in handy. The monogram is an especially nice touch. This wallet can be made out of scraps of pleather or leather.
Here are the materials and supplies you’ll need to complete this project:
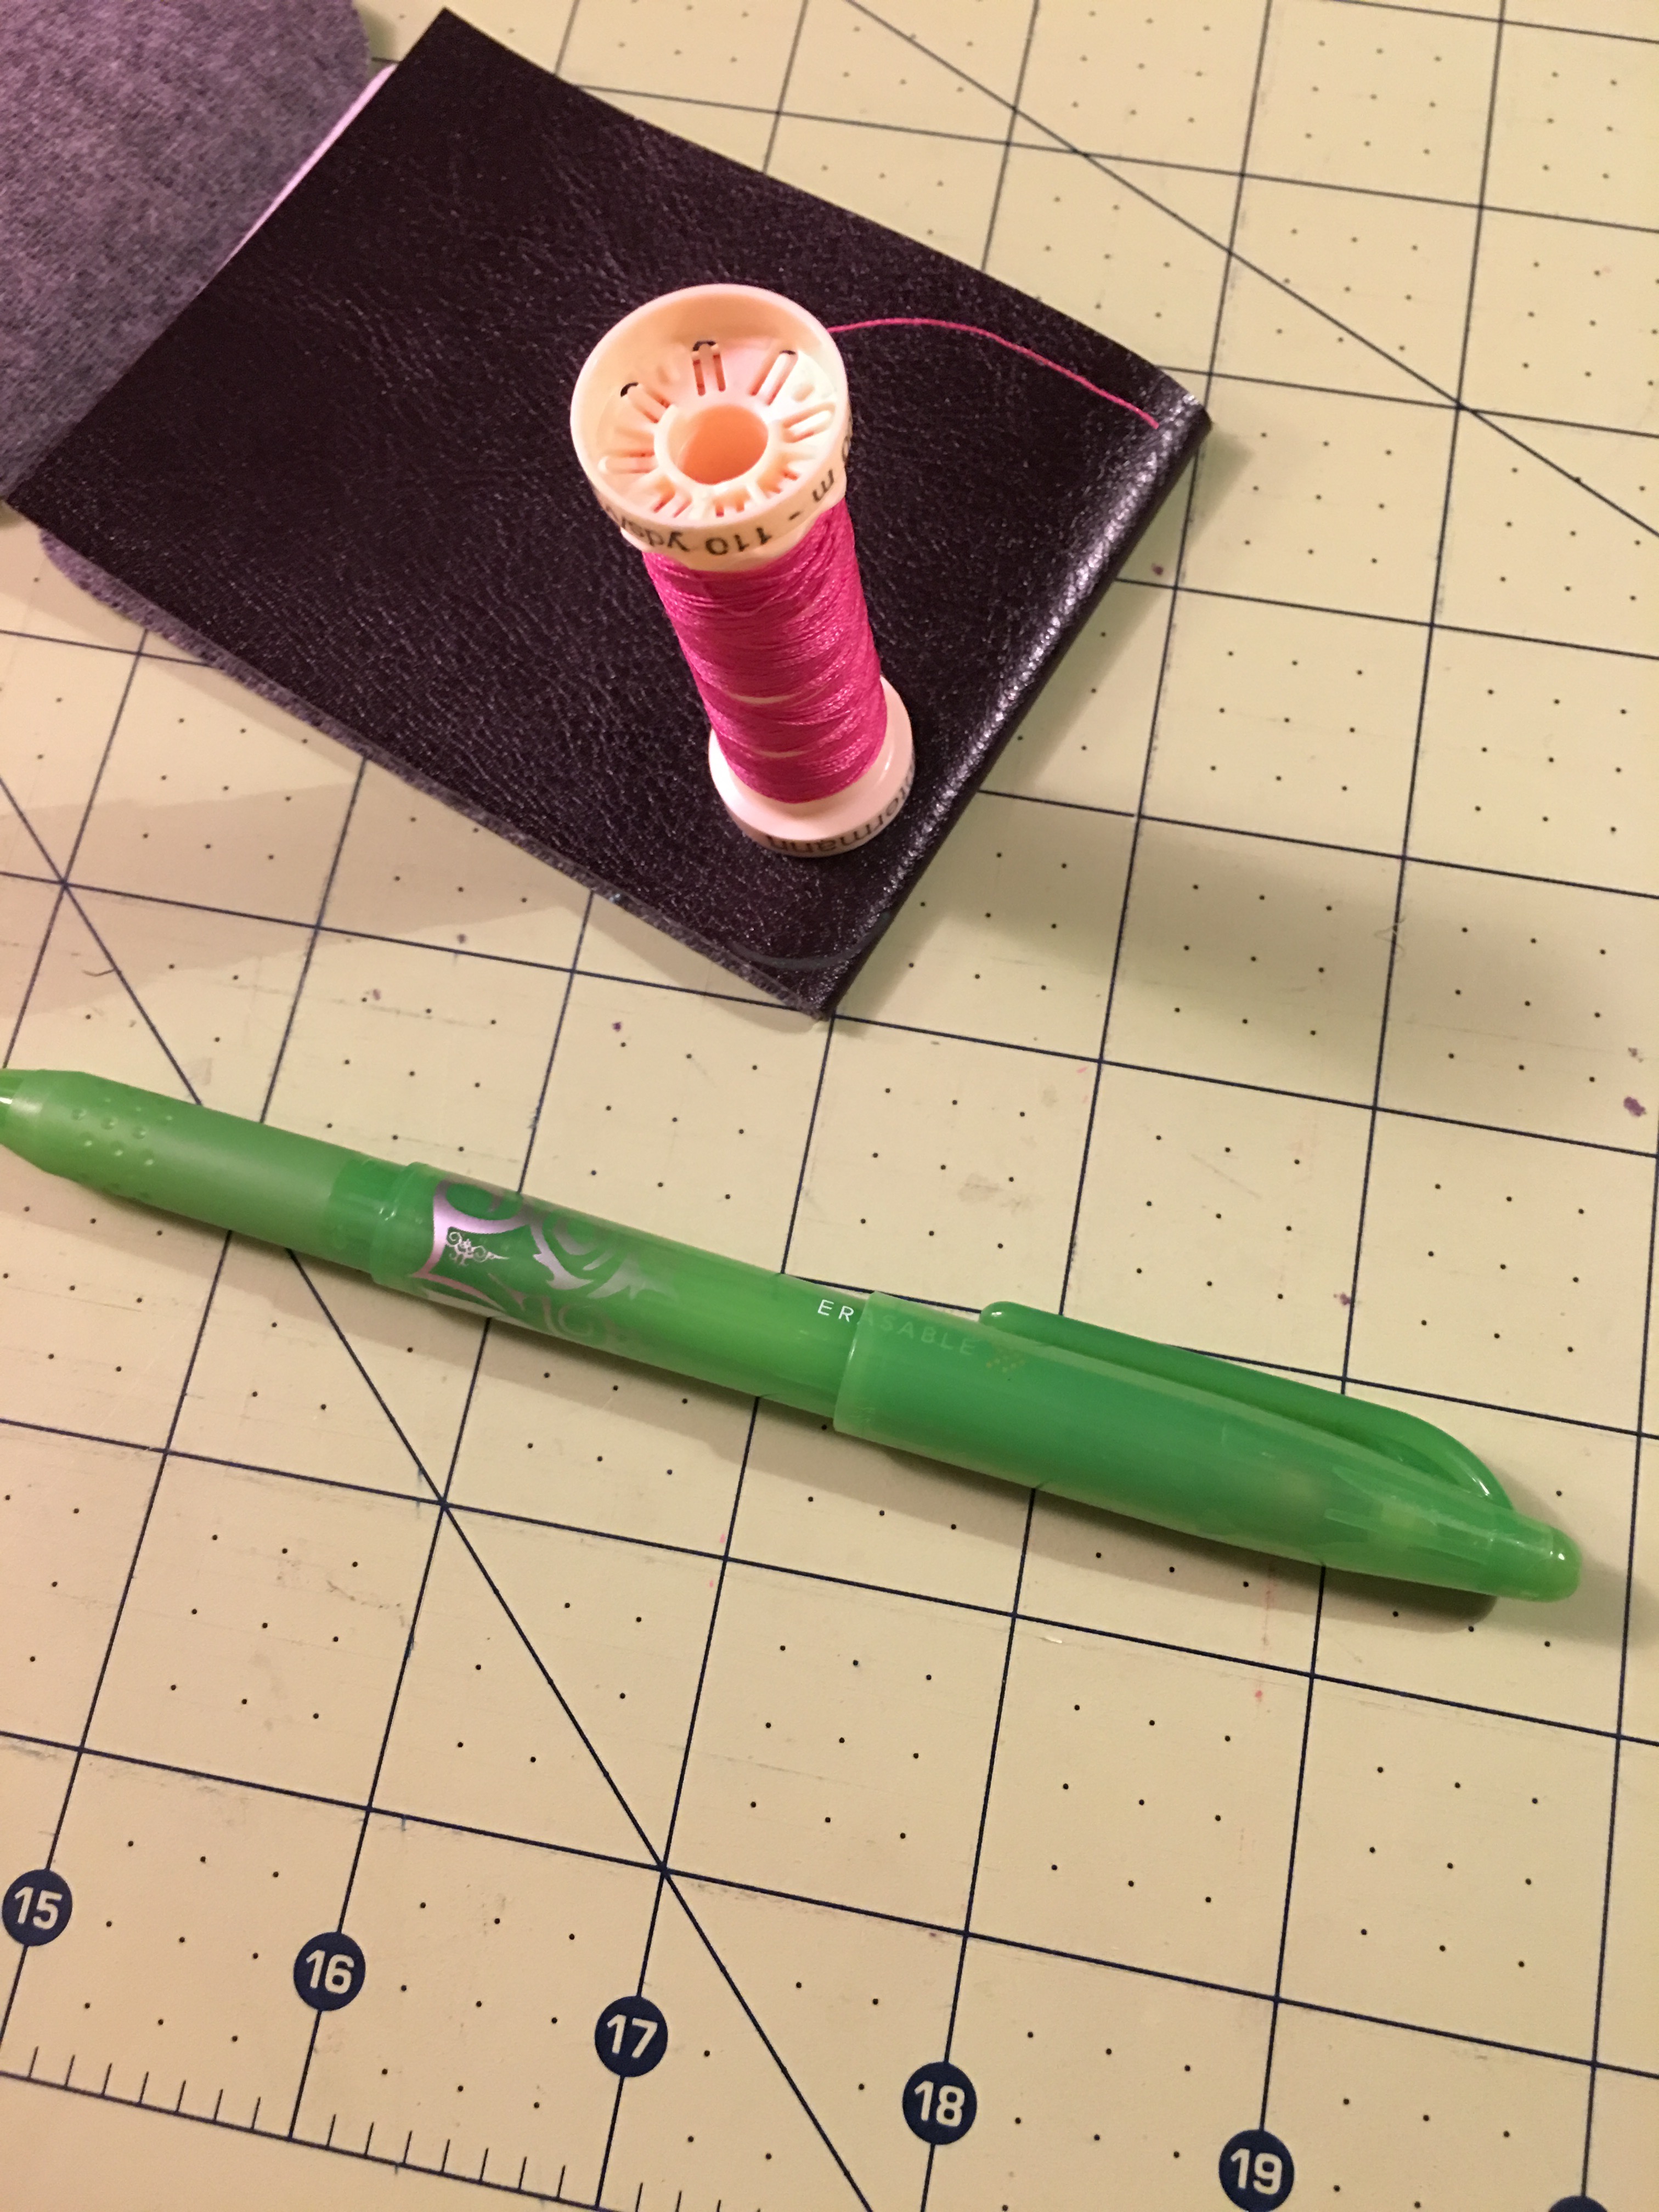
• 2-7/8” x 11¼” scrap of flannel-backed heavy-to-medium-weight vinyl • 2½” x 3½” rectangle of medium-weight interfacing • Temporary spray adhesive • Contrasting 30 wt. thread • Large hand embroidery needle • Leather machine needle • Fabric or paper clips • Removable fabric marker • Acrylic ruler
Prepping
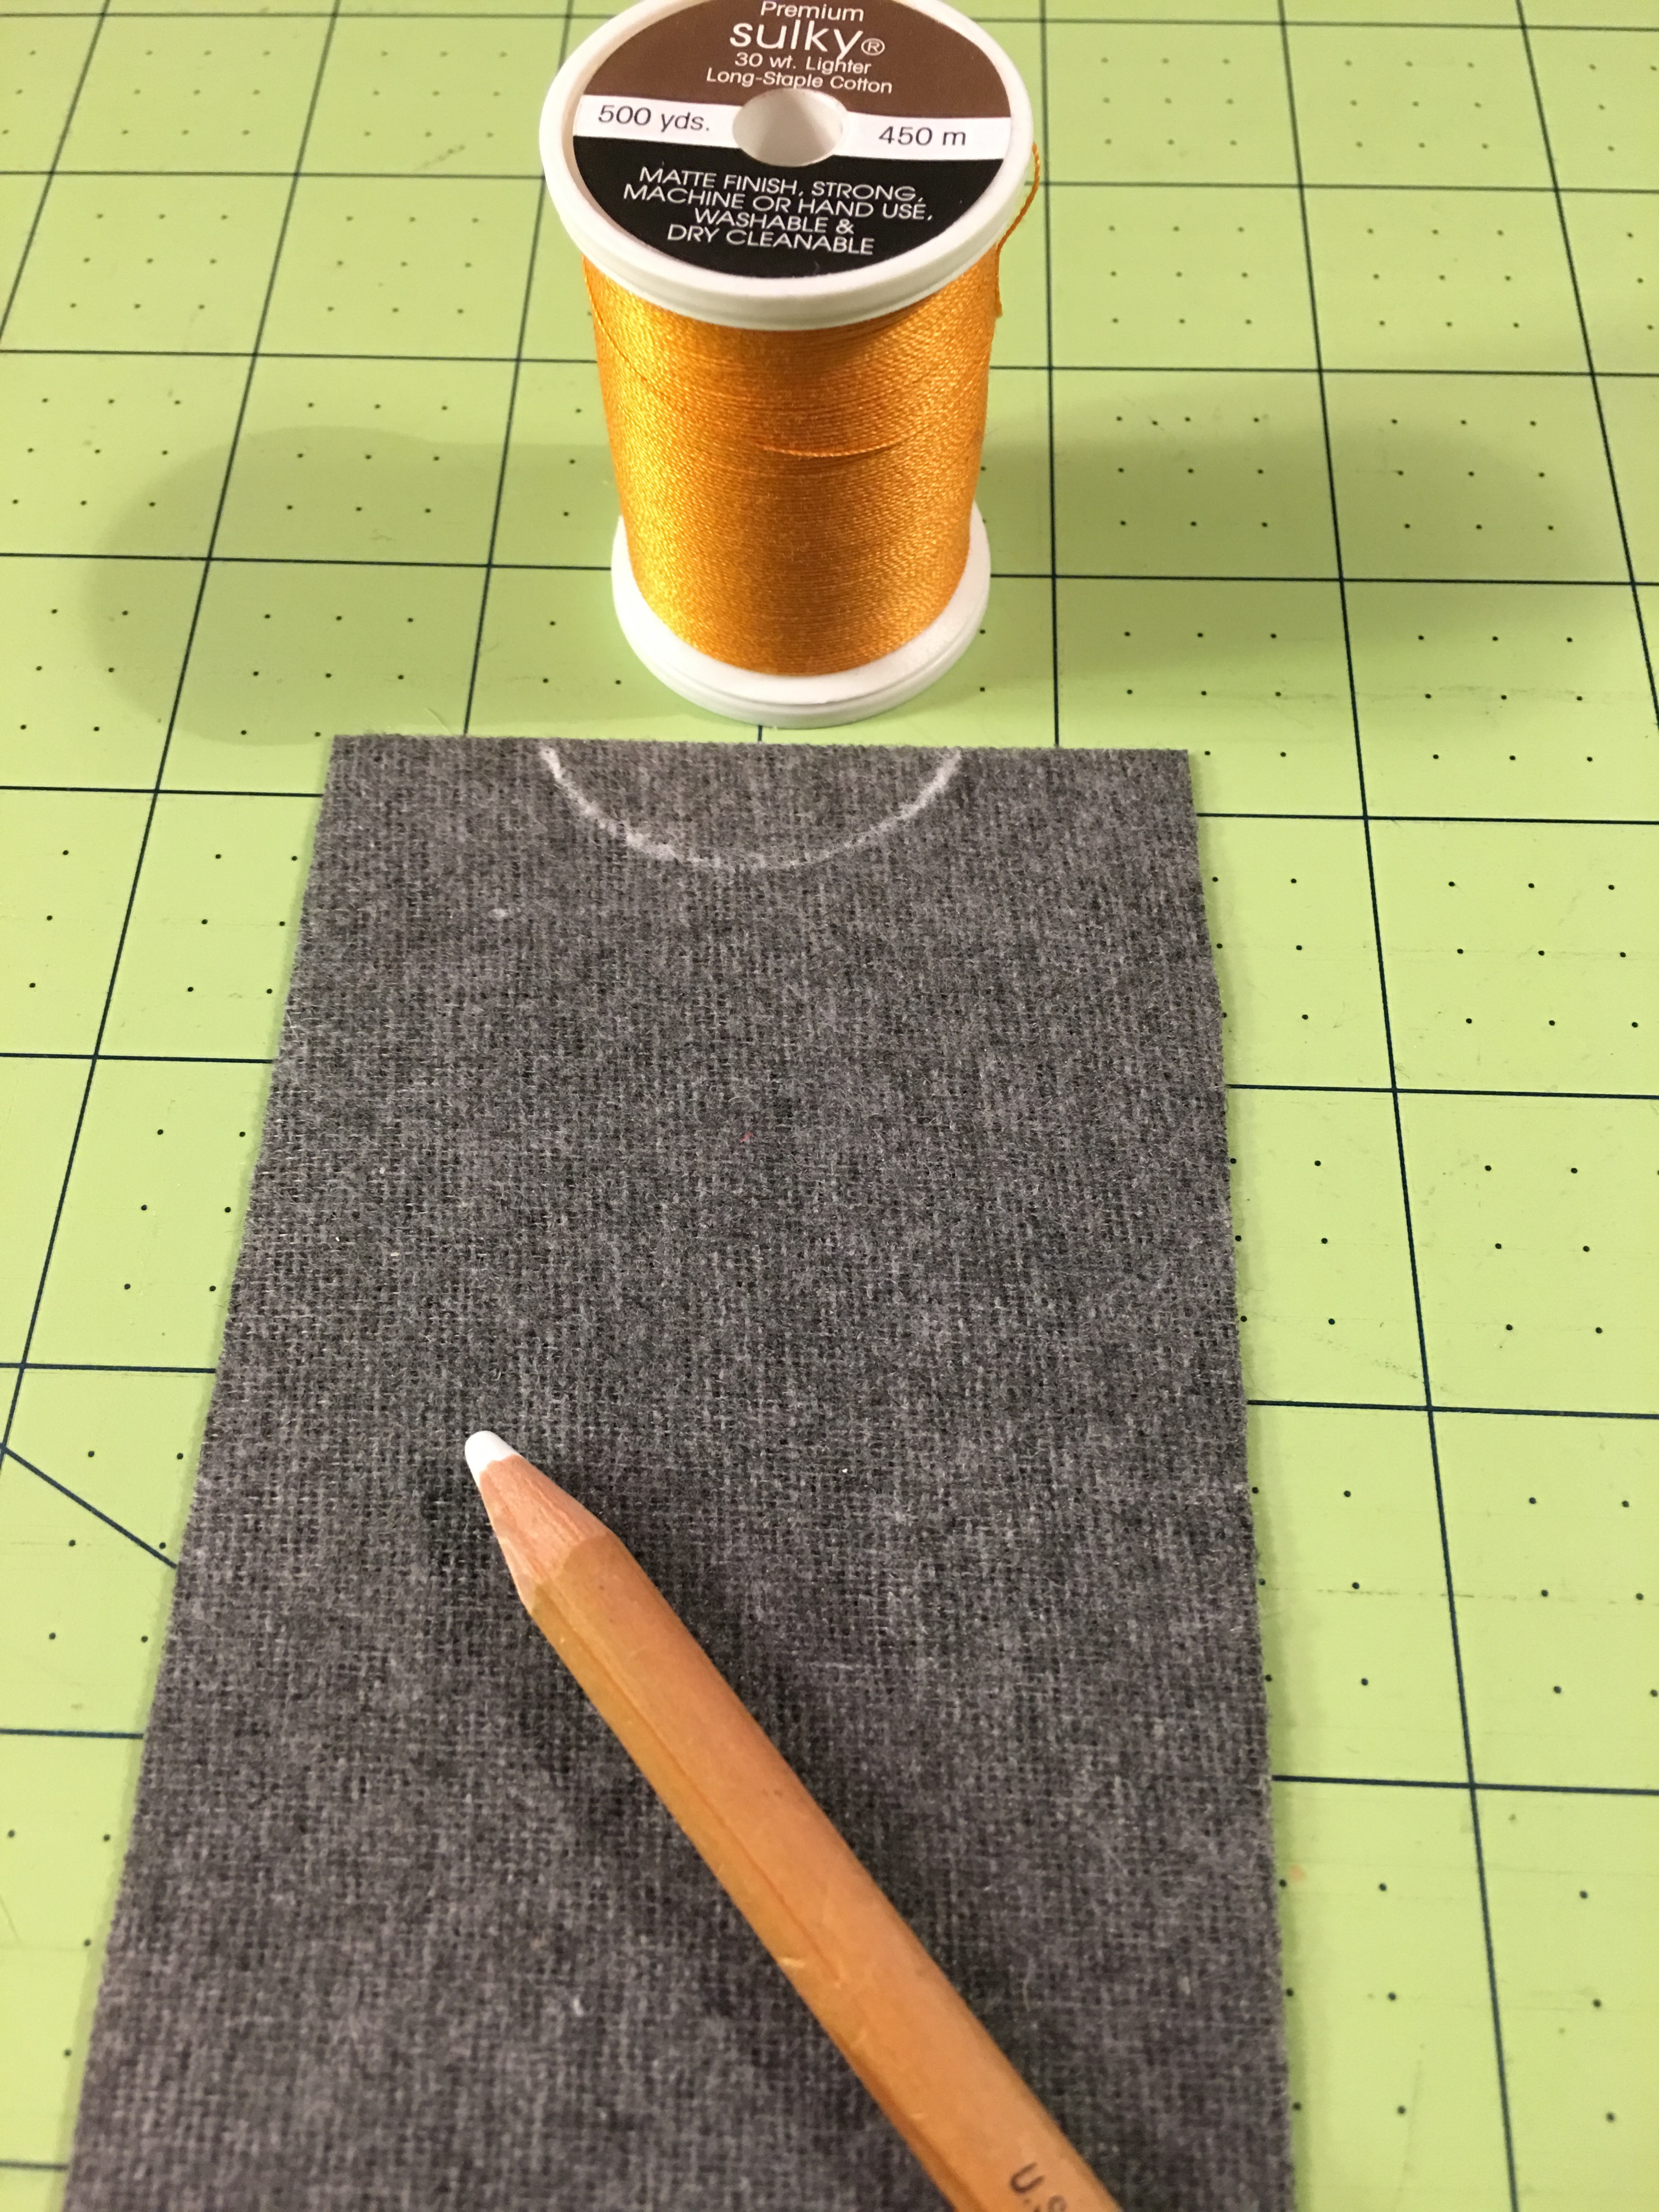
Step 1a: On the fabric’s wrong side trace a half circle using the spool of thread. Center the half circle on one 2-7/8” end. Cut out the half circle.
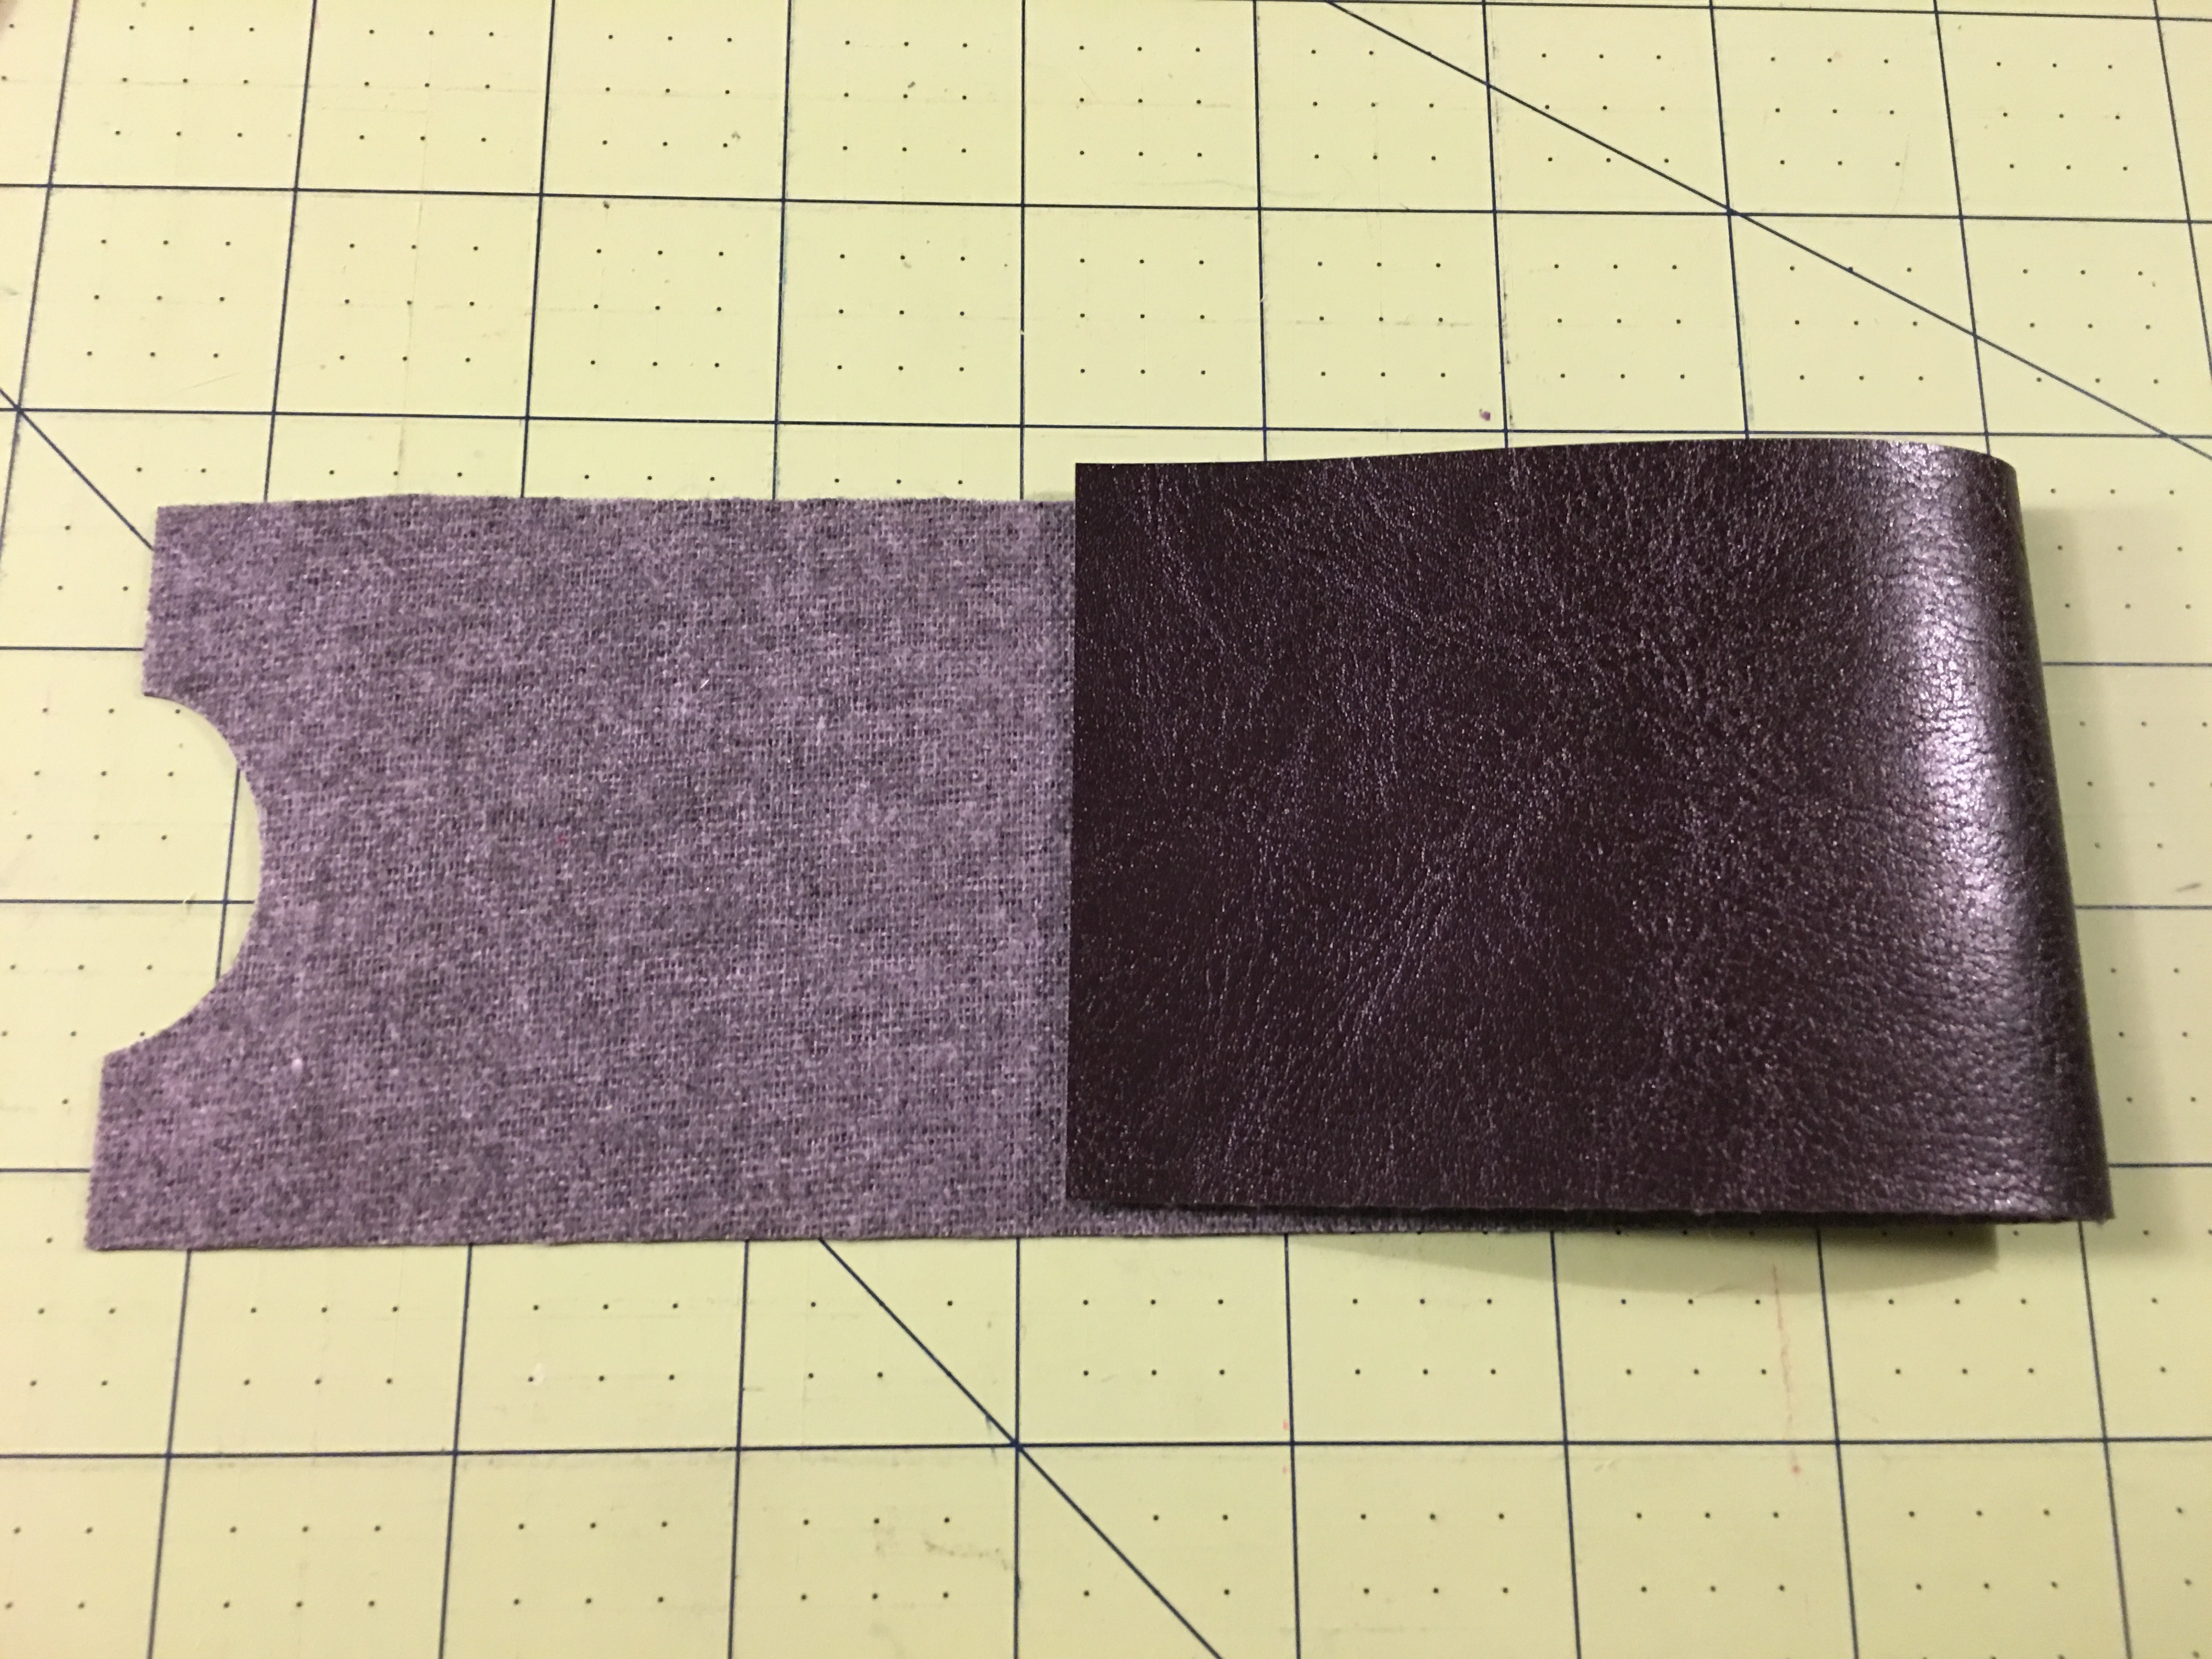 Step 1b: Fold the end without the half circle cutout in toward the wrong side. Fold 3¾” from the end toward the middle. Finger press along the fold to create a crease.
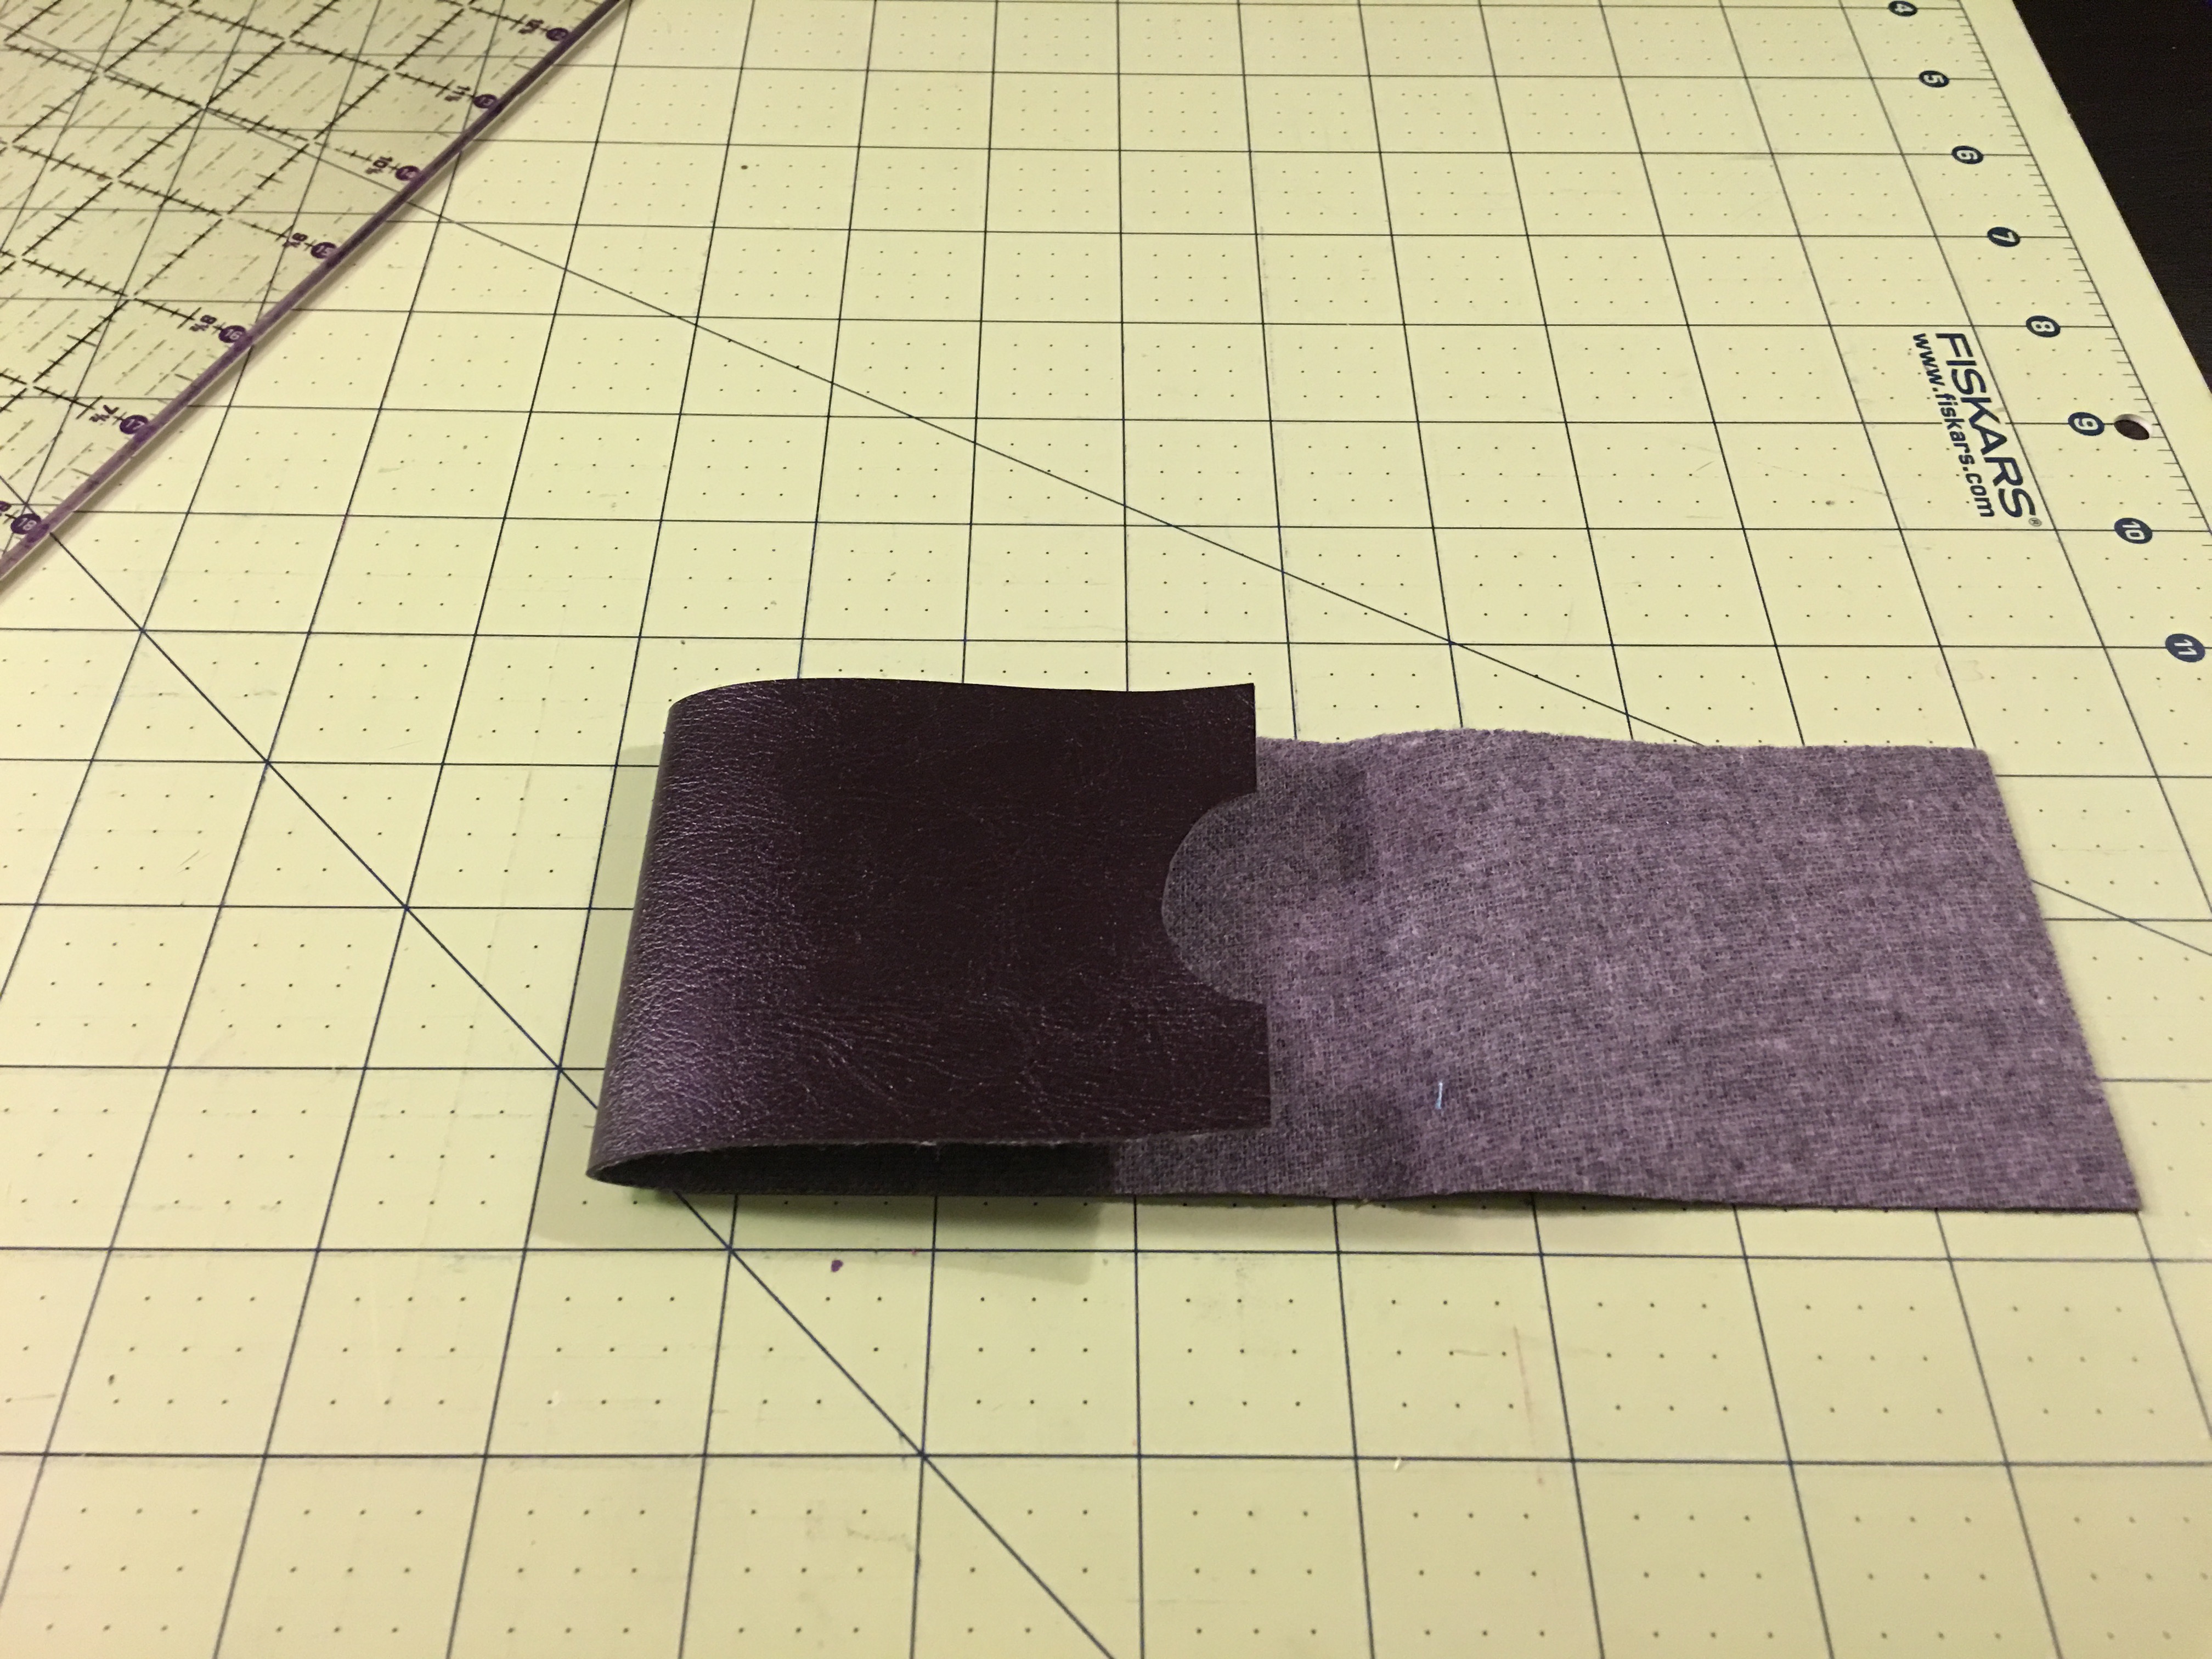 Step 1c: Fold the end with the half circle cutout in toward the wrong side. Fold 3-3/8” from the end toward the middle. Finger press along the fold to create a crease.
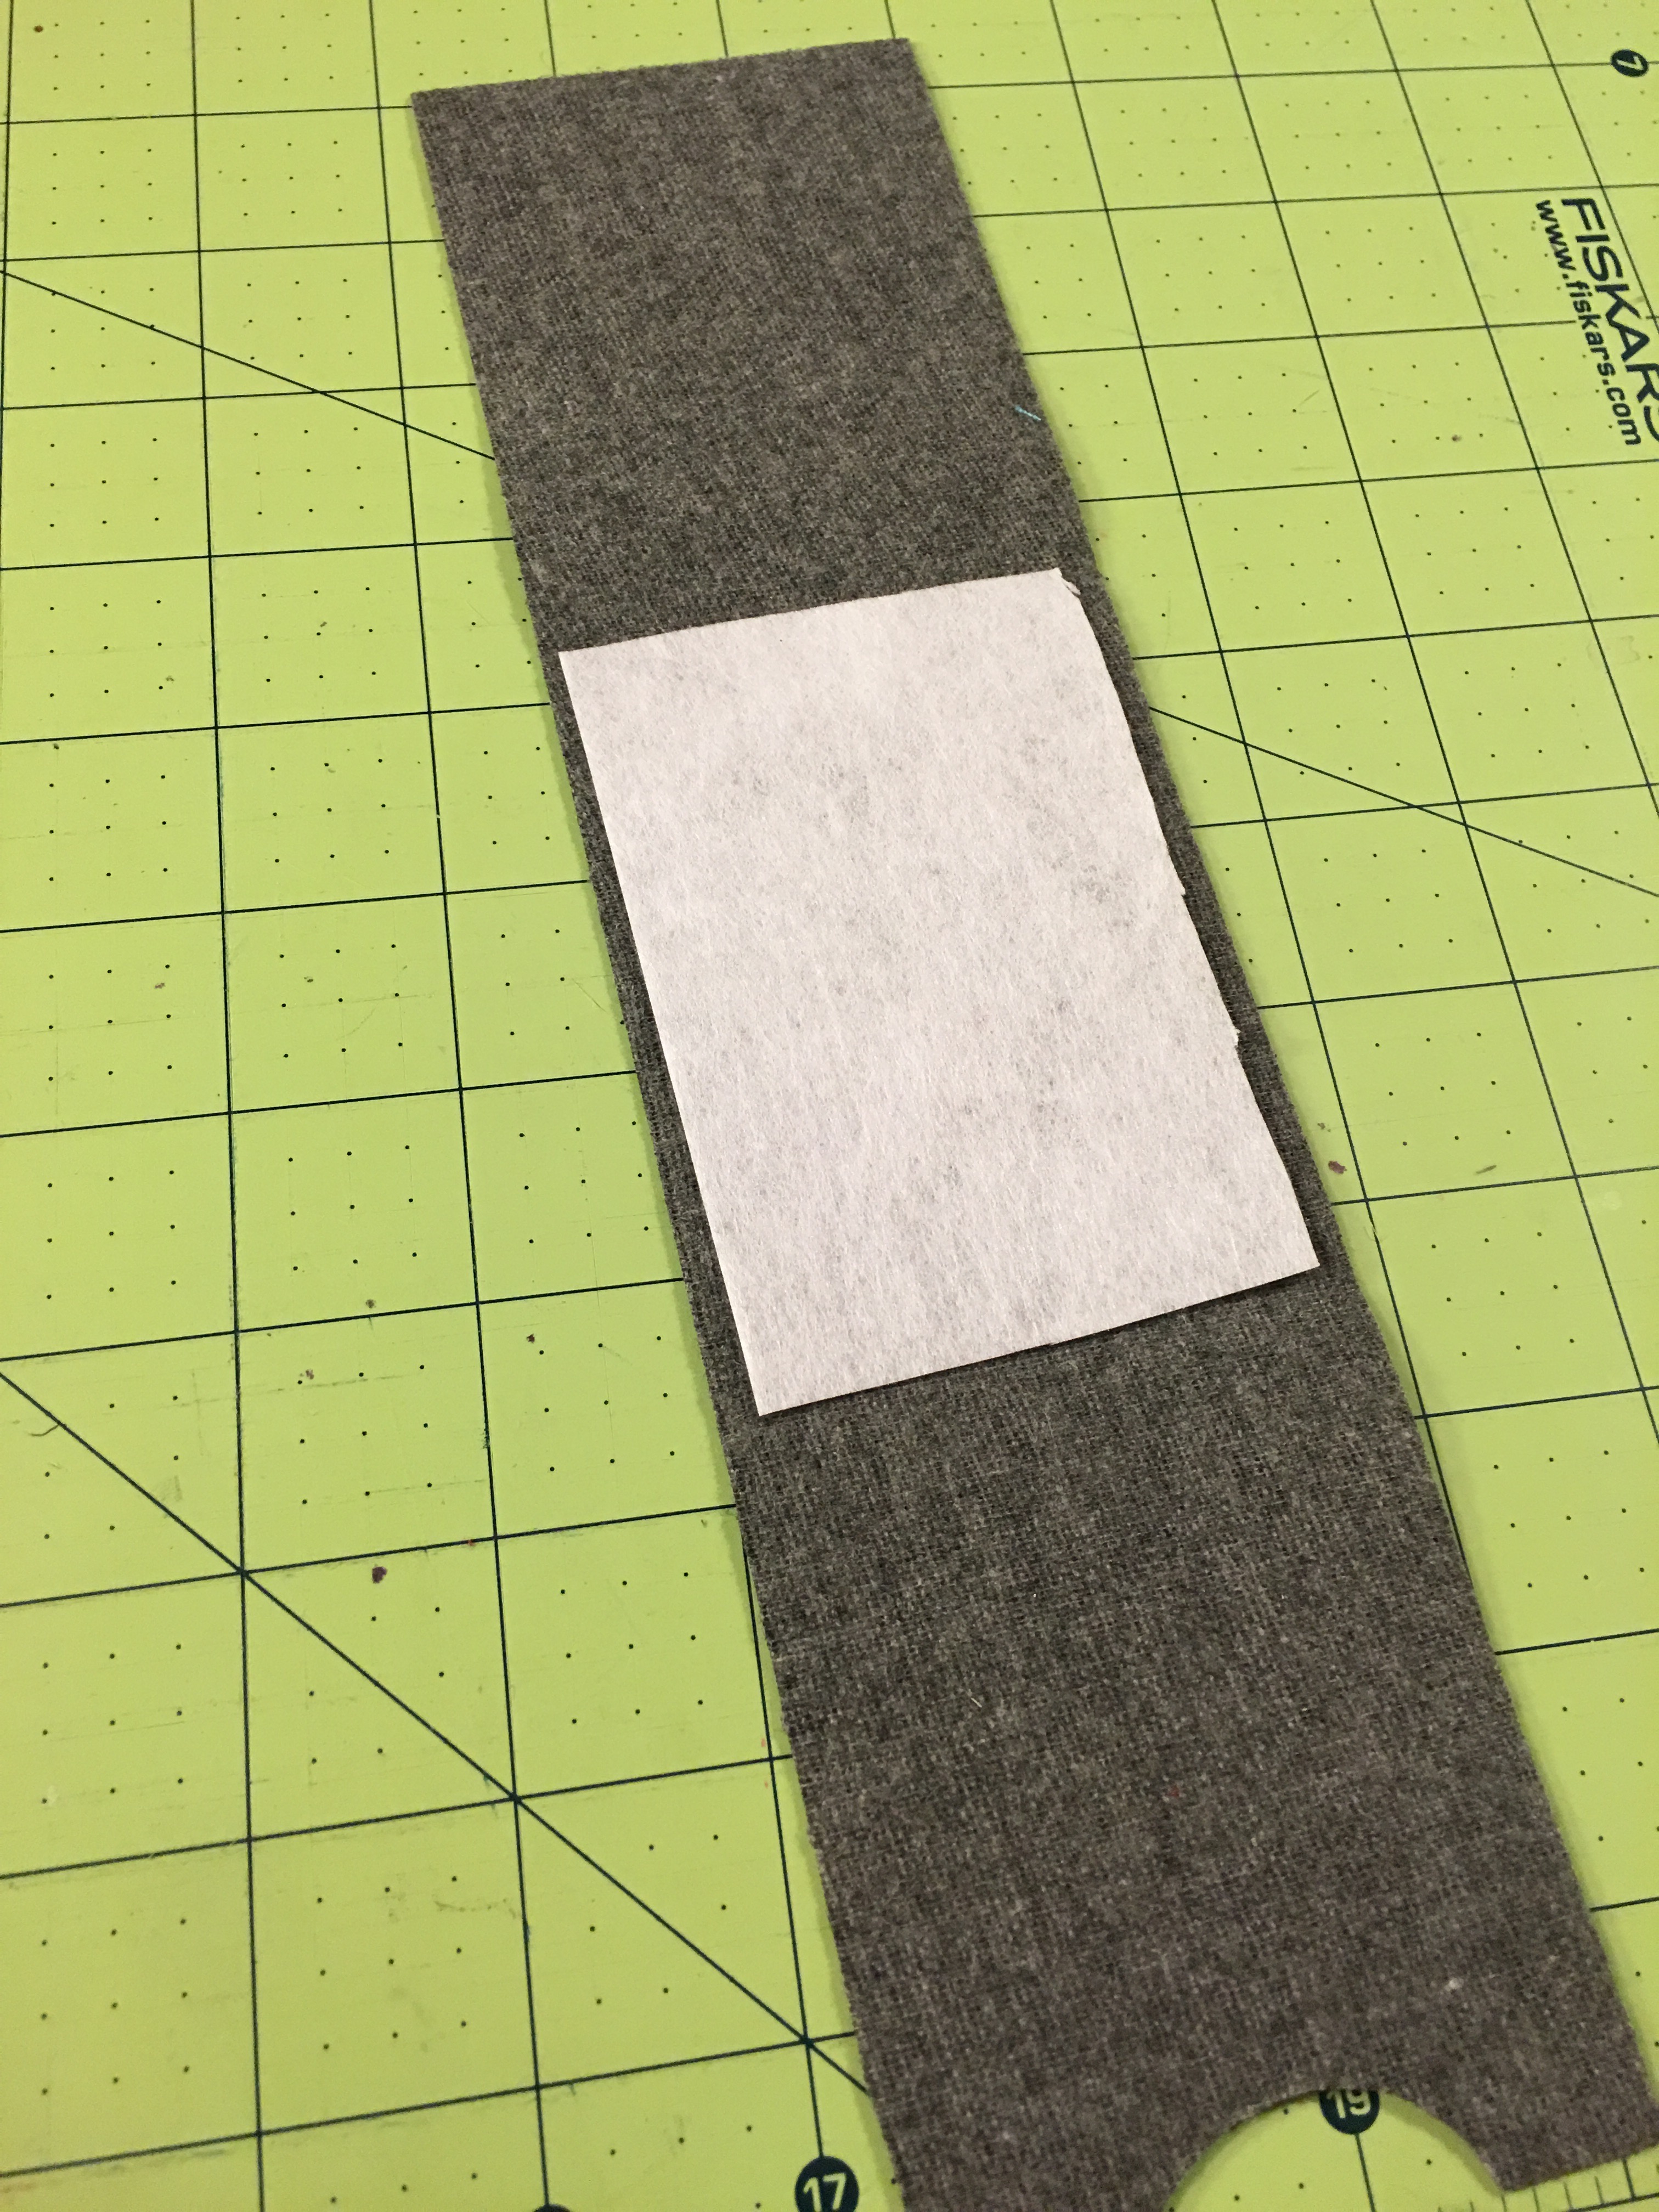 Step 1d: Following the manufacturer’s instructions, spray one side of the interfacing. Adhere the interfacing to the vinyl’s wrong side. Align the interfacing with the two crease lines.
Embroidery
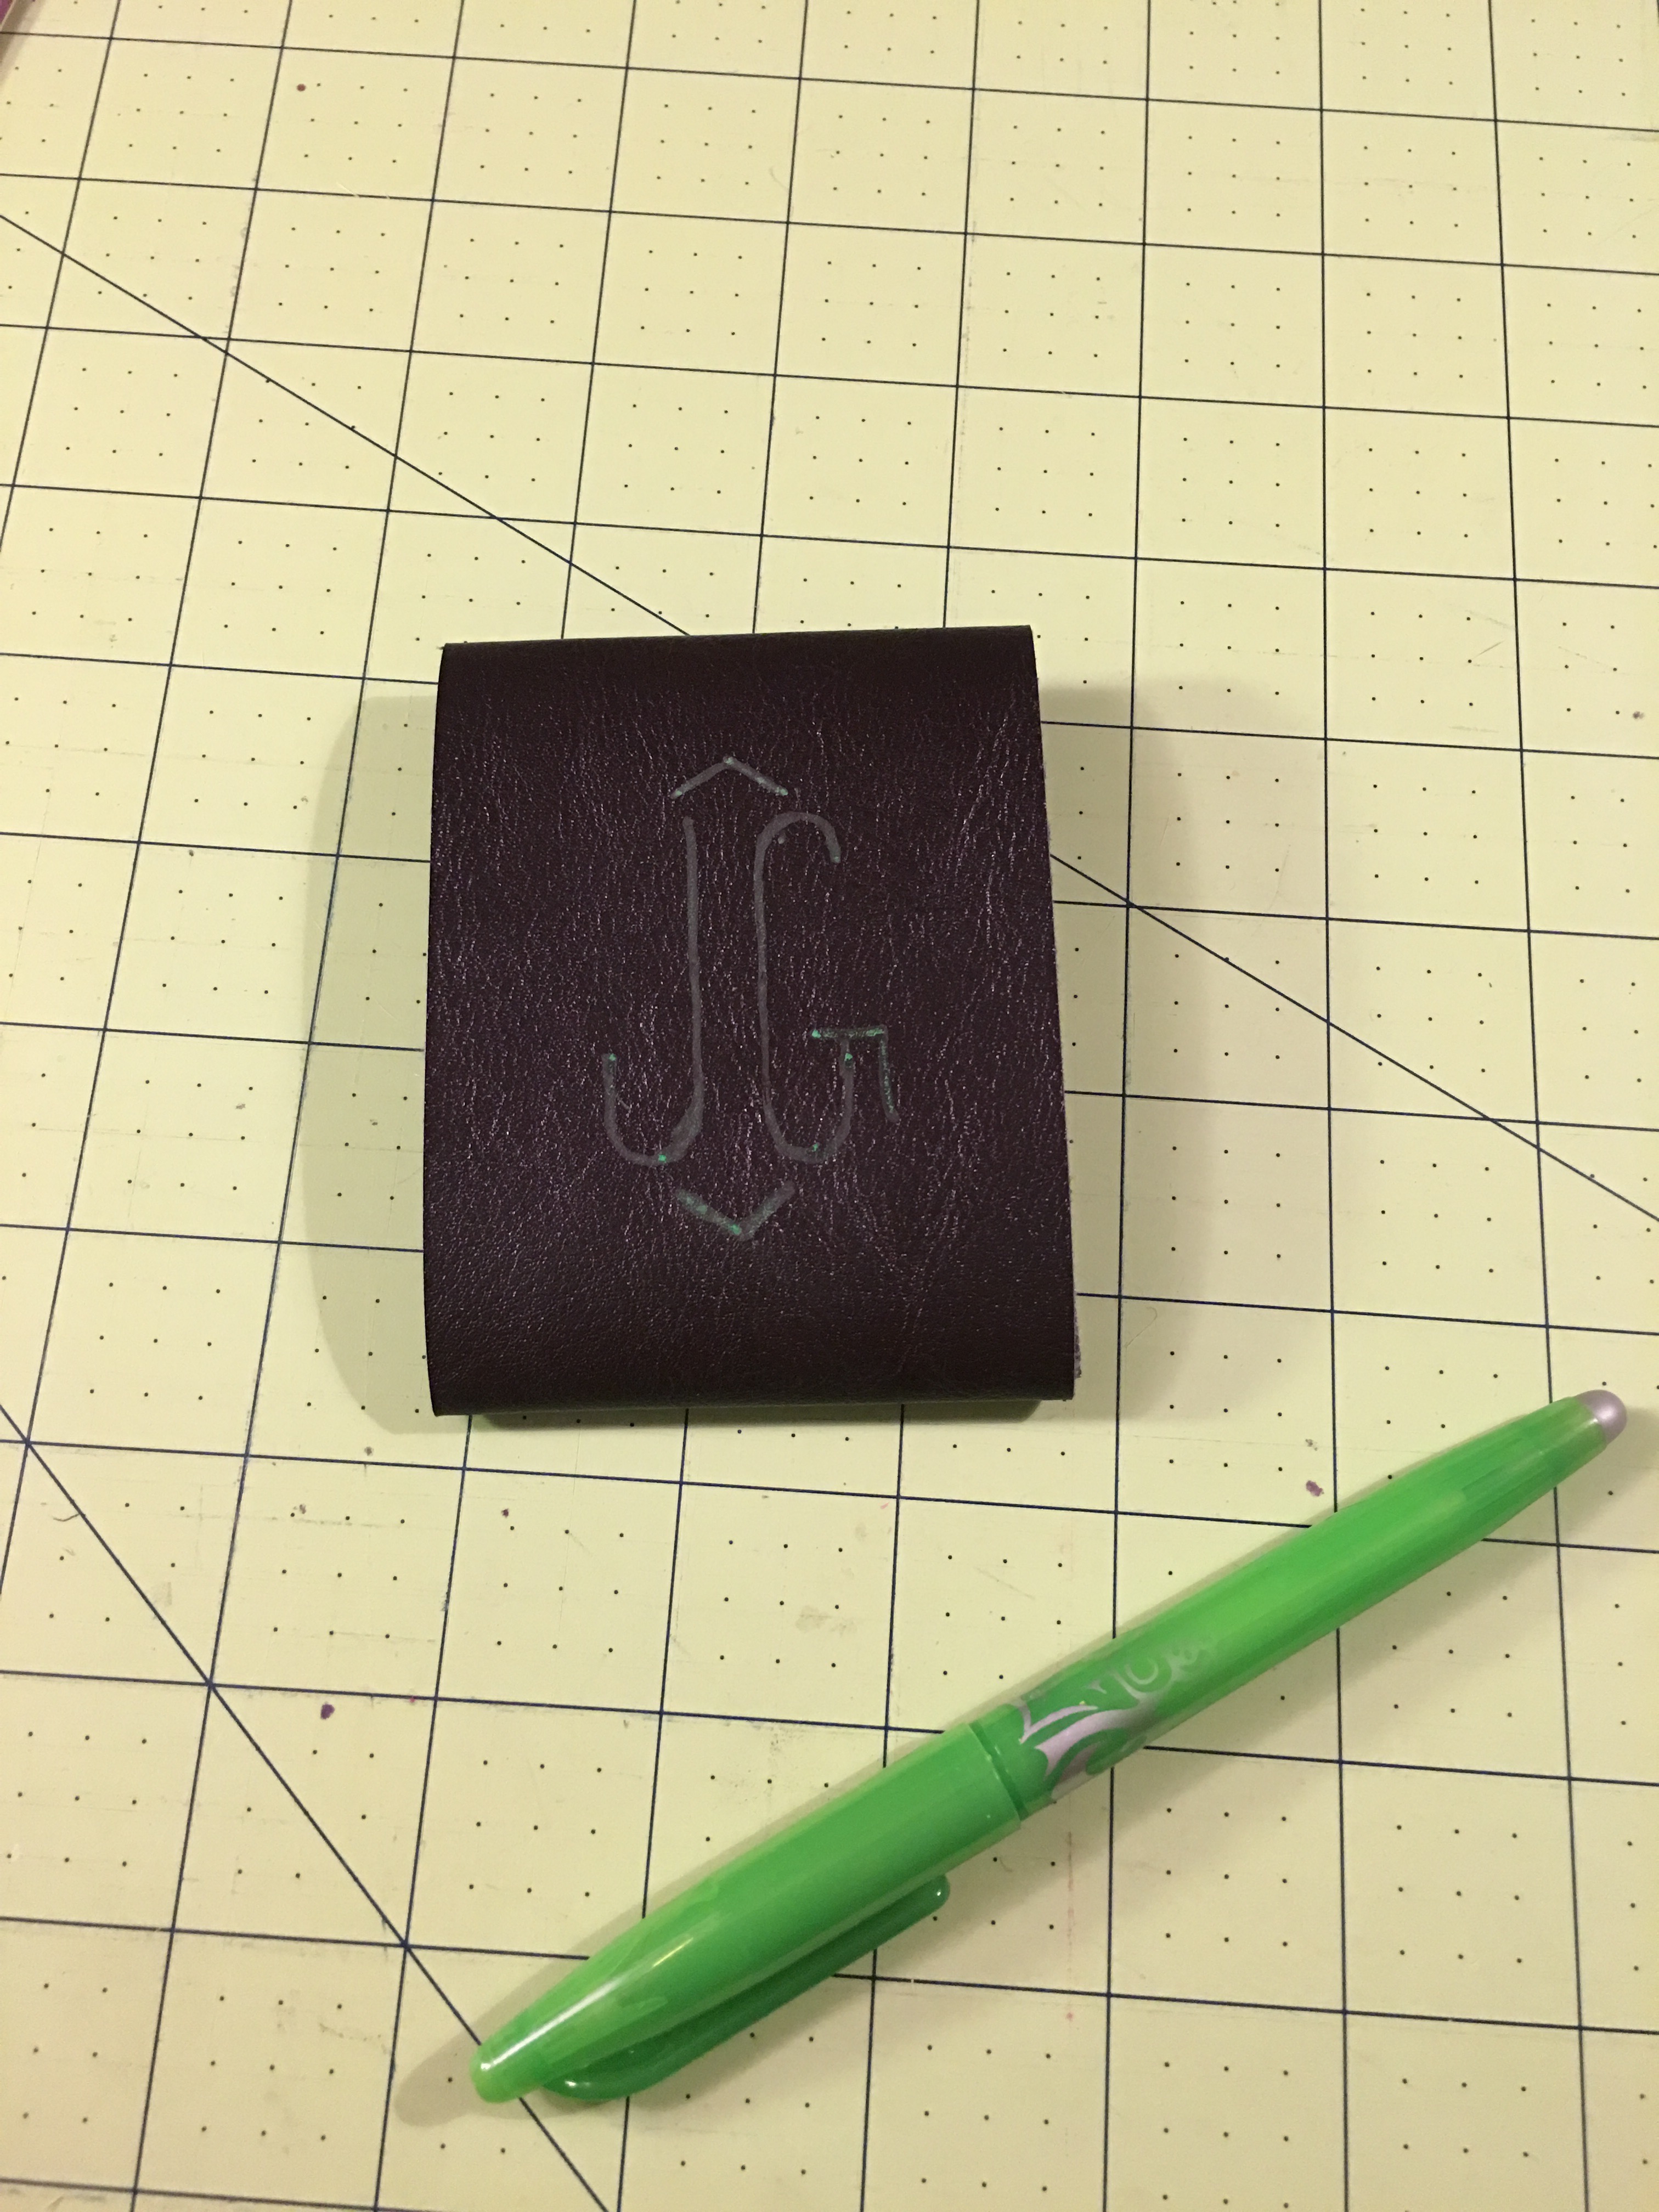
Step 2a: Using a removable fabric marker, draw the monogram in the center of the vinyl’s right side. To ensure the monogram is centered properly, fold along the crease and measure in from each side. TIP: Always make sure the chosen removable fabric marker will remove quickly and easily. When working with vinyl I tend to use heat-removable fabric markers as they dry quickly, show up nicely, and wipe away with a wet cloth.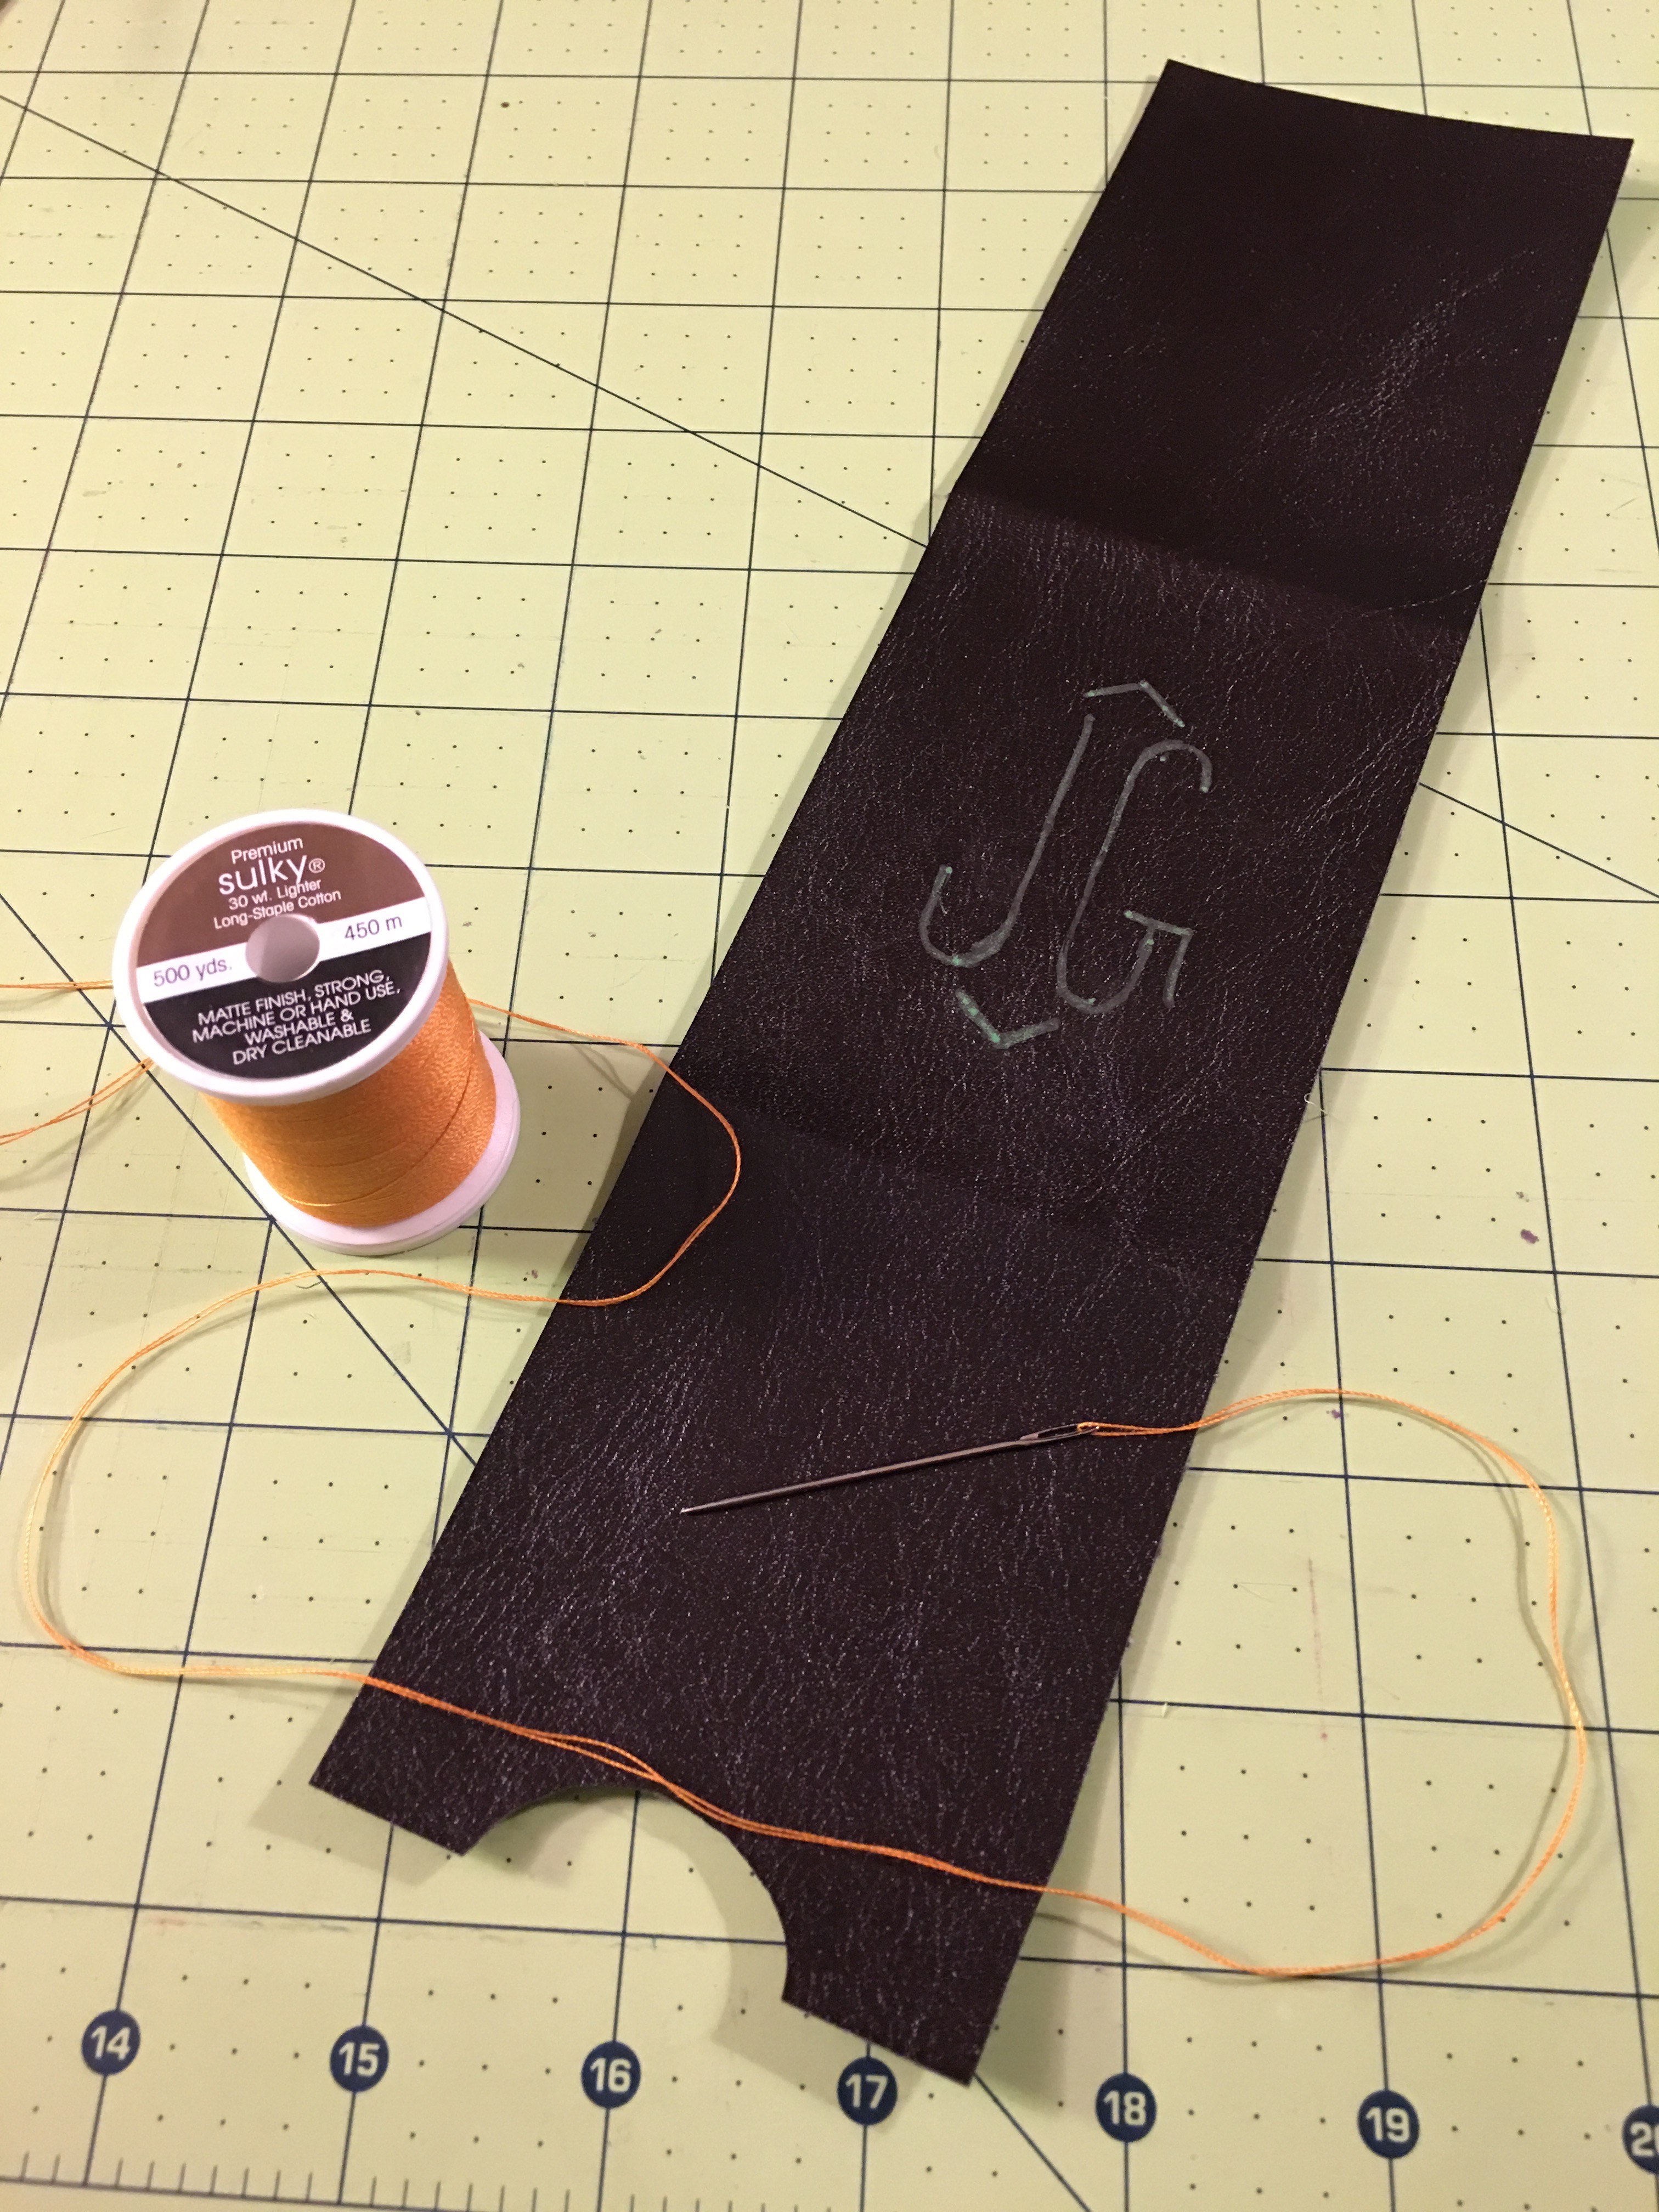 Step 2b: Thread the needle with the contrasting thread. Plan how you will embroider the monogram. In general it’s best to work bottom to top so as to avoid accidentally wiping away markings while working.
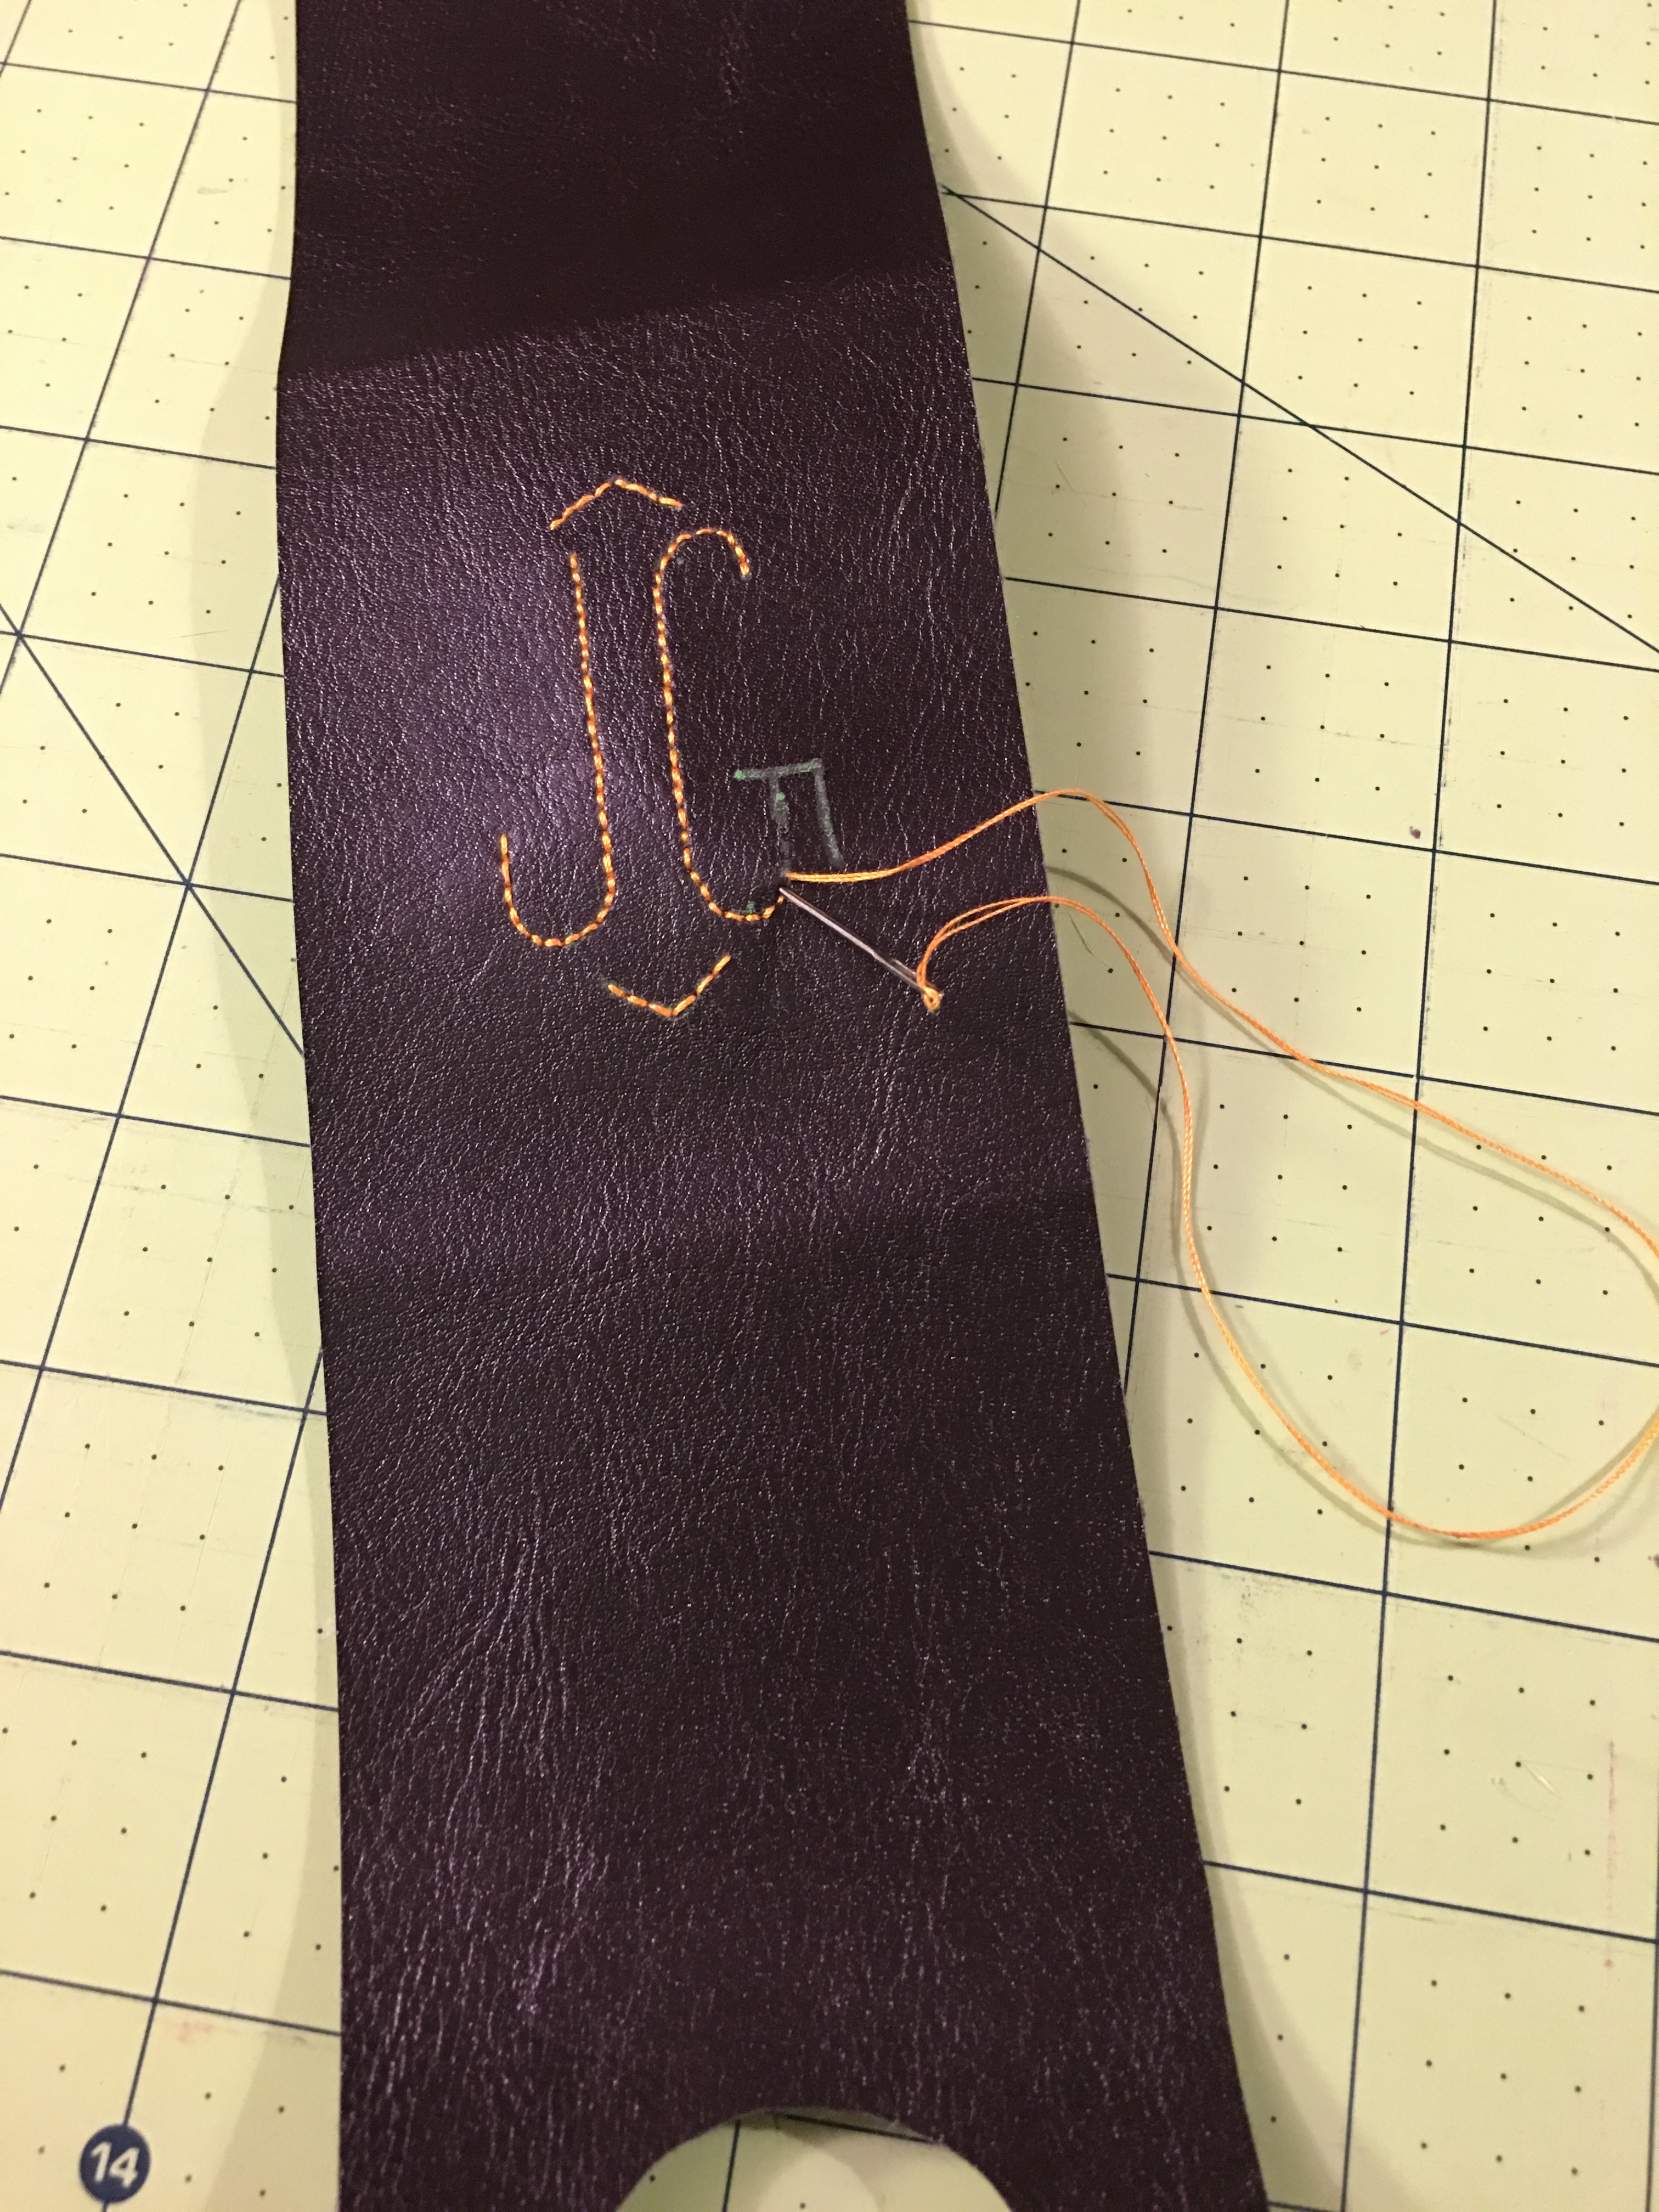 Step 2c: Embroider the wallet. Use consistent sized stitches for a professional look.
Construction
Step 3a: Fold along the crease lines. Trace a small spool of thread on each corner, including the corners on the half circle cutout edge.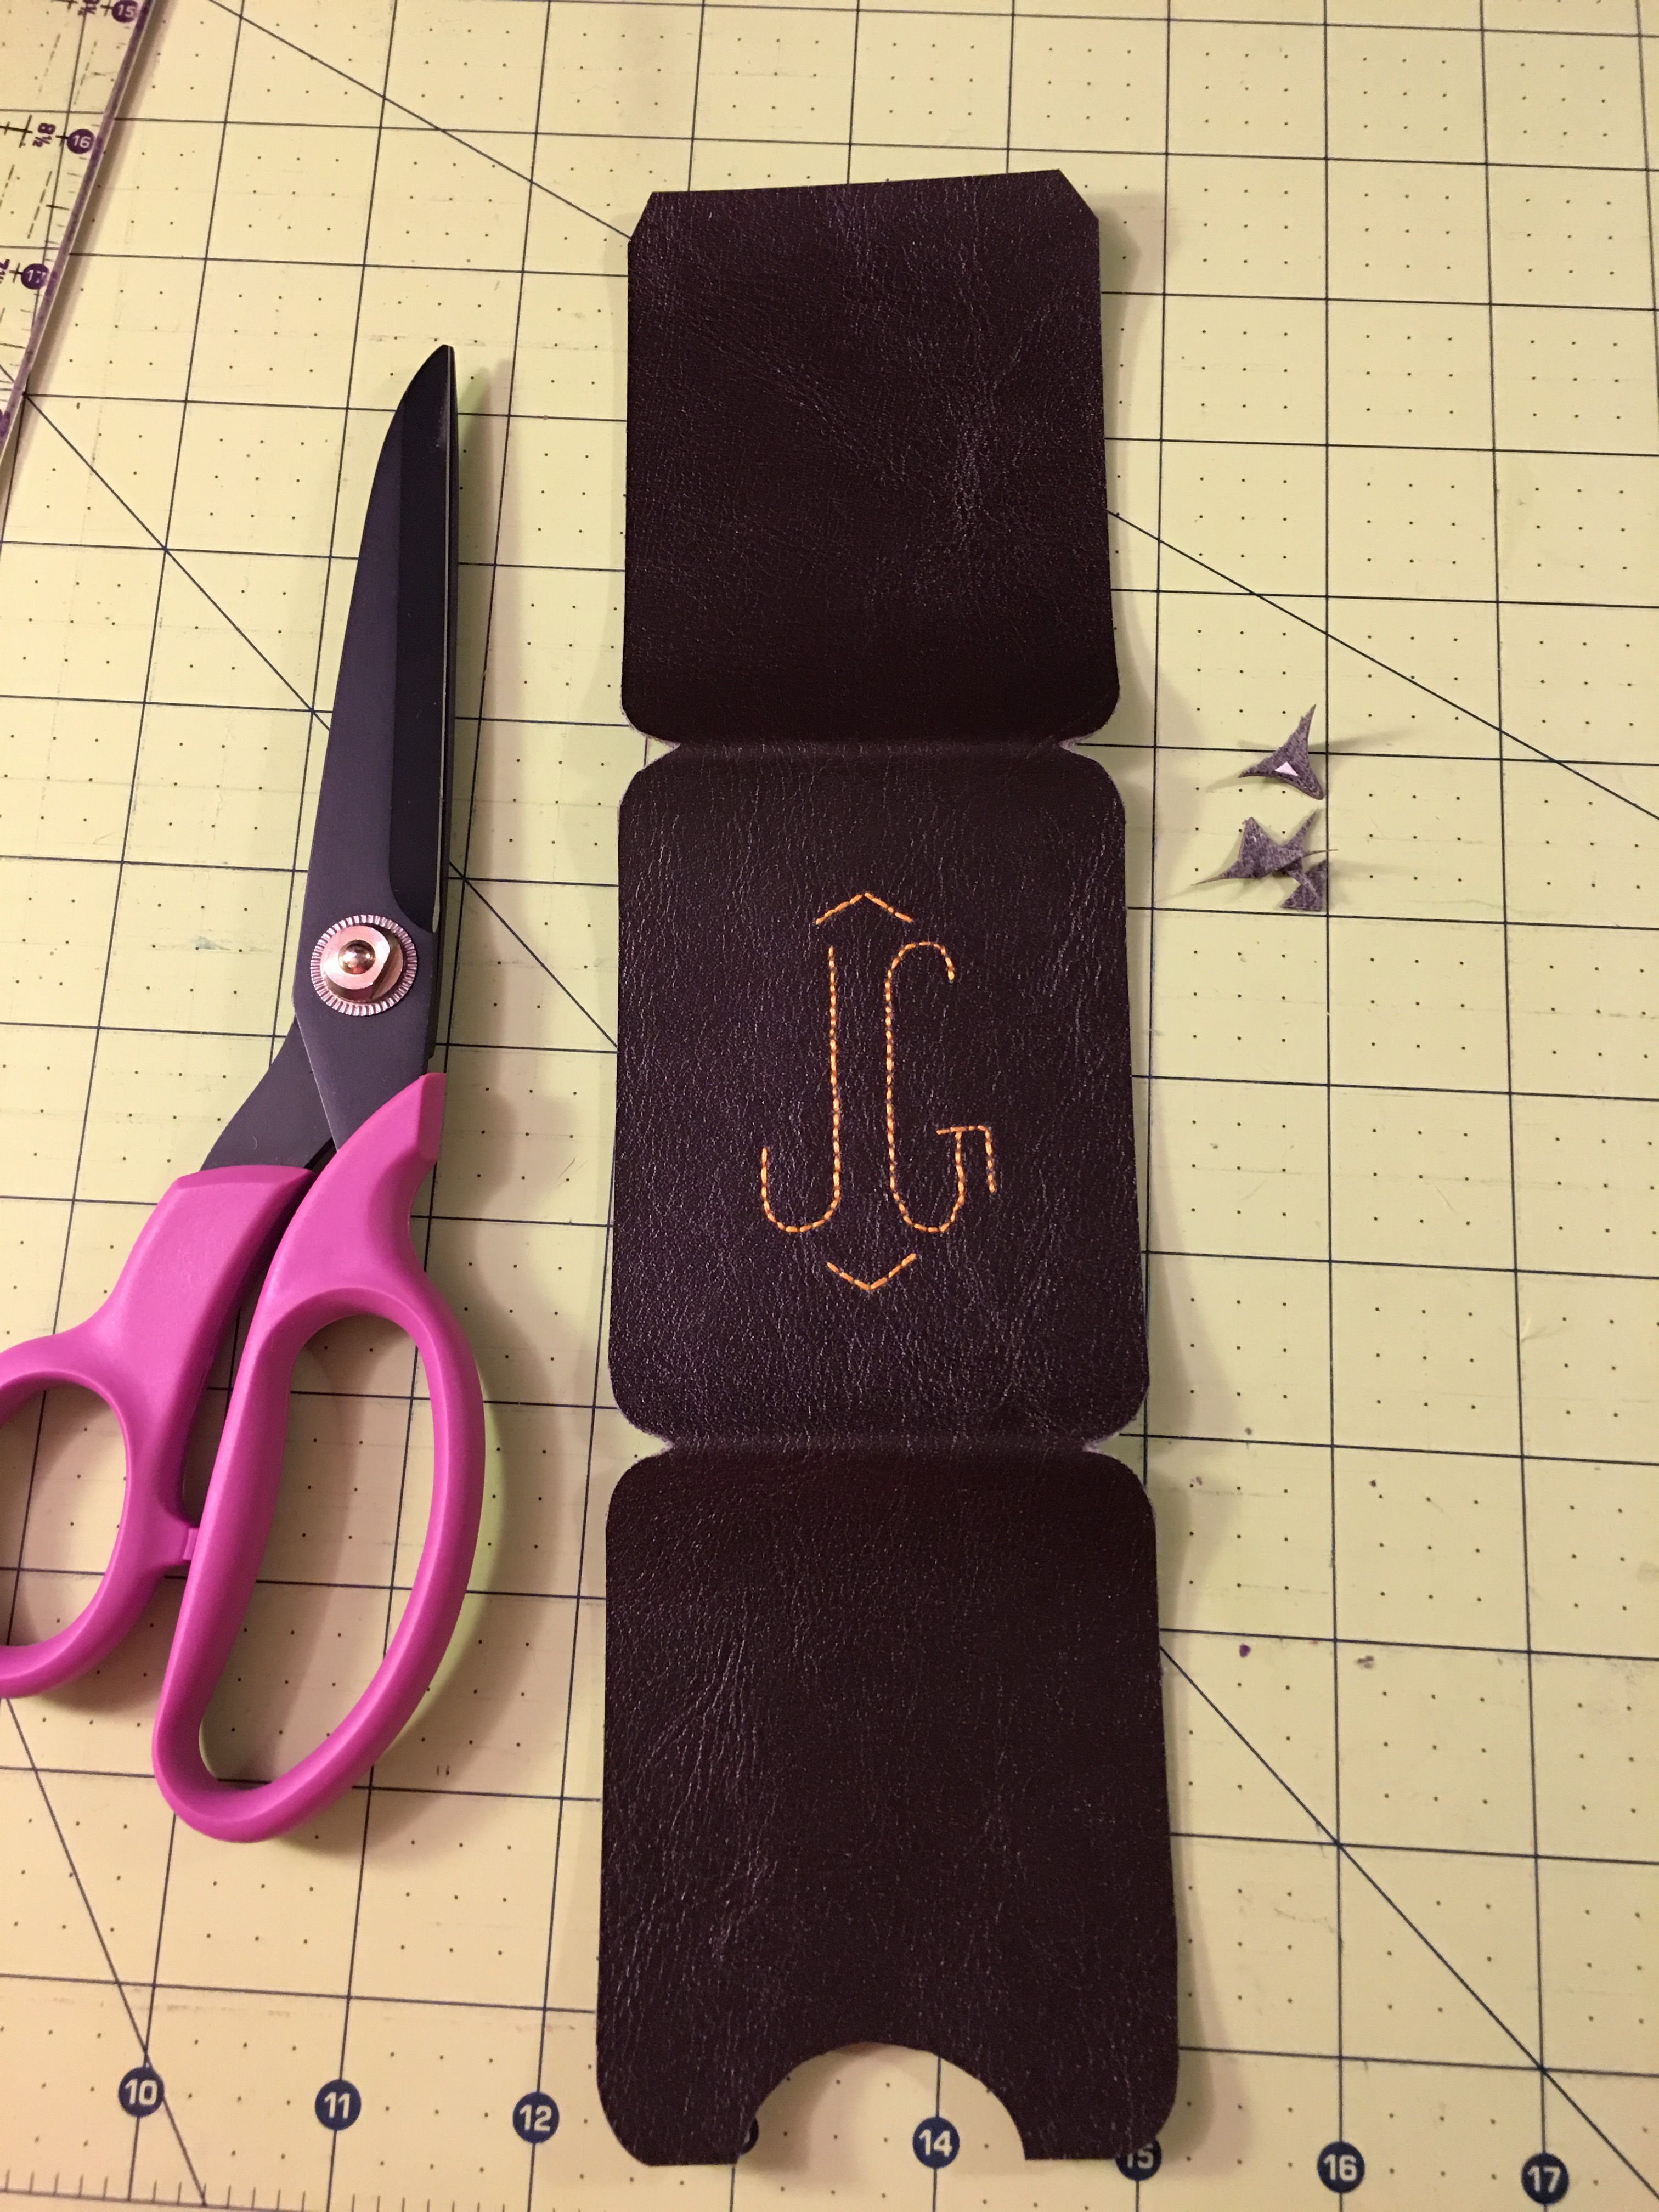 Step 3b: Cut along the curved lines to round all the corners. Note that the uppermost edge in the image has angled corners; this edge will be hidden inside and does not require curved corners. Be sure to also trim the interfacing to keep it from showing on the final product.
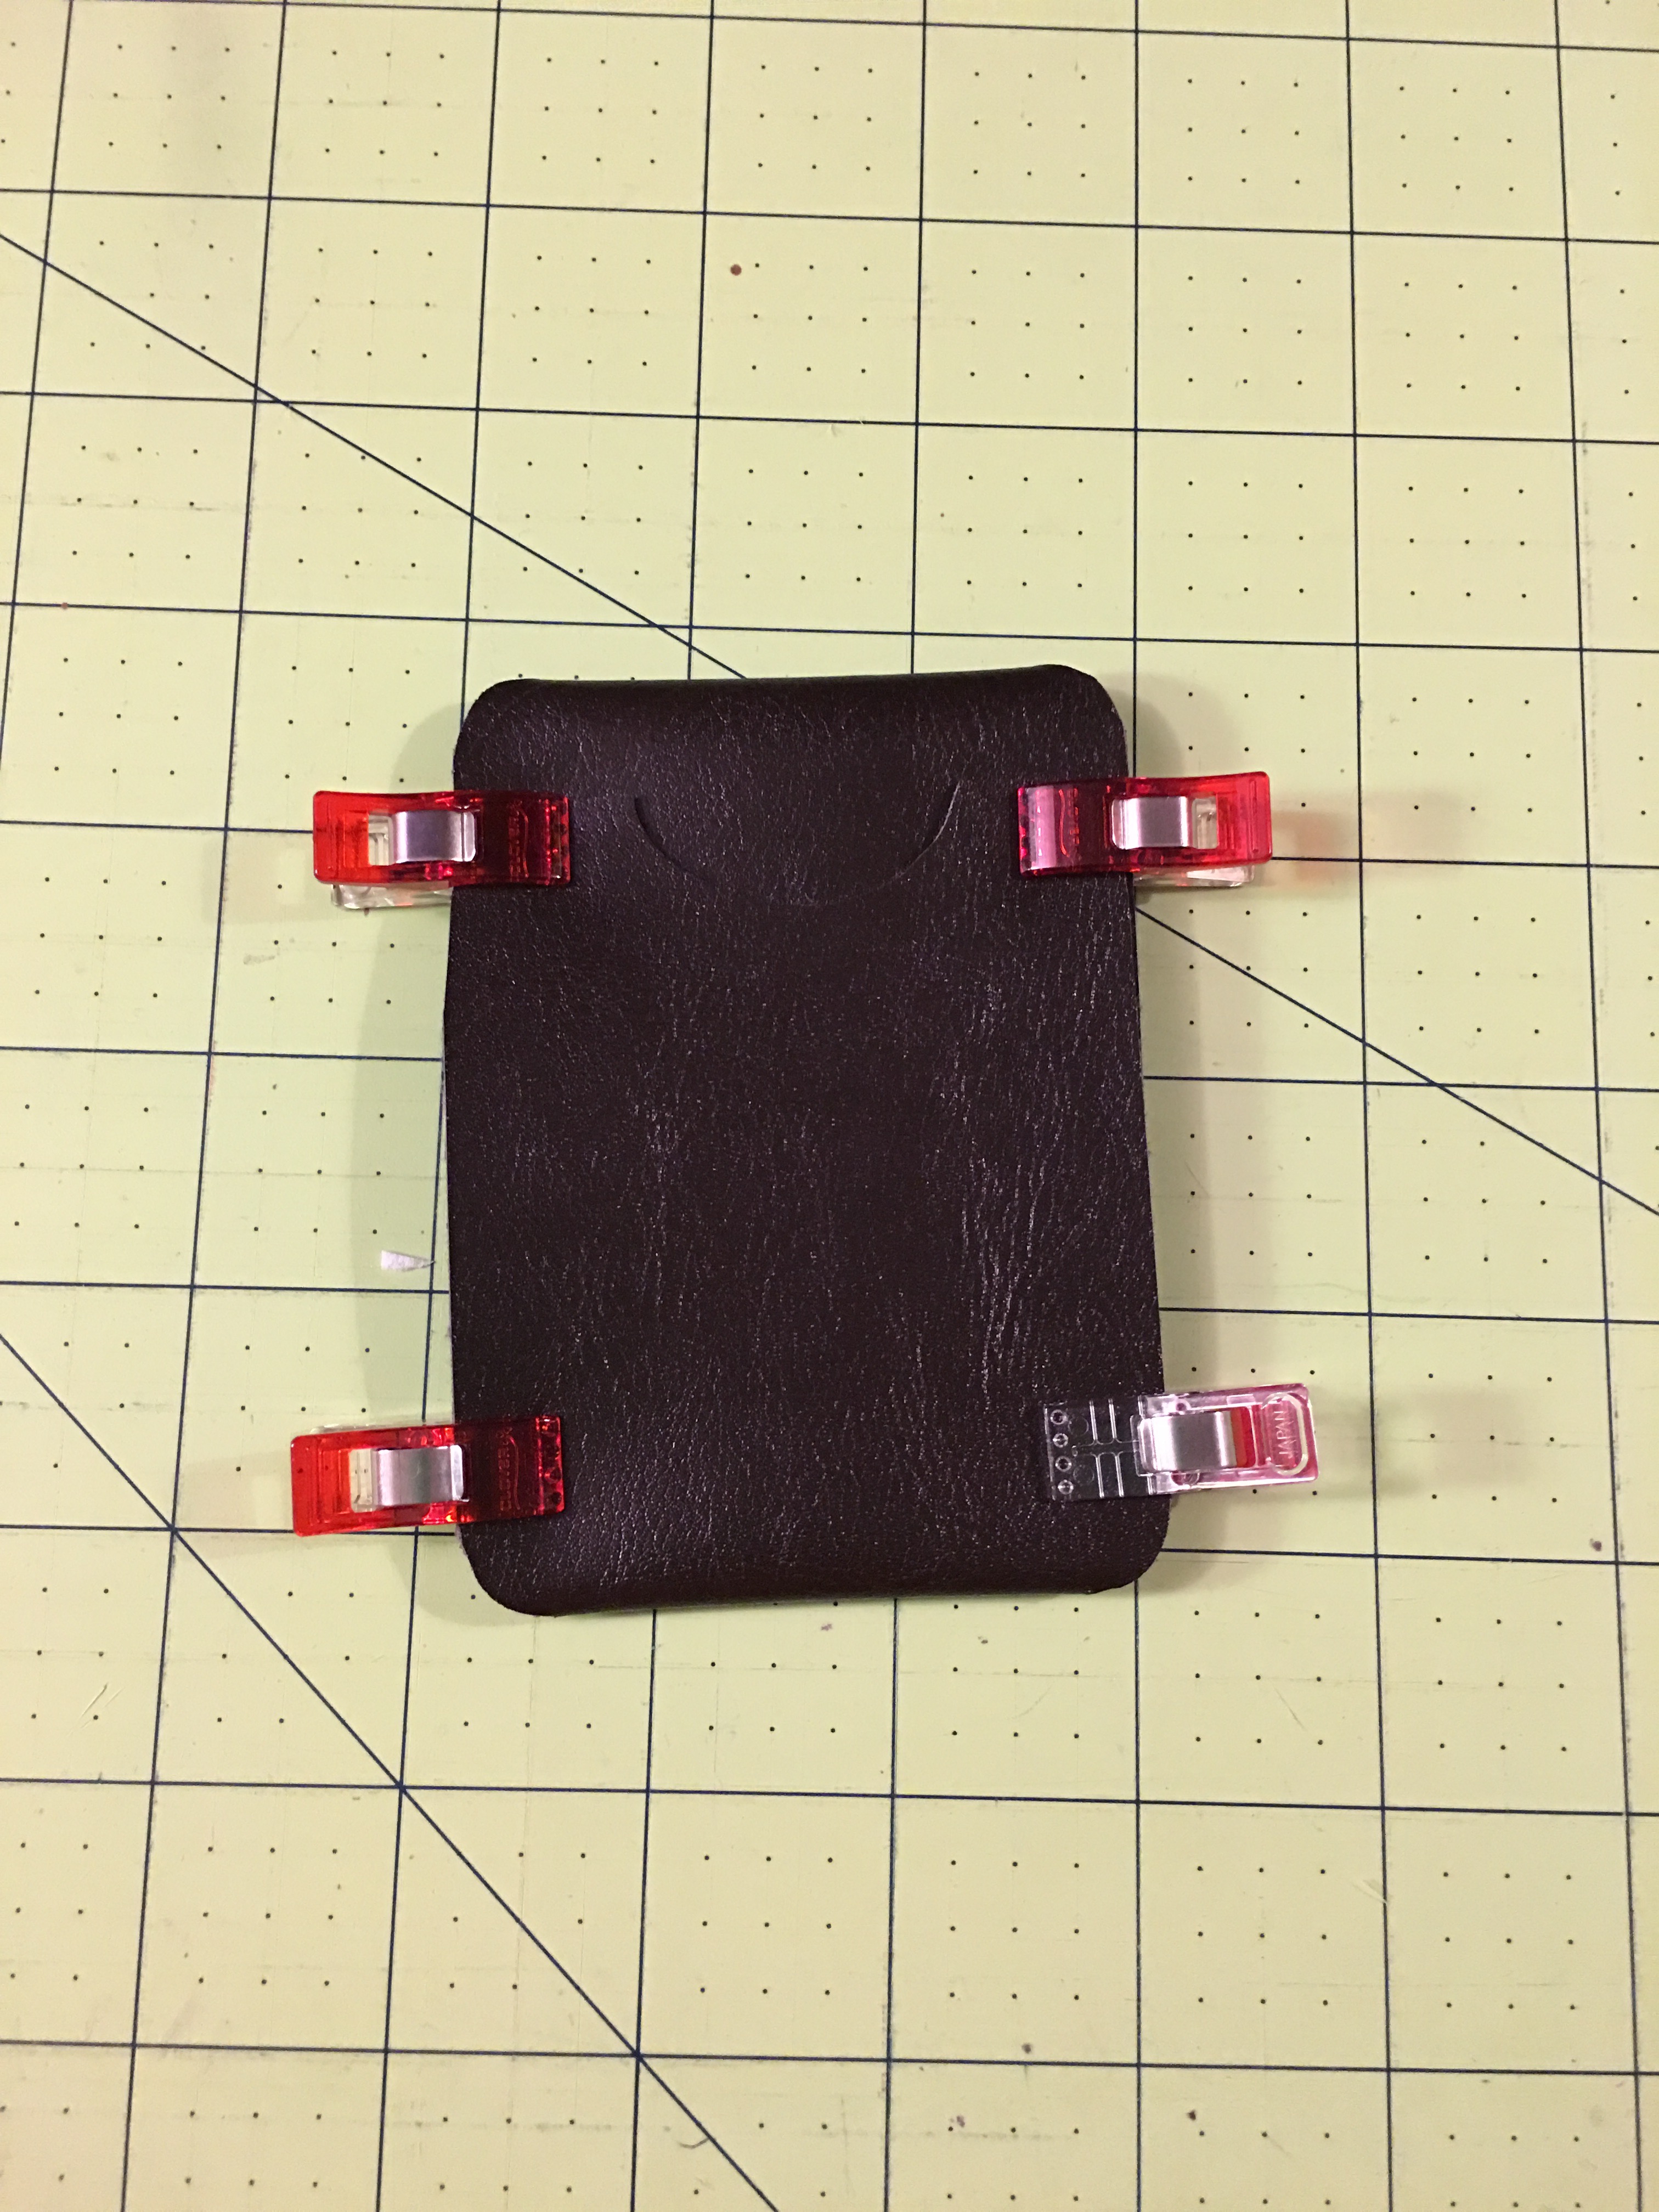 Step 3c: Fold along the crease lines. Keep the half circle cutout edge on the outside of the folds. Clip the wallet in place.
 Step 3d: Stitch ¼” from each long edge leaving long thread tails at the beginning and end. For best results, lengthen the stitch length to 3.5mm and insert a leather machine needle.
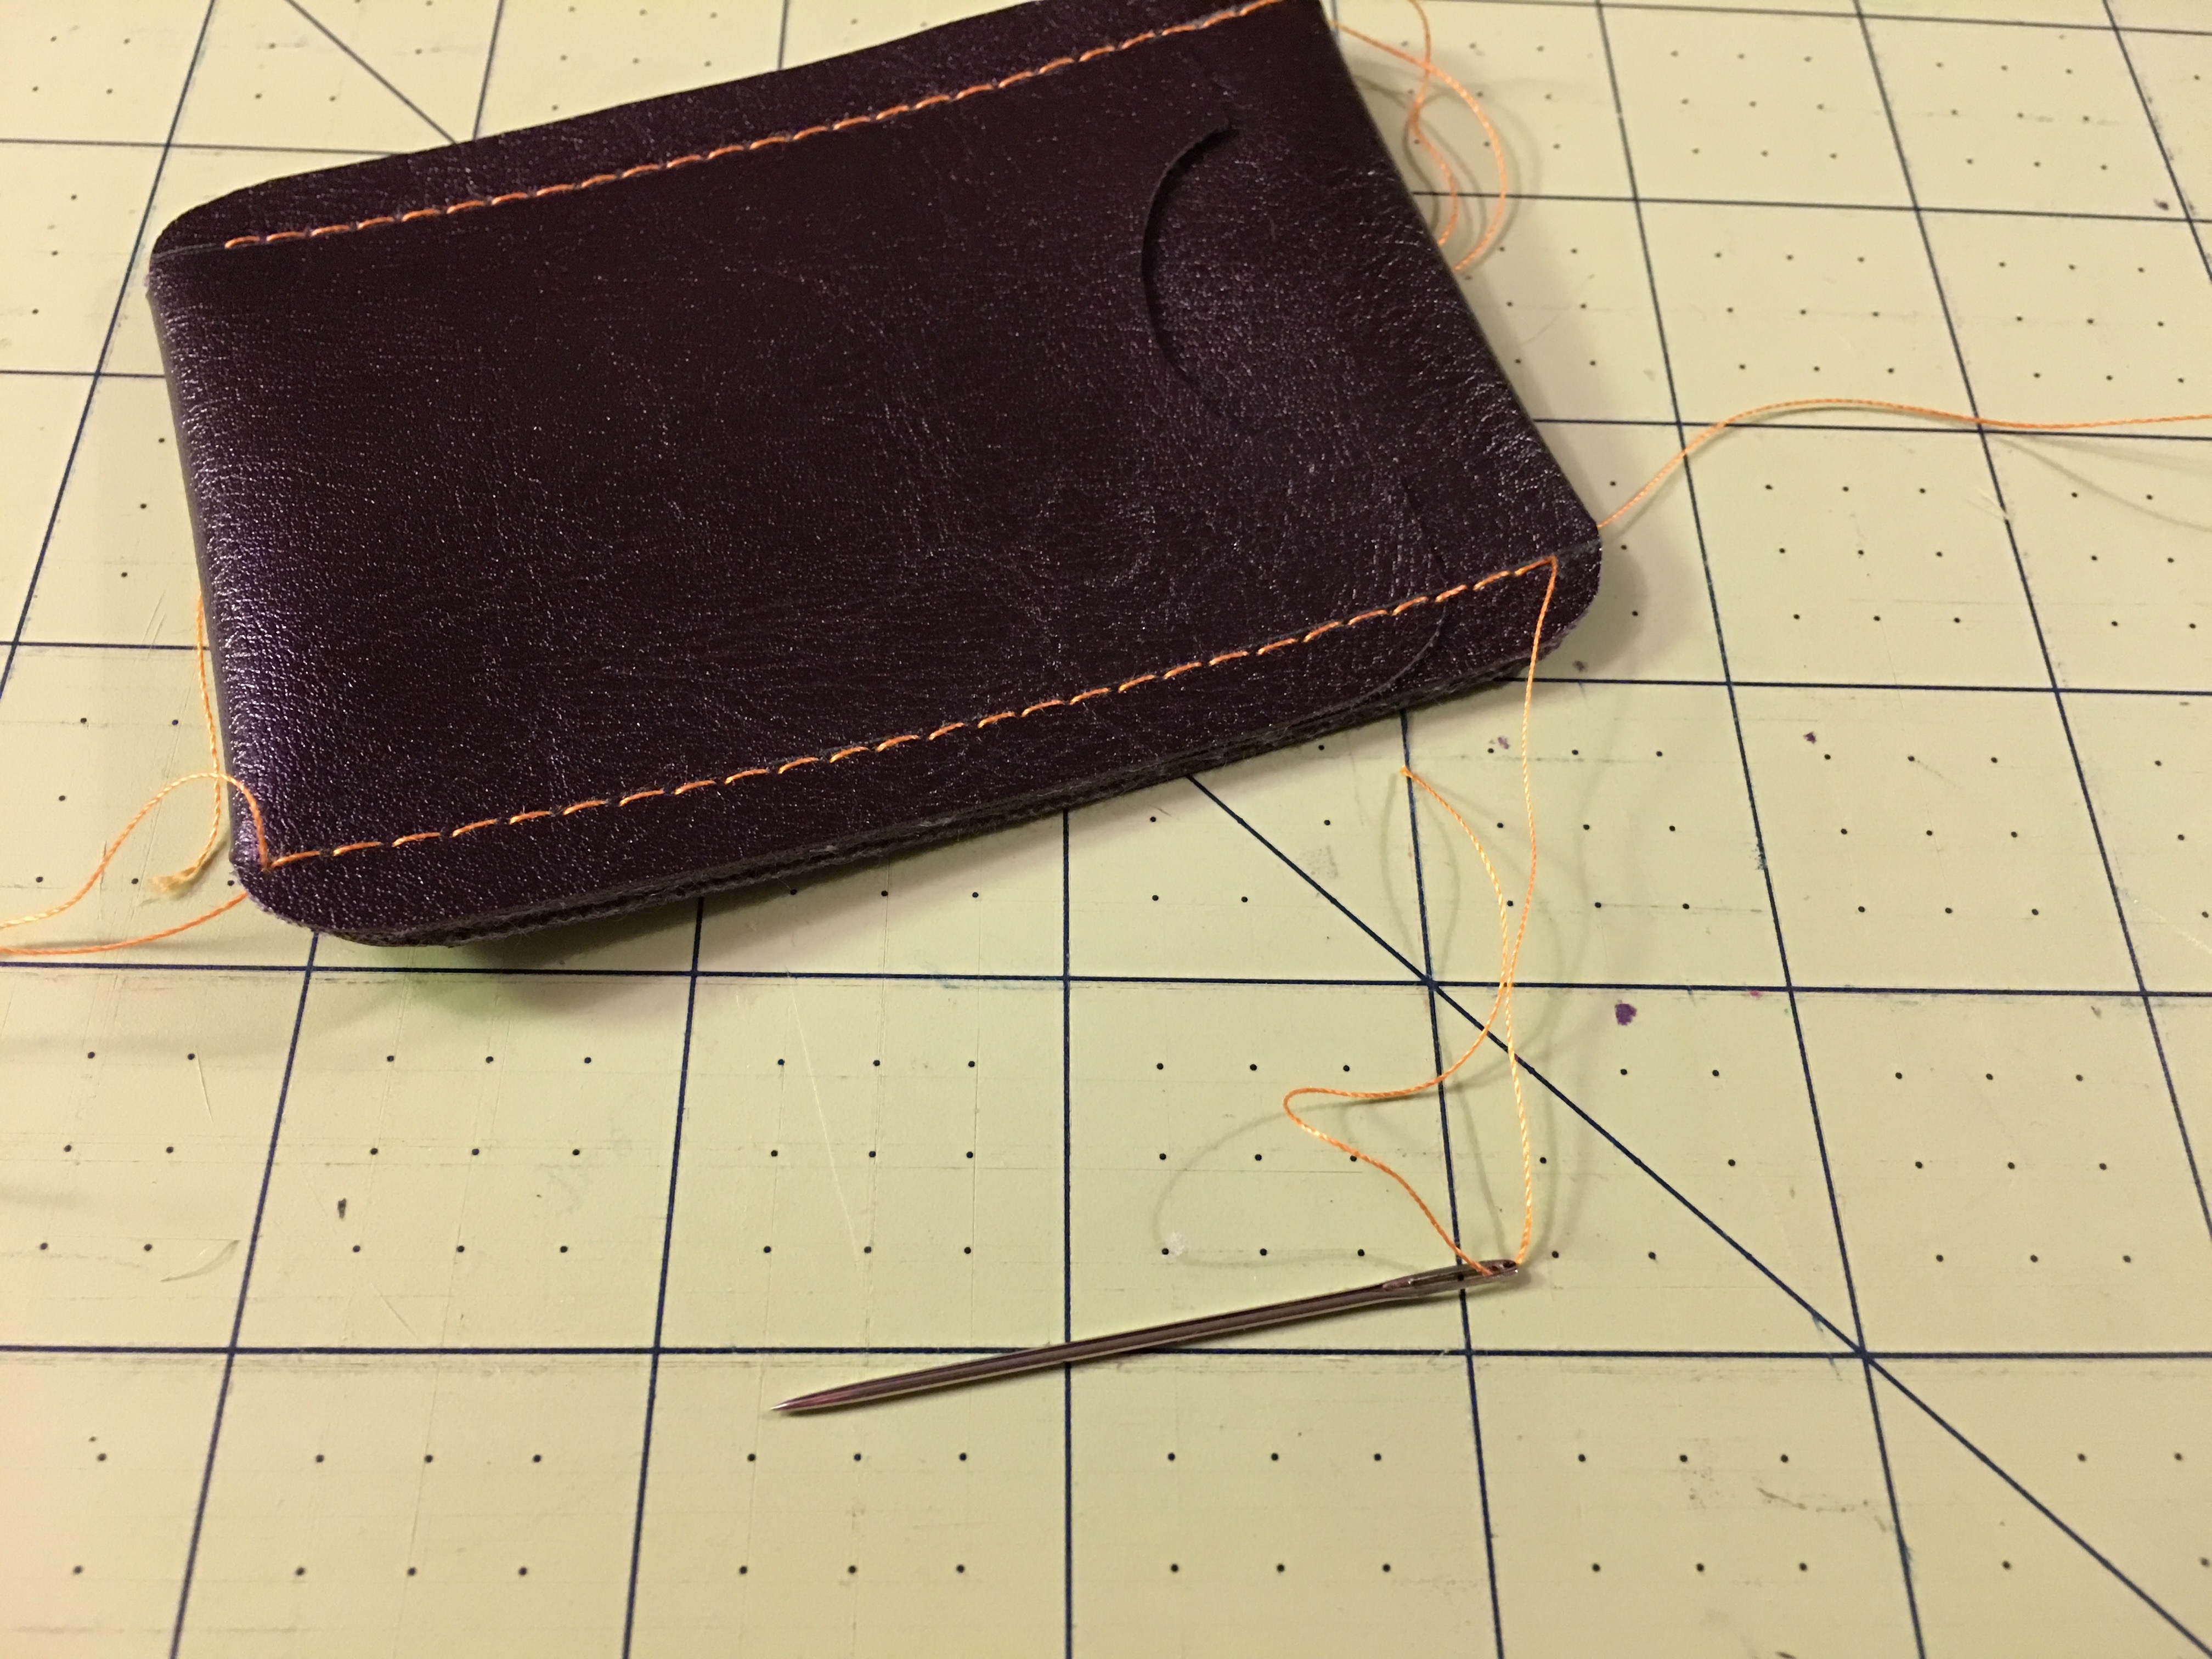 Step 3e: Thread the needle with one long thread tail. Complete any stitches necessary to finish the row of stitches if the machine didn’t stitch all the way to the end.
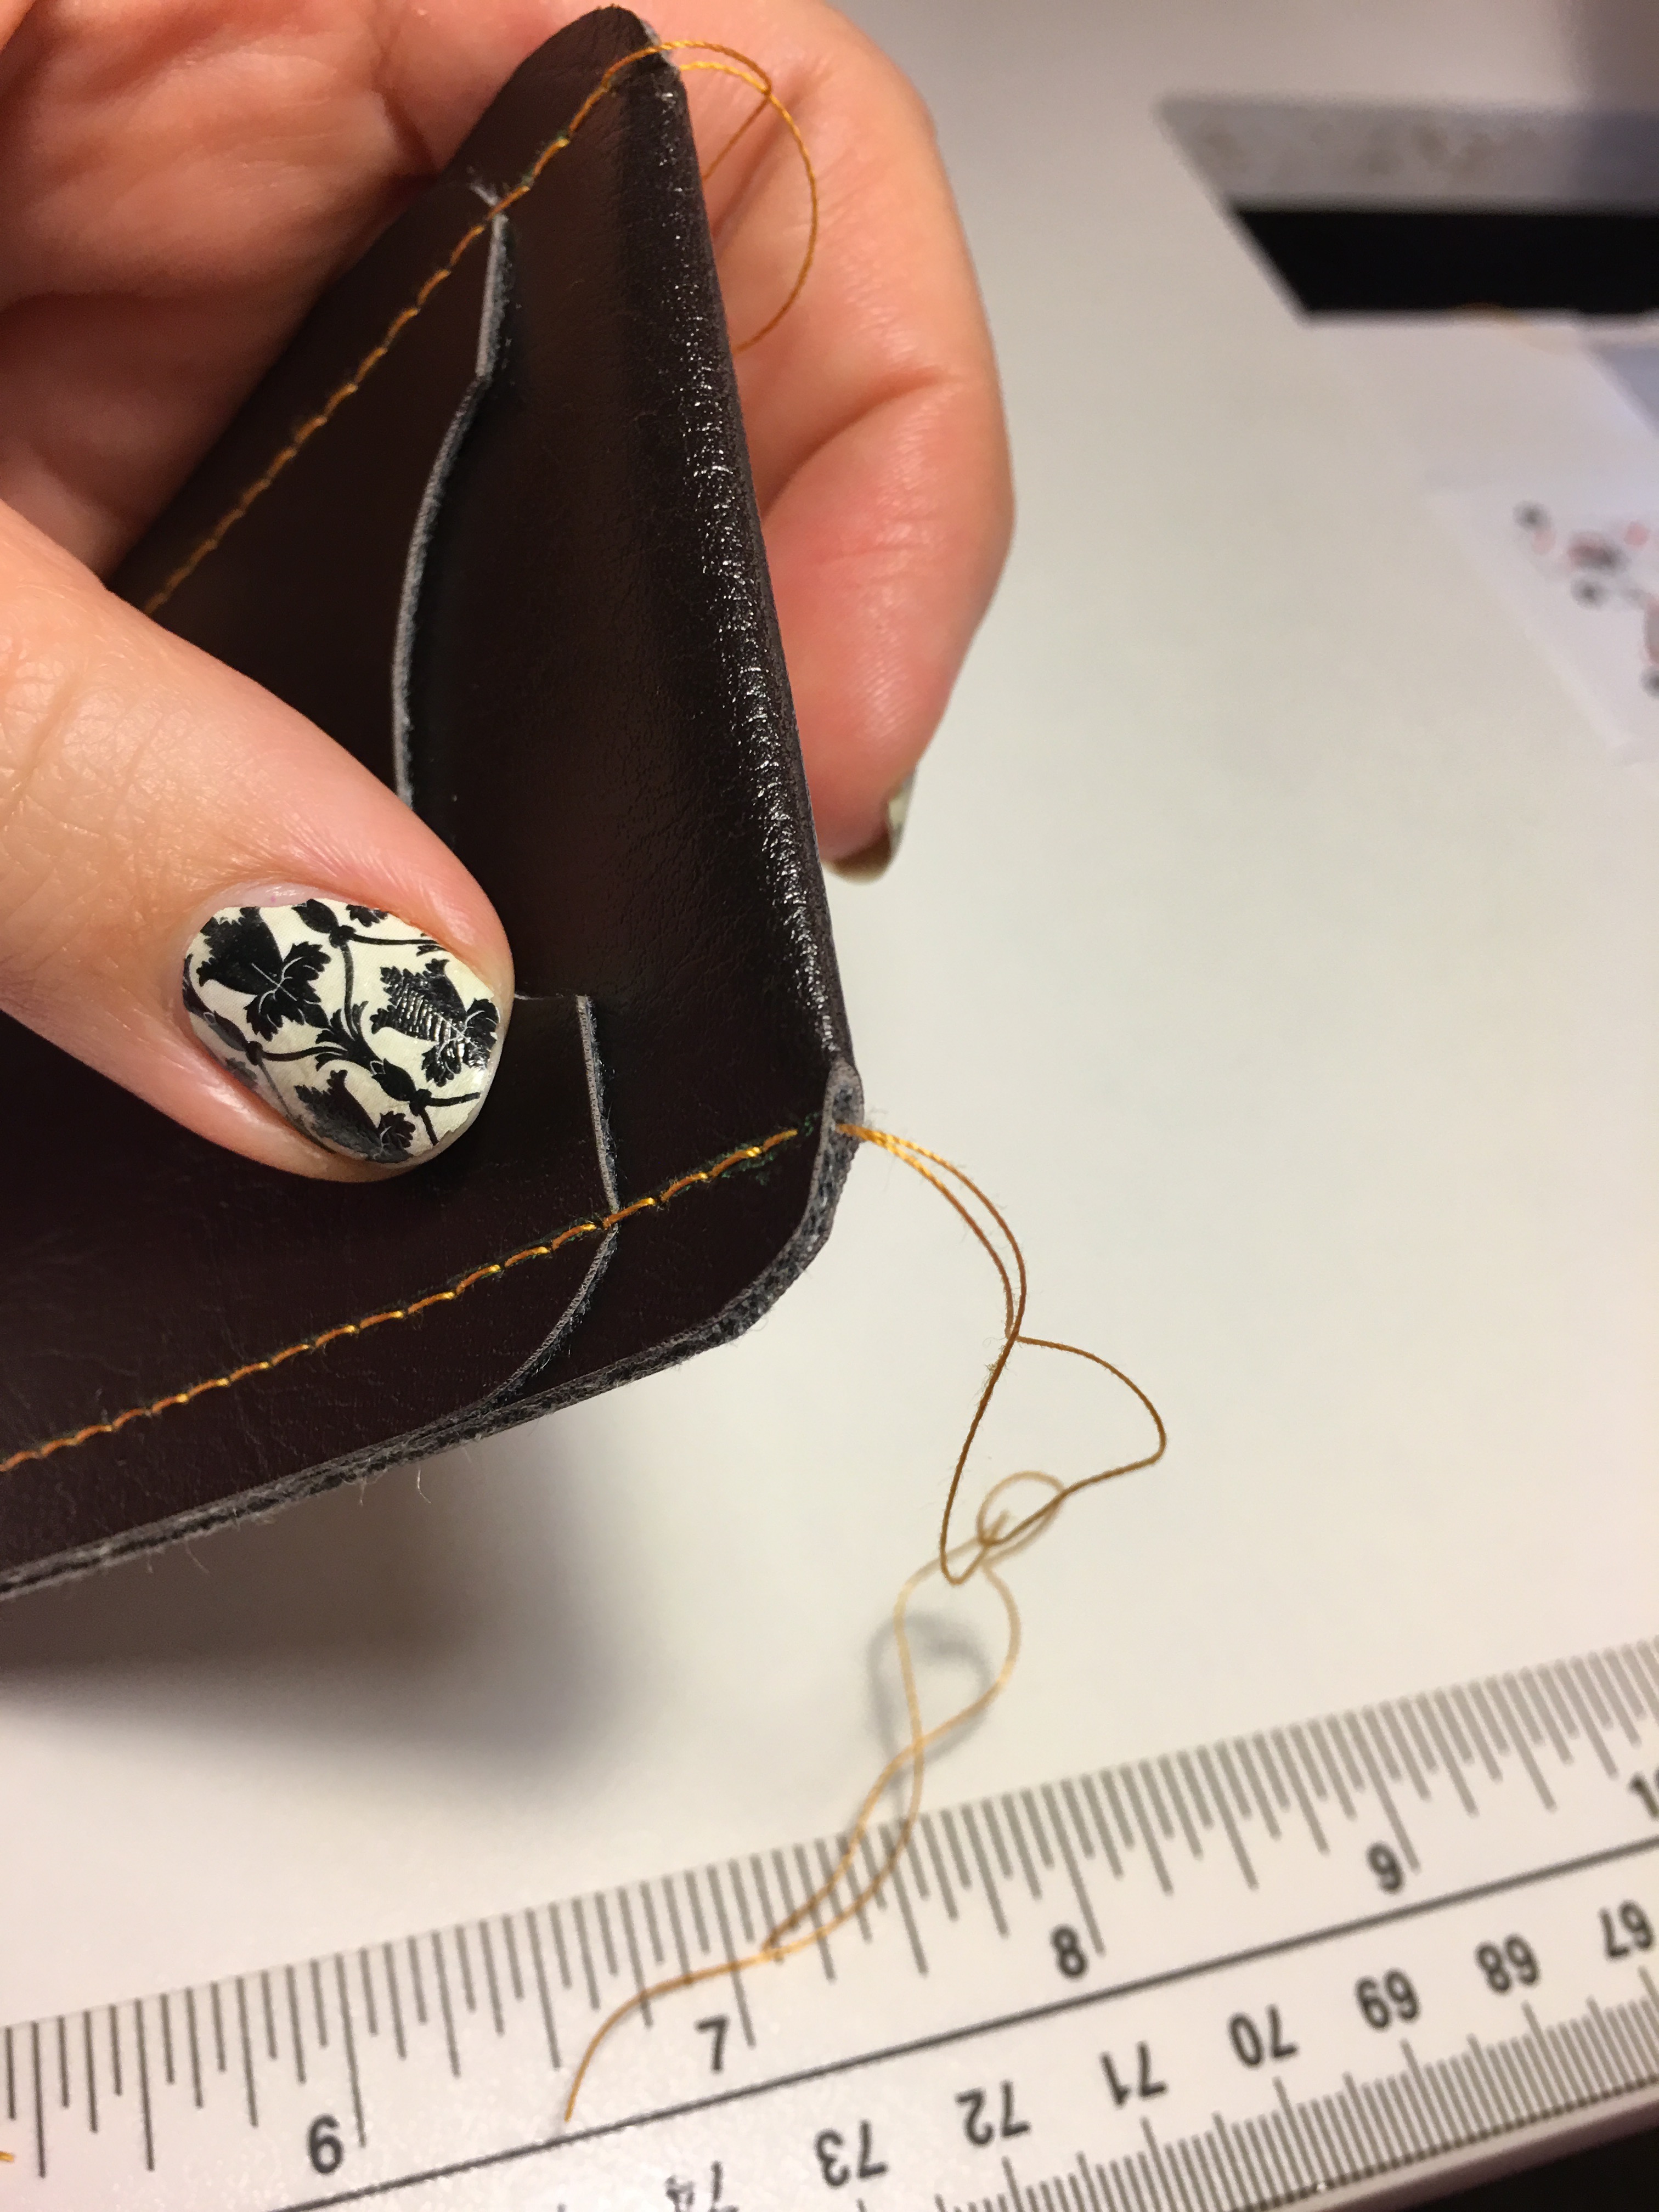 Step 3f: Pull the threads through to the openings in the corners.
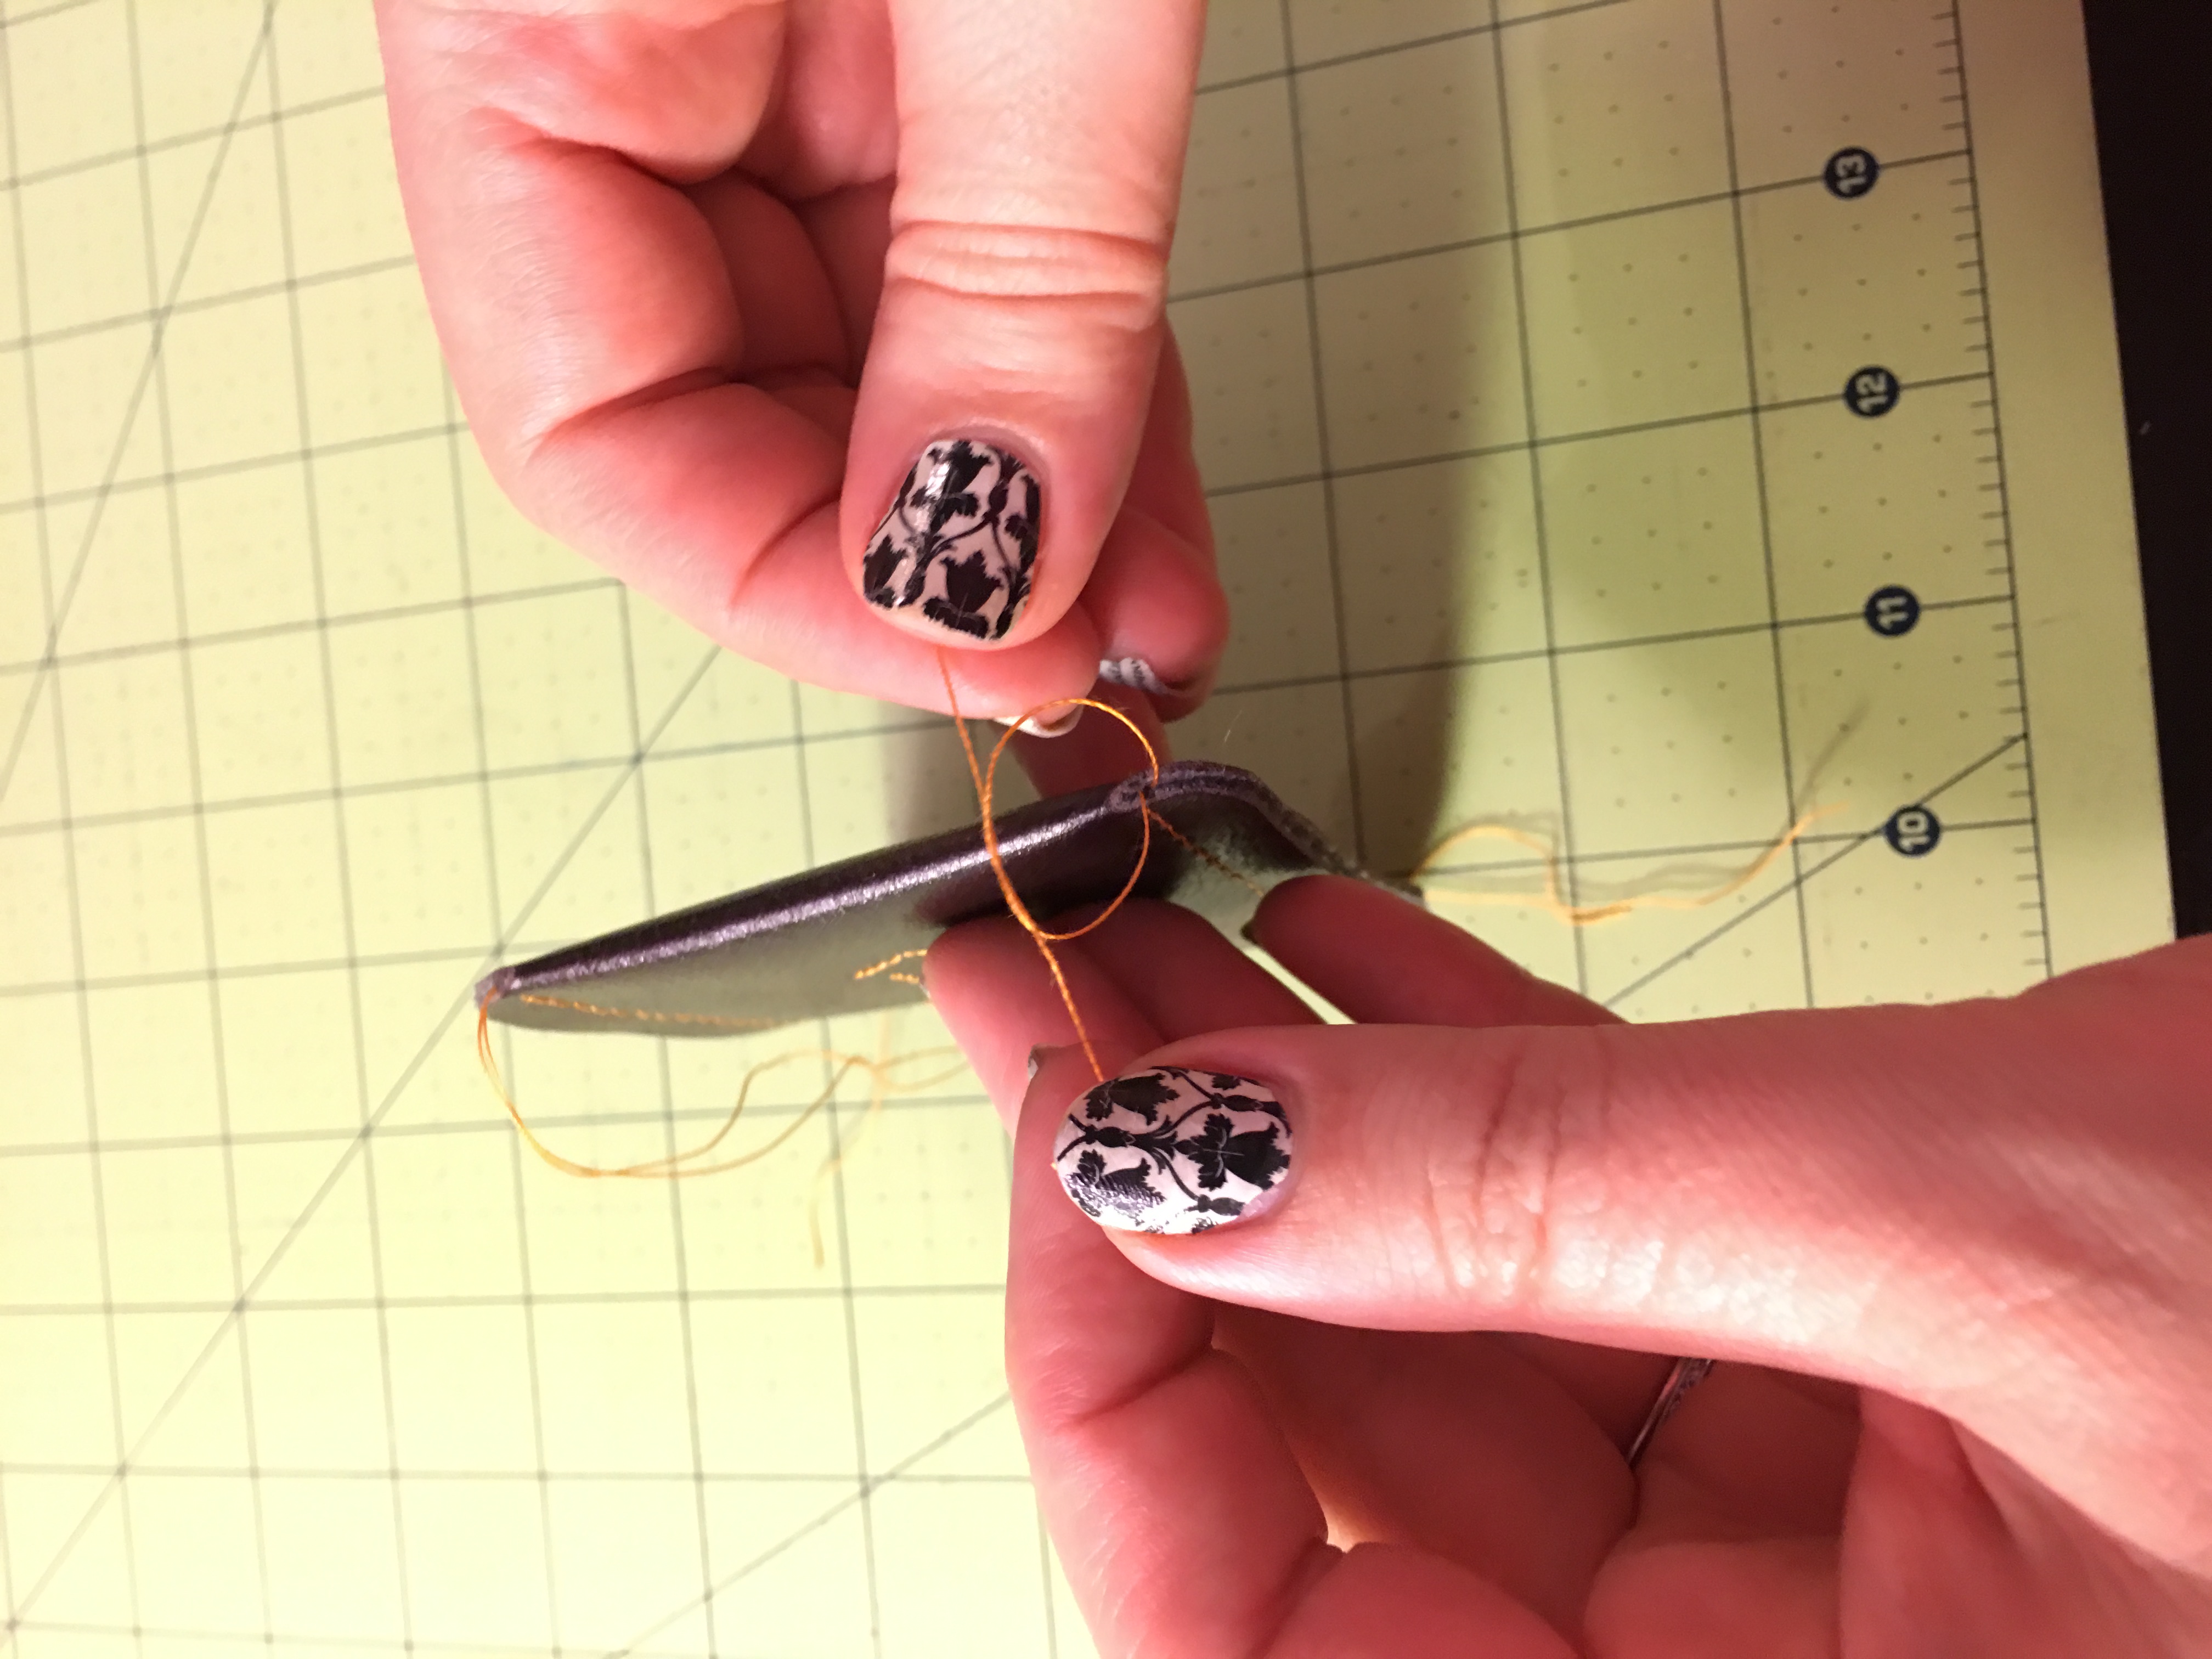 Step 3g: Tie the threads off at the corners, allowing the knot to hide between the layers.
Now wrap up the simple wallet with a special business card inside inviting your favorite guy to lunch. This wallet holds plenty of business cards and a few credit cards. It’s sure to make a great accent to the trio of gifts you’ve just made by hand.
Step 3g: Tie the threads off at the corners, allowing the knot to hide between the layers.
Now wrap up the simple wallet with a special business card inside inviting your favorite guy to lunch. This wallet holds plenty of business cards and a few credit cards. It’s sure to make a great accent to the trio of gifts you’ve just made by hand.
 If you’re looking for more gift ideas for your favorite fella, check out these fun projects:


Men's clothing. I need patterns for men's clothing.
Thanks for the men ideals for christmas I love the simple wallet
I want a video showing me how to monogram on an embroidery machine. Freehand.....
Is it possible to print these instructions, please?
3 very easy things you can make. The Fob and the Handkerchief would even be great teaching the kids the sewing and the assembling of the Fob would be easy and fun for them for construction! Love it!
Some good ideas for hubby's gifts.
Would love to see more easy projects
Looks good
you've done a nice job of presenting your projects. I think I'll go make some handkerchiefs now. thank you.
Your nails are beautiful and I love this idea