 Learn how to make a nautical-themed booze bag that’s perfect as a gift or to keep for yourself! This bag will fit an average sized wine bottle or a 20-ounce bottle of beer.
All this project needs are a few scraps, rope or cotton cord, and grommets. For my nautical design, I created a fun crest using the built-in embroidery designs that came with my machine.
If you don’t have an embroidery sewing machine you can always hand-embroider a nautical design onto the bag or draw one using permanent fabric markers.
Here are the materials and supplies you’ll need to complete this project:
• One 13”x19” rectangle each of exterior fabric, lining fabric, and fusible fleece
• Scrap of cut-away stabilizer
• Two large 7/16” grommets
• Grommet setting tool
• 45” of 5/8” cotton cable cord or rope
• Coordinating all-purpose thread
• Various colors of rayon thread
• Air-soluble fabric marker
• Clear craft glue (optional)
Cutting
Step 1: From the exterior fabric, lining fabric, and fusible fleece, cut one 13” x 13½” rectangle and one 5” circle for the bag bottom.
Designate one 13½” side of both the exterior and lining rectangles as the upper edge. Mark with a removable fabric marker.
TIP: Fat quarters are the perfect size for this project!
Embroidering (optional)
Step 2a: Create a mock crest using built-in designs to mimic the featured project. To do so, either create a design using embroidery design editing software, or, depending on the embroidery machine, use the design edit function built into the embroidery machine’s display. Select a nautical themed design such as a ship’s wheel and center it in the design. If the intended recipient has a nickname that you would like to include, select an old English style font and place the letters above and below the nautical design.
Lastly, select a shield shape from the built-in designs to frame the nickname and design. Loading the designs in this manner will cause them to stitch out in this order. Double check that the design will fit within your hoop size and that none of the designs are layered over one another. If you wish, designate the thread colors within the design per the thread colors you intend to use. Otherwise, save the design and load it onto the embroidery machine.
TIP: If the intended recipient doesn’t have a nickname consider embroidering “Captain’s Brew” or “Grog Bag” onto the bag. Alternatively, you can always create a seaworthy nickname by inserting Admiral, Captain or Sailor in front of the recipient’s name. Better yet, choose an attribute about the individual such as “Fuzzy” for bearded fellows, “Muddy” for hikers, or “Grumpy” for your favorite curmudgeon and add that to the bag’s design.
Step 2b: Select a weight of cut-away stabilizer suitable to the exterior fabric. Heavyweight stabilizer works best with heavyweight fabrics such as home decor weight and canvas. The featured project uses a thin corduroy fabric and medium-weight stabilizer. If desired, spray the stabilizer with temporary spray adhesive and adhere to the exterior fabric’s wrong side.
Hoop the exterior fabric and stabilizer so that the design is centered horizontally and at least 2½” from the fabric’s upper edge. Following the manufacturer’s instructions, place the embroidery hoop on the machine.
Step 2c: Embroider the design, changing thread colors as needed. Once the machine is finished, remove the hoop from the embroidery machine and trim away any excess stabilizer. Snip all jump threads.
Step 2d: Using a press cloth, press the design. Set the iron to a heat setting that best suits the chosen fabric.
Step 2e: Following the manufacturer’s instructions, adhere the fusible fleece to the wrong sides of the lining fabric main piece and bag bottom.
Sewing
Use 1/2” seam allowances unless otherwise noted.

Step 3: Fold the exterior main piece in half right sides together, matching the 13” sides, and pin. Stitch using ½” seam allowances. Repeat to stitch the lining piece, and press both seam allowances open.

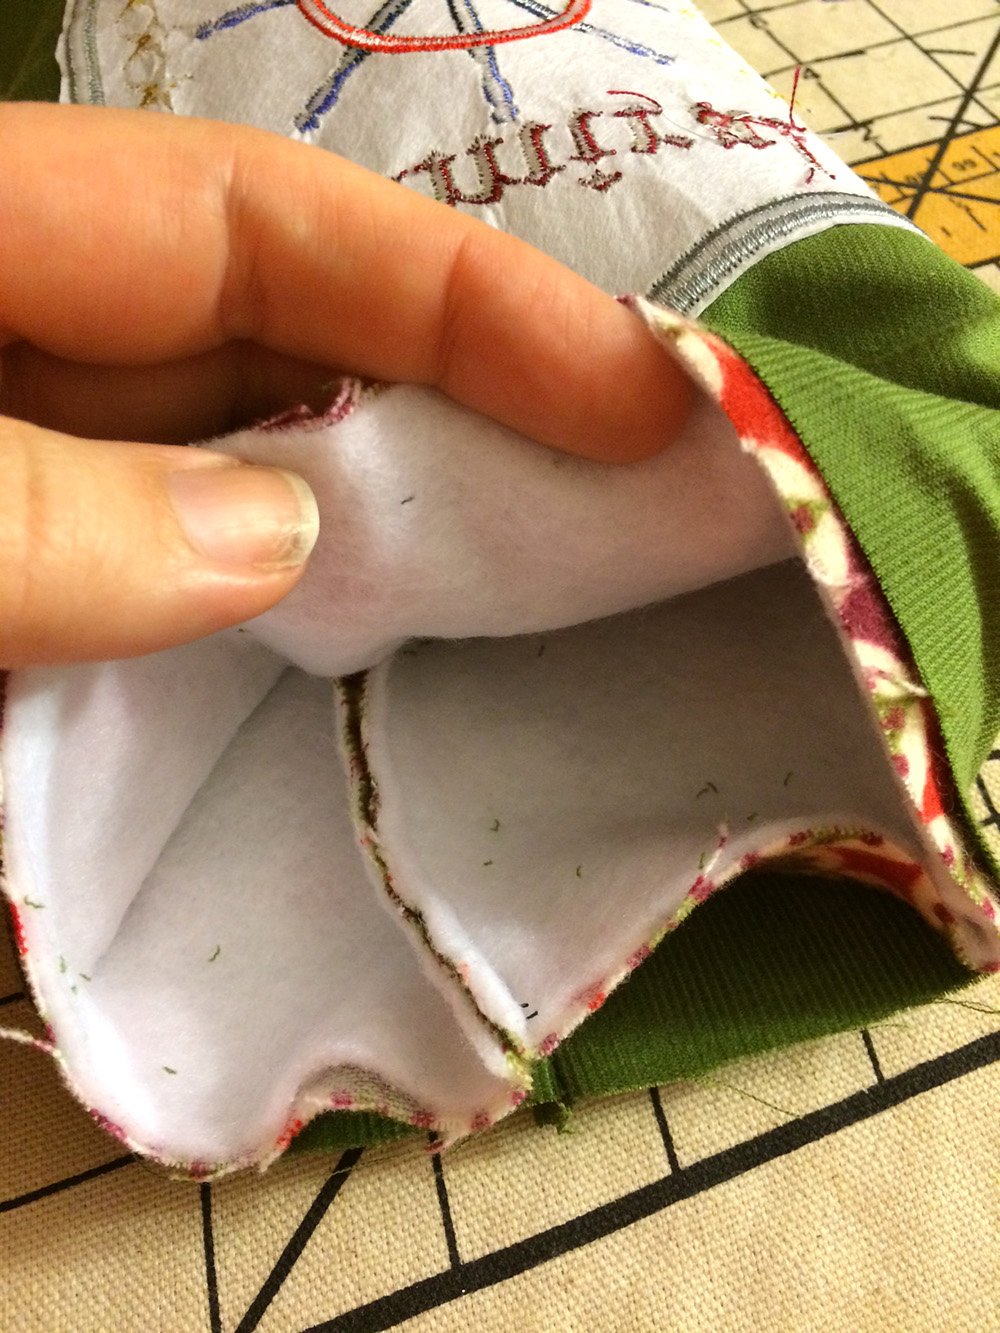
Step 4: Place the lining bag bottom right side down on a work surface; the fleece side should face up. Place the exterior fabric bag bottom right side up over the fleece and lining side. Baste the bottom pieces together.
Step 5: With the lining fabric and exterior fabrics right sides together, pin along the upper edge, then stitch together. Turn right side out, and press.
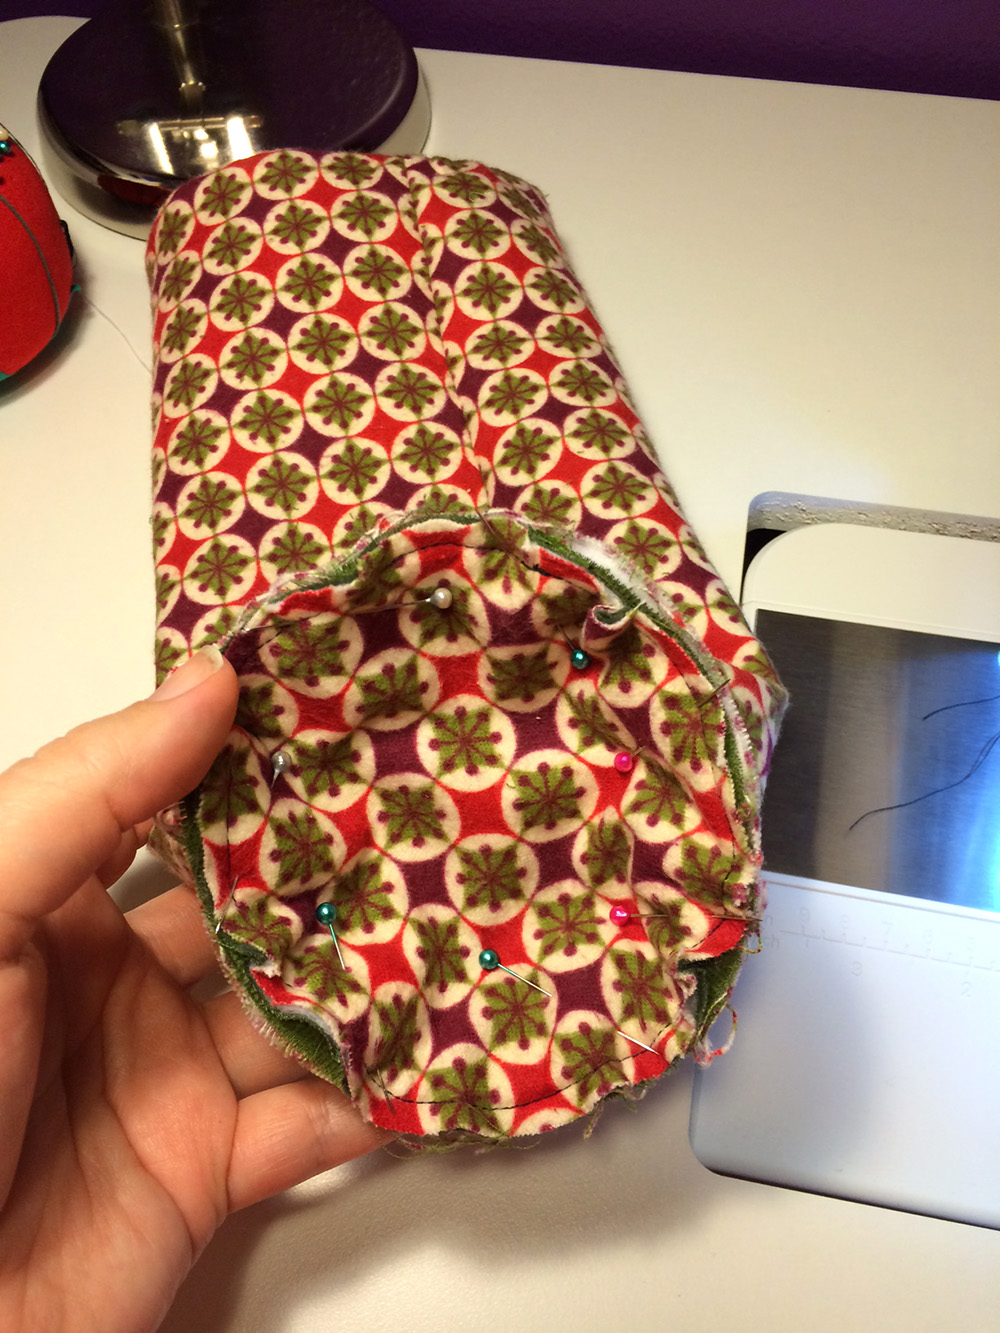
Step 6: Turn the bag body lining side out, and stitch the circular bottom piece to the circular opening. Pink the seam allowance if desired.
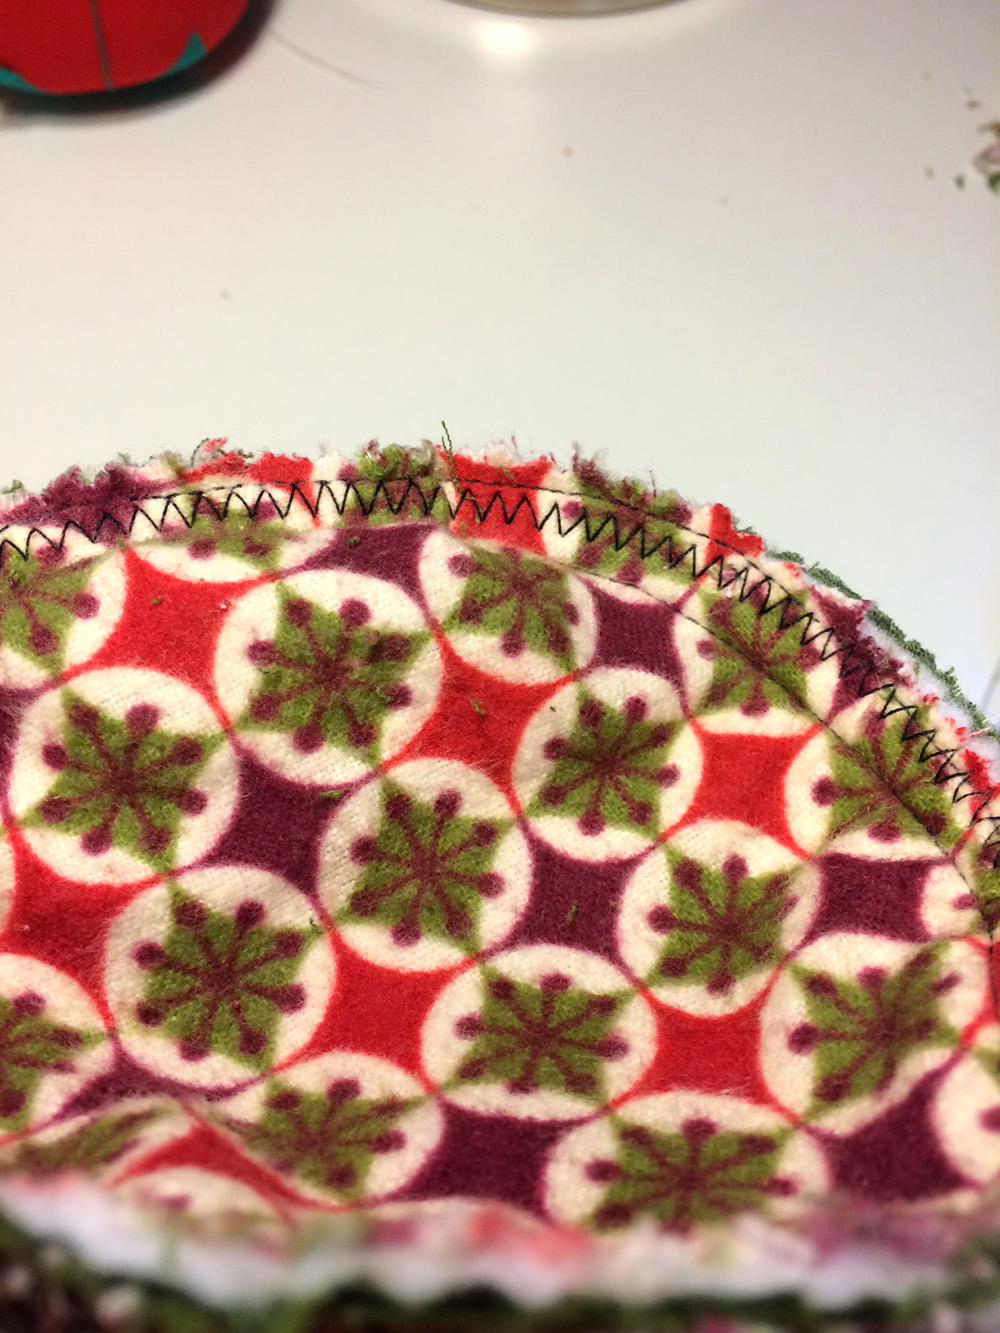
Step 7: Zig zag stitch the bag bottom seam allowances. Then turn the bag right side out, and if desired topstitch ¼” from the bag’s upper edge.
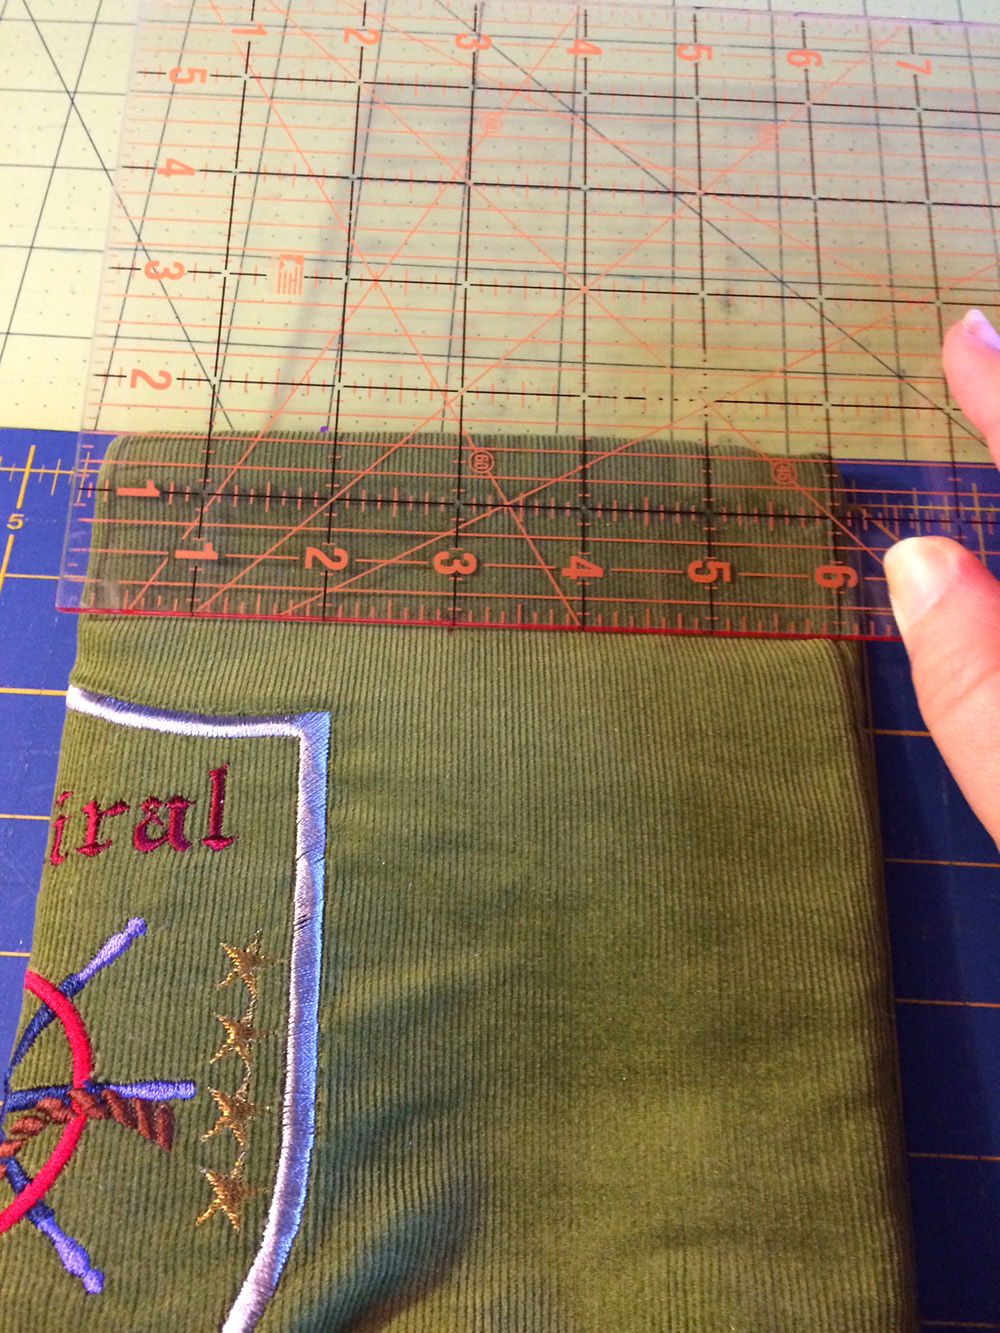
Step 8: Fold the bag in half with one side between the design and the back seam facing up. Measure down 1½” from the bag’s upper edge and centered on the bag’s side (roughly 3” from the back seam). Using an air-soluble marker, mark the grommet placement. Repeat to mark the remaining bag side.
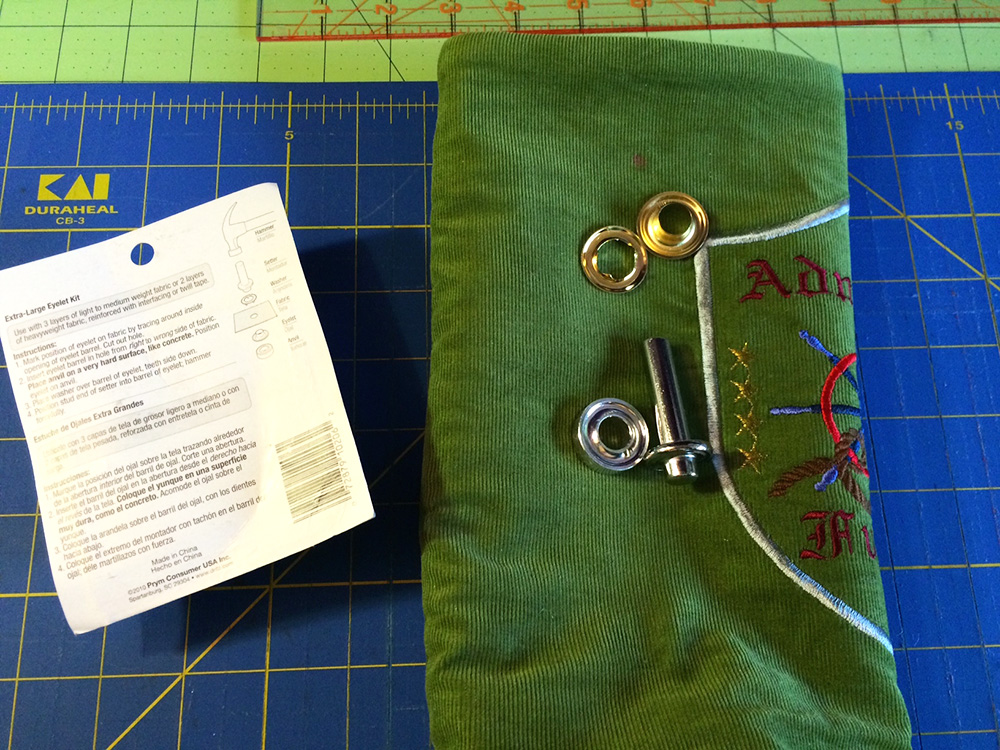
Step 9: Following the manufacturer’s instruction, set the grommets in place.
TIP: Always install grommets on a very hard surface such as concrete or brick; the grommet setter will protect the grommet from scratching.
Knot Tying
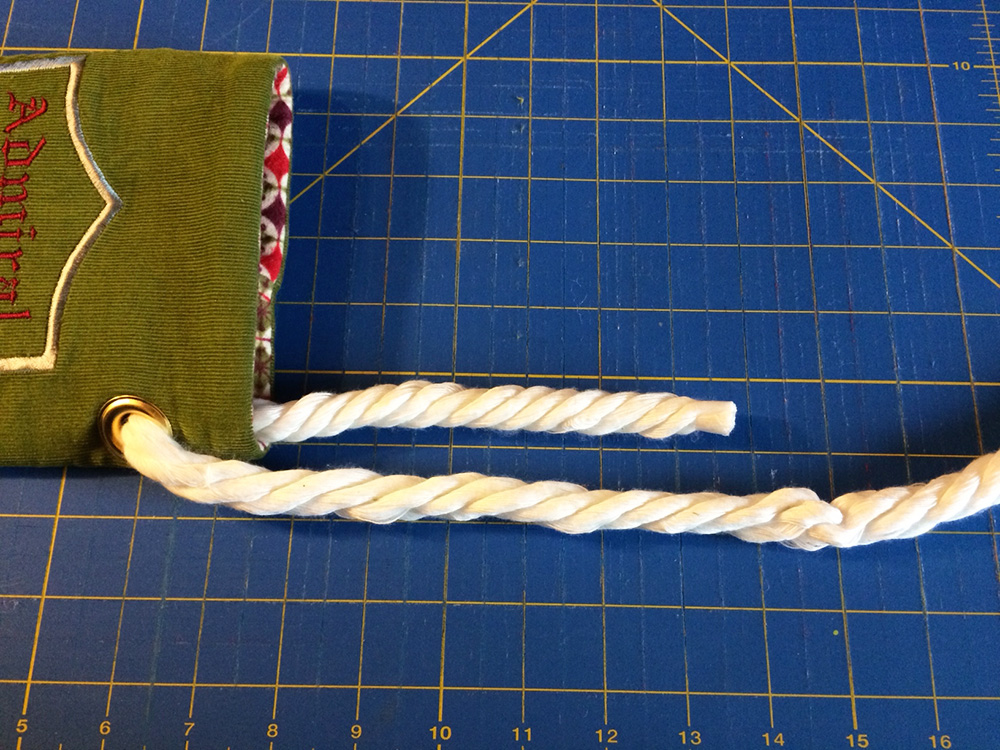
Step 10: Tie a knot of your choice. To complete the noose knot as shown on the featured project, pull 9” of cord through the grommet from outside the bag to in. Pull the knot’s end up to meet the remaining rope.
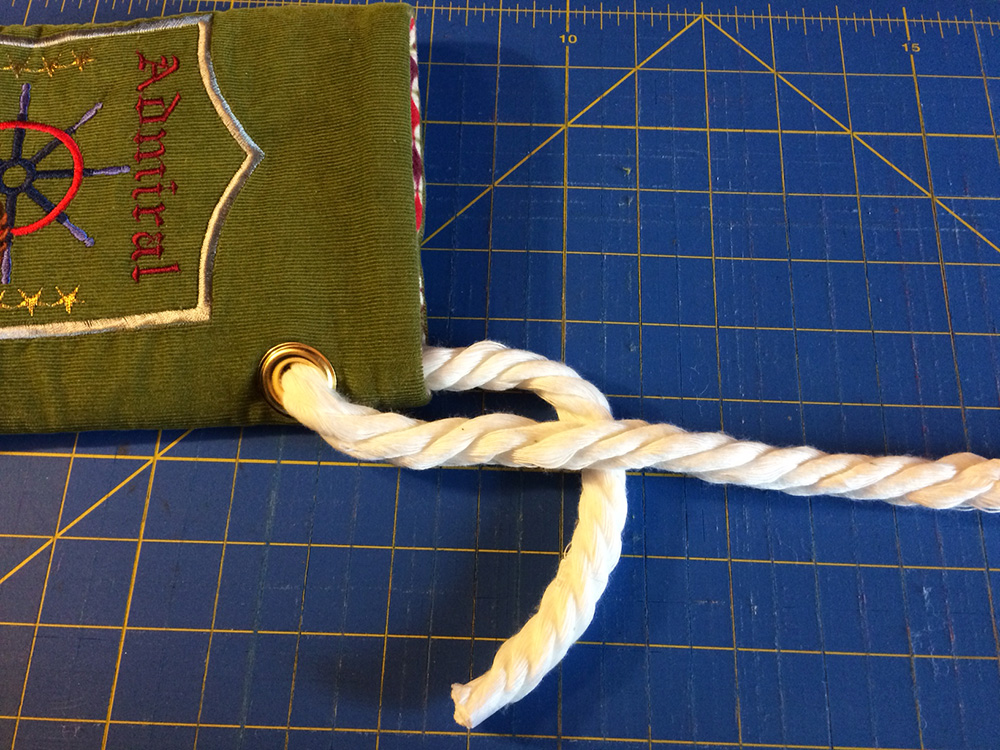 Place the short end under the remaining rope.
 Place the short end over both pieces of rope.
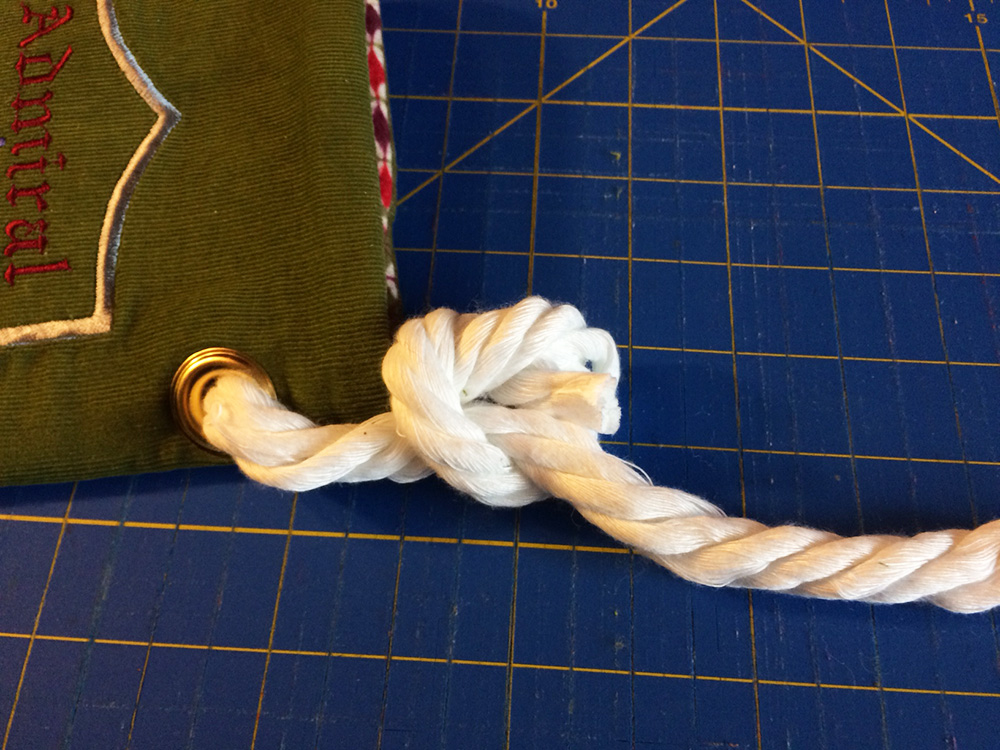 Pull the tail through the loop created over the remaining piece of rope.
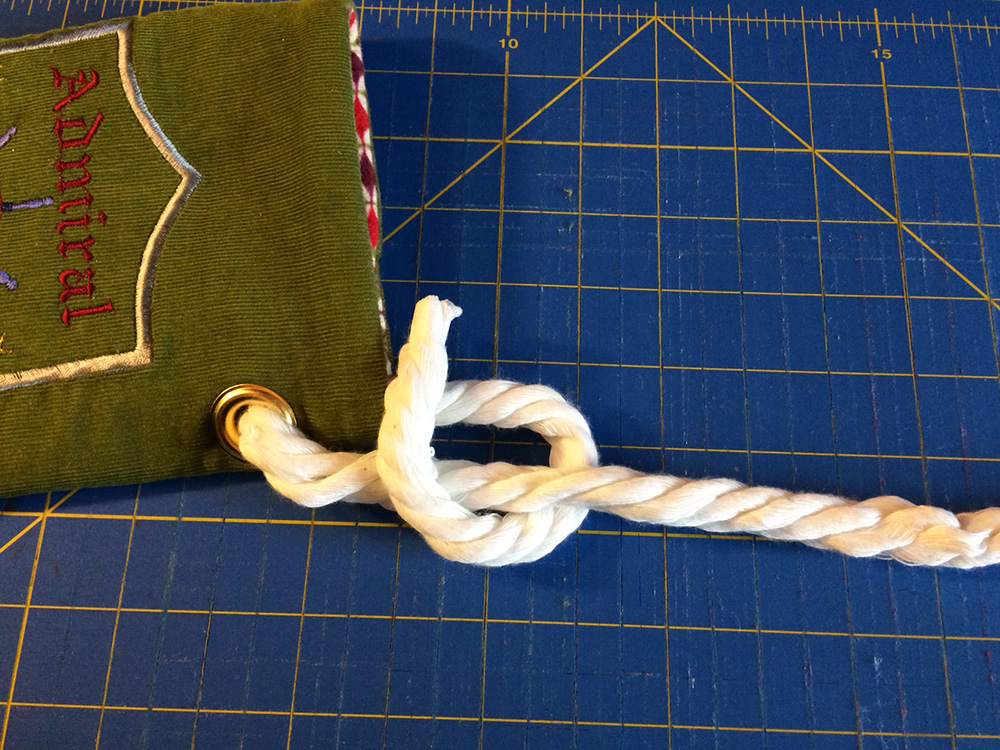
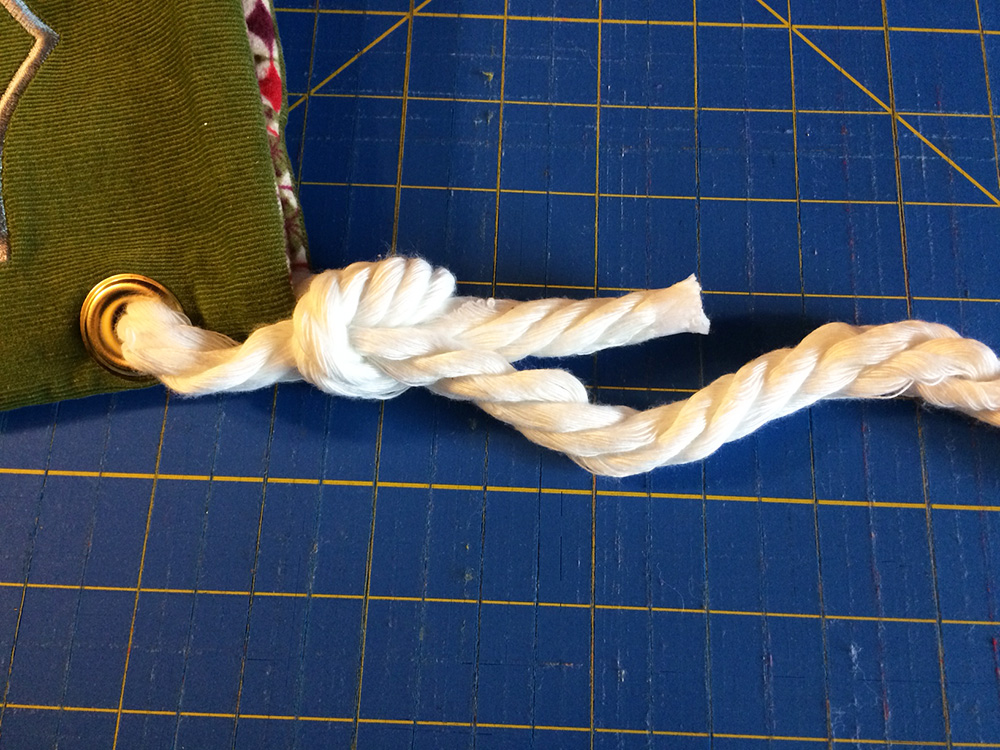 Pull the tail until there’s roughly 2½” to 3” of tail remaining.
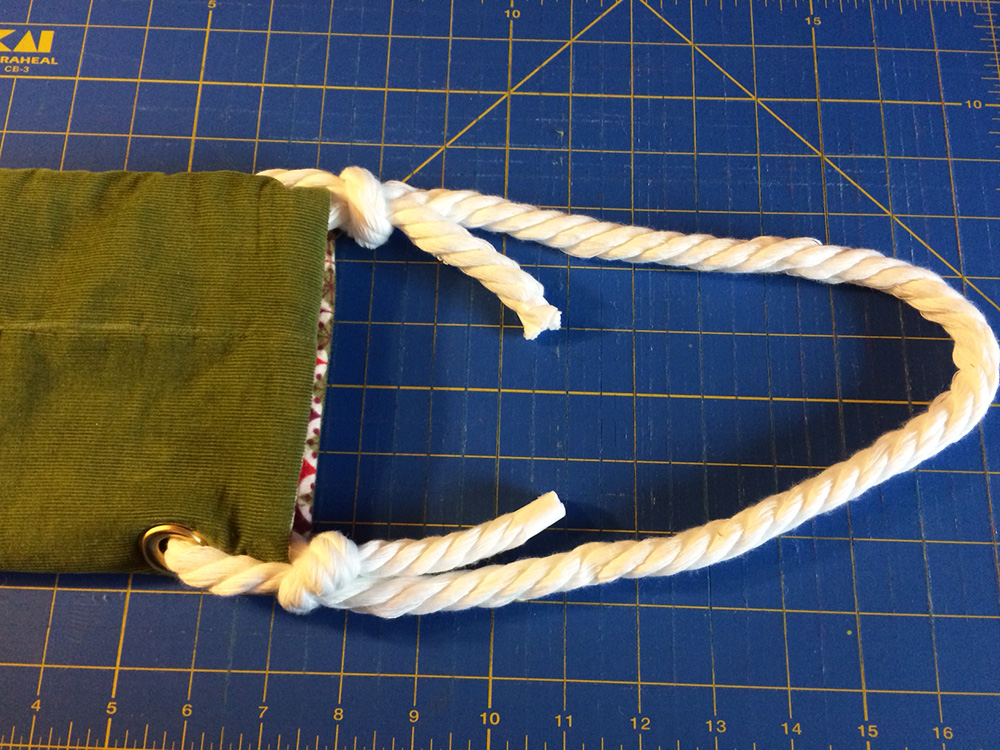 Repeat the steps above to tie the remaining bag side.
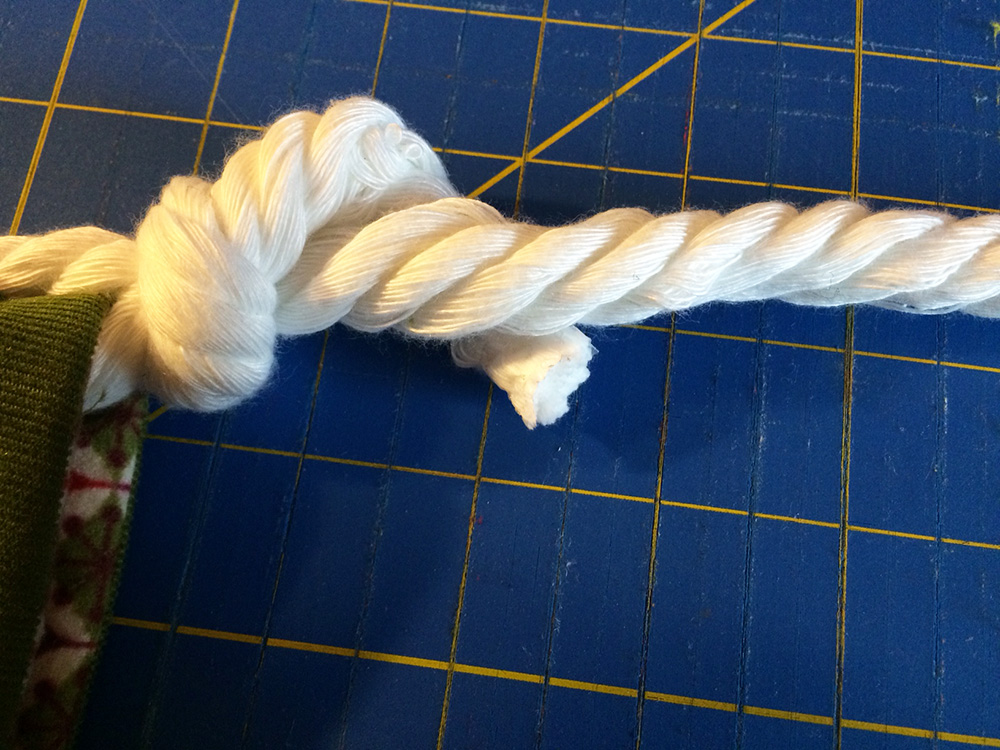 Wrap the tail around the main rope.
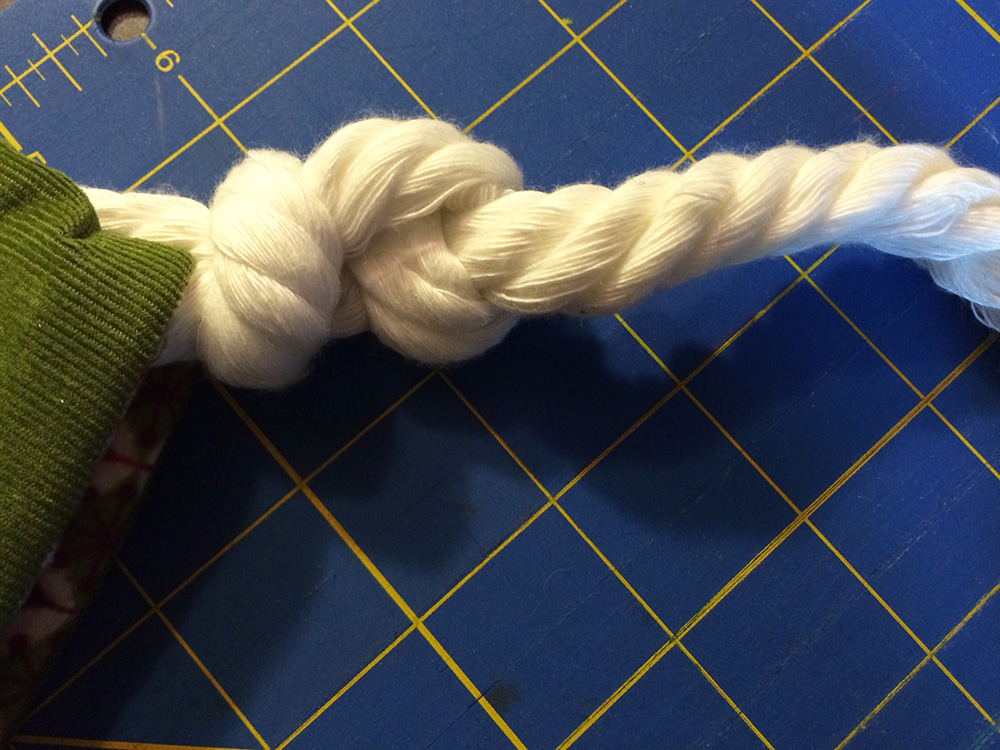 Tuck the tail into the loop just created, and pull tight. If desired, use clear craft glue to secure the rope’s ends inside the knots.
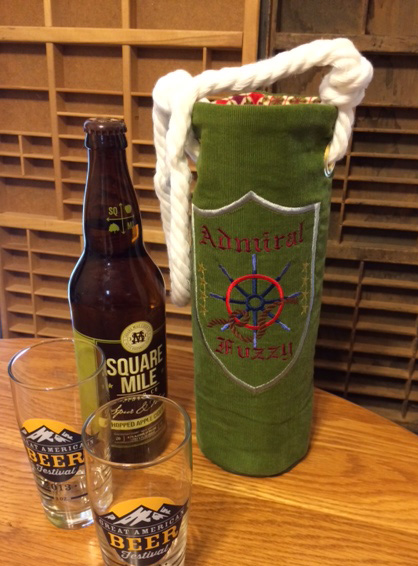 Now all that’s left is to add in your favorite bottle of wine or beer, and give as a gift to your favorite captain or cabin boy!
Related Video: Sewing Machine Embroidery Techniques
Get in touch! Leave a comment or email editor@nationalsewingcircle.com.

Can you make this pattern printer friendly
Either your measurements are wrong or I missed something. A 5" circle requires a 16" side. A 13" side as you say to cut is for a 4" circle. I now have side pieces that are too small. What am I missing here? Guess I should've checked before cutting. Please correct me or your measurements so this doesn't happen to another.
Why such heavy rope?
What are 'fat quarters'?
Perfect project for my son-in-law,for wine bag.