Men’s dress shirts can be great projects for sewers looking to get into garment construction. They have less fitting and shaping requirements than other garments and also tend to have fewer pieces. However, there are several components that need to be mastered in order to give it a real professional finish.
Over the years I have sewn several men’s dress shirts. Typically I would find a commercial pattern I liked and follow it step-by-step. Luckily dress shirts for men don’t vary much in the front, back, and arms. However, I found there are dozens of ways to customize the collars, cuffs, and pockets! Even the simplest of changes can completely alter the look of the shirt.
It actually wasn’t until my recent engagement to my fiancé that I really started looking at all the different shirt styles out there and how easy it was to customize patterns. Feeling comfortable with my sewing abilities (and having a small wedding party!), I decided I would sew everything for my wedding – my dress, my bridesmaids’ dresses and all the shirts and vests for my groom and his groomsmen.
Along the way I discovered some valuable tricks for finishing the collars, cuffs, and pockets so everything would be picture-perfect on our big day. Compiled here is an overview of the various styles and how to alter your classic patterns to achieve them. Read on to learn how you can master these essential elements for your own men’s dress shirts – wedding-related or not!
Classic Collars
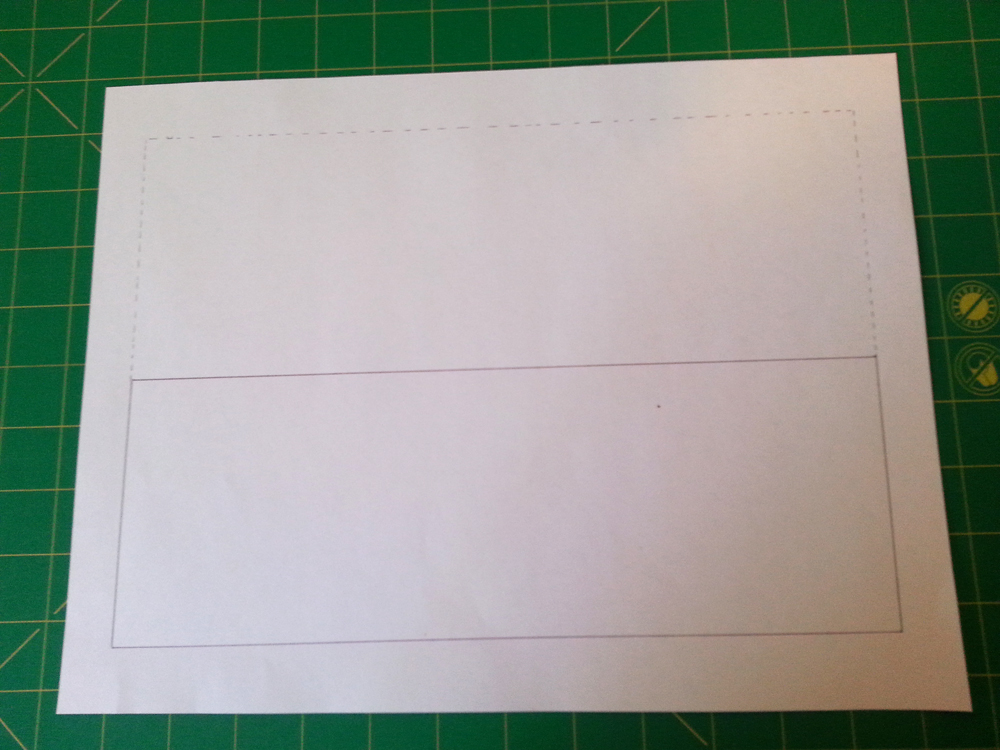
 A typical commercial pattern will have a classic collar. To sew a classic collar, simply place the collar pieces right sides together and stitch along the upper edge and sides, beginning and ending 5/8” from the edge. The points of the collar are the most important part, so ensure you stop 5/8” from the edge before pivoting and continuing on.
 If it helps, mark your stitching line before you begin. Turn the collar right side out and press. Sandwich the collar between the two pieces of the collar band and stitch along the upper edge.
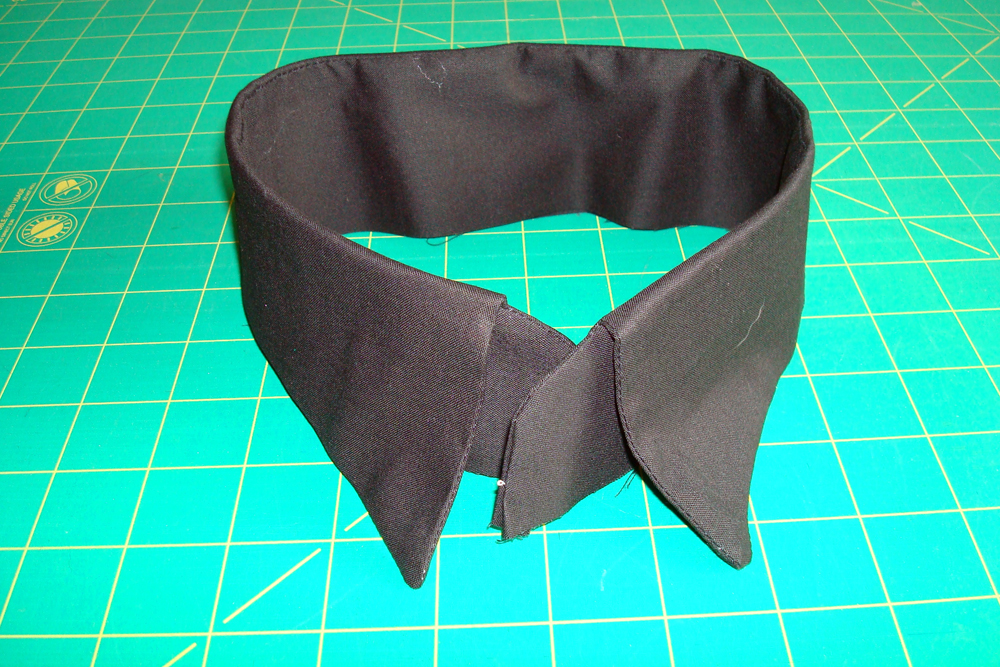
 Your classic collar is now ready to be attached to your shirt.
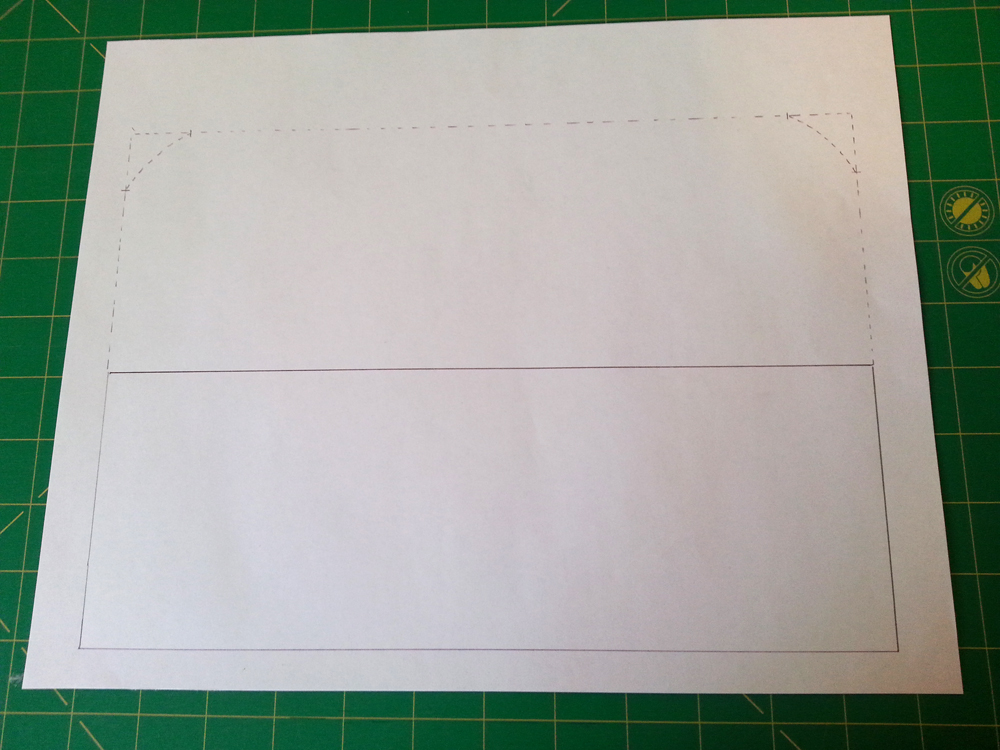
Cutaway Collars
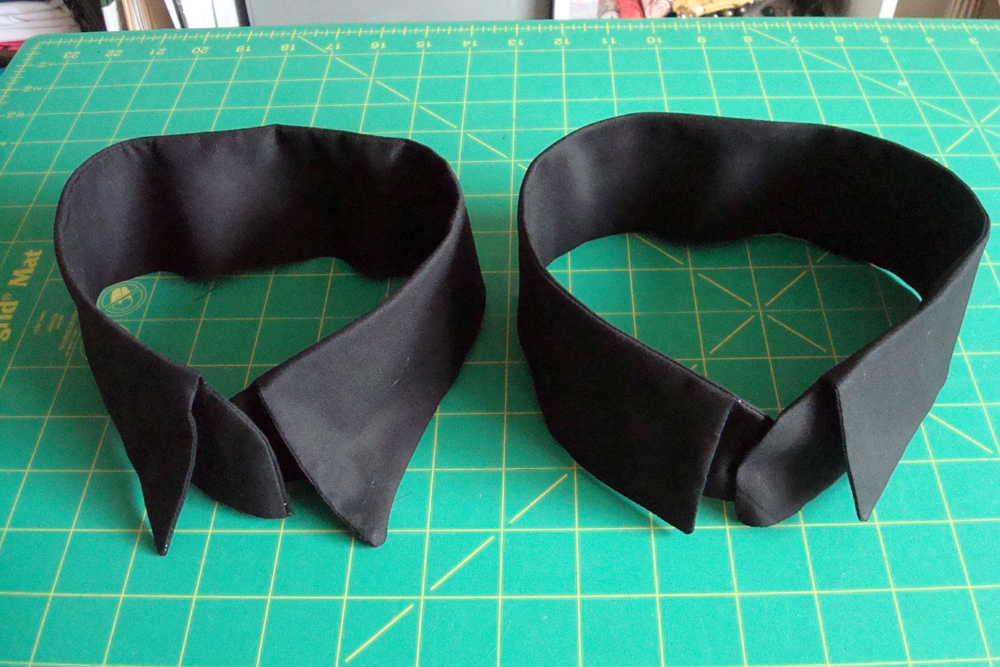 A Cutaway collar (pictured on the right) is another popular type of collar for men’s dress shirts. It is called a cutaway because of the extra distance between the two points of the collar. This extra area that is “cut away” shows more of the shirt and gives extra room for larger tie knots like the Windsor.
 Cutaway collars are constructed in the same manner as a classic collar, but require a slightly different pattern piece. To modify the classic collar piece to make a cutaway collar, start in the middle of your pattern and simply taper the collar edges so the collar the same height along the entire piece and the points are removed.
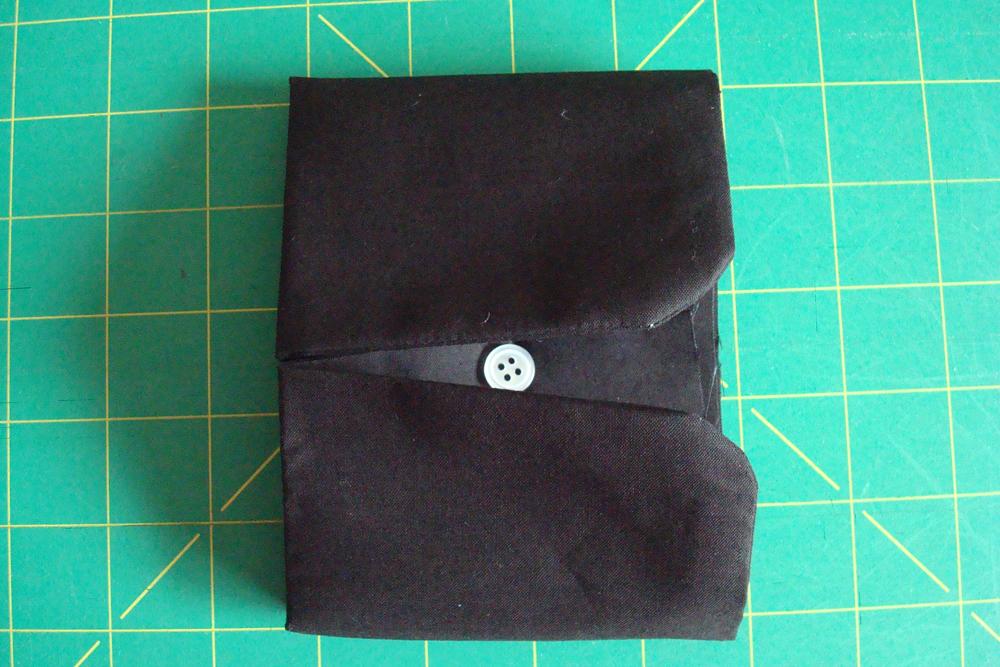
Classic Barrel Cuffs
 Now that you’ve mastered collars it’s time to move onto cuffs. When making a shirt following a commercial pattern it will most likely have a classic barrel cuff with one button.
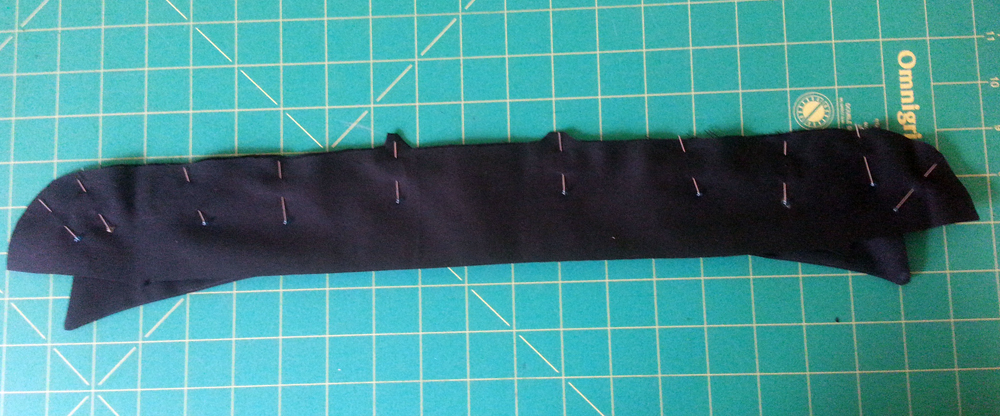
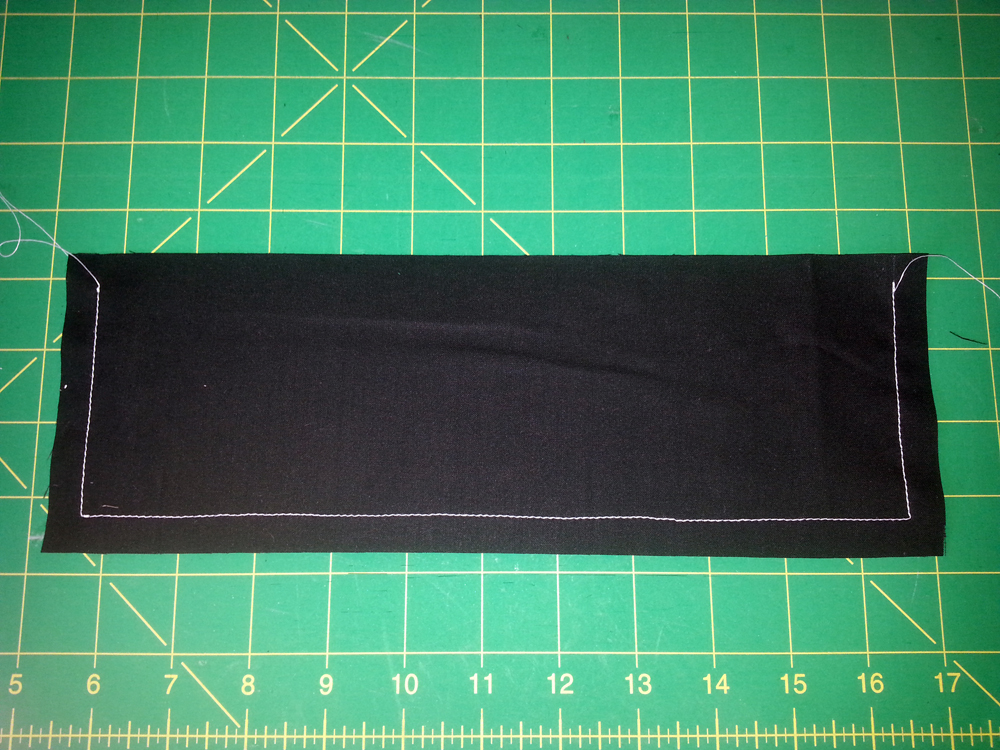 To construct a barrel cuff simply place the two pieces right-sides together and stitch around the sides and lower edge. It is important to have crisp corners on a barrel cuff, so again, marking your stitching line may be helpful. I’ve used white thread on black fabric here so you can easily see my stitches.
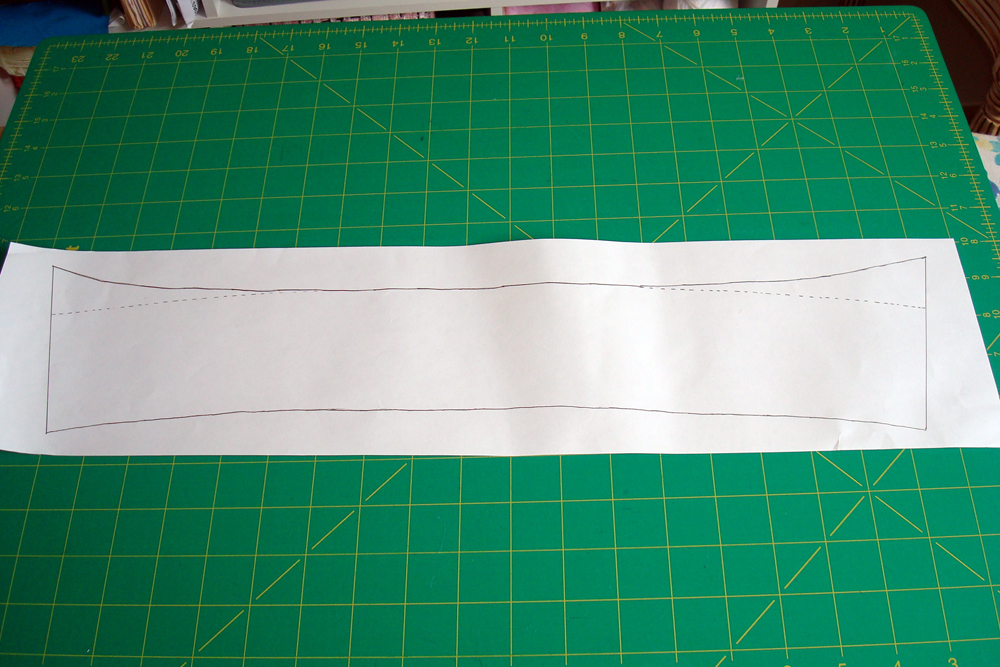
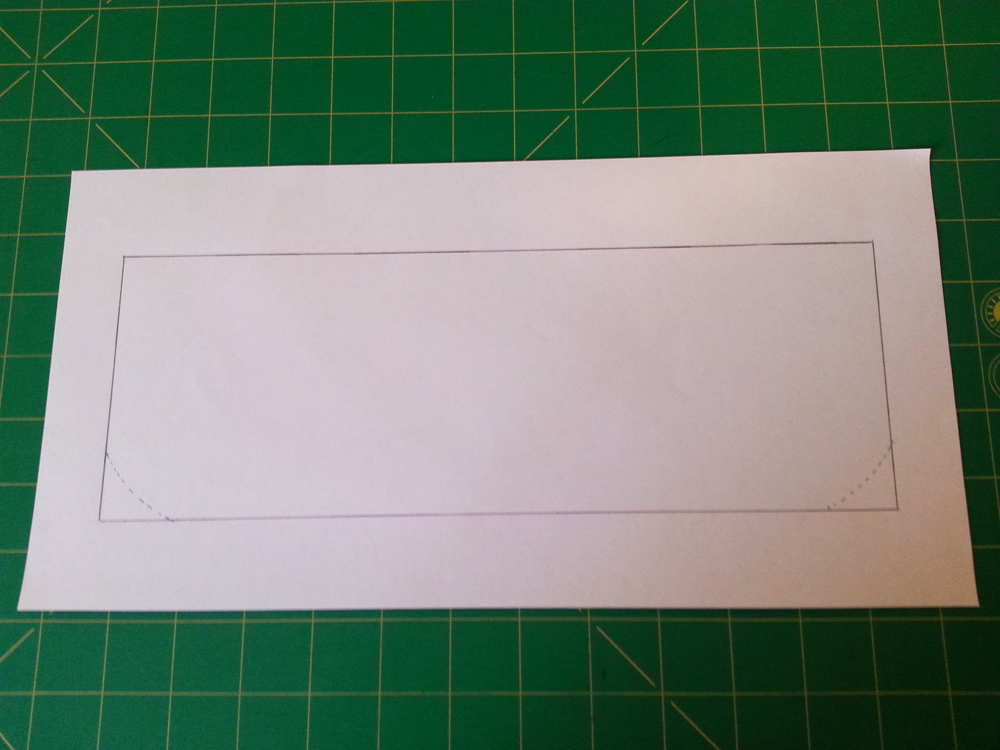 Another modification that can be made to the barrel cuff is to round the edges. Here’s how to modify your barrel cuff pattern piece. To do this, measure 1” over and 1” down from each upper corner of your pattern. Draw a curved line to connect the marks.
French Cuffs
 One way to make a men’s dress shirt even dressier is to add a French cuff. A French cuff is folded and can be made to wear with buttons or cuff links.
 To modify a barrel cuff pattern piece for a French cuff, simply double the length of the classic barrel cuff pattern piece. Construct this cuff just like a barrel cuff and then fold in half.
Portofino or Turnback Cuffs
 Another fancy cuff that can be added is the Portofino or Turnback cuff. It is also referred to as the James Bond cuff! This cuff is constructed similarly to the French cuff because you begin with a larger piece and fold it back; however, there is a small amount of shaping to be done to the pattern piece first.
 To modify the barrel cuff pattern piece for a James Bond cuff, simply double the length of the classic barrel cuff pattern piece and then round the edges following the instructions above.
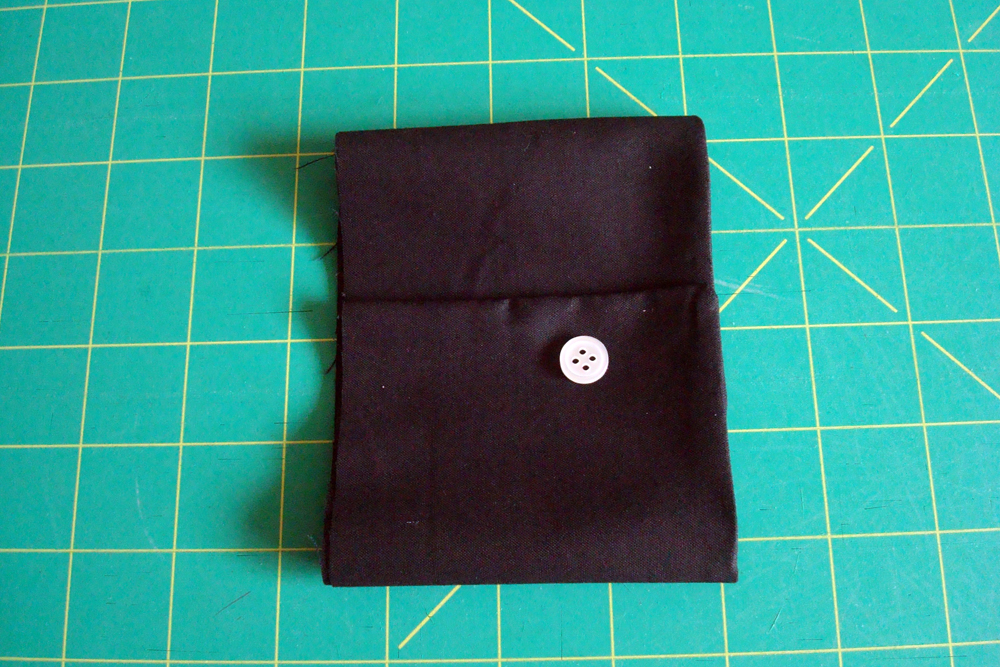
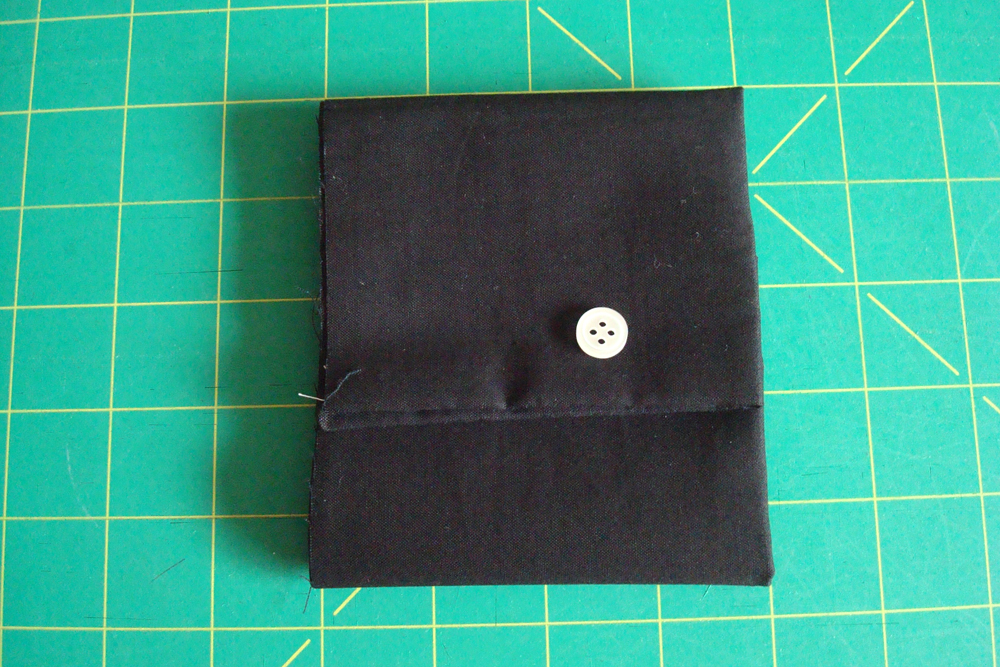
Classic Dress Pockets
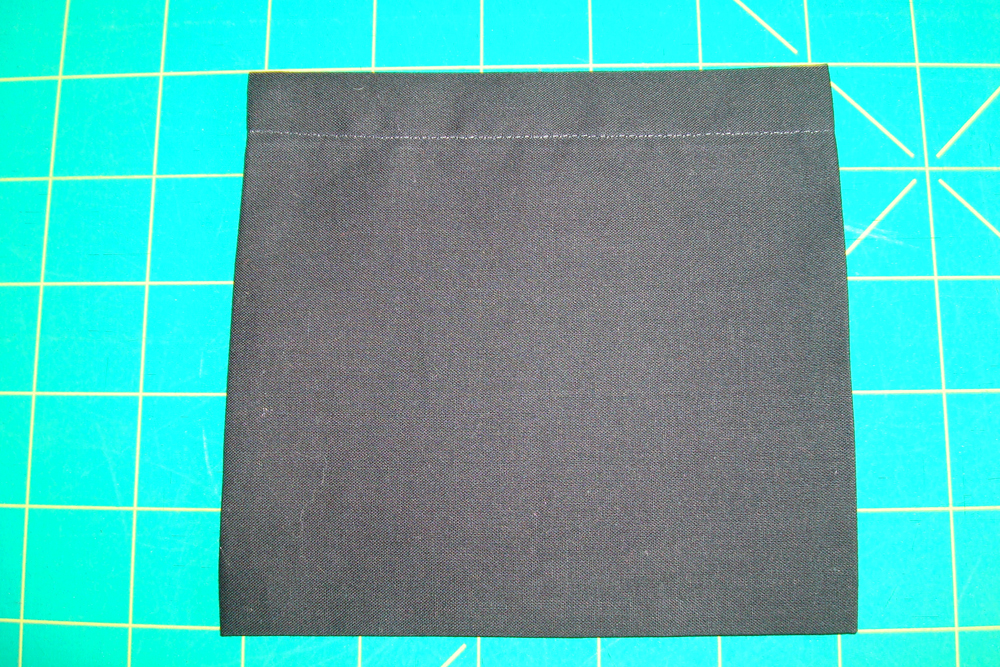
 The final finishing touch that can change the look of a men’s dress shirt is the pocket. Again, if following a commercial pattern, it will most likely have a classic dress pocket.
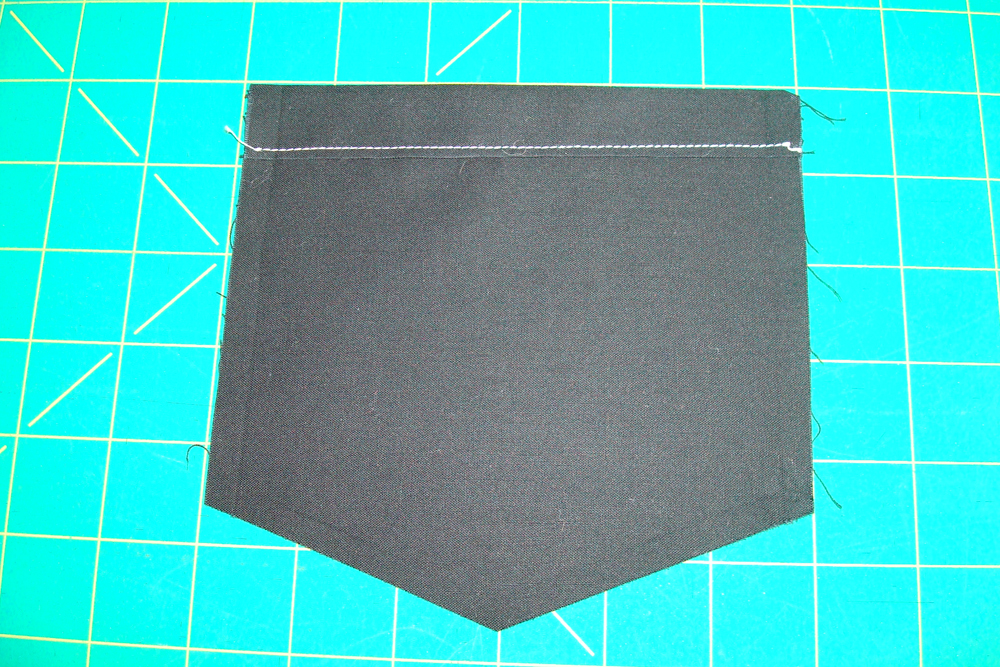 To construct this pocket, double fold the upper edge ½” toward the wrong side, press, and then edgestitch along the folded edge. Fold the remaining sides and lower edge ½” toward the wrong side and then press. The pocket is now ready to be attached to the left front of the shirt.
Regular Pockets
 One modification that can be made to the classic pocket is to change the pocket bottom from a point to a straight edge. This can be referred to as a regular pocket.
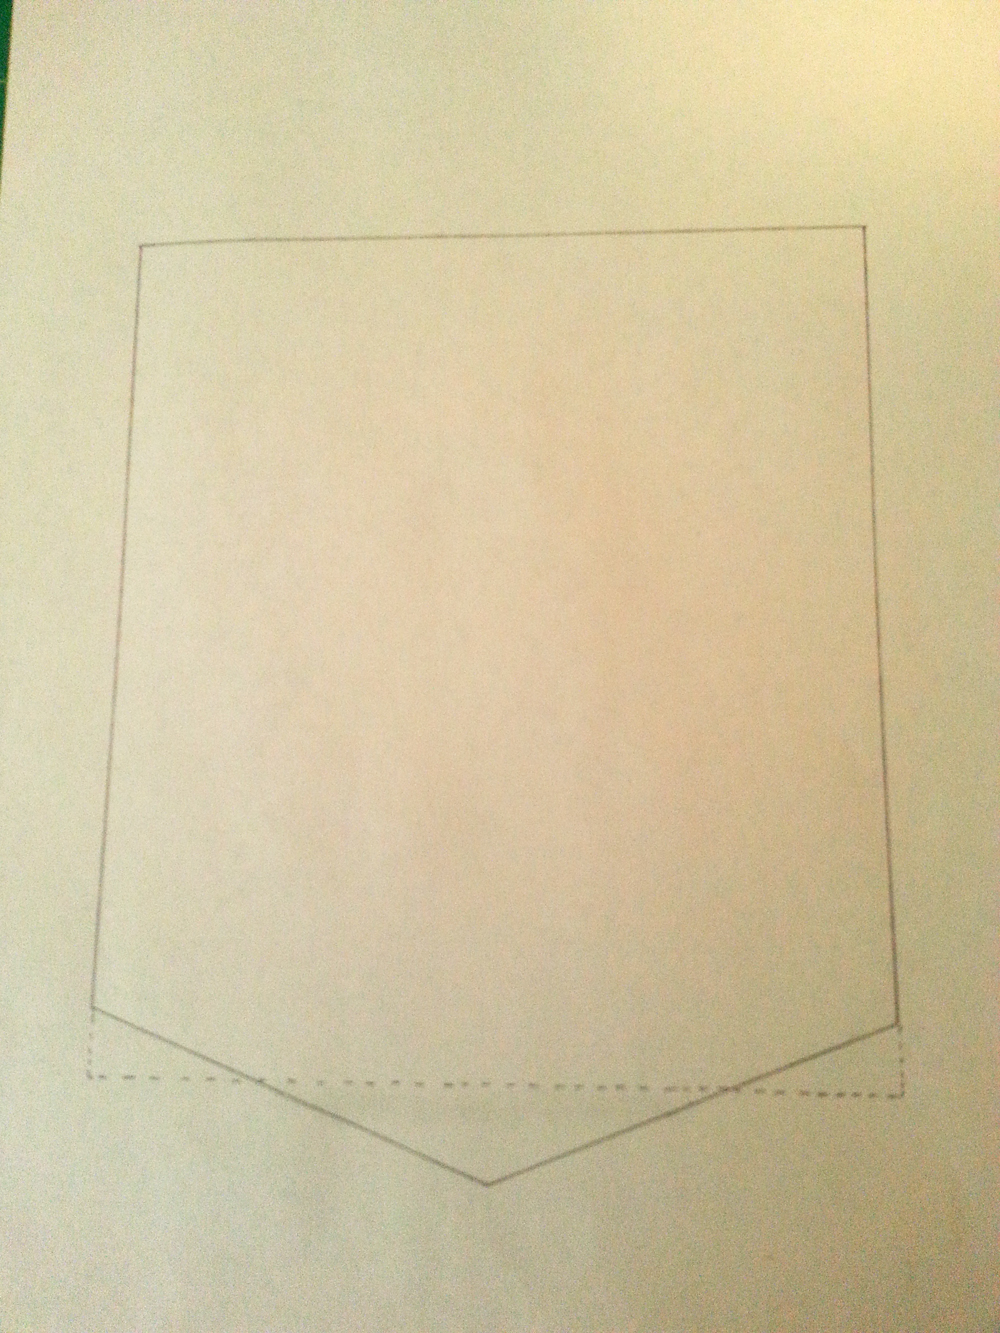 To modify the pattern piece for a regular pocket, extend each pocket side by ½” and then draw a straight line across the pocket bottom.
Pleated Pockets
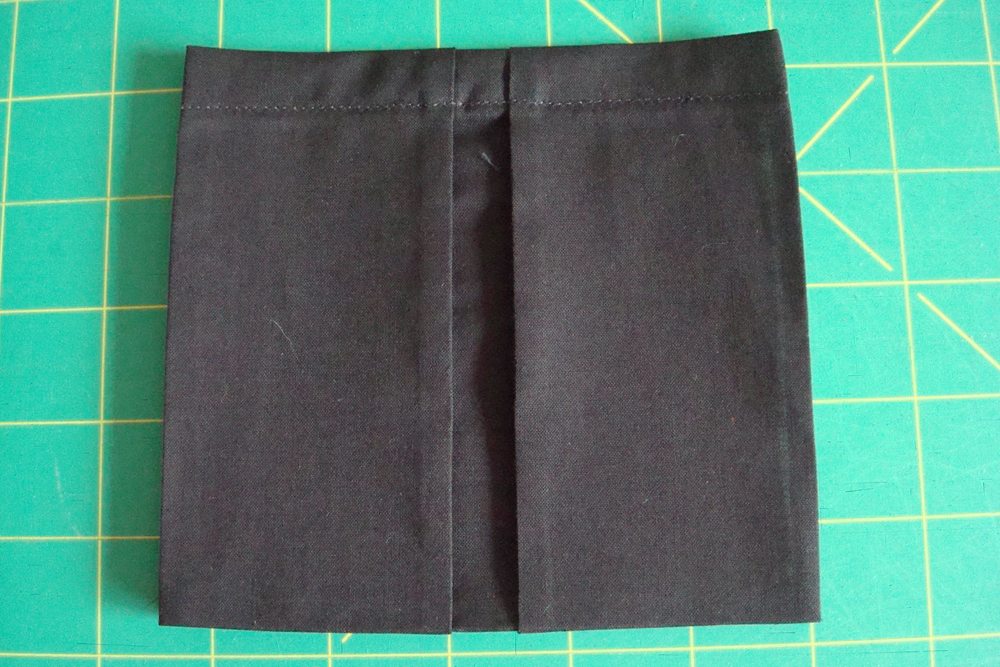 Another modification that can be made to the pocket is to add a pleat. This is known as an inverted pleat.
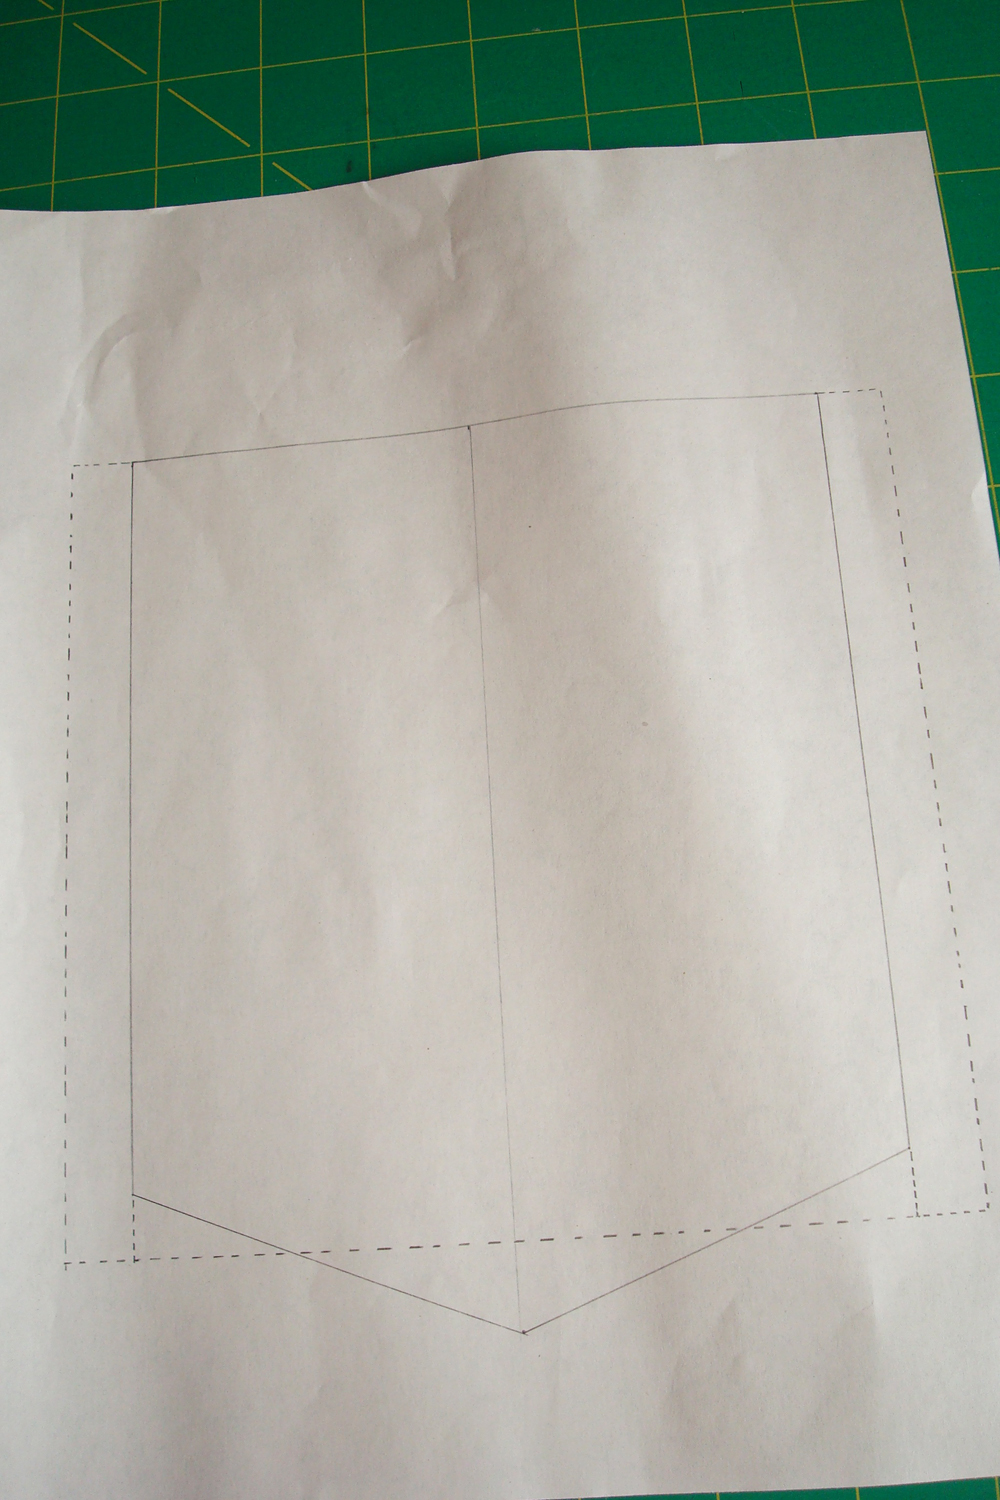 To modify your pattern piece for an inverted pleat, follow the instructions above to create a flat pocket bottom, and then extend the pocket width by ½” on each side.
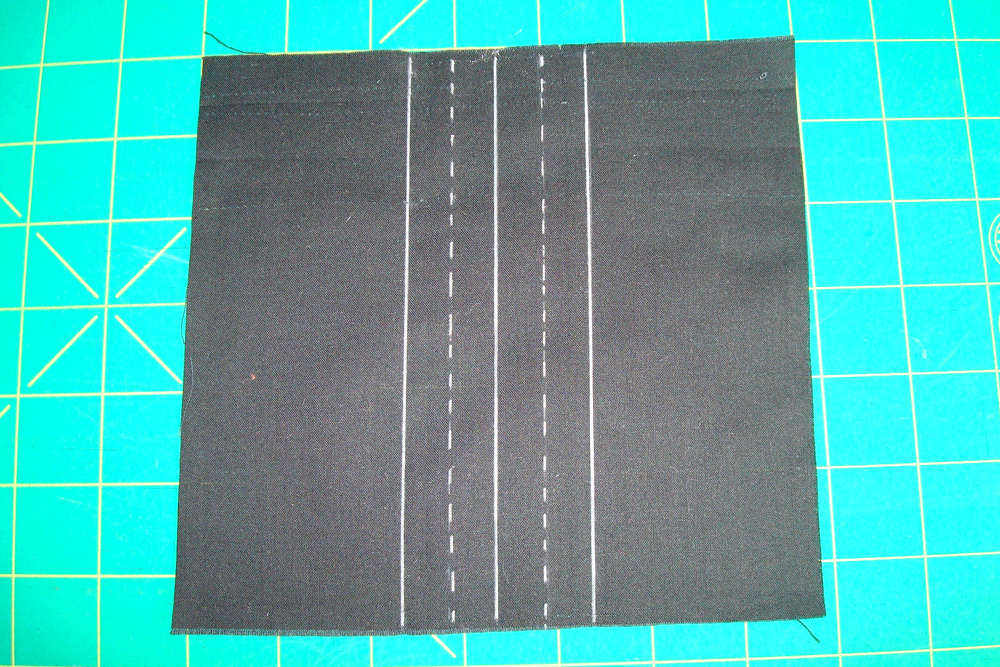 On the wrong side, draw a solid vertical line down the pocket center. Measure ½” on either side of the mark and draw a dotted line. Measure another ½” out on either side of the dotted line and draw another solid line.
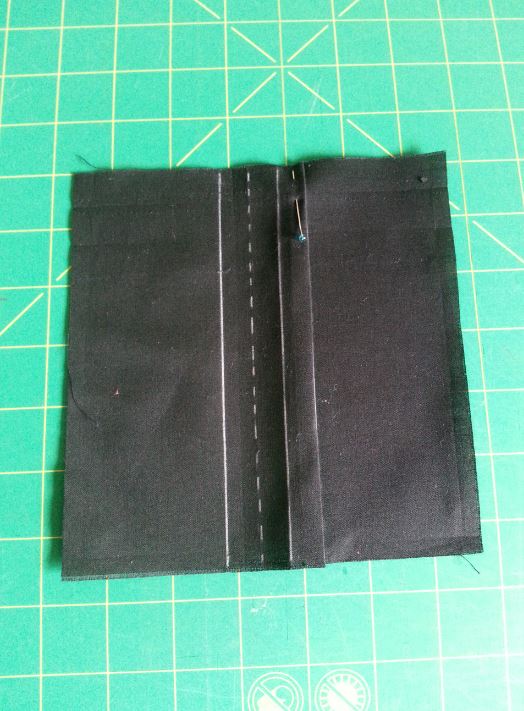 Fold the dotted line out towards the solid line.
 Repeat with the other side and then baste in place.
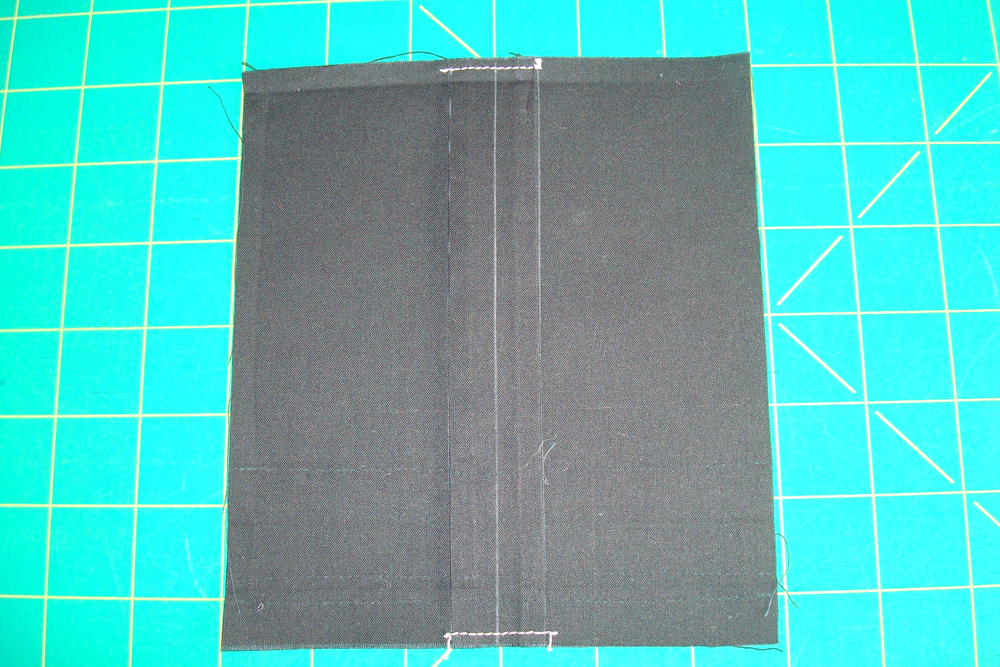
The pocket is now ready to be constructed just like the others by double-folding the top edge and edgestitching, and then folding the sides and bottom ½” toward the wrong side.
Even after all of these variations, there are still dozens more. Once you’ve mastered these shirt essentials with the regular or commercial pattern pieces change it up and try something new!
Related Video: Making Lined Patch Pocket Patterns
Get in touch! Leave a comment or email editor@nationalsewingcircle.com.

How do I make Vneck + collar
How do I put a pocket on stretch pants?
This is absolutely great!! I've been setting up my sewing room for awhile now so while I'm waiting on all my supplies to arrive I've been on the internet trying to find video's that show & explains the "how to" in sewing patterns, making/altering patterns etc, I have to say this is the best most easily understandable video's & written theory of sewing patterns I've come across & it takes me awhile to understand thing's as I have literacy issues so that's very good for not only me but everyone as we're not rereading cause of being confused. So I've just signed up for the year! As I'm very happy & in hopeful I'll be learning heaps more here!! 👍😁💯
Good information. However, the first few pictures just look like white rectangles. The photos need to be enlarged to see the dotted lines of the alterations. Also, interfacing is not mentioned, unless I missed it.
An outstanding share! I've just forwarded this onto a coworker who was doing a little homework on this. And he in fact ordered me breakfast due to the fact that I stumbled upon it for him... lol. So allow me to reword this.... Thank YOU for the meal!! But yeah, thanx for spending some time to discuss this issue here on your blog.
I would like to begin a t shirt quilt for my three children I have a serger and husquaverna
Useful and keep updates and educate more
Where is the collar stand on your example? I'm making shirts at the moment and have never sewn an oblong with points straight onto the body of a shirt. There are 2 pieces plus interlining for the oblong piece with the pointed corners and 2 pieces interlined for the collar stand which need attaching to each other before being attached to the body of the shirt. I can't envisage a good fit without a collar stand? Also, at the corners of the oblong piece I would suggest just one stitch at a 45 ° angle to the seam line at each corner, which would help when turning right side out to help stop the corners popping when trying to get a good point.
Where is the collar stand on your example? I'm making shirts at the moment and have never sewn an oblong with points straight onto the body of a shirt. There are 2 pieces plus interlining for the oblong piece with the pointed corners and 2 pieces interlined for the collar stand which need attaching to each other before being attached to the body of the shirt. I can't envisage a good fit without a collar stand?
Hi, I would llike to sew polo shirts. I need to know where can I find collars and cuffs for polo shirts. I cannot find them in my area. Could you please help me. Thank you, Catherine