If you’re interested in learning how to sew stuffed animals, hand-sewn stuffed toys are great for simple weekend projects or last-minute gift ideas for little ones, and they are easy to customize using coloring pages as patterns!
You’ll need access to a printer and scanner or some sort of image enlarger to transfer your coloring book image to a sheet of paper for the pattern, but after that all you’ll need is some fleece and a bit of stuffing to complete this project.
Let's Get Started!
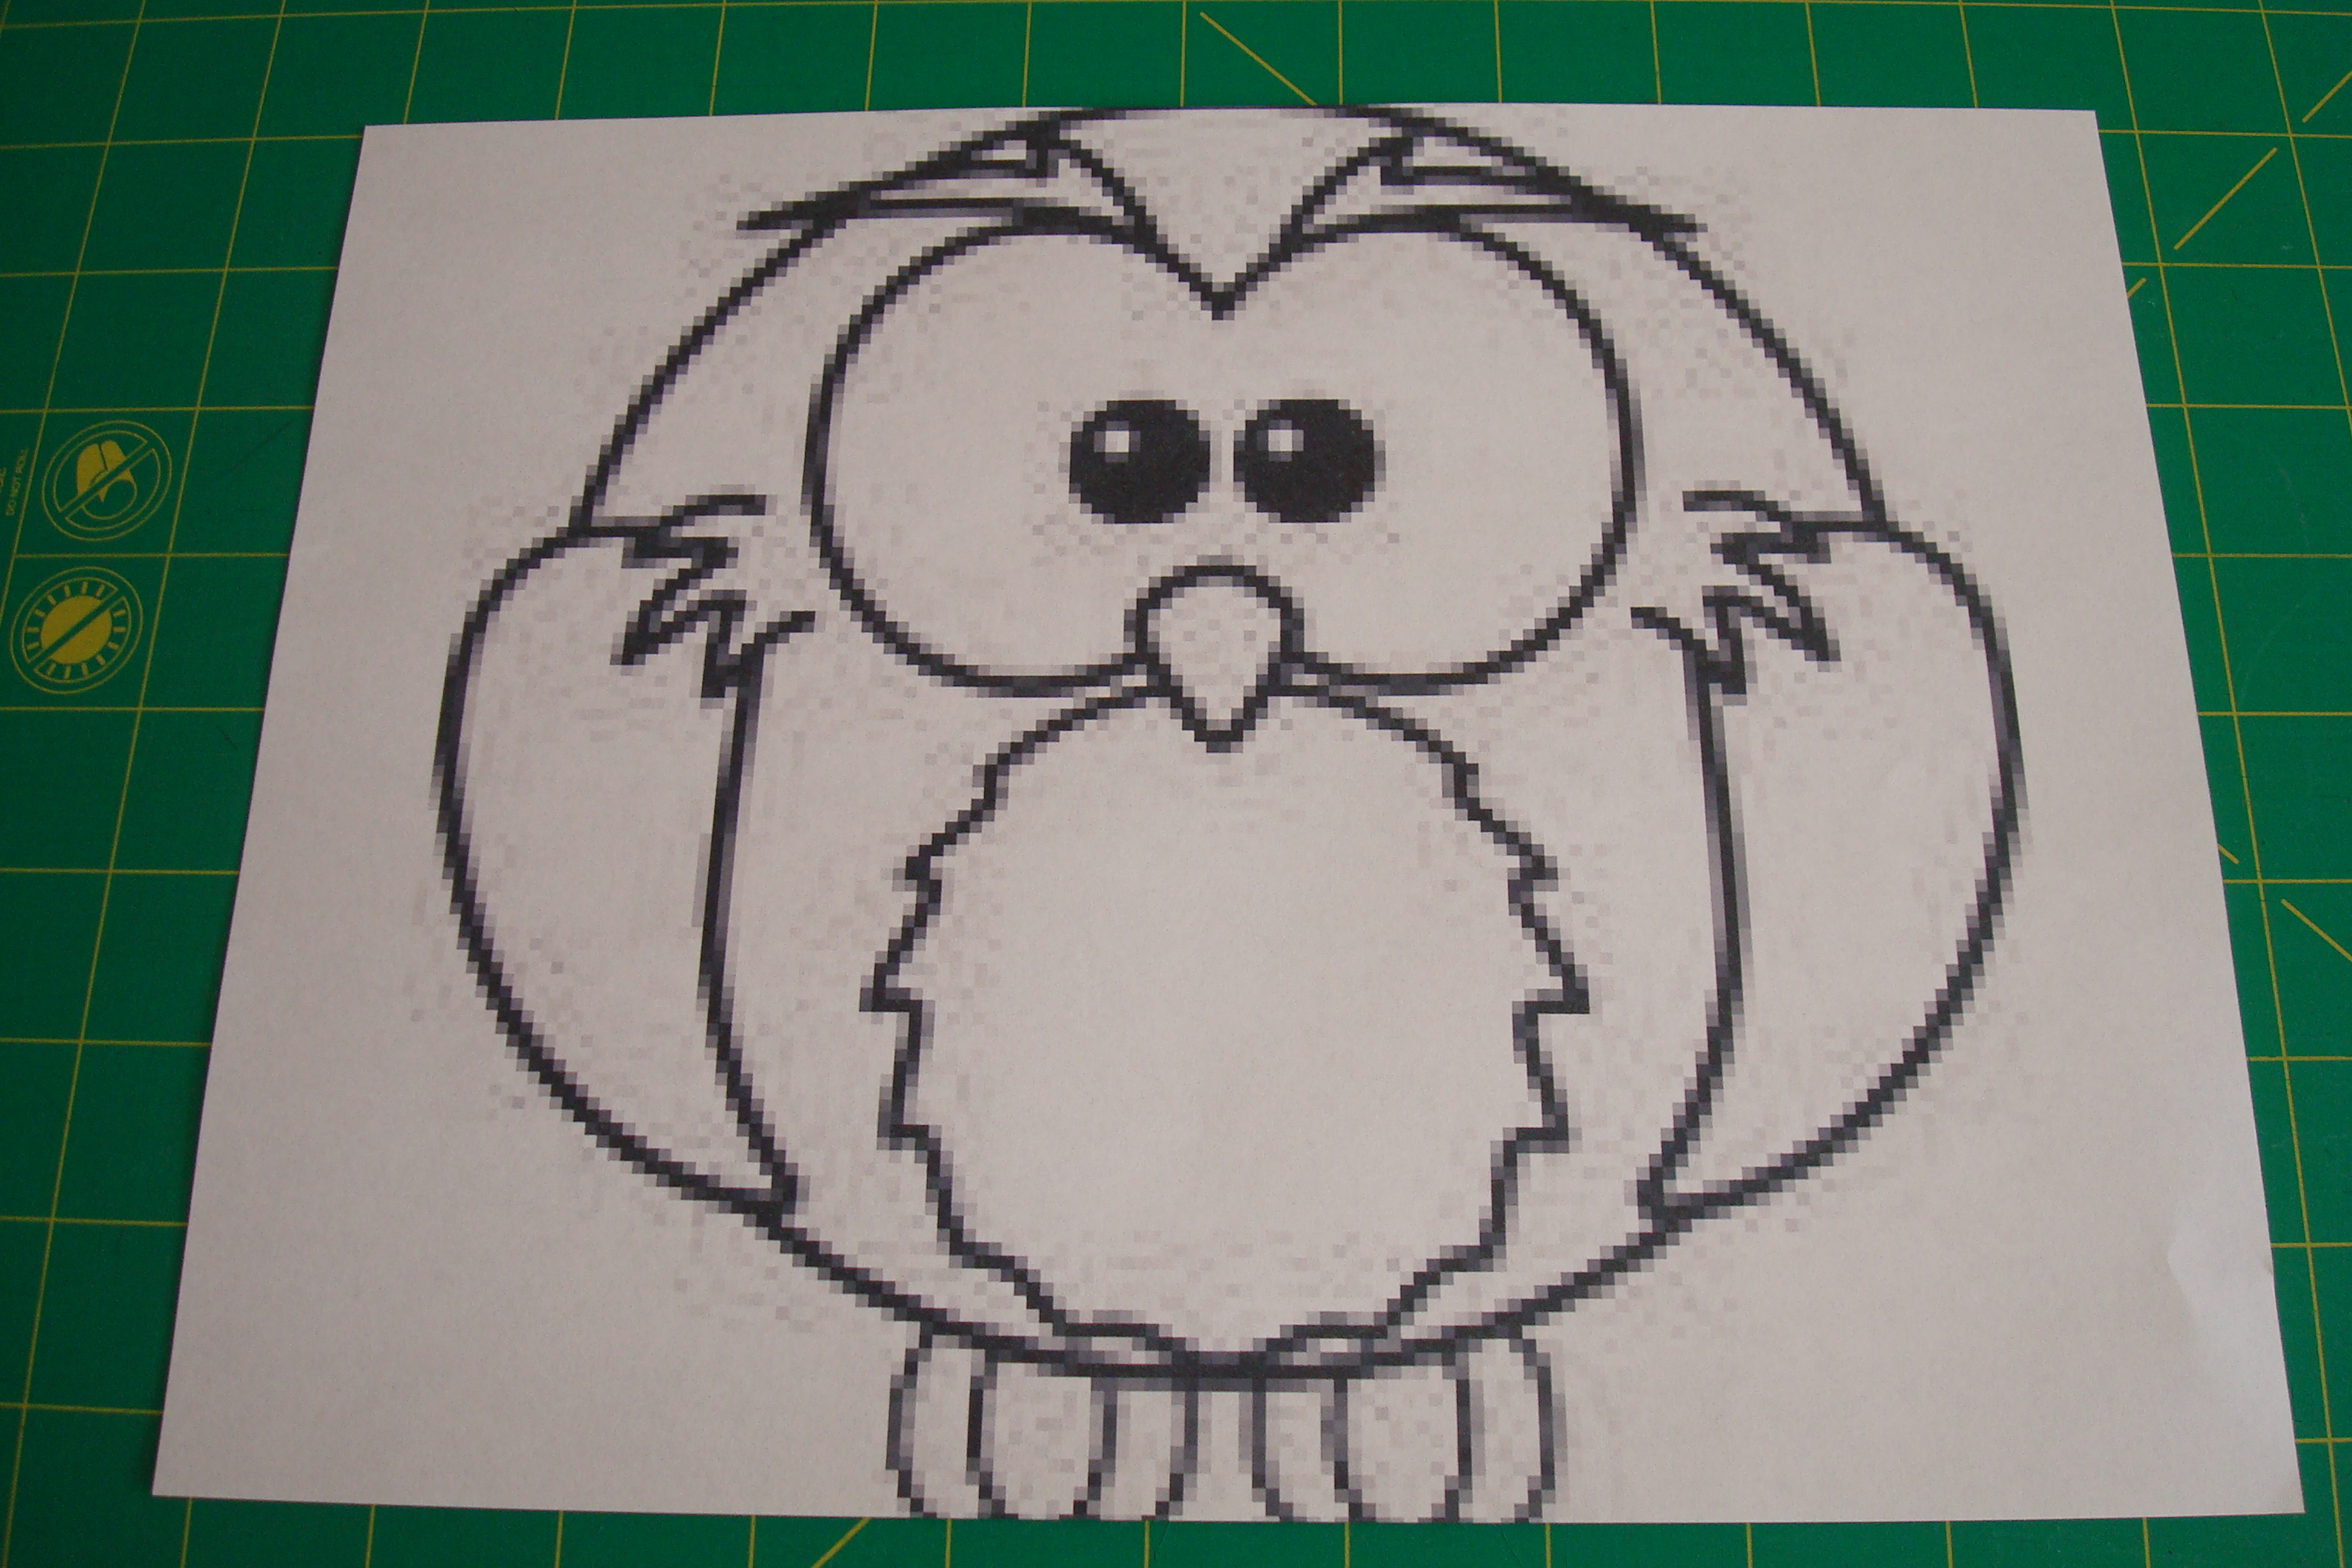
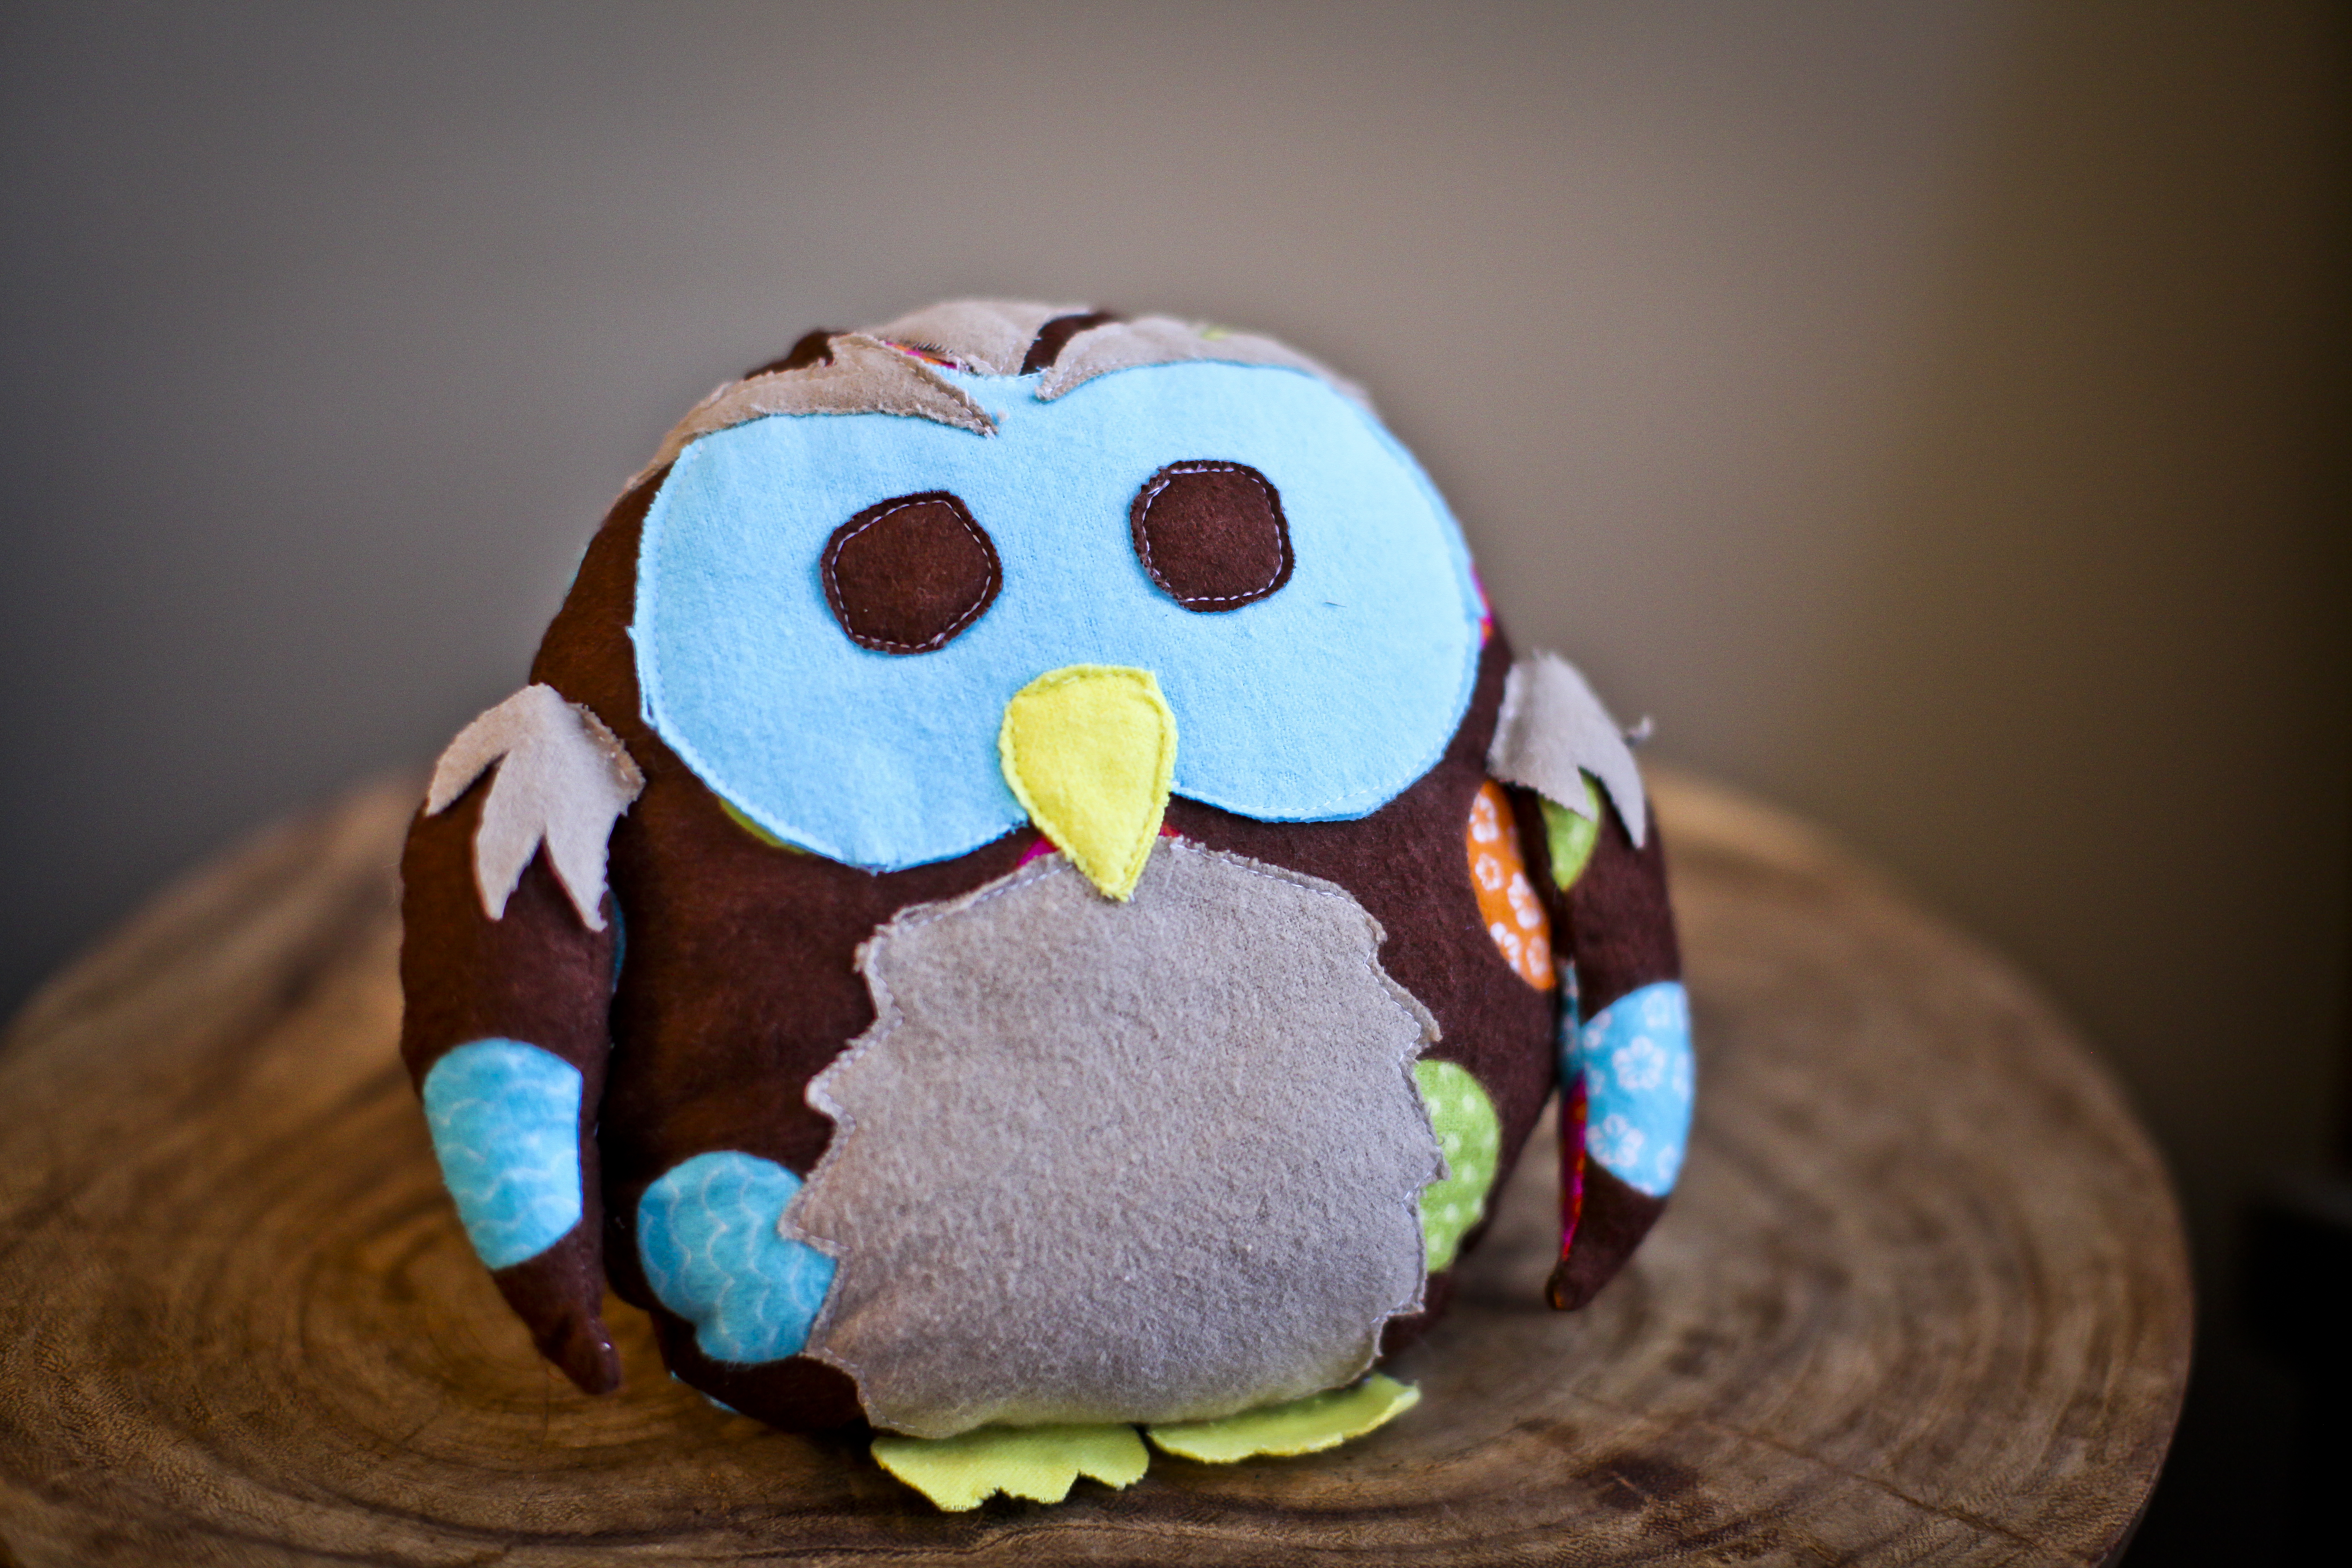
To begin, it’s important to pick the right kind of coloring page when you are learning how to sew stuffed animals with these types of patterns. You want one that has enough detail to be interesting, but not so much that it becomes too complicated to make. This little owl is a great example of a coloring page to use.
This owl picture was a very small coloring page that was enlarged to fit an 8 ½”x11” piece of paper, which is why it is slightly grainy. That’s okay though, since the coloring page will just be used as a guide for tracing your pattern pieces. So whichever coloring page you choose to use, feel free to enlarge it to whatever size you want.
For this project, we’ll focus on how I created the owl pattern and another cute little elephant pattern I found, but you can adapt these instructions to any cool coloring book image you like!
Owl Pattern
If you’d like to use the owl pattern featured in this project, click here to download it.
Step 1. First, lay a blank piece of paper over your resized coloring page and start tracing the basic body shape outline. When you get to the wing sections, skip them and continue tracing just the body shape.
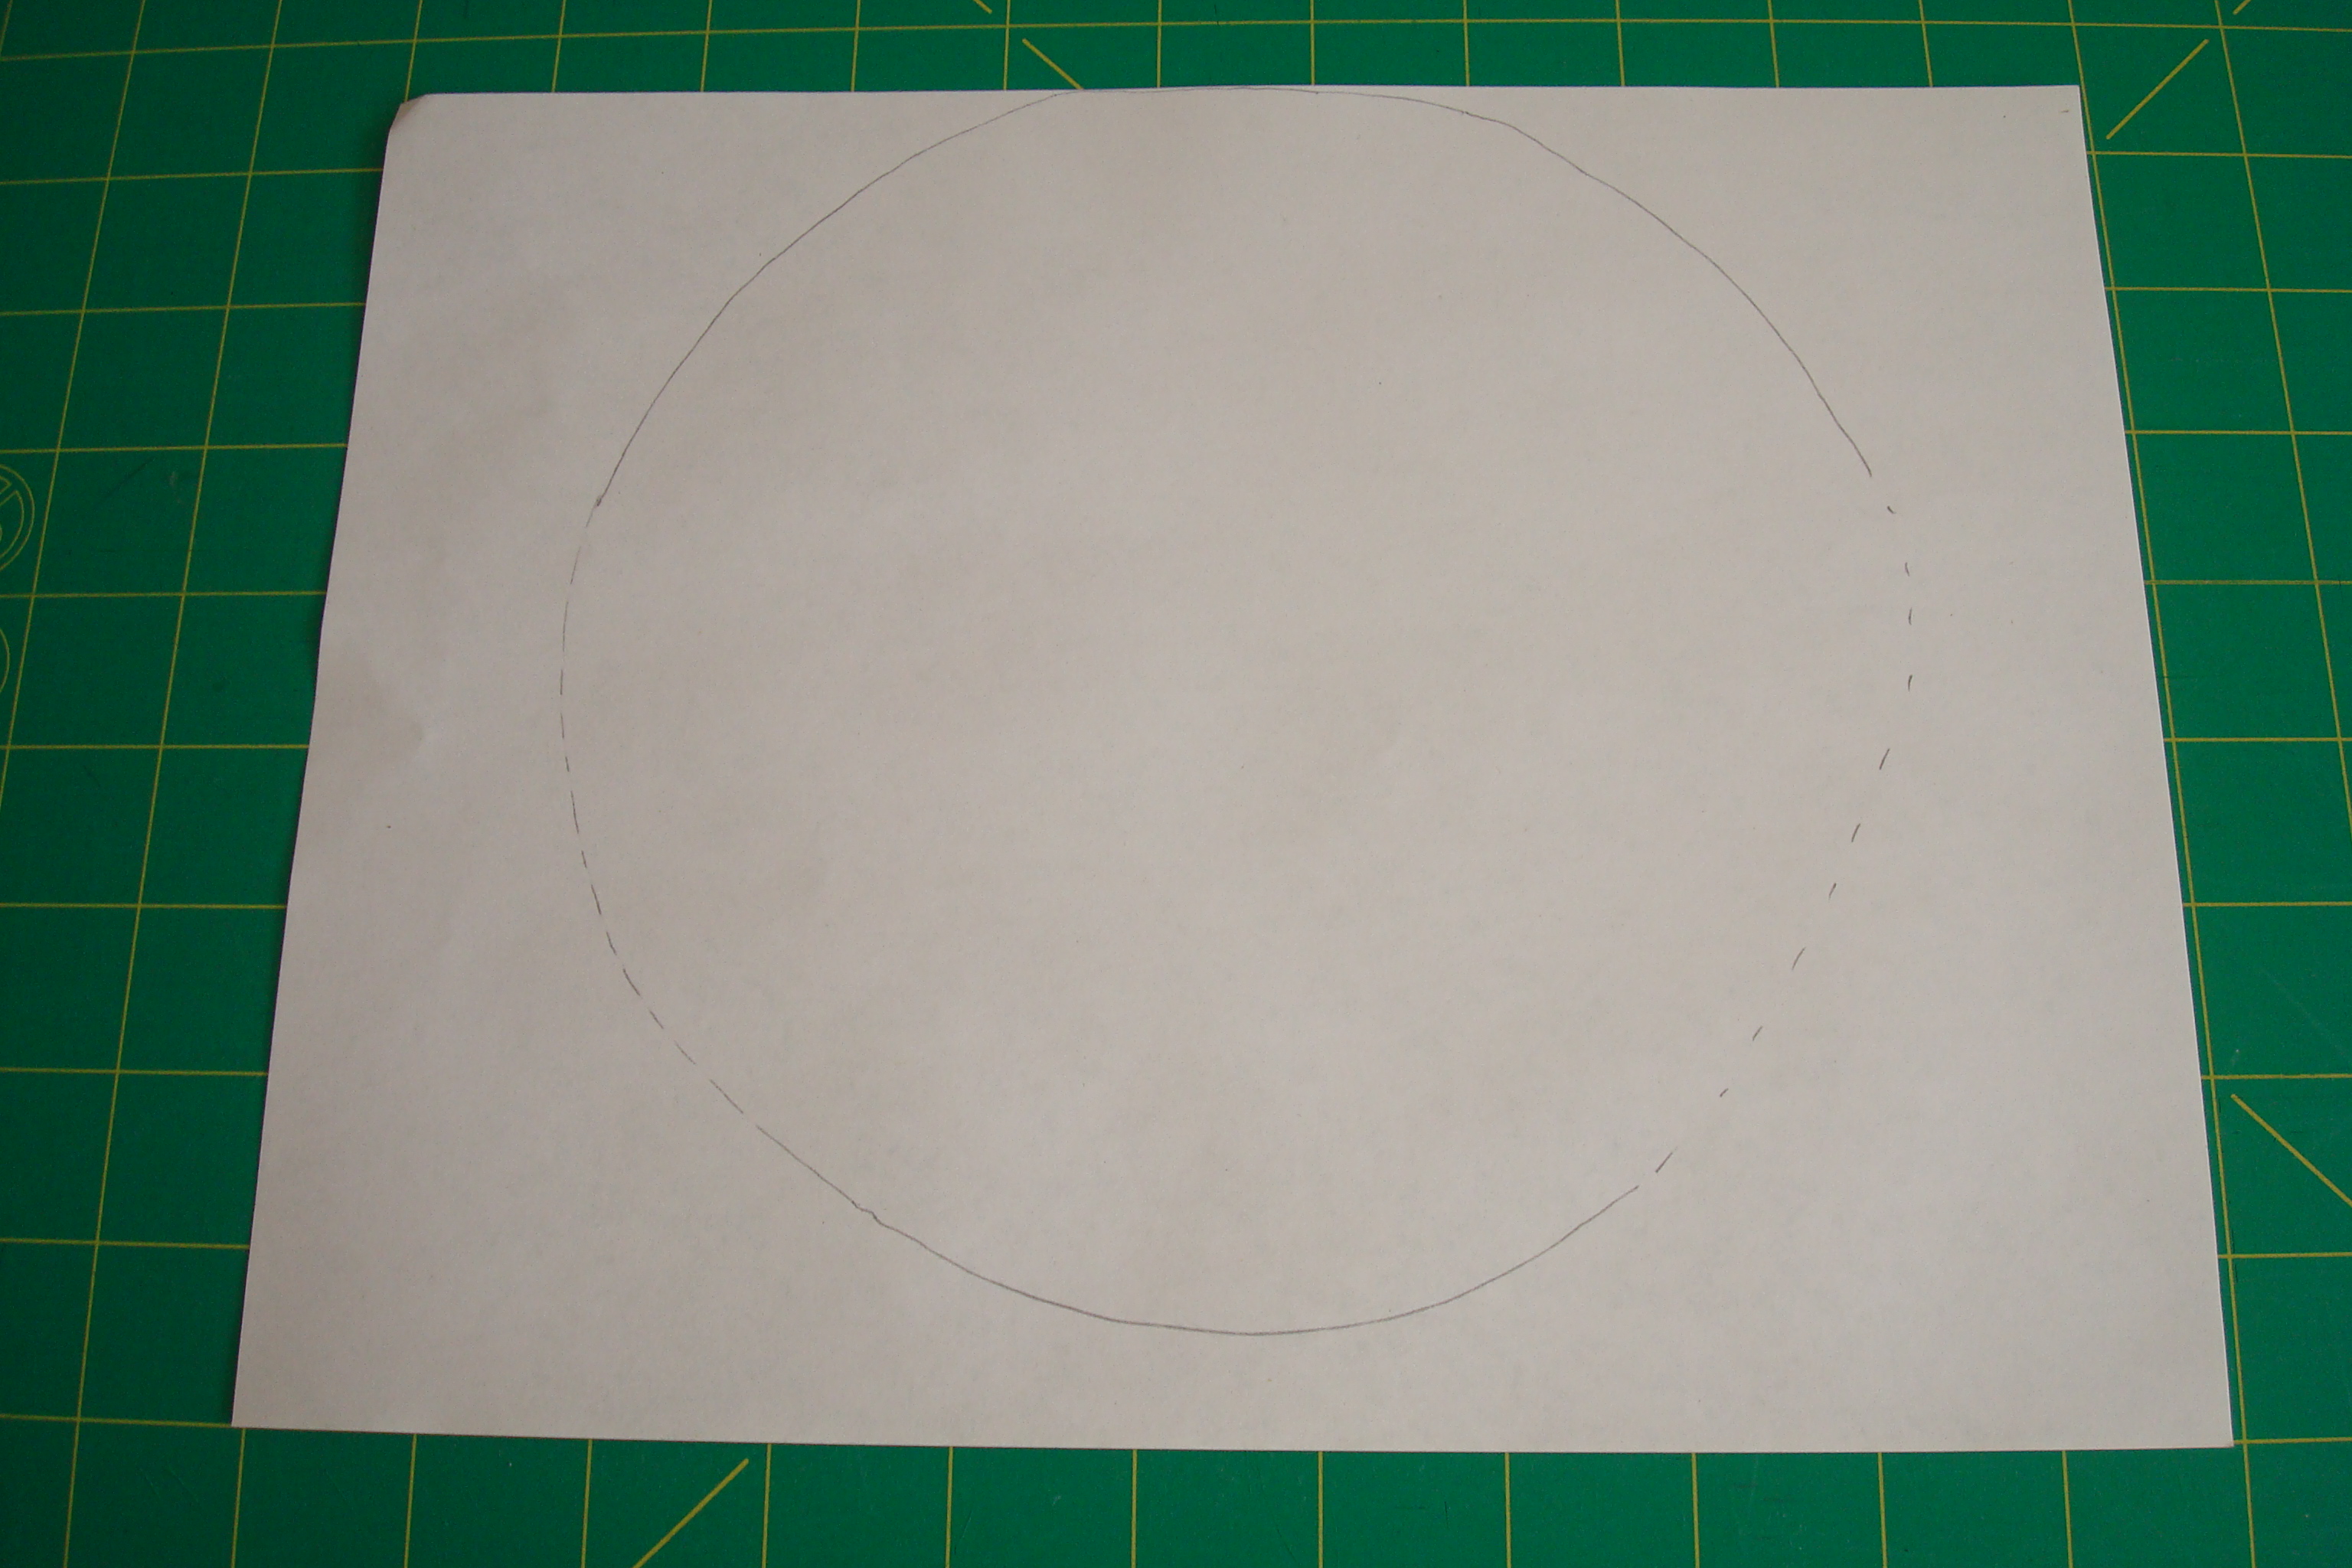
Step 2: Then, go back and connect the skipped areas with dotted lines as shown.

Step 3: Use the same method to trace all the other components of the owl. Then, cut out all the pattern pieces from the paper.
Step 4: Now it’s time to cut the pattern pieces out of your fabric. For these projects I used a fleece fabric. Fleece is nice and soft and also doesn’t fray, so you don’t have to worry about finishing any edges. You could also use felt or flannel.
TIP: For me the hardest part of the project was picking the colors. Don’t worry about trying to be too literal with your color choices, just have fun. If you know ahead of time you might have trouble picking colors, print off the coloring page and give it to a child to color. Then, stitch the toy according to the colors they used. Not only will you know its colors they like, but it’s a fun way to personalize it.
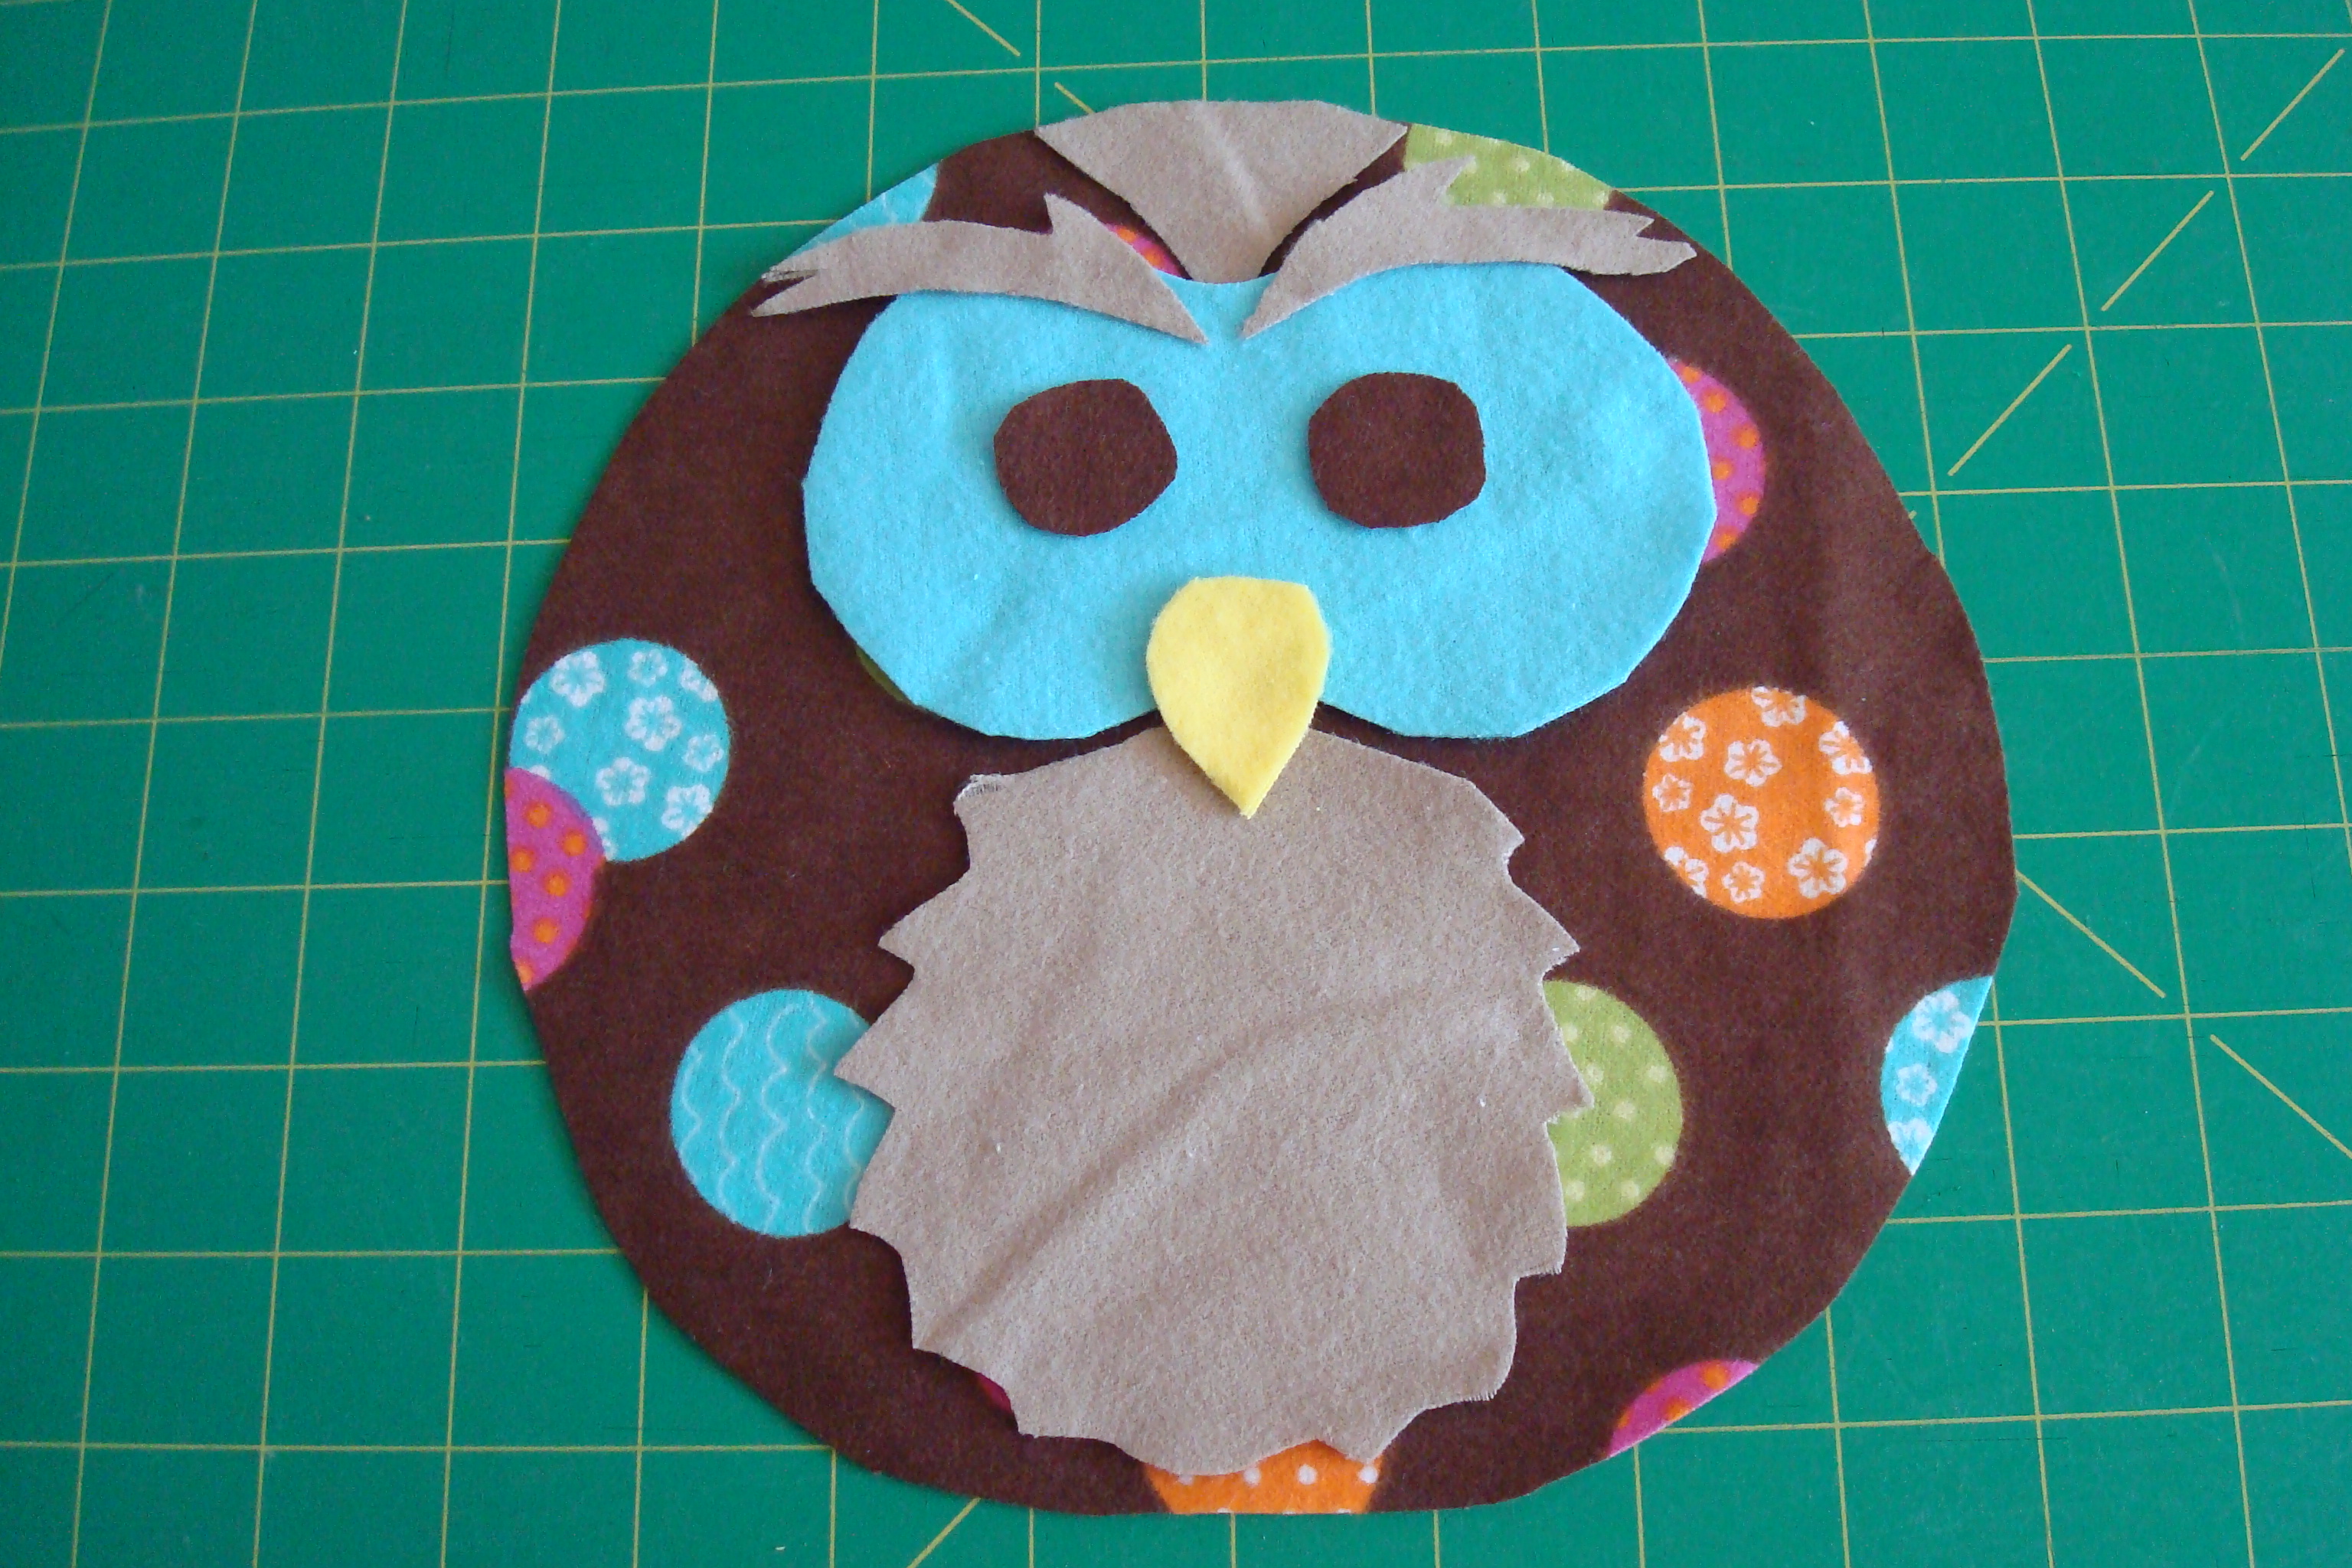
Step 5: For this particular owl pattern, you will need to cut out two body section pieces, two of each wing piece, and one of everything else. Once you have all the pieces cut out, lay the eye section, eyes, beak, eyebrows, stomach and head patch on one of the body pieces to match the coloring page.
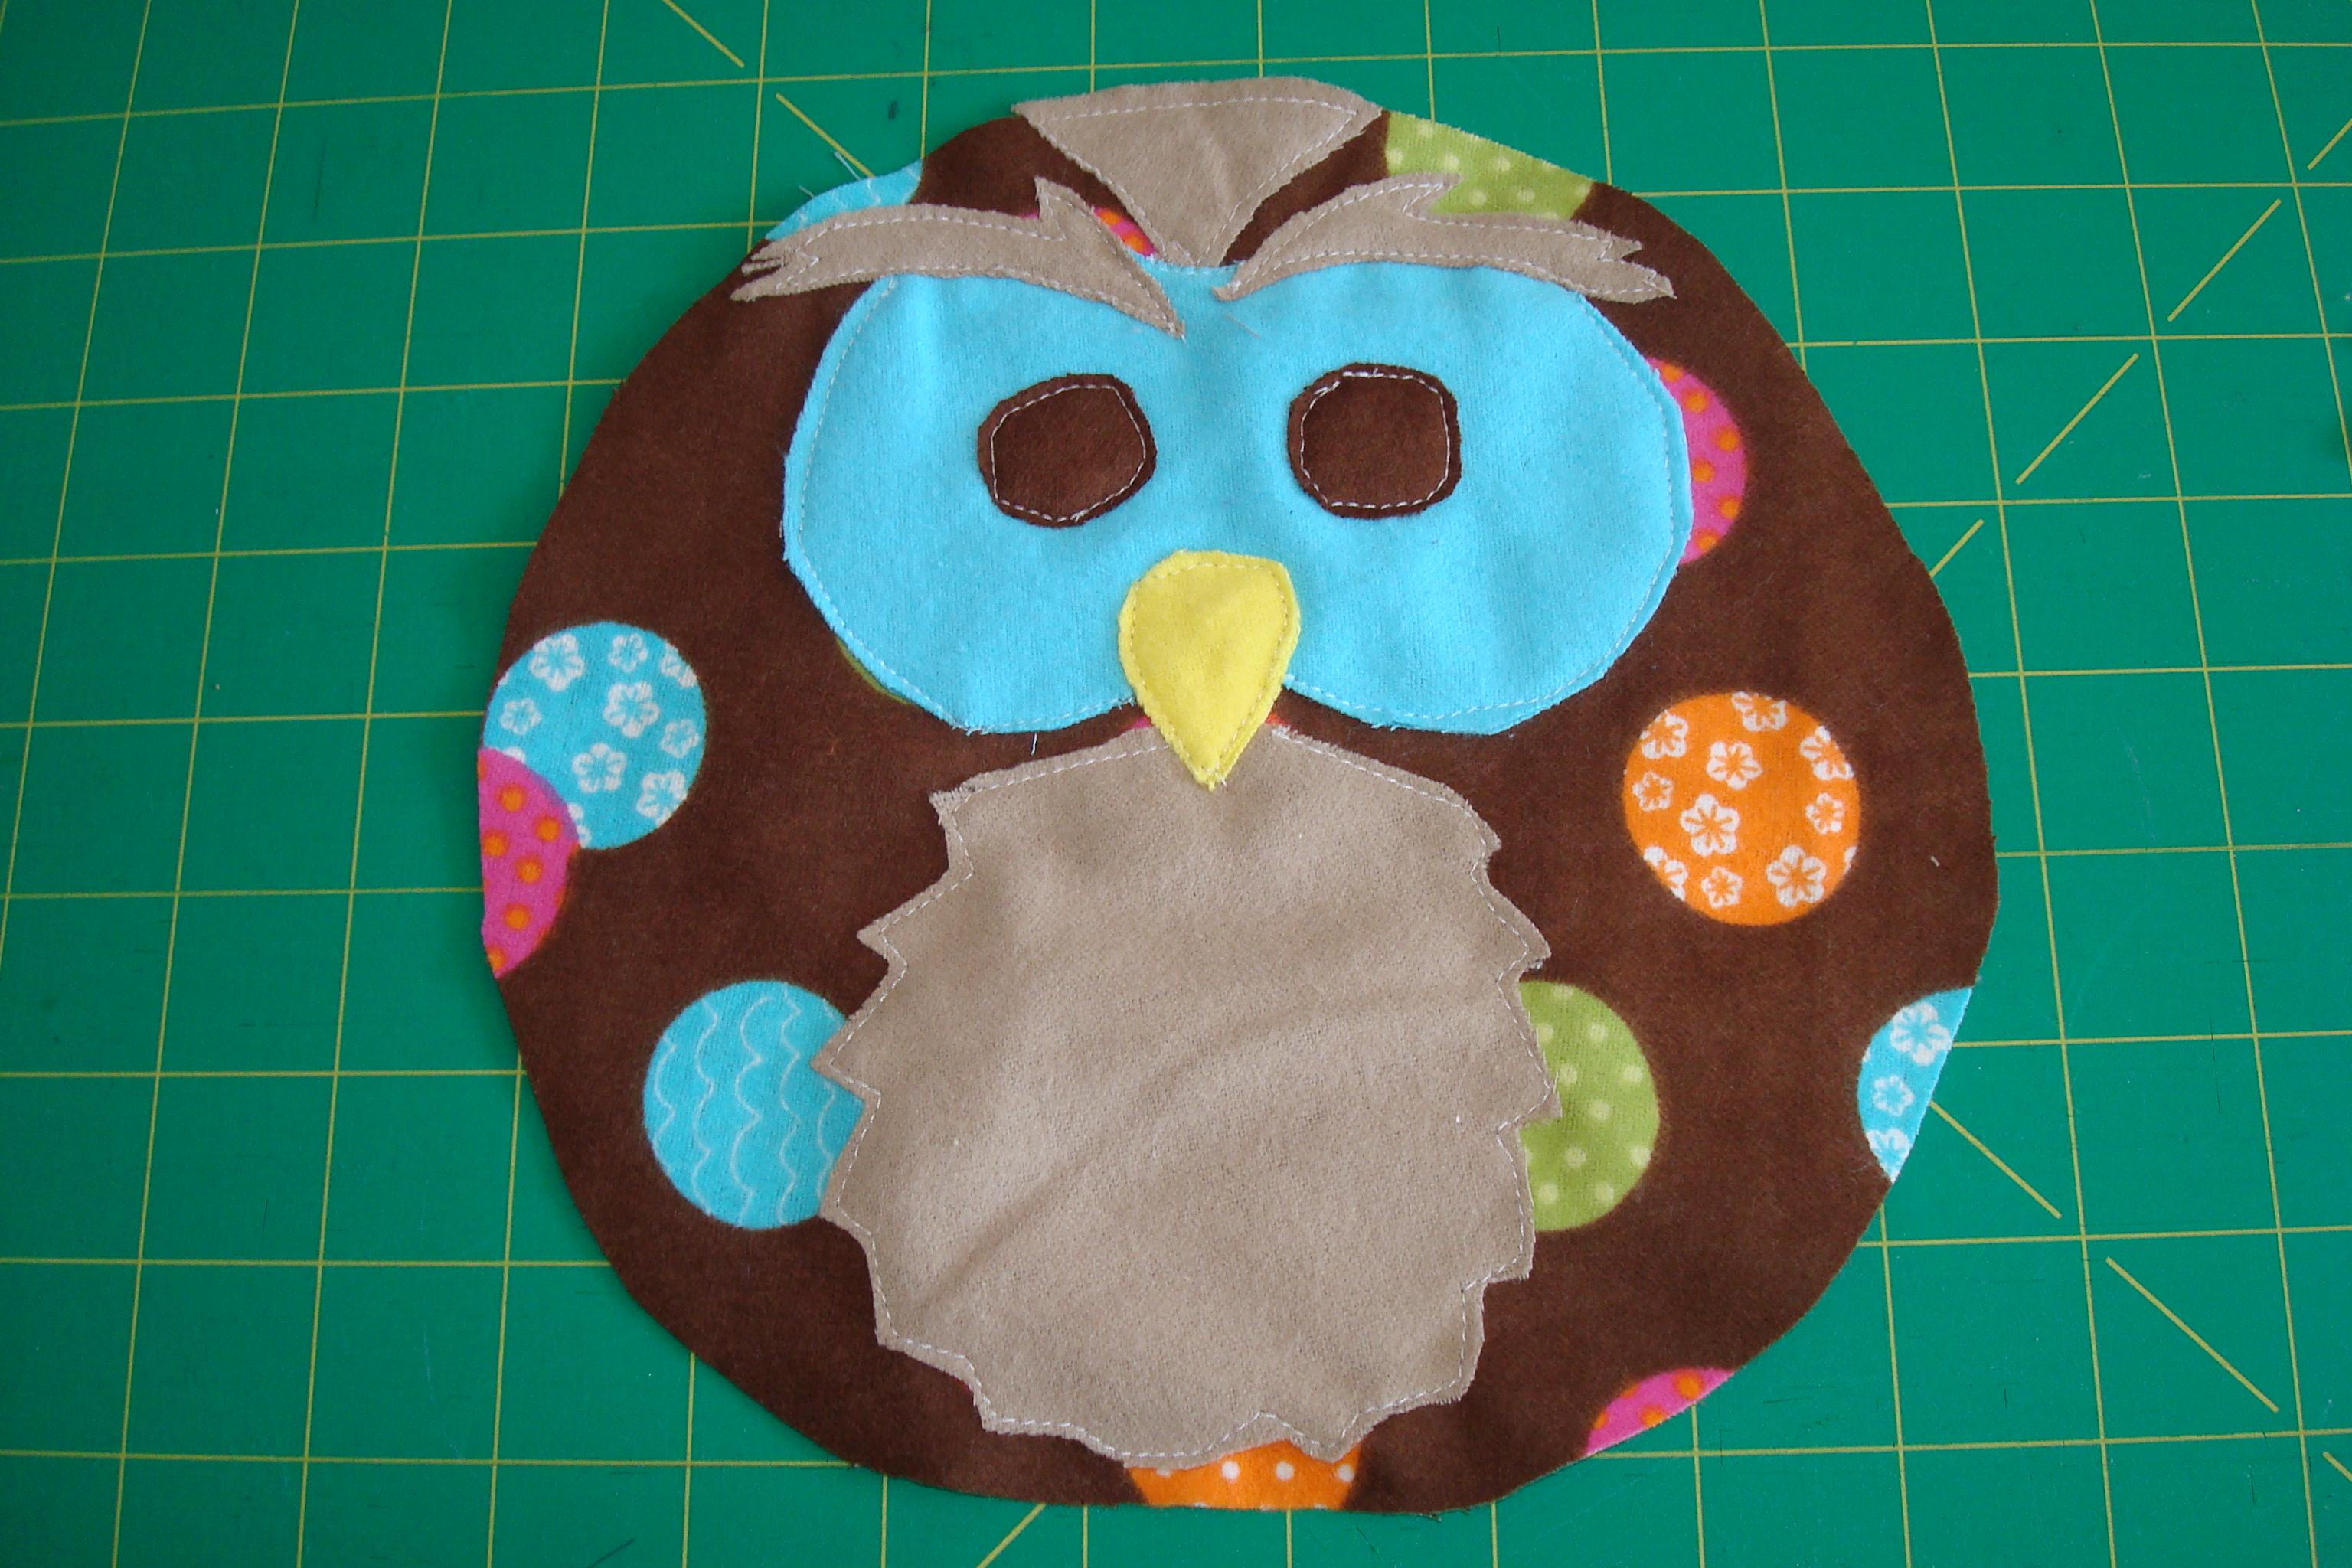
Step 6: Stitch the pieces in place using either a straight stitch or any other appliqué stitch you like.
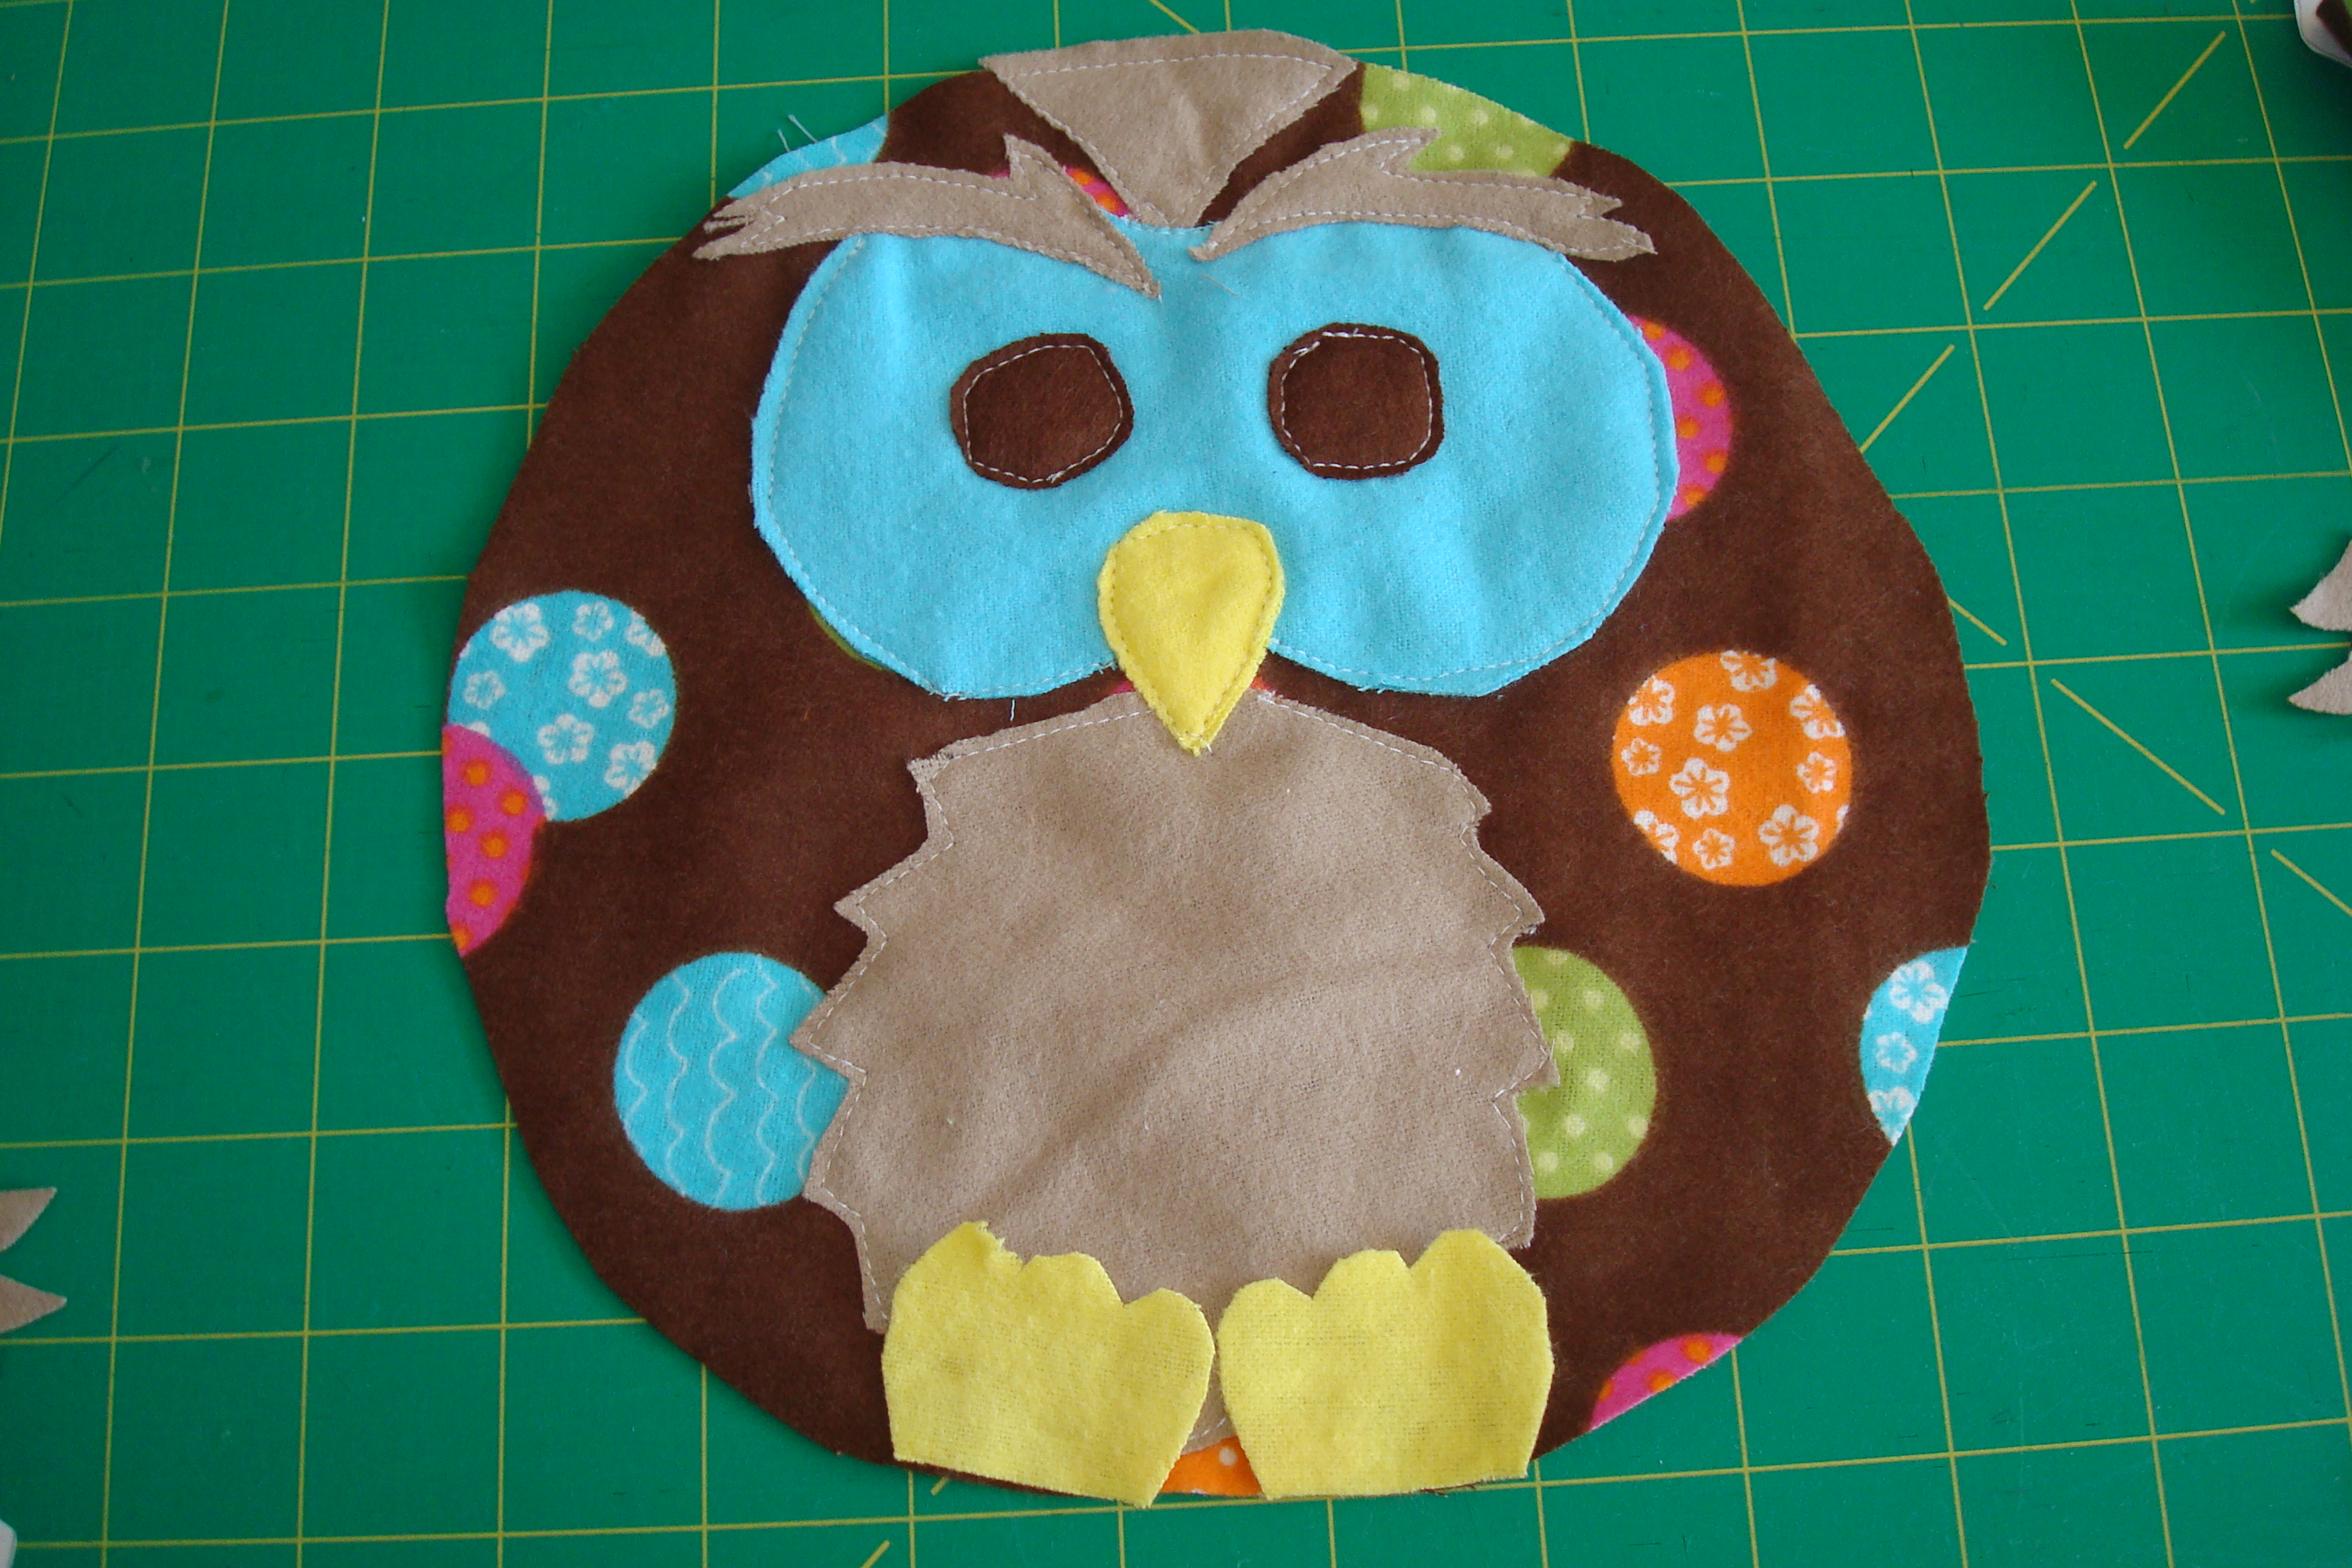
Step 7: Next, place the feet on the body piece lower edge as shown and pin in place. Place the two body pieces right sides together and stitch around the edge using a ¼” seam allowance. Leave approximately 3” unstitched for turning. Turn the owl right side out and stuff, and then machine or hand stitch the opening closed.
Step 8: Place the two wing pieces right sides together and stitch around the edge using a ¼” seam allowance. Leave approximately 2” unstitched for turning. Turn the wing right side out and stuff, and then machine or hand stitch the opening closed. Repeat with the remaining wing.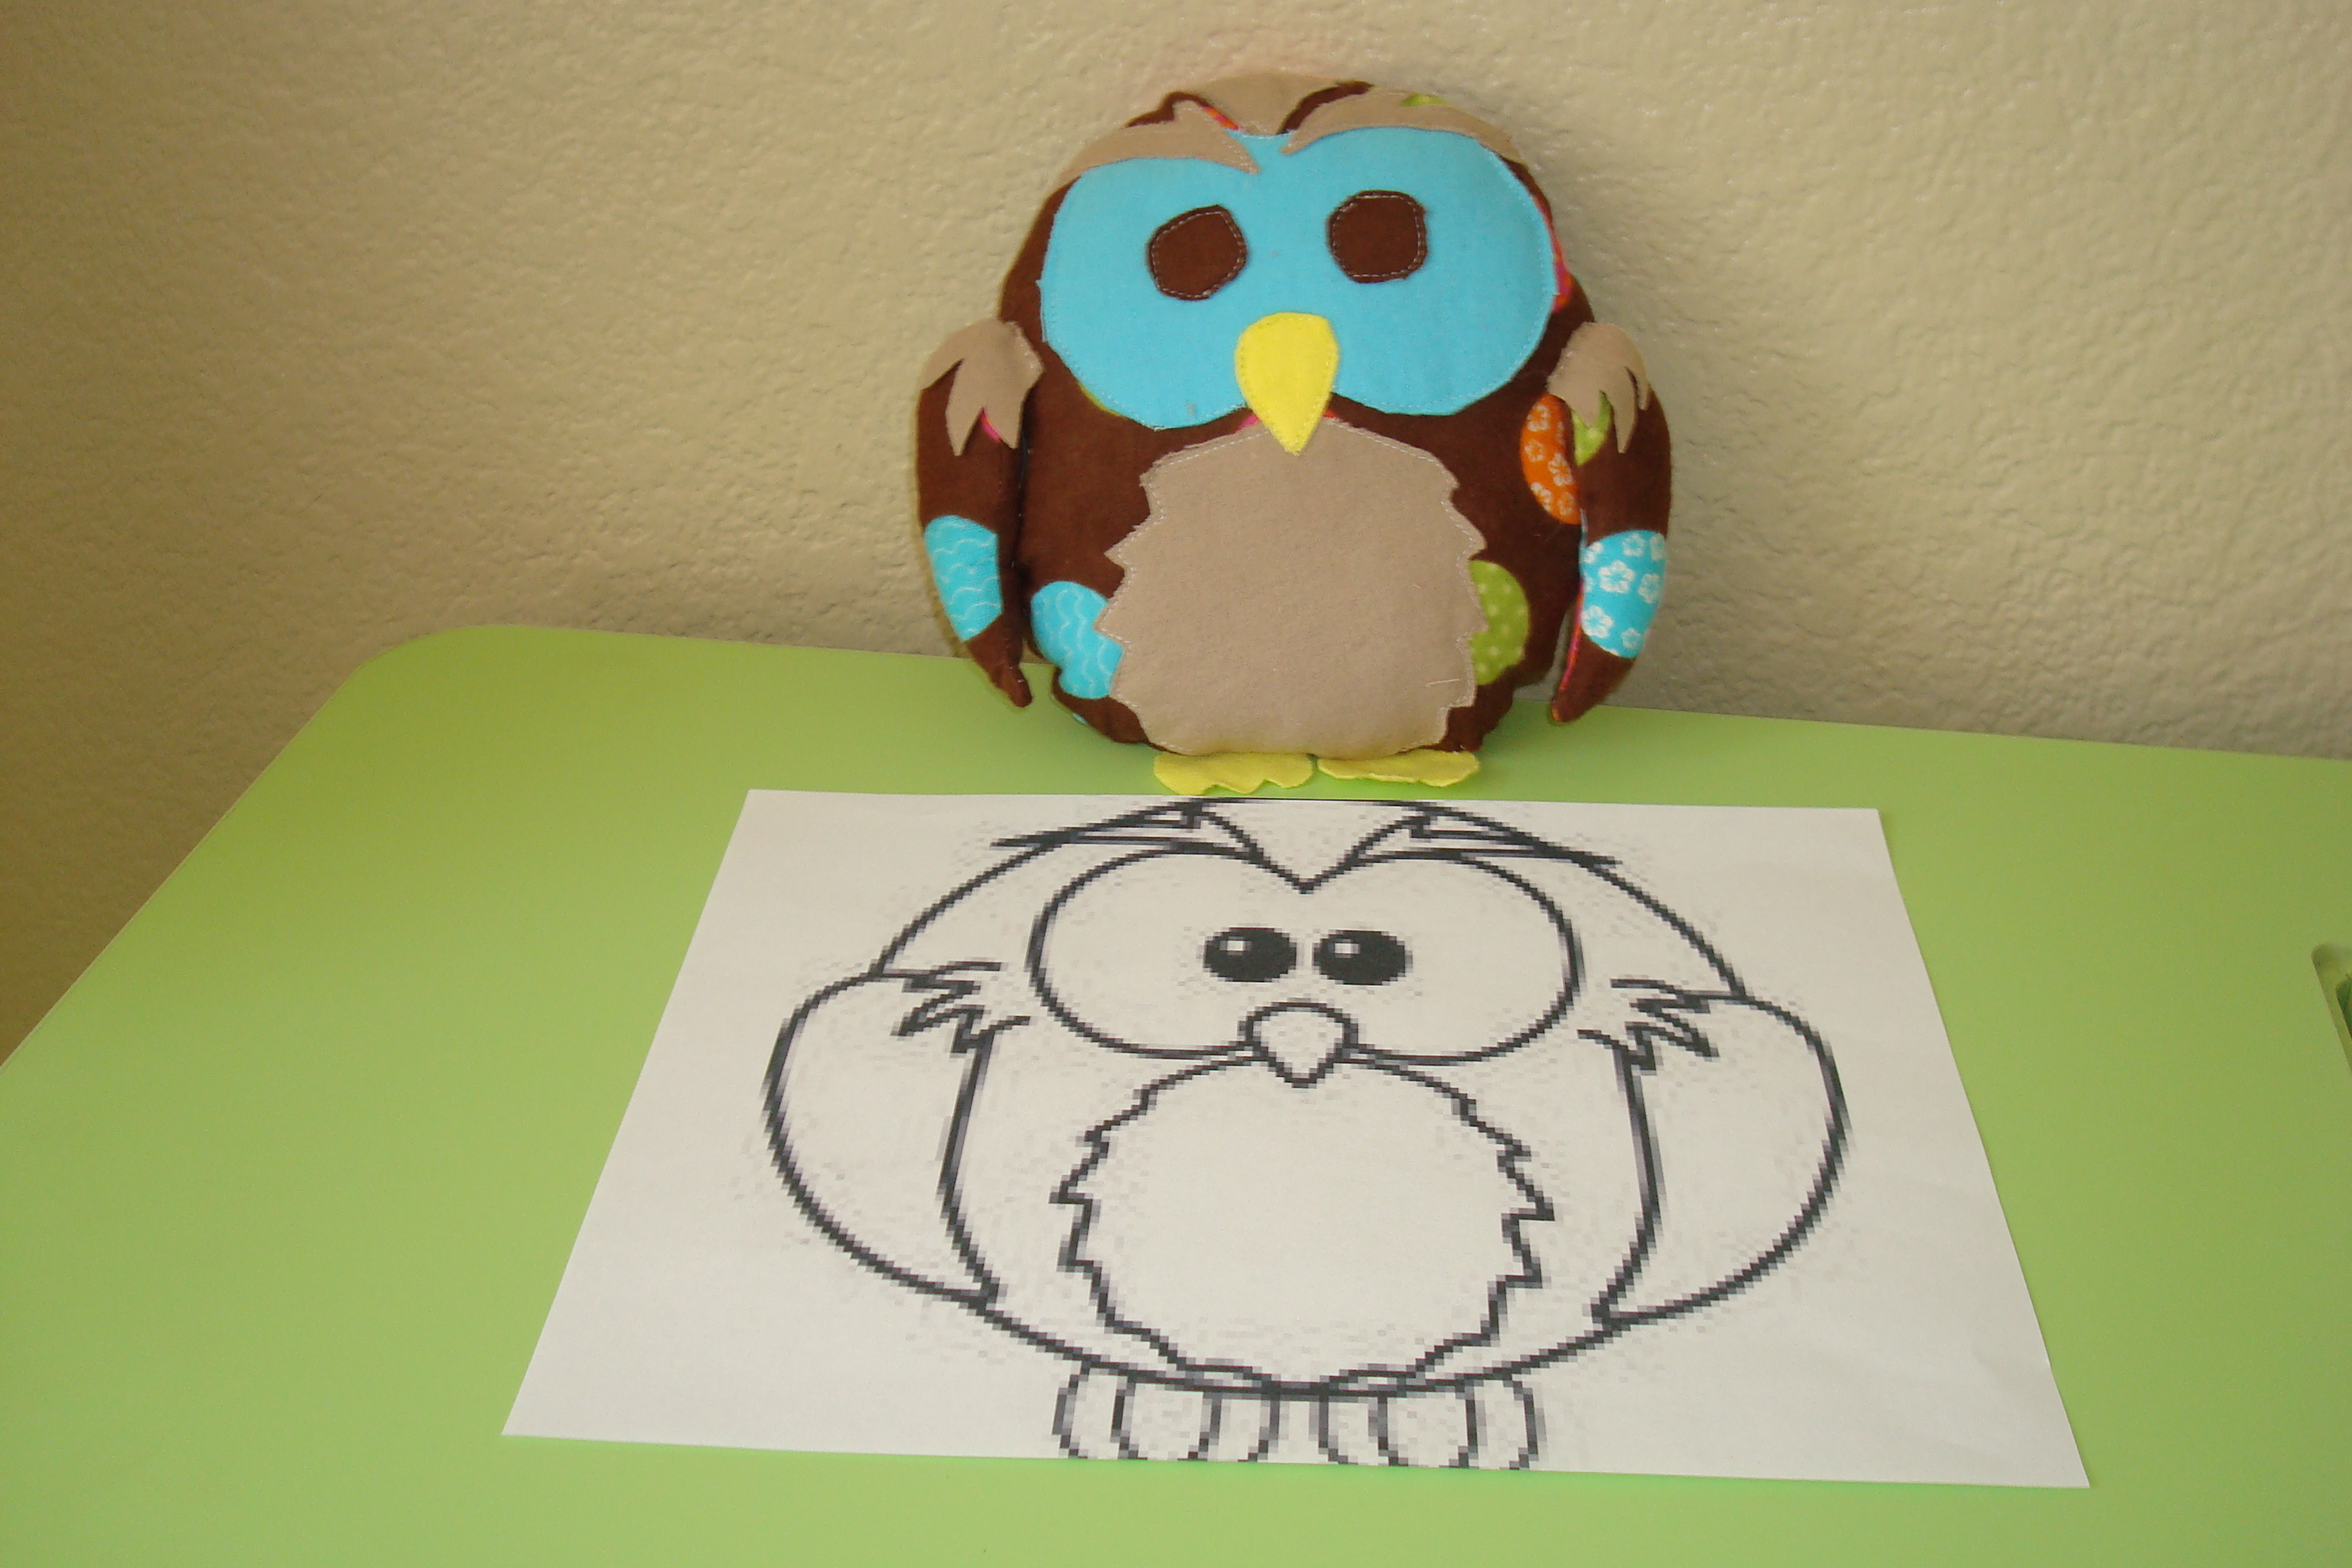
Step 9: Finally, using the printed coloring page as a guide, hand stitch the wings in place. Add the little feather pieces over the top of each wing and your toy is complete!
Elephant Pattern
If you're learning about how to sew stuffed animals and would like to use the elephant pattern featured in this project, click here to download it.
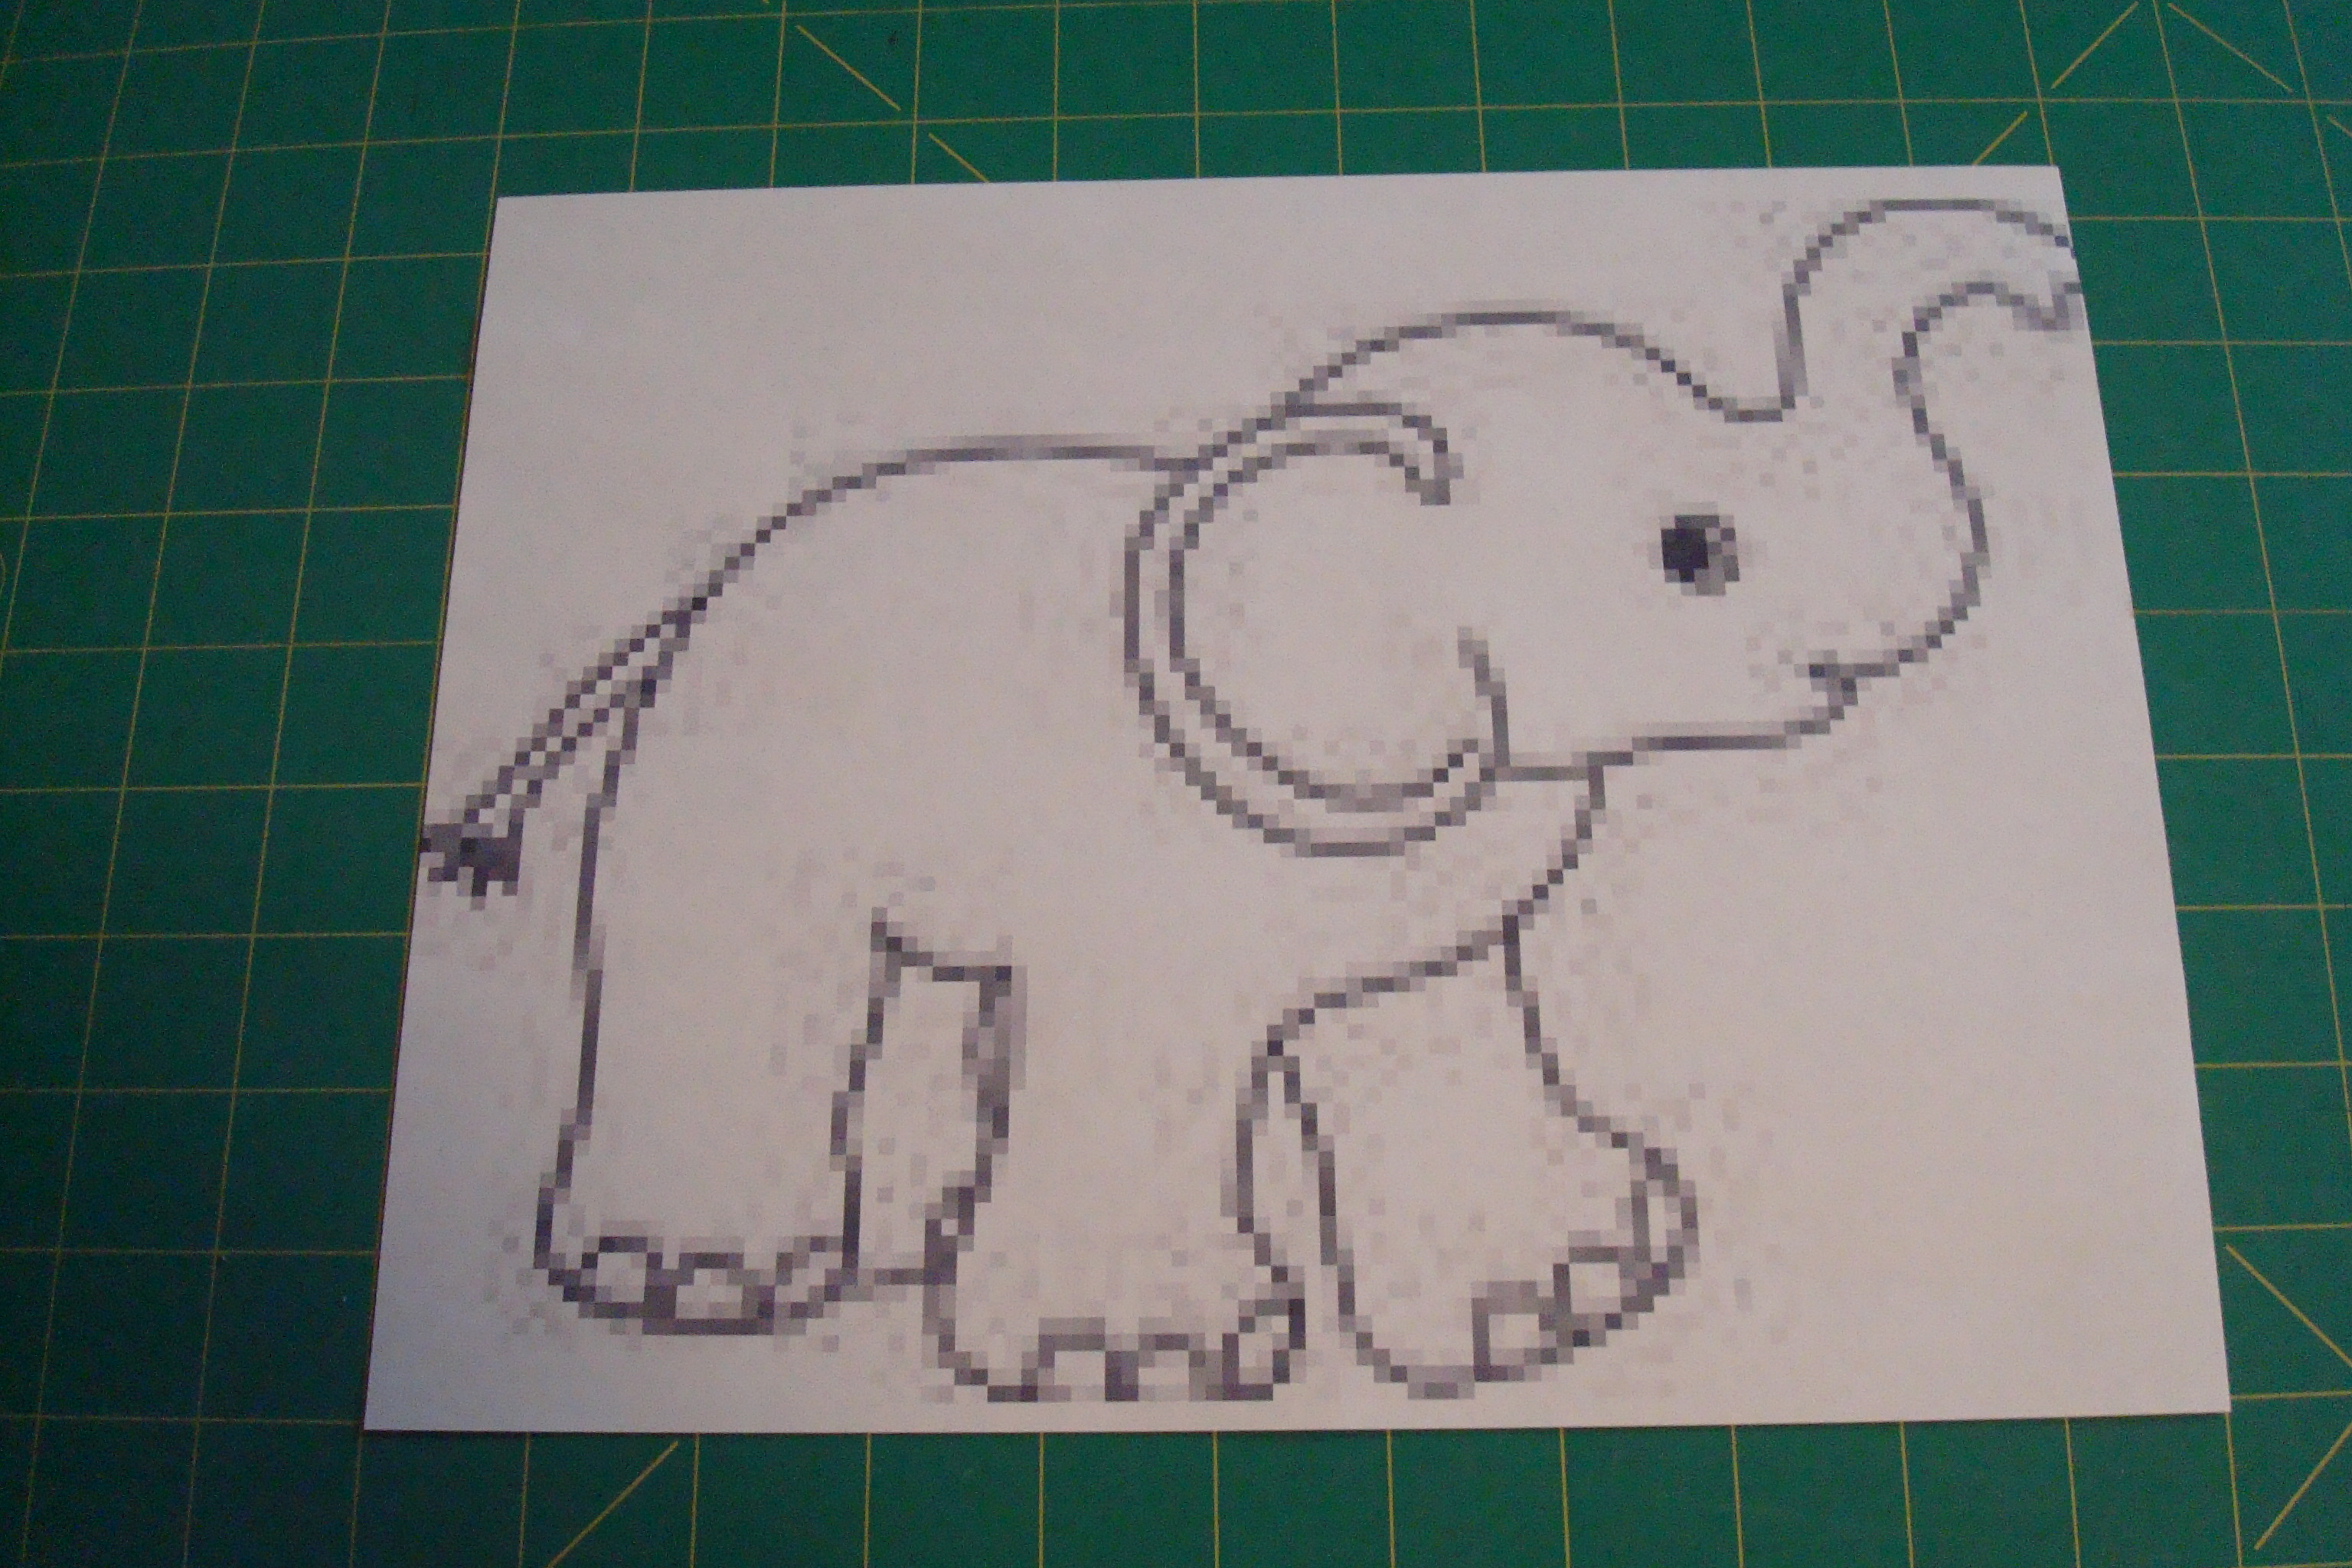
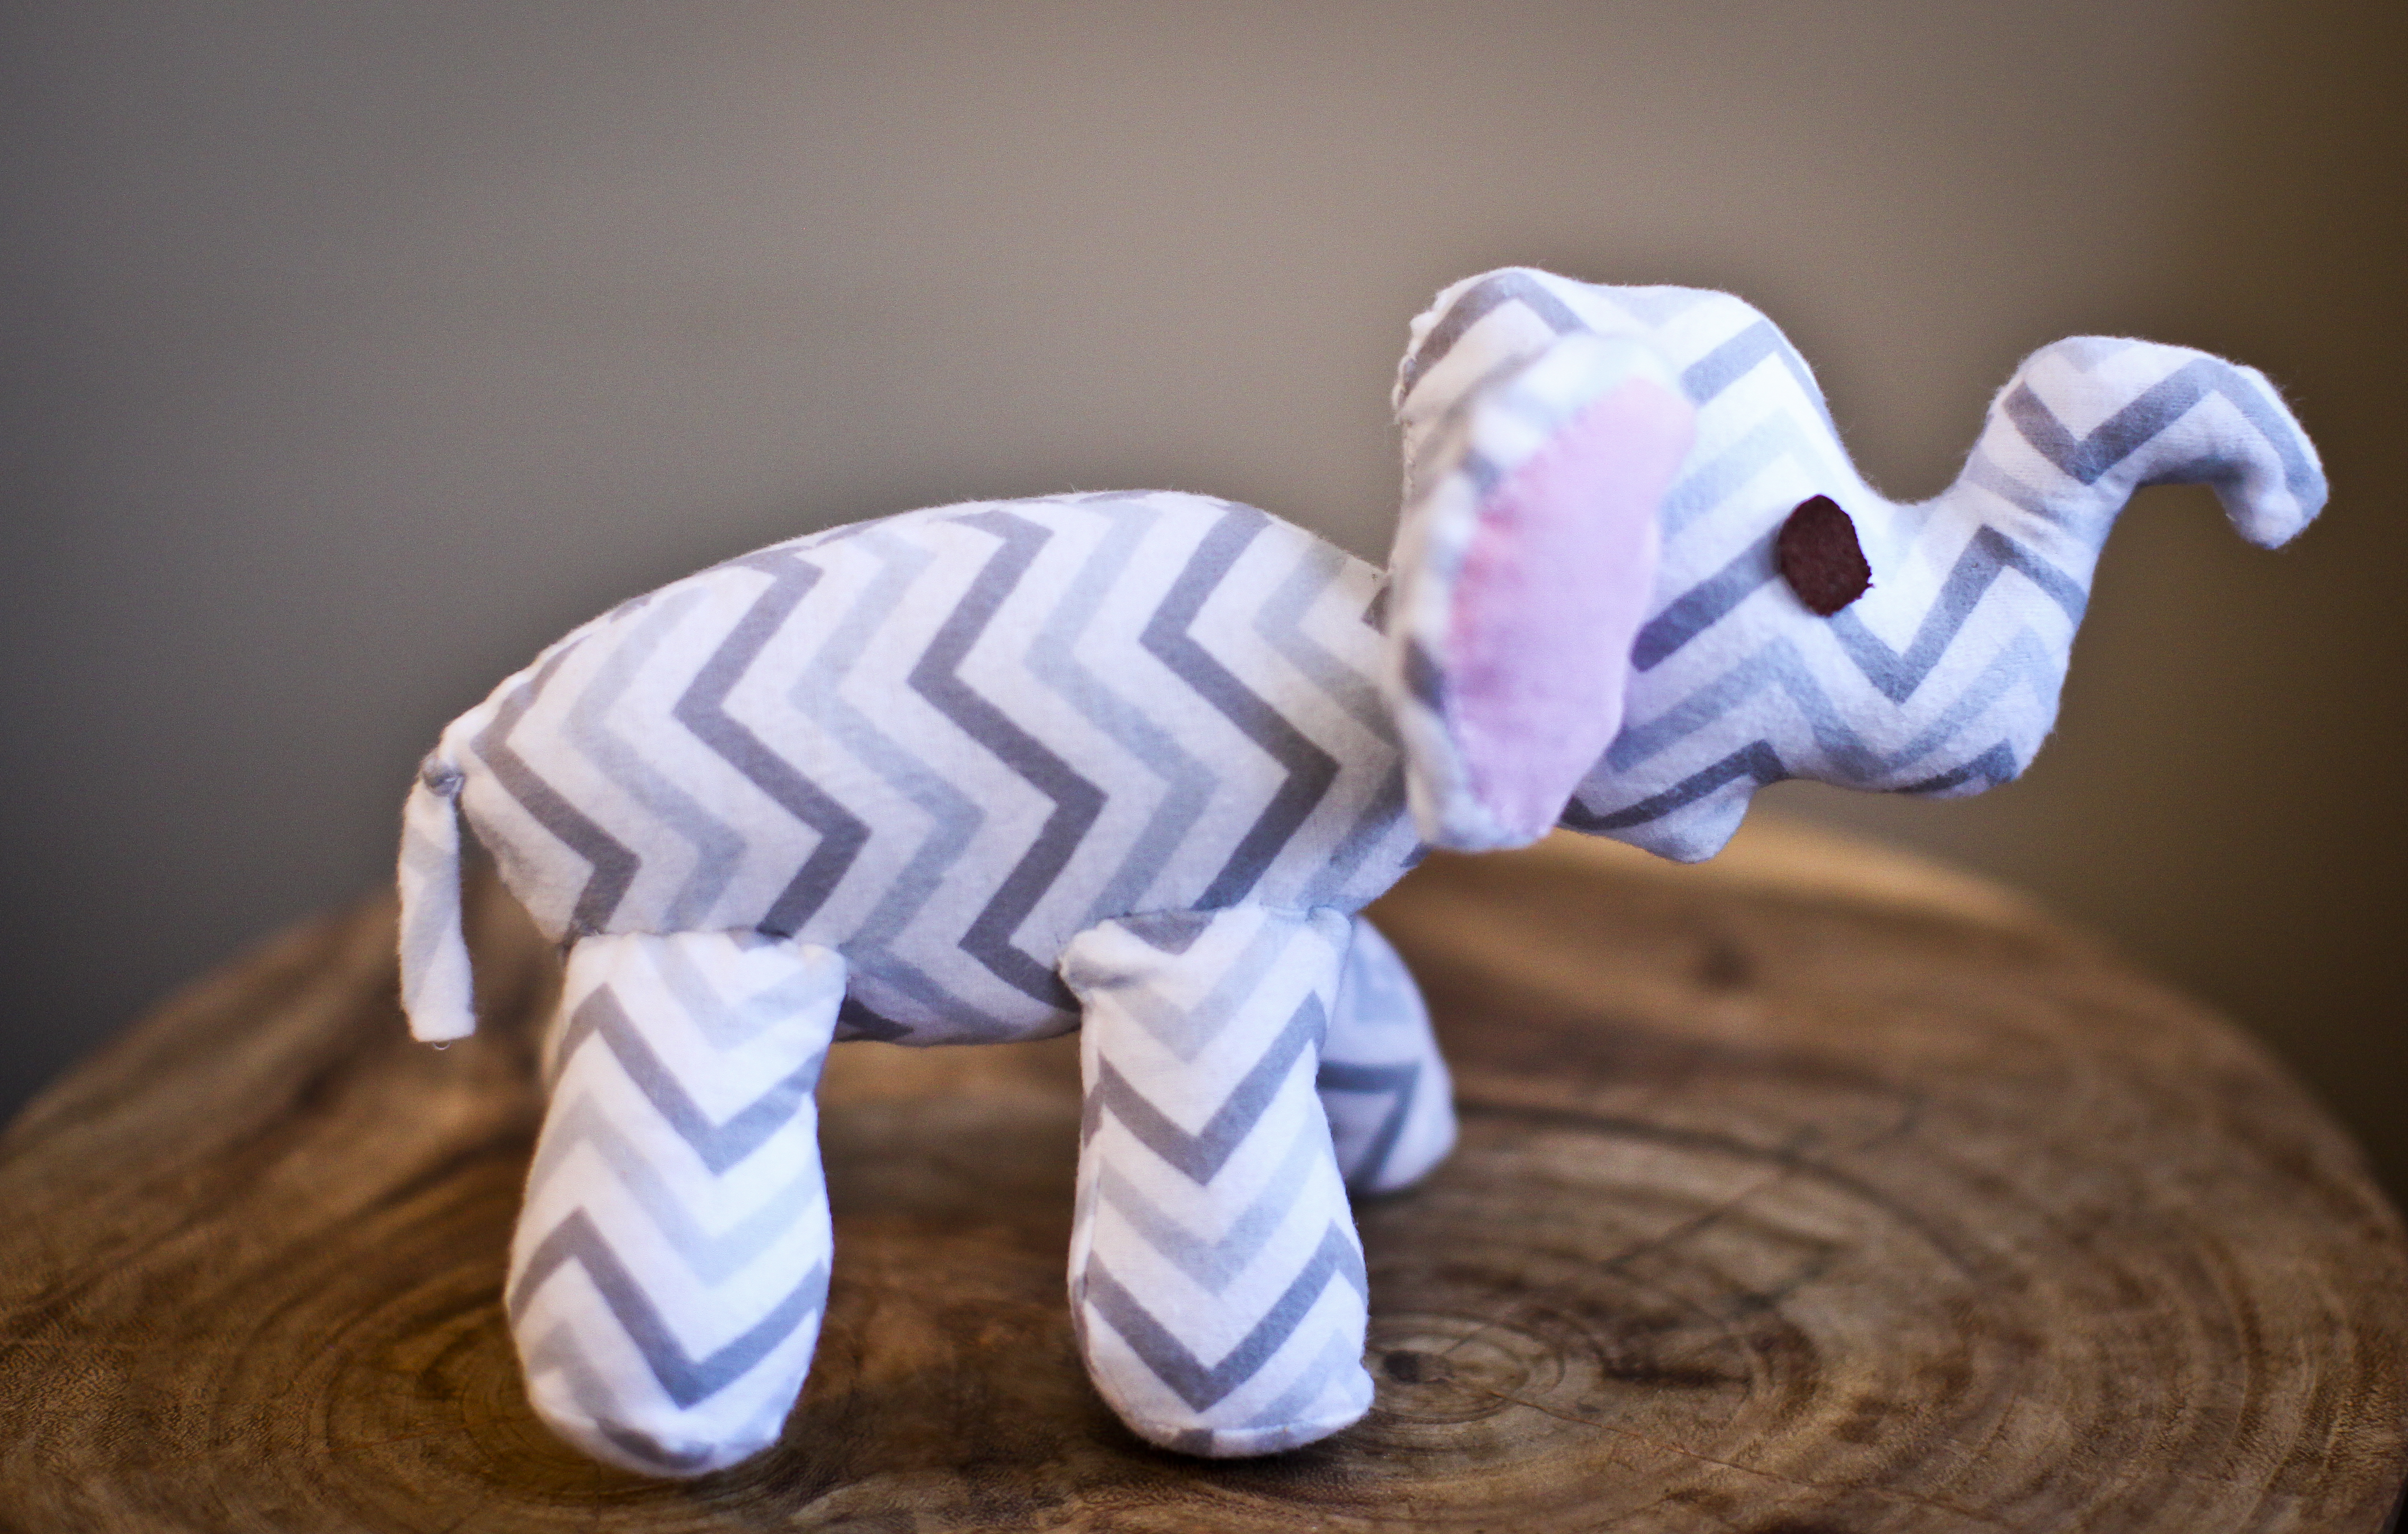
This elephant is another example of a coloring page that would make a cute toy. Again, this pattern was enlarged, which is why it’s a little grainy. The elephant is slightly more complicated than the owl because the legs need to be made in a way that allows the toy to stand up on its own.
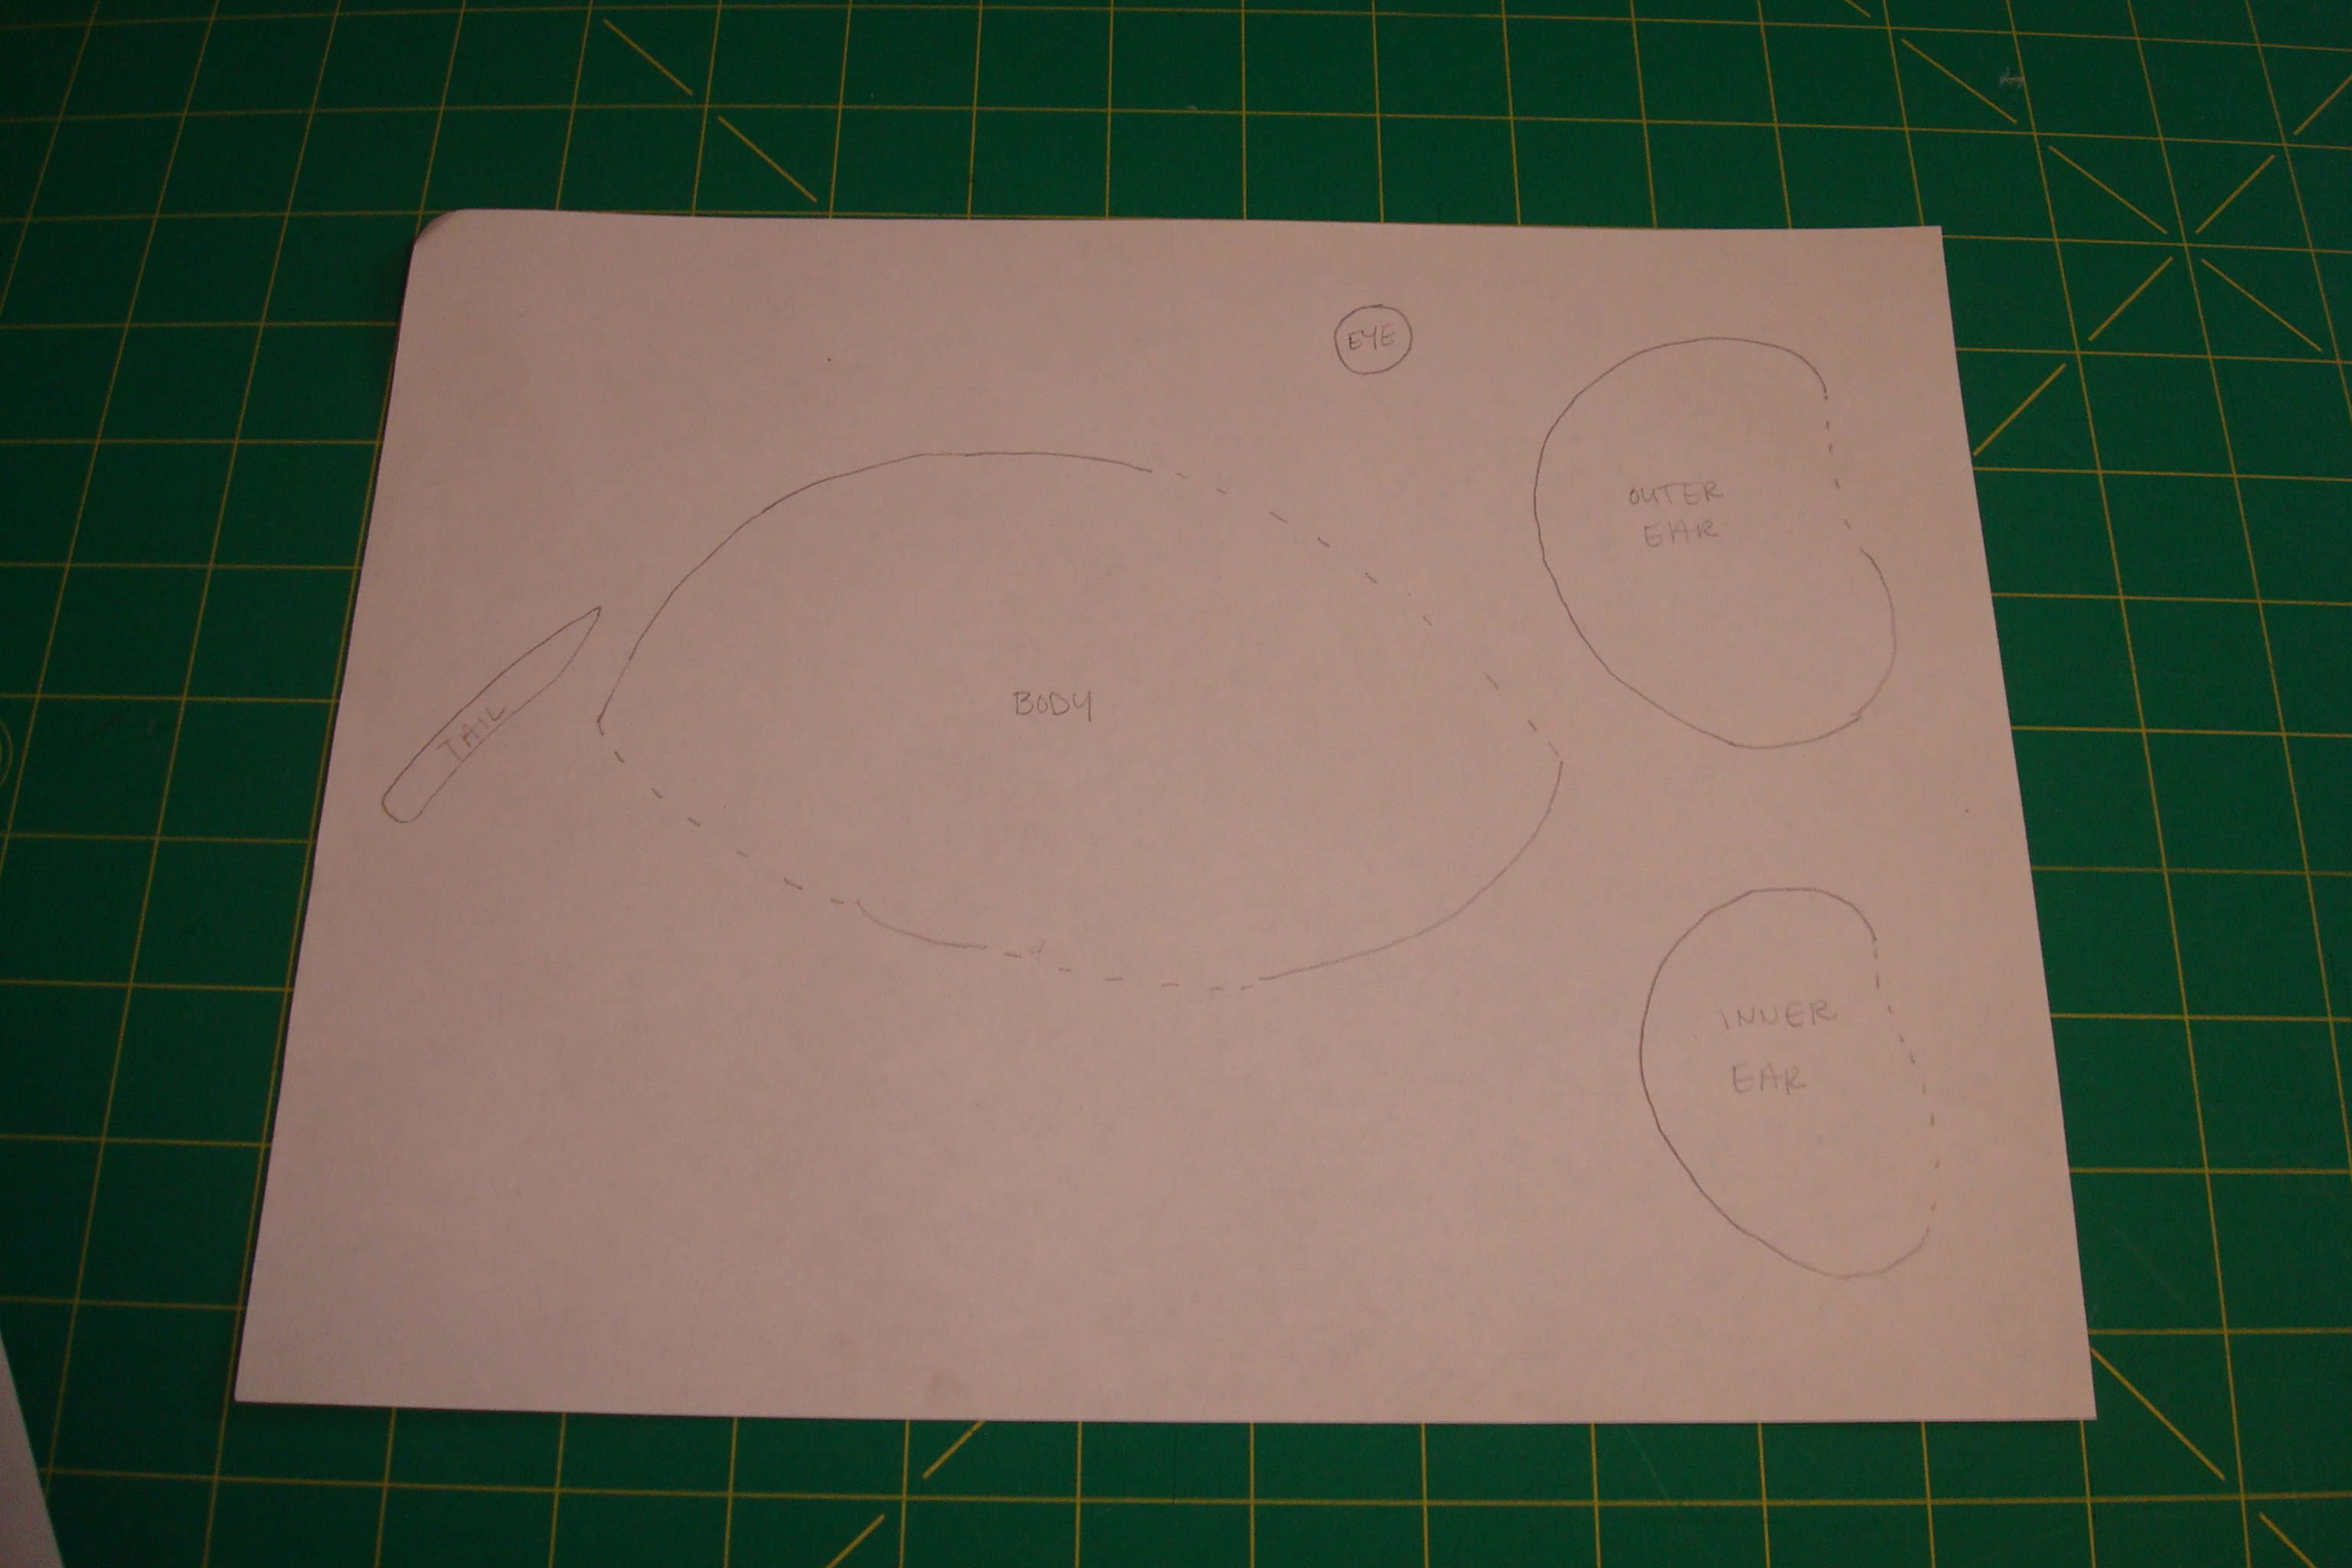
Step 1a: Again, start by tracing all the components of the elephant separately, connecting any skipped areas with dotted lines.
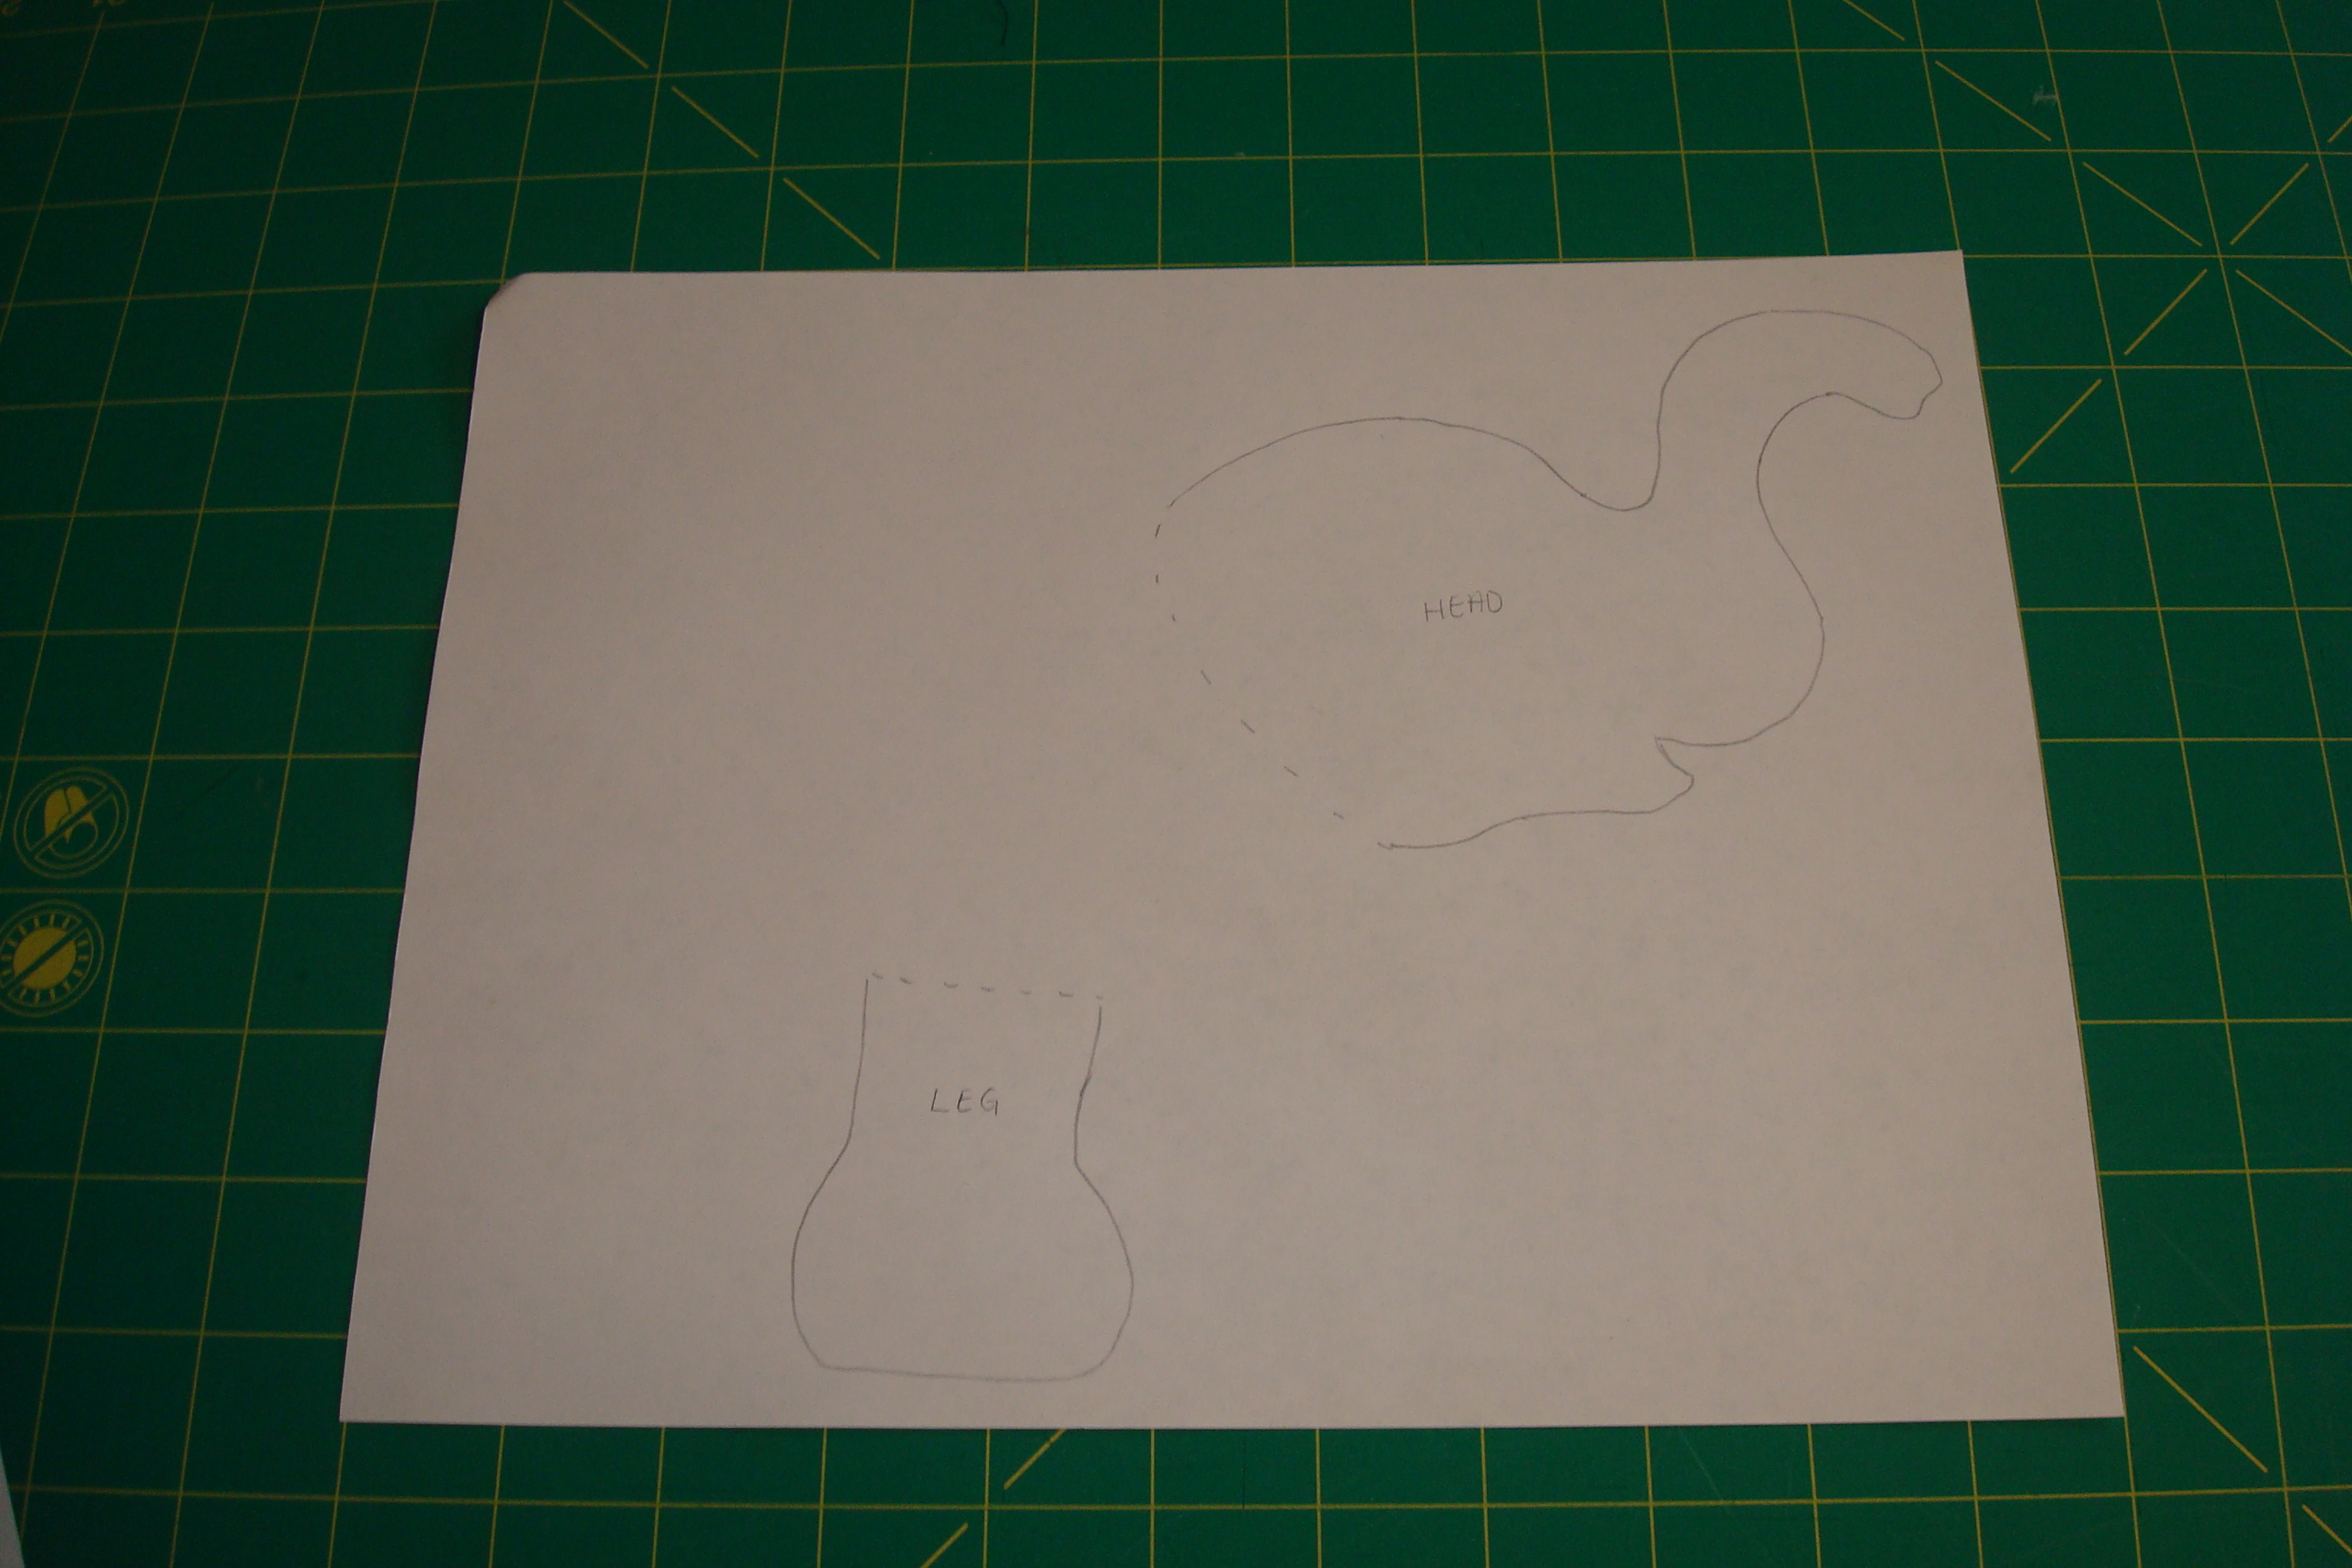
Step 1b: Use as many sheets of paper as you need to get all of the components traced out.
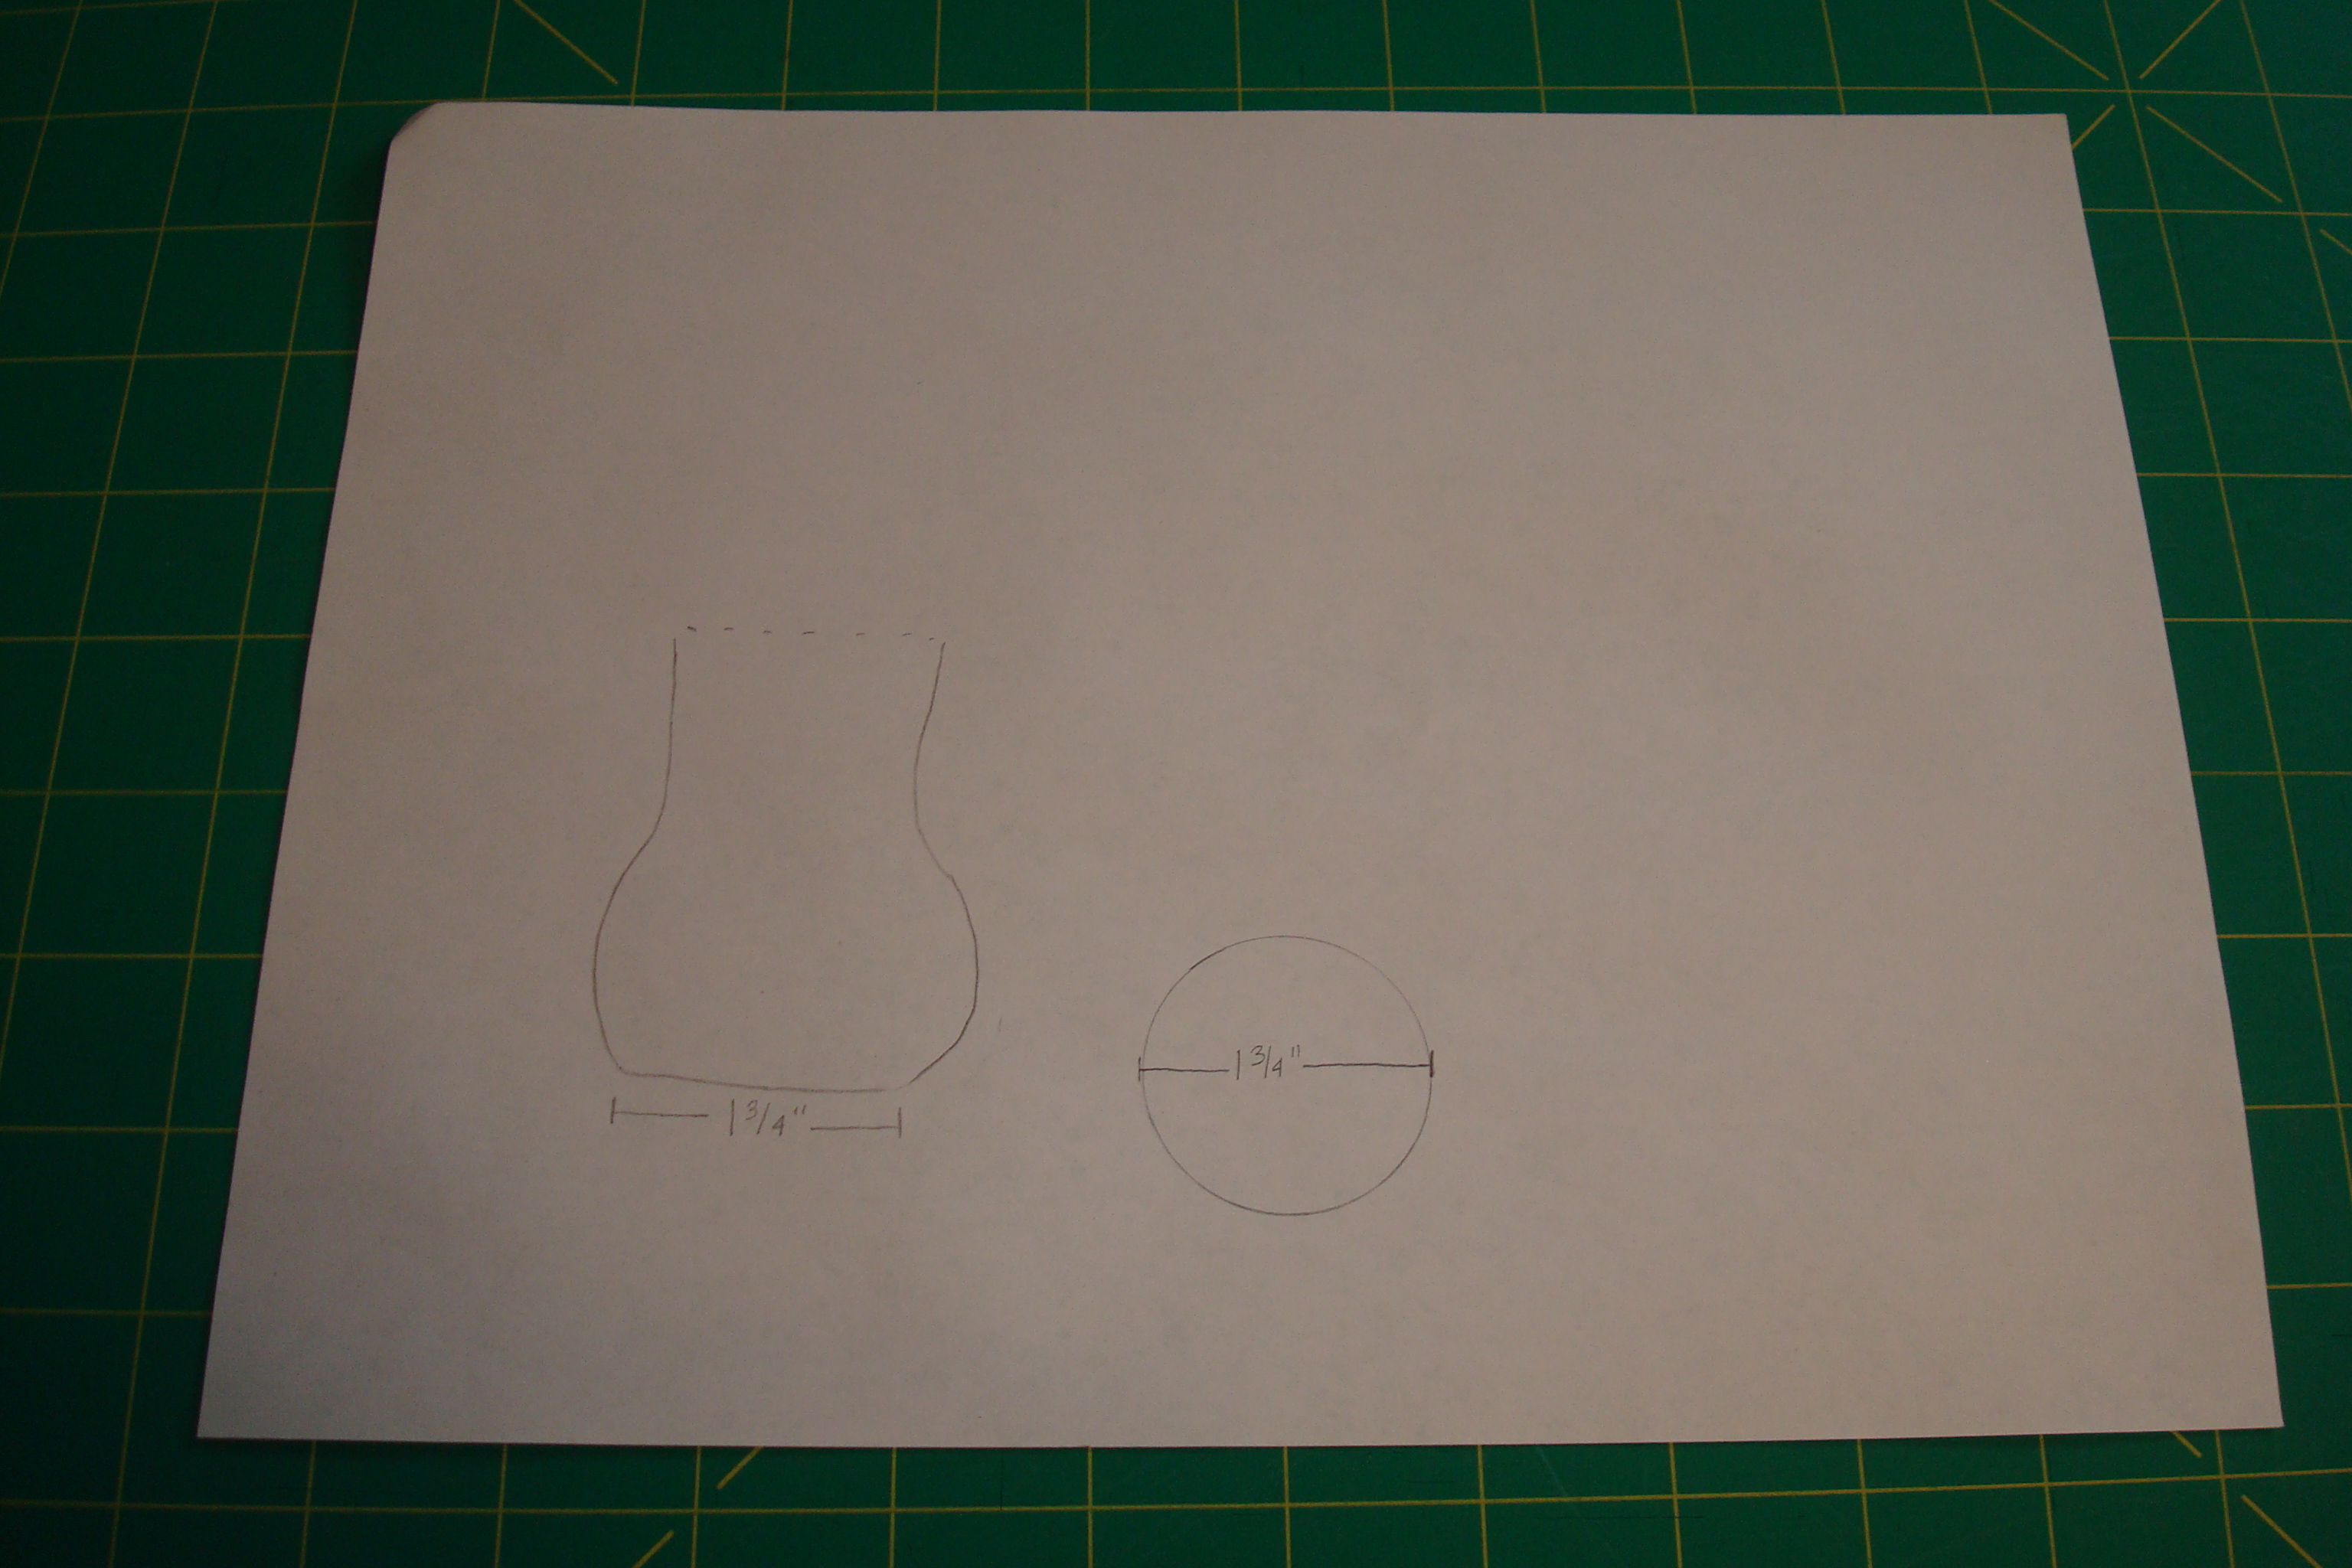
Step 2: For the leg, measure the width at the bottom of the foot. For my coloring page it was 1 ¾”. This is the diameter circle you will need to cut for the foot bottom.
Step 3: Cut out all the pattern pieces. From the fabric cut two body pieces, two head pieces, four outer ear pieces, two inner ear pieces, one tail piece, eight leg pieces, and four foot bottom circles.
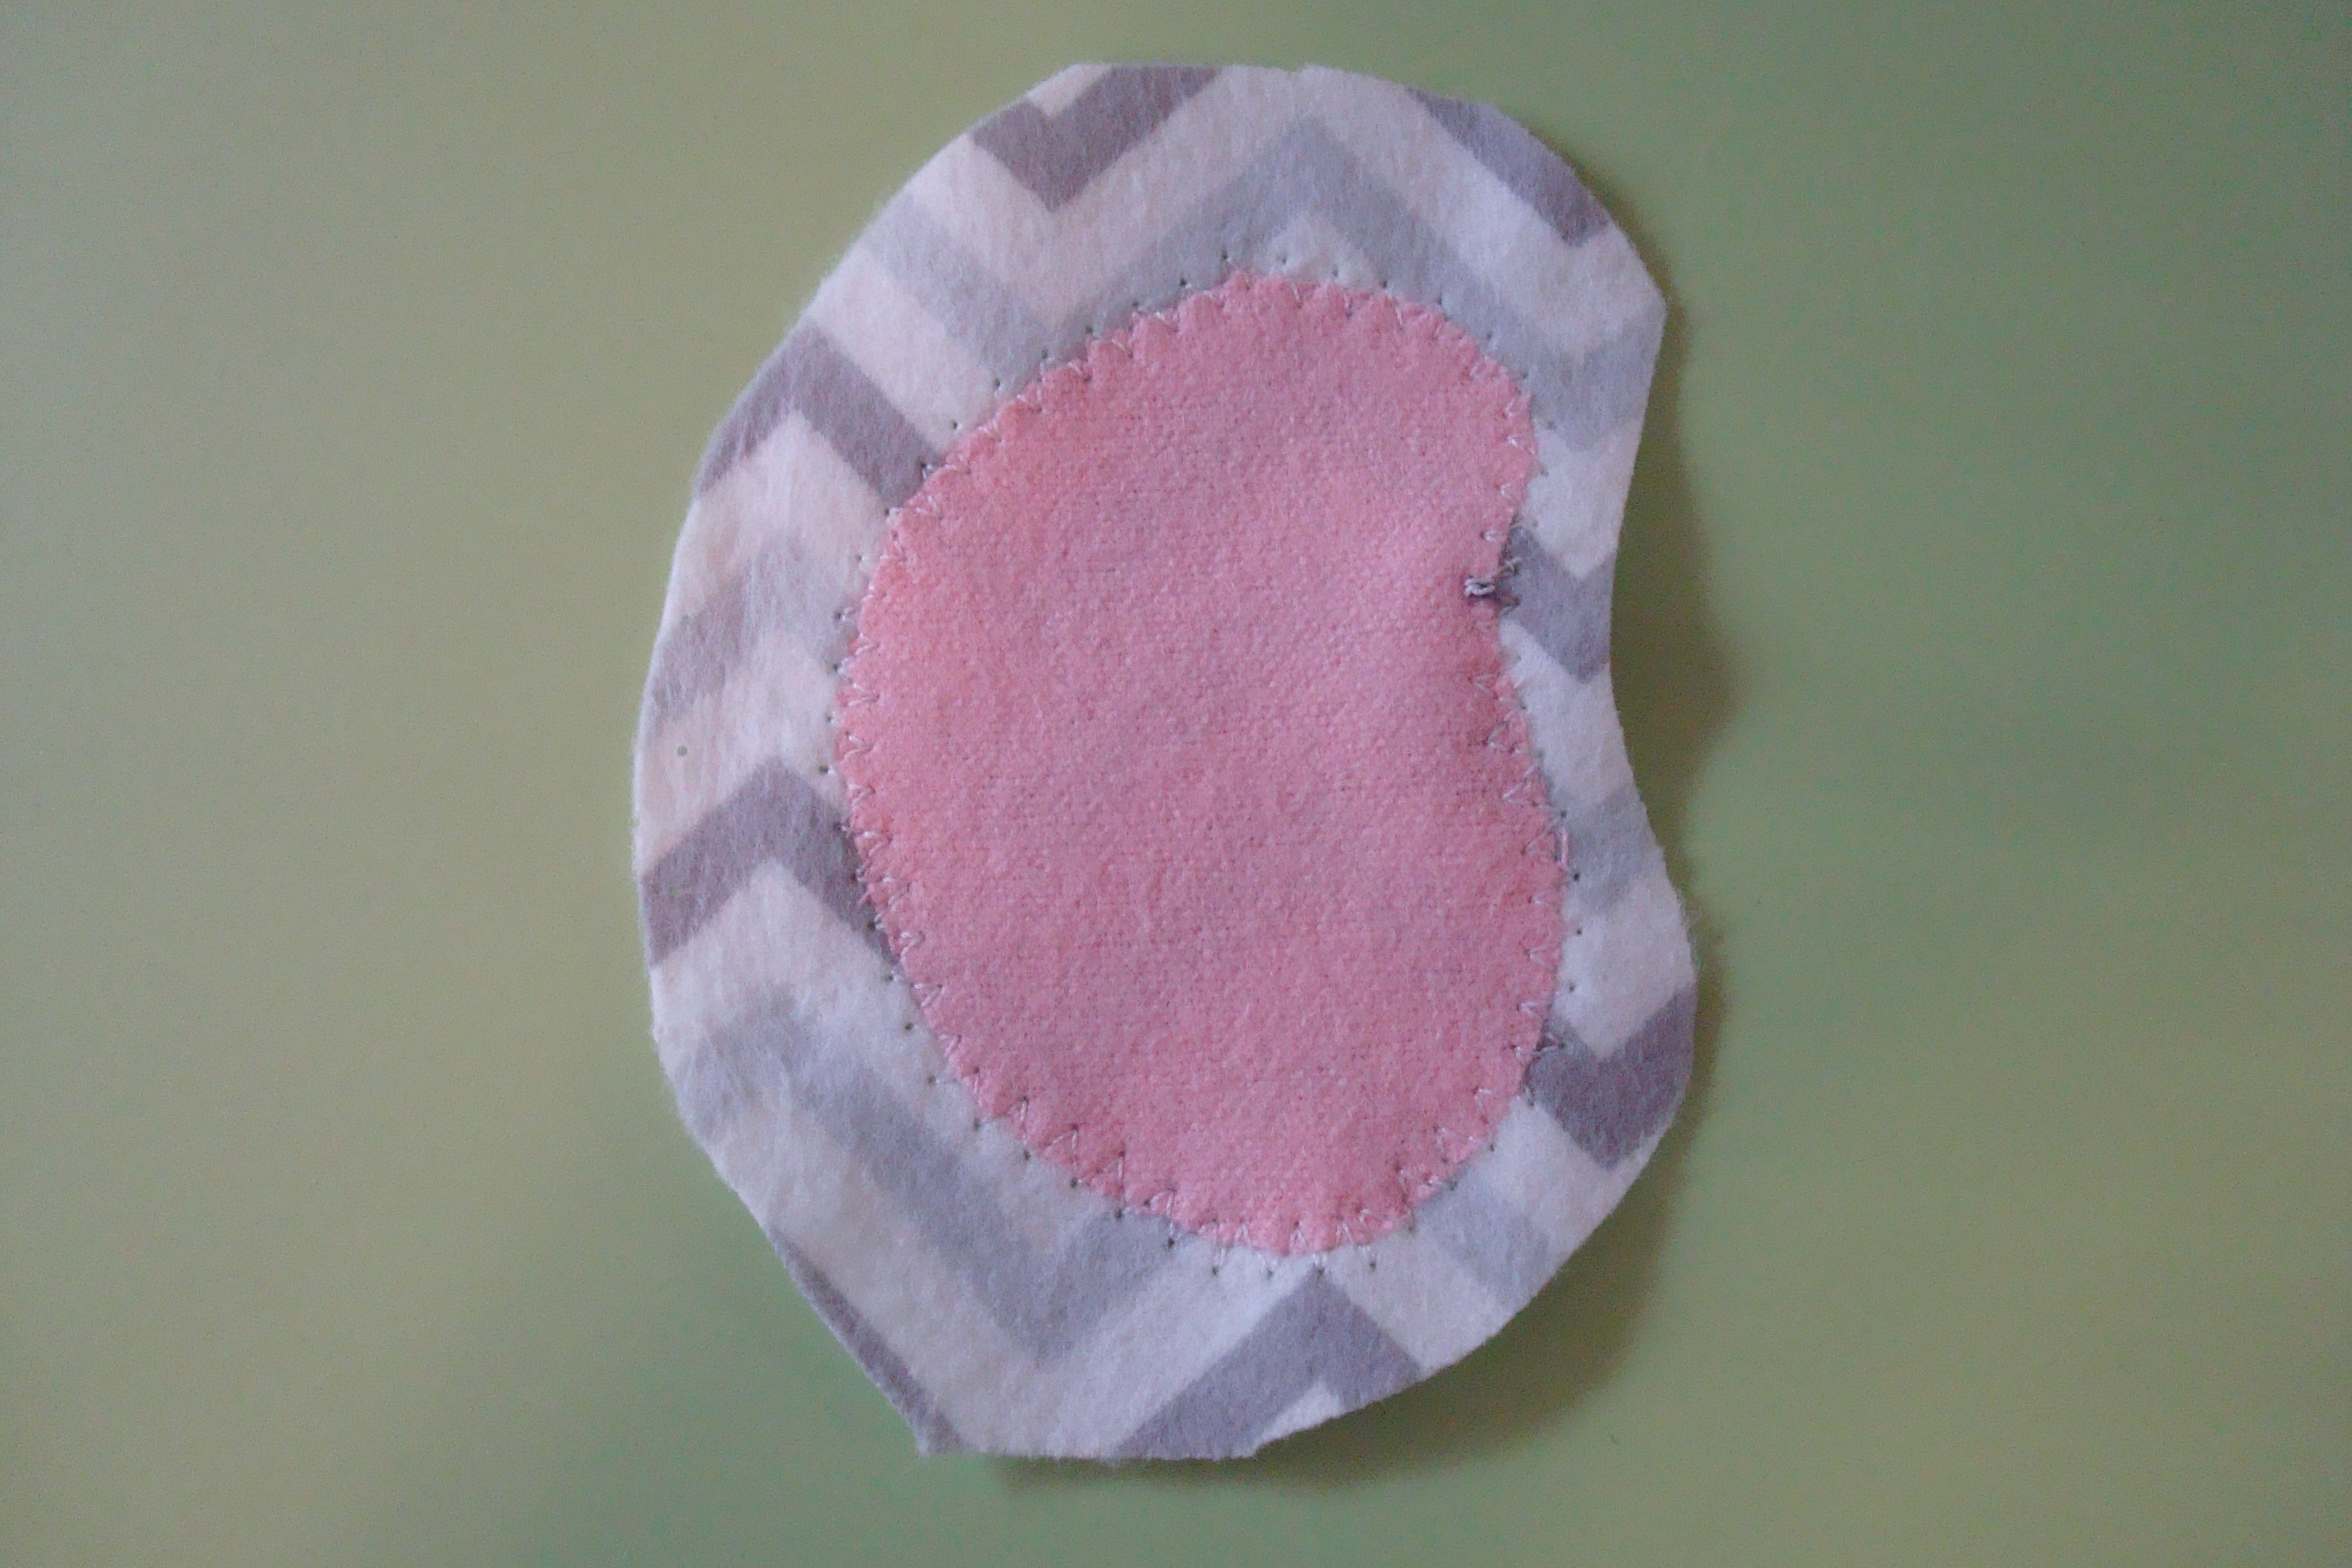
Step 4: Position one inner ear piece on one outer ear piece right side and stitch using a straight stitch or any other appliqué stitch you like.
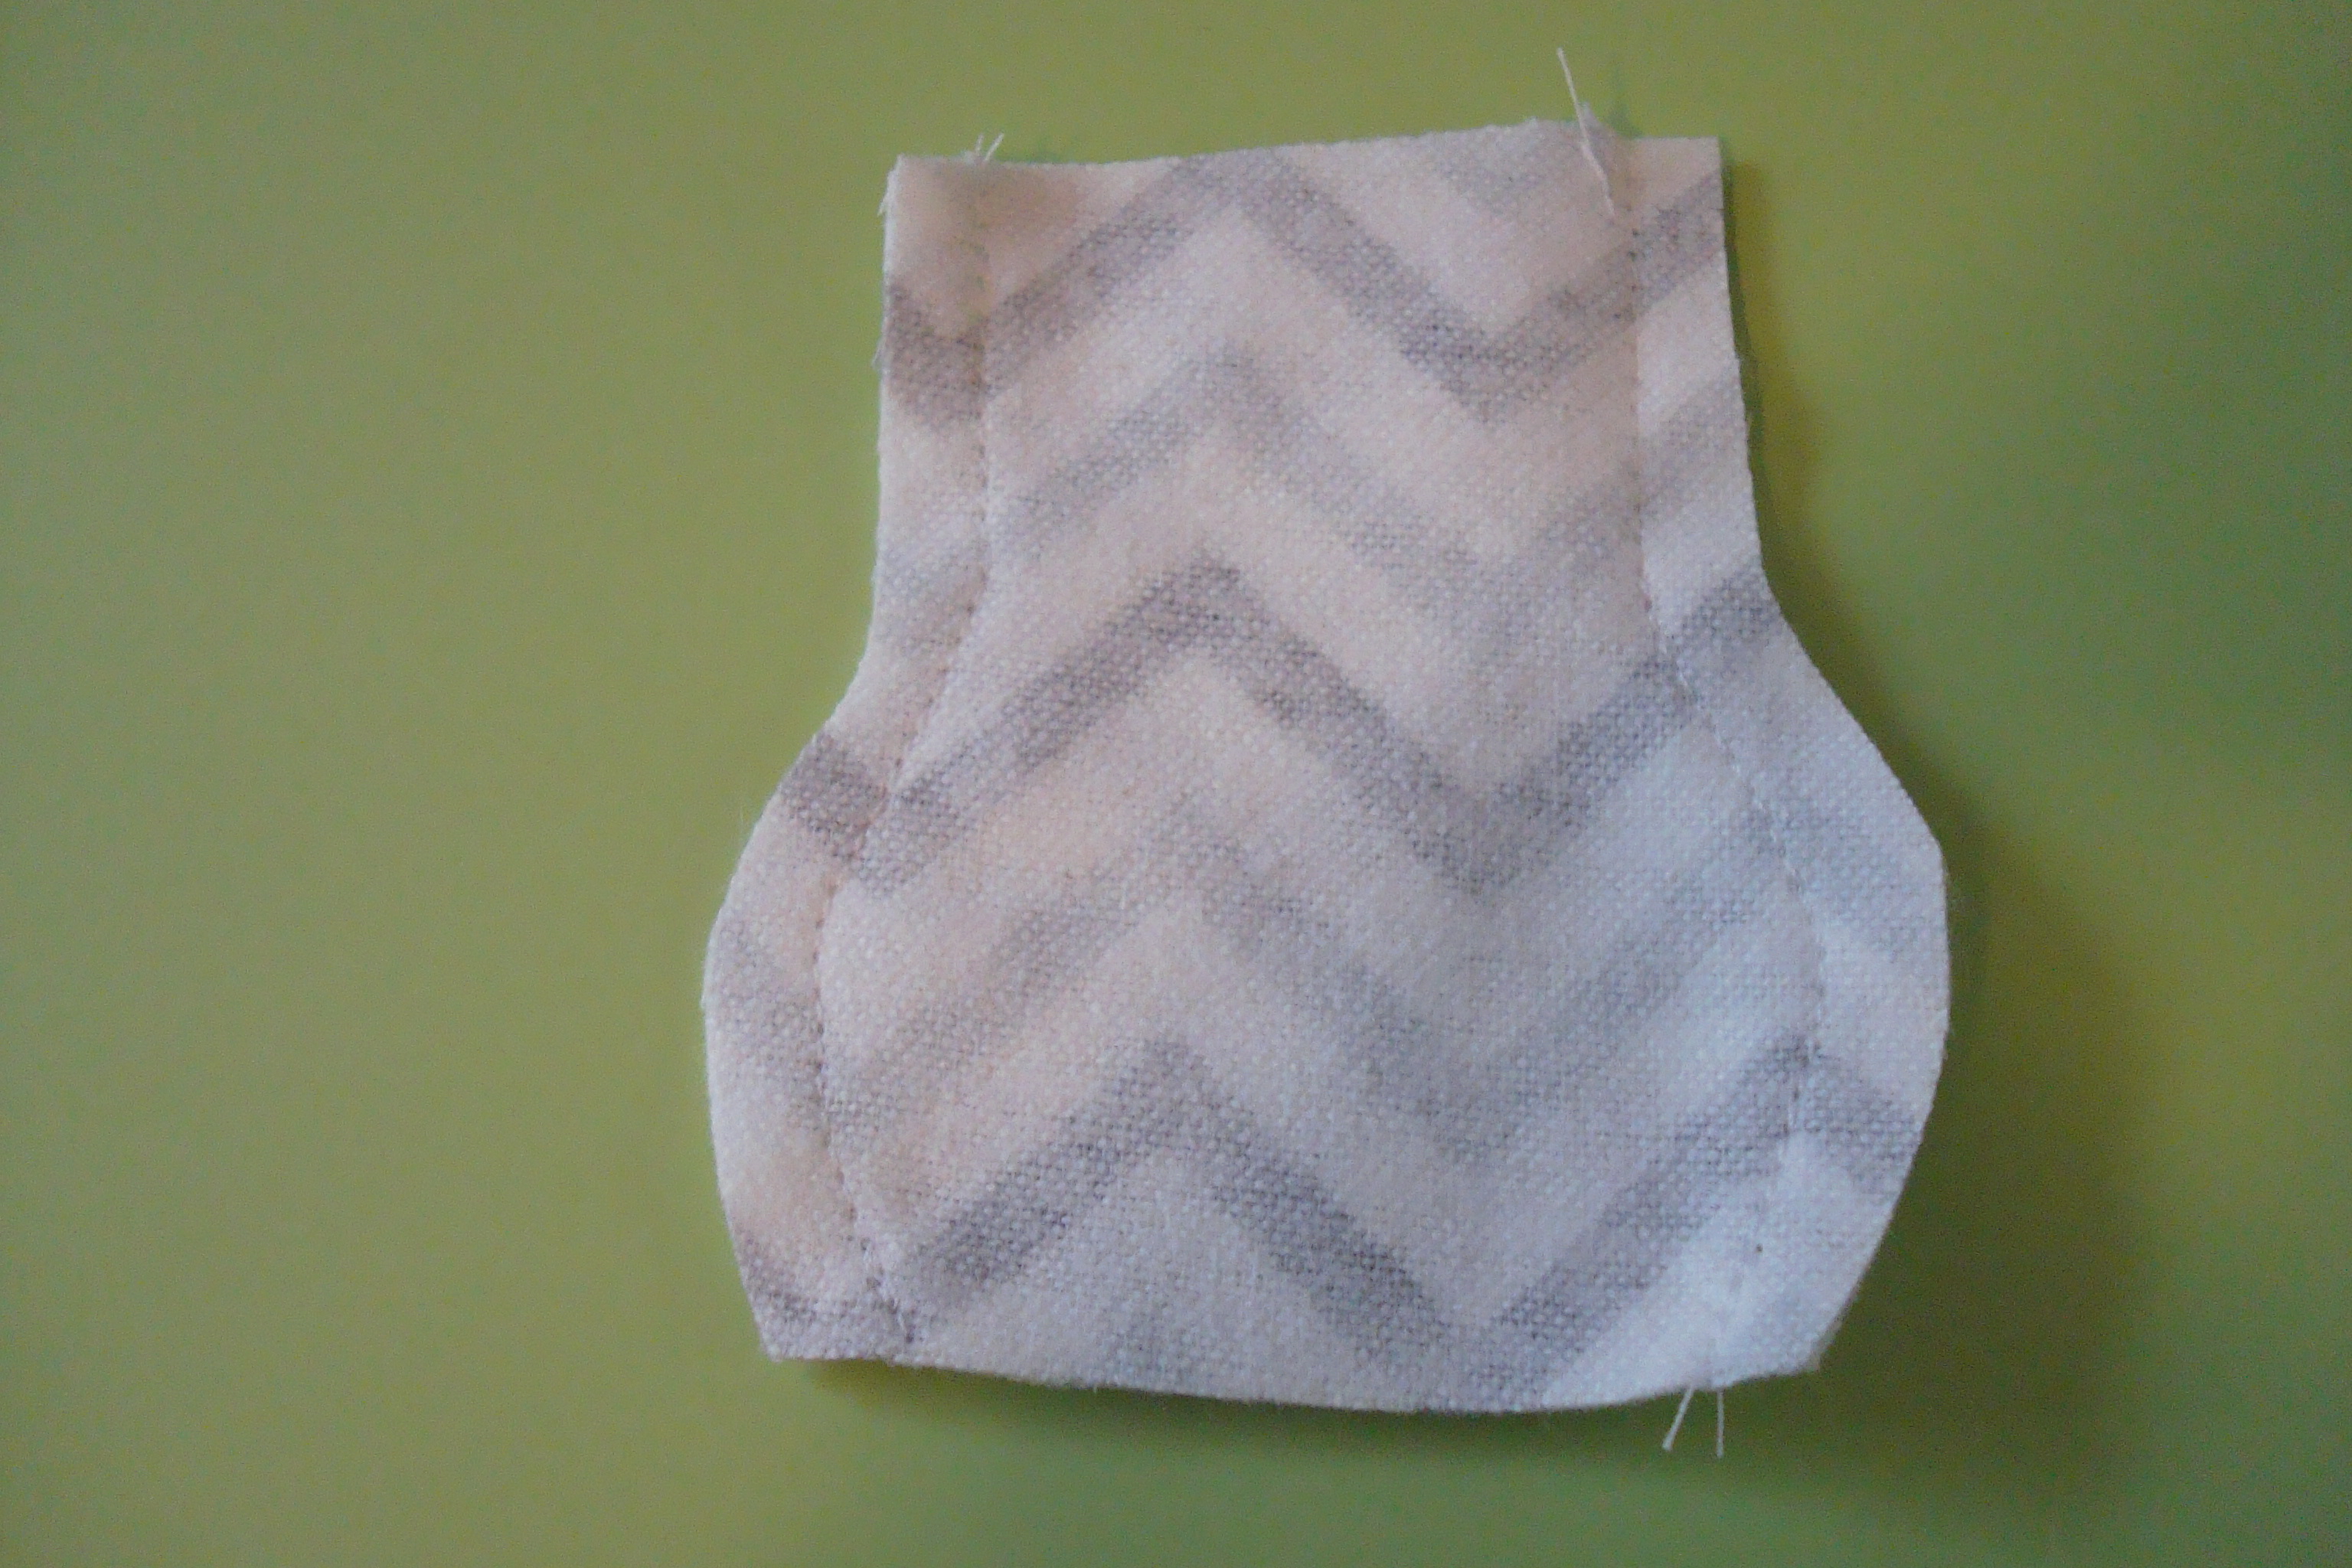
Step 5: Place the two outer ear pieces right sides together and stitch around the edge using a ¼” seam allowance. Leave approximately 2” unstitched for turning. Turn the ear right side out and stuff, and then machine or hand stitch the opening closed. Repeat with the remaining ear.
Step 6: Place the two leg pieces together and stitch along each side using a ¼” seam allowance.

Step 7: With right sides together, align the foot bottom circles with the lower edges of the leg and pin in place. Stitch using a ¼” seam allowance, and then turn right side out and stuff. Repeat with remaining three legs.
Step 8: Using the printed coloring page as a guide, place an eye on each head piece and stitch using a straight or appliqué stitch. Place the head pieces right sides together and stitch around the perimeter using a ¼” seam allowance. Leave approximately 3” unstitched for turning. Turn the head right side out and stuff, and then machine or hand stitch the opening closed.
Step 9: Using pins, and the printed coloring page as a guide, position an ear on either side of the head. Then hand stitch the ears in place
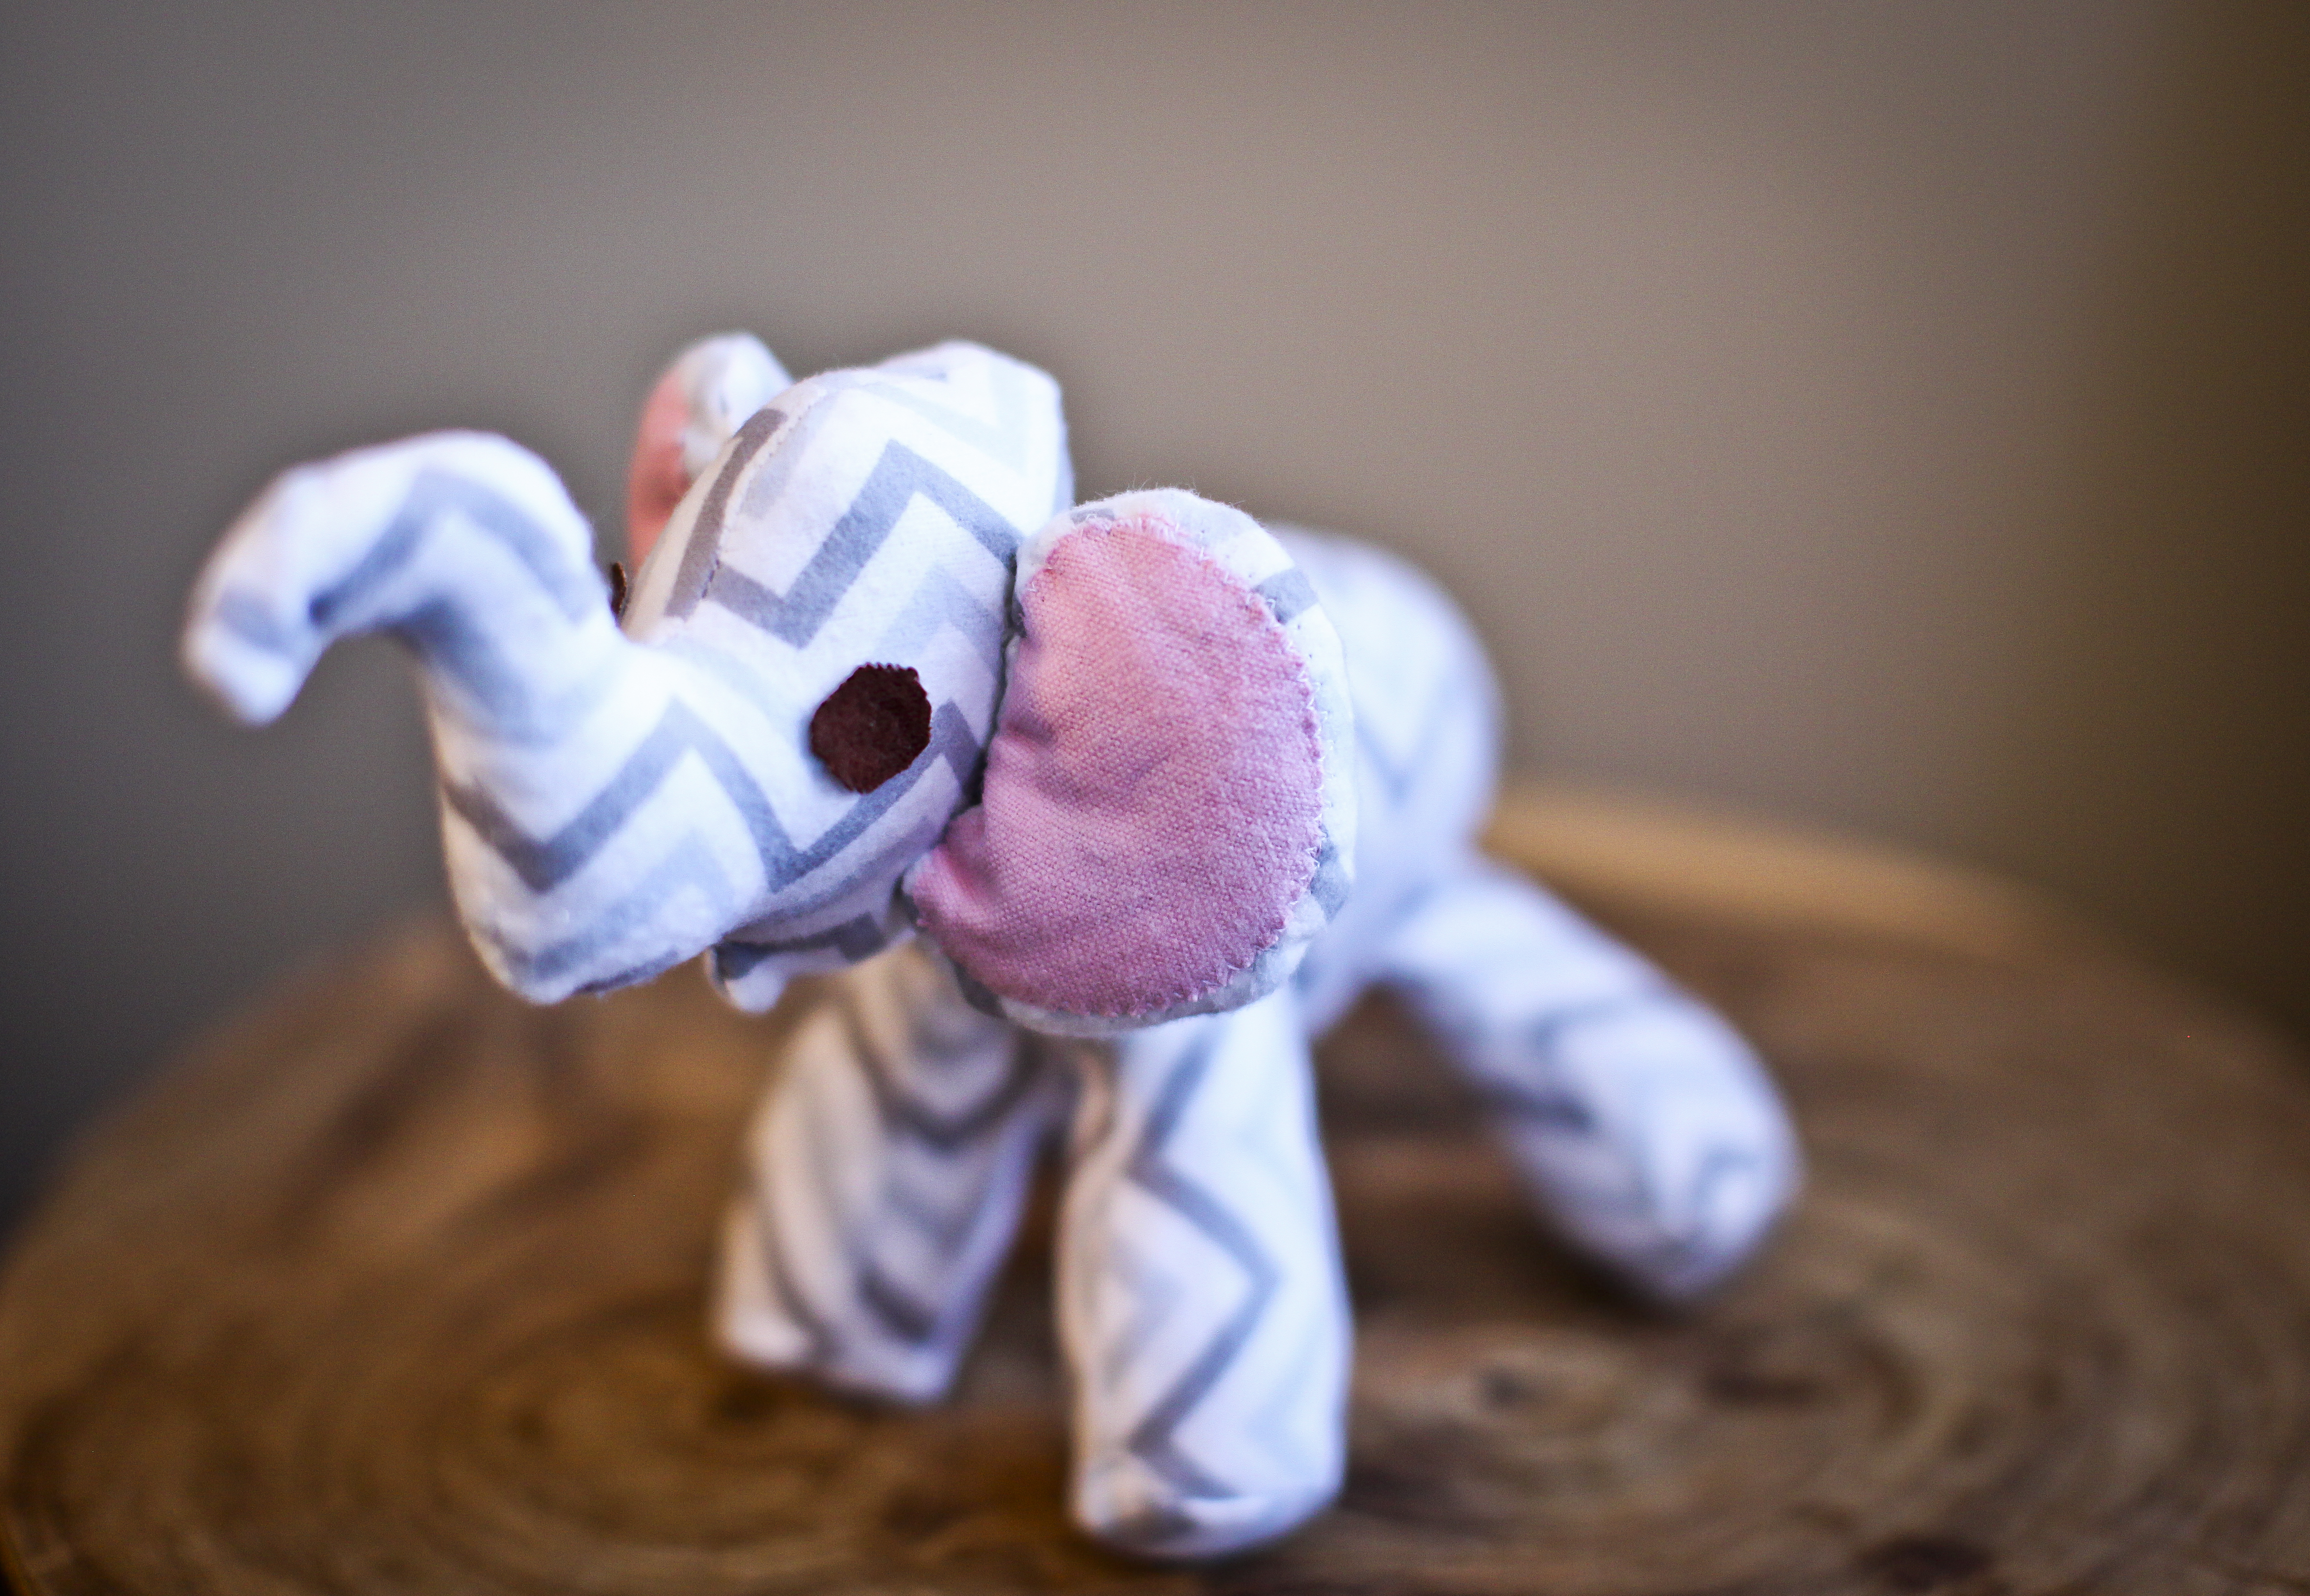
Step 10: Continue using the printed coloring page as a guide to position the legs and head on the body. Attach the little tail and your toy is complete!
Follow these instructions when learning how to sew stuffed animals and you’ll have an adorable army of coloring-book-inspired toys in no time. Have you tried this project? Share a photo with us on our Facebook page!
Get in touch! Leave a comment or email editor@nationalsewingcircle.com.


Thanks, great idea and good way to use scrap pieces of fabric too.
I knew that saving these coloring books from kids & grandchildren would be useful someday! Thanks for this tutorial.
Been looking for ways to make puppets. This might work for that too! Thanks for this!
Thanks for the tutorial. A good idea
Good Idea as far as taking ideas from a coloring book
Download link not working for this pattern. Really disappointing.
Gostaria de receber estes tutoriais são lindos
What a great idea using coloring books to help make stuffed toys. I love it!
What a great idea! So many toys I can make from this!
These are great I have used color books for lots of patterns