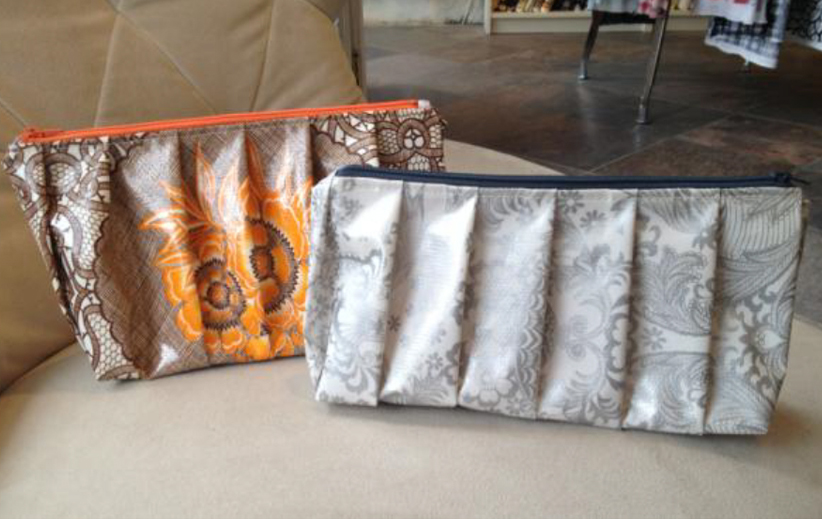
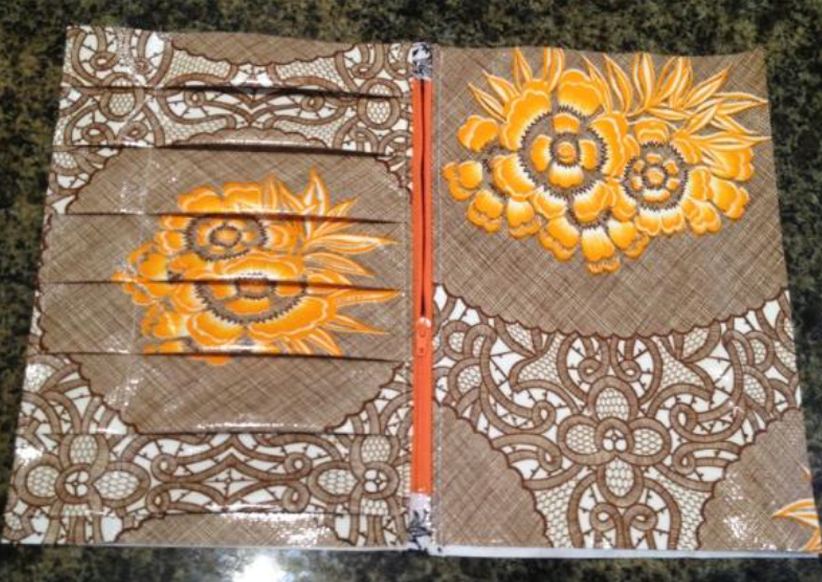
 Learn how to make a cute and stylish clutch purse using oilcloth fabric, which makes your design not only extra durable but also water resistant. Oilcloth comes in a wide variety of prints and colors so it can be fun to play around with different combinations for the exterior and lining fabrics of the clutch, or you could use the same for each if you prefer.
- ½ yard oilcloth for exterior
- ½ yard oilcloth for interior
- 9” zipper
 Step 1: Cut your fabric to the following dimensions:
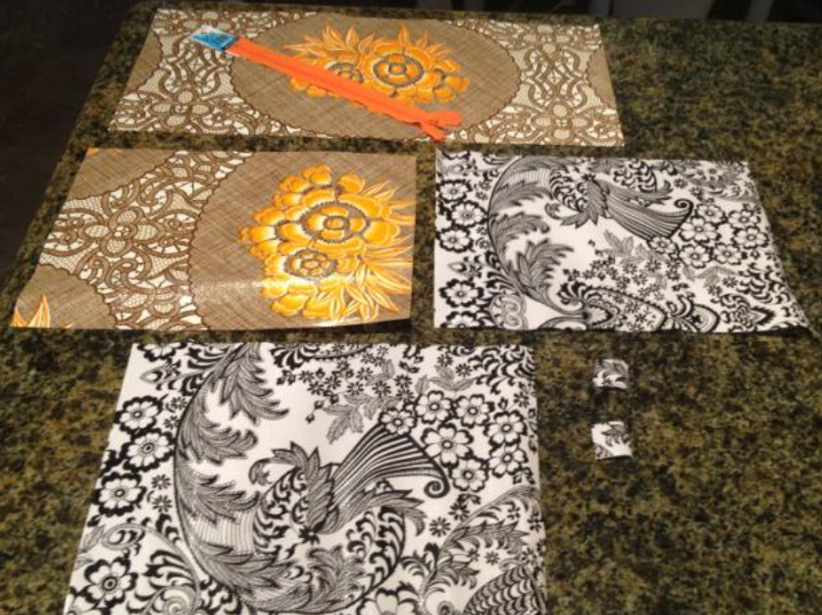
• One 7” x 11” piece for back (from exterior fabric) • One 7” x 18 1/2” piece for front (from exterior fabric) • Two 1” x 1” pieces for zipper tabs (from exterior fabric) • Two 7” x 11” pieces for lining (from interior fabric)
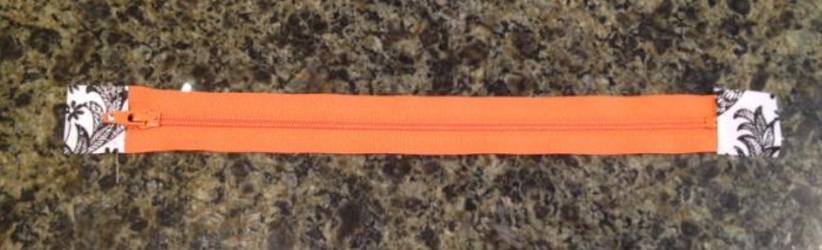 Step 2: To sew the tab pieces to the zipper, place the tabs at the edge of each zipper end and topstitch into place.
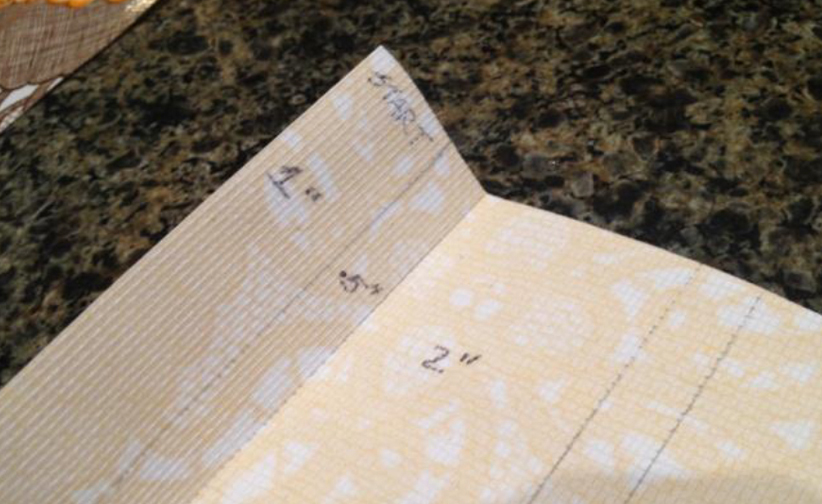
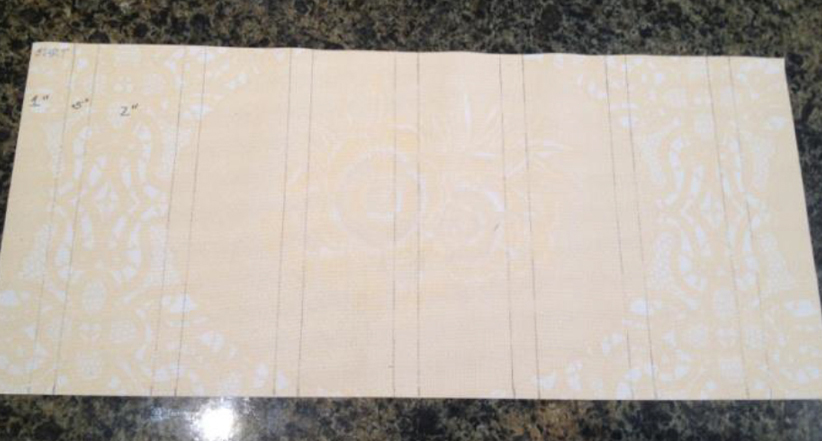 Step 3: Now we’ll draw pleat lines on the exterior fabric. Find the longer of the two exterior pieces, flip it over, and grab a pencil and a ruler. Starting 1” in from the left edge, draw your first line from top to bottom. Then, draw another line .5” to the right of the first line. Then, draw a third line 2” from the second line. Continue drawing lines all the way across alternating between .5” and 2”.
 Step 4: Starting at the second line you drew, fold the fabric over right on that line and finger press it.
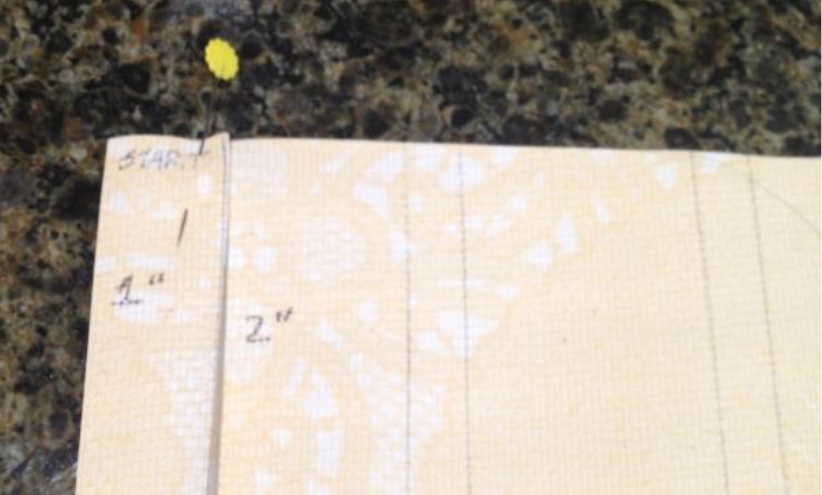 Step 5: Now, fold it back to the left on the first line. This will hide the .5” space you drew and give you a pleat! Pin it at the top as shown.
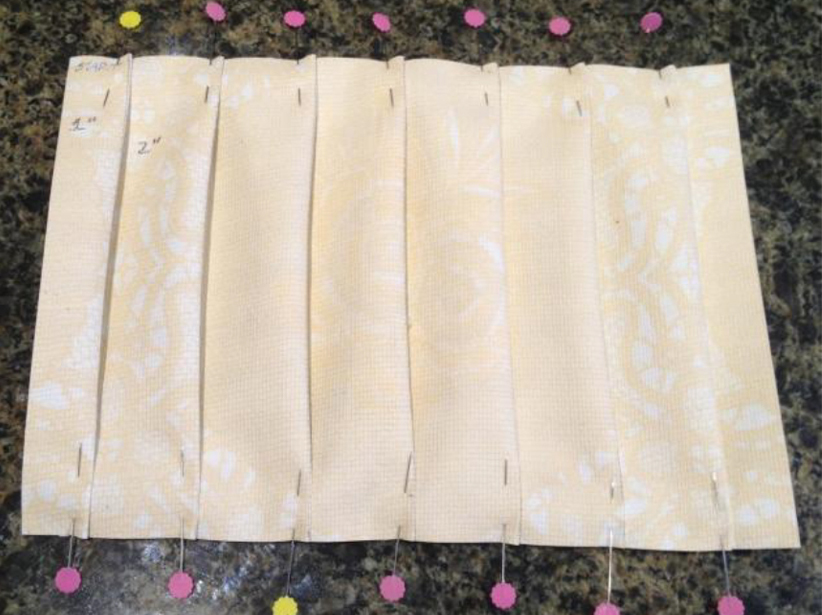 Step 6: Continue in this manner until all the pleats are folded and pinned.
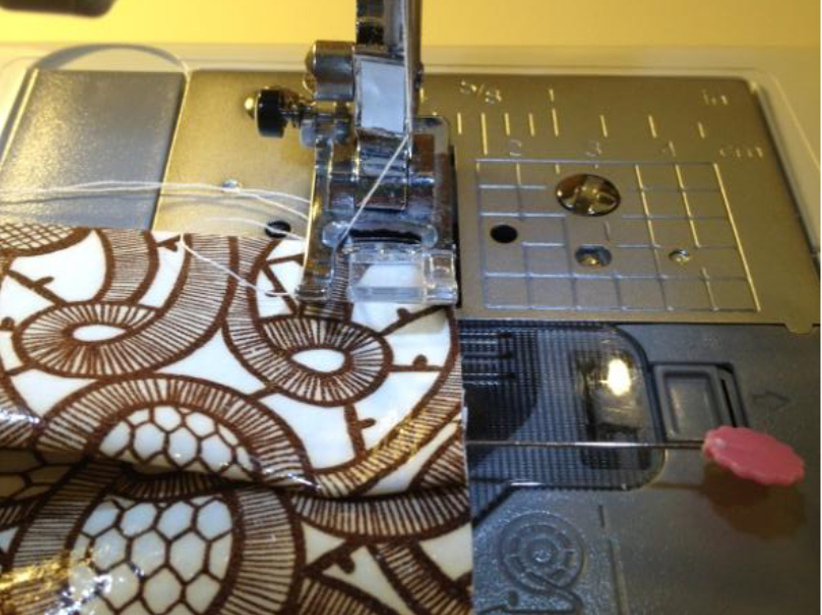 Step 7: Now we’re going to stay stitch the pleats you’ve created. To make life easier, edge stitch down both pleated sides to keep them steady.
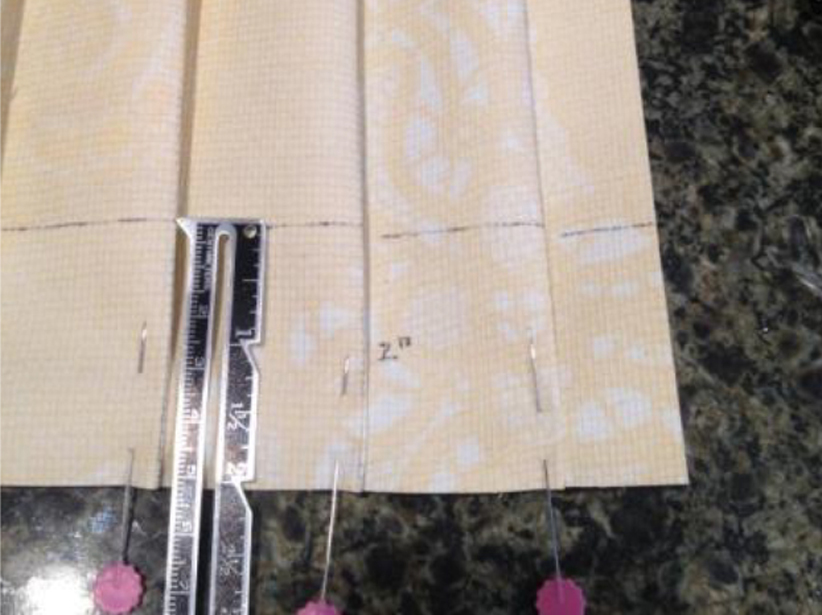 Step 8: This bag is going to have a gusset on the side, and the pleats sometimes come unfolded where the gusset turns the front side. So, we are going to measure up 2” from the bottom edge, draw a line across the pleats, and stay stitch along that line too.
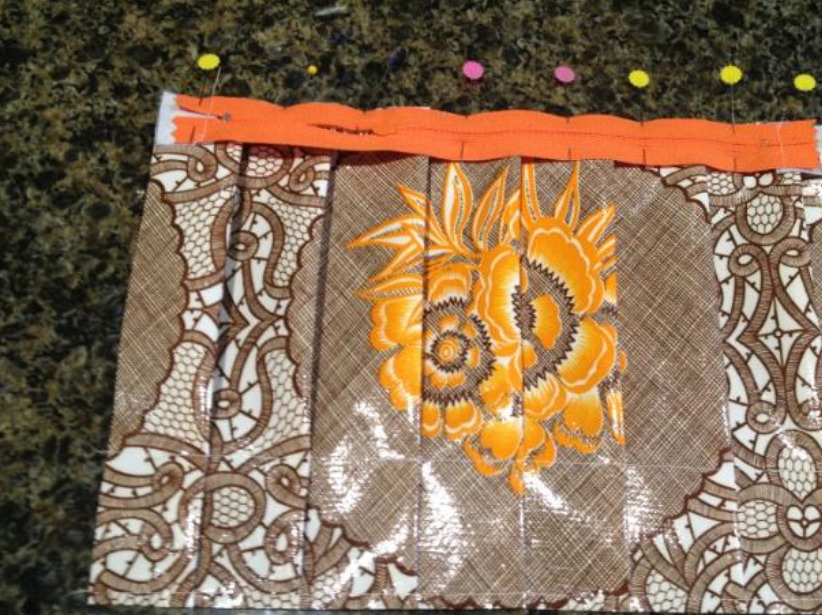 Step 9: Now we’re going to get the zipper in place. Place the zipper face down on the top edge of the pleated front exterior (the stay stitch across the front should be 2” from the bottom edge). Pin into place.
 Step 10: Grab a lining piece and match its edge along the edge of the zipper, right sides together. Pinch where the current pin is, remove the pin, and then replace the pin through all three layers: exterior, zipper, and lining.
 Step 11: Using your zipper foot and an approximately ¼” seam, stitch through all three layers, moving the zipper head by reaching between the layers and unzipping it to get it out of the sewing path.
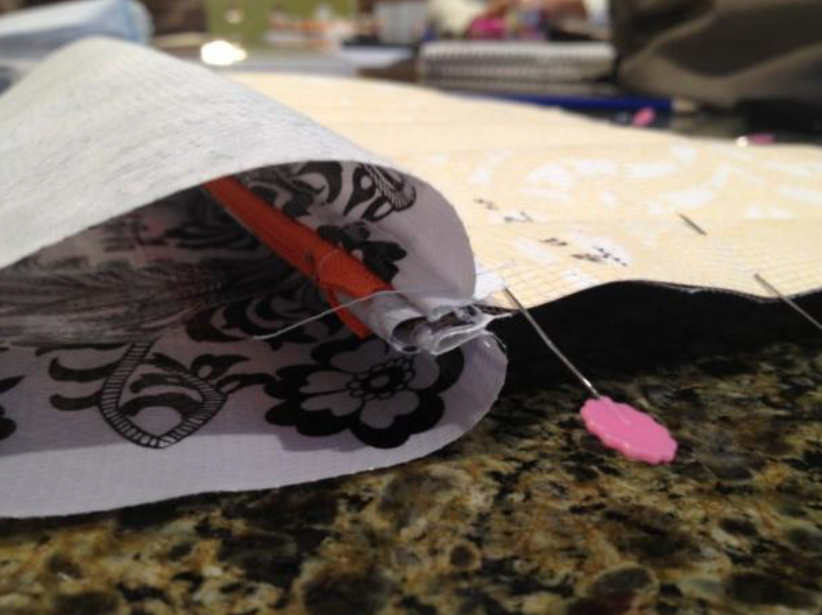
 Step 12: Press both oilcloth pieces away from the zipper, and finger press them down with your hands. (Don’t iron!) Then topstitch along the edge of the zipper to keep both pieces in place.
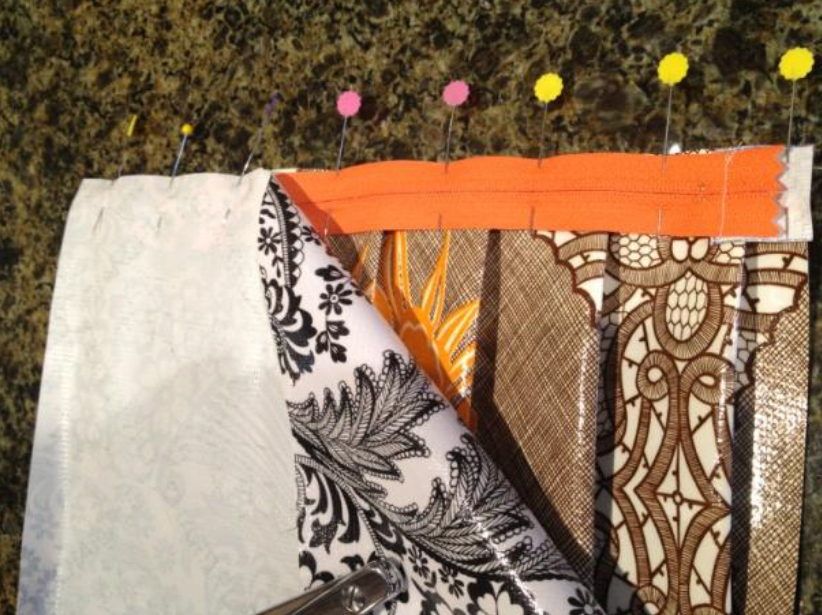
 Step 13: Repeat these steps with the other lining piece, the smaller exterior piece, and the other raw edge of the zipper. You will have what looks like a zipper with wings!
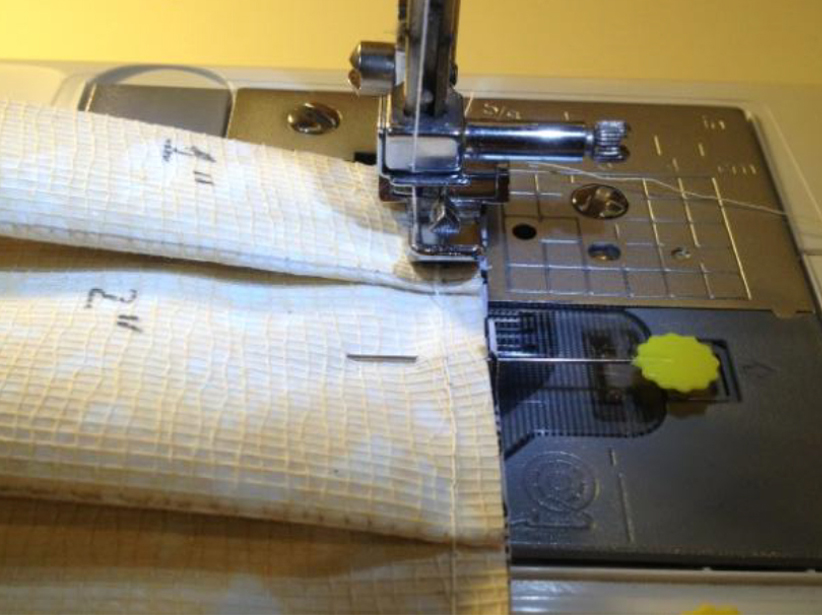
 Step 14: Now we’ll work on sewing the exteriors and linings together. Fold the panels over so the front right sides are together, and the lining right sides are also together. (Hint: Open the zipper halfway to get the zipper head out of the way!)
When matching the front sides together, make sure the top stitching on each side of the zipper matches perfectly. This will leave the extra zipper tape on the inside folded toward the lining side.
Step 14: Now we’ll work on sewing the exteriors and linings together. Fold the panels over so the front right sides are together, and the lining right sides are also together. (Hint: Open the zipper halfway to get the zipper head out of the way!)
When matching the front sides together, make sure the top stitching on each side of the zipper matches perfectly. This will leave the extra zipper tape on the inside folded toward the lining side.
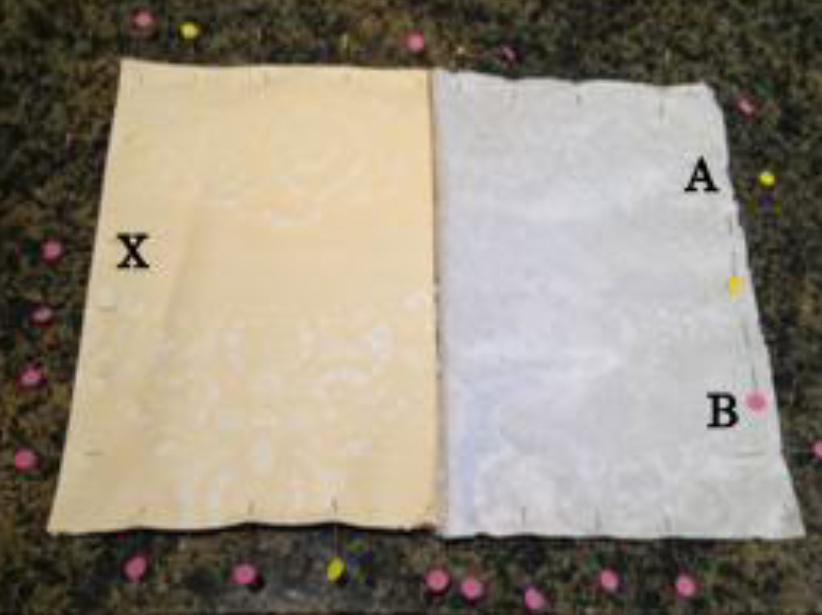 Step 15: You will be leaving an opening unsewn in the bottom of the lining so the entire thing can be turned inside out. On the opposite end, make an X with a pen in the middle of the bottom of the front panels.
Starting on one edge of the lining hole (marked with an A in the picture), do a little backstitch, and sew all the way along the edge of the bag, using a ¼” seam. Sew to the X on the opposite end and stop there.
Now start again on the other end of the hole in the lining (marked with a B in the picture). Backstitch, then sew again along the edge of the back, driving OVER the stitching near the X you made in the previous step to complete it, and THEN backstitch. This makes the zipper lay better!
Step 15: You will be leaving an opening unsewn in the bottom of the lining so the entire thing can be turned inside out. On the opposite end, make an X with a pen in the middle of the bottom of the front panels.
Starting on one edge of the lining hole (marked with an A in the picture), do a little backstitch, and sew all the way along the edge of the bag, using a ¼” seam. Sew to the X on the opposite end and stop there.
Now start again on the other end of the hole in the lining (marked with a B in the picture). Backstitch, then sew again along the edge of the back, driving OVER the stitching near the X you made in the previous step to complete it, and THEN backstitch. This makes the zipper lay better!
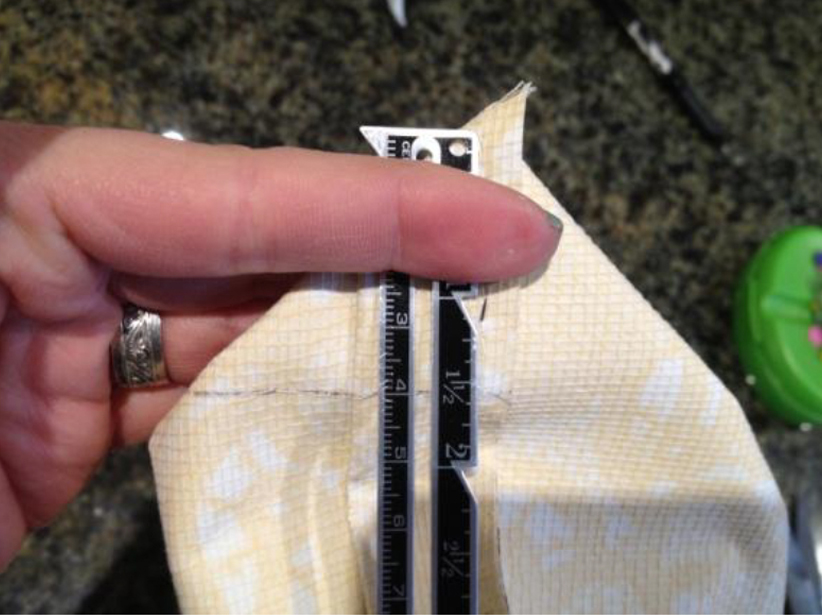 Step 16: Now we’ll make the gussets. Pinch in each corner (on both corners of the exterior and both interior) so the side and bottom seams are right on top of each other. You can verify they are aligned by using a pin.
Measure down the seam 1 1/2” from the tip of the corner and make a mark. Then, draw that line horizontally across the entire corner.
Step 16: Now we’ll make the gussets. Pinch in each corner (on both corners of the exterior and both interior) so the side and bottom seams are right on top of each other. You can verify they are aligned by using a pin.
Measure down the seam 1 1/2” from the tip of the corner and make a mark. Then, draw that line horizontally across the entire corner.
 Step 17: Sew right down each line you drew on both corners of the exterior and the lining.
 Step 18: Next trim the extra off each corner, and turn the bag right side out.
Step 19: Lastly, match the edges of the lining, pin, and topstitch across to close the hole in the lining.
Zip up your new clutch, and enjoy!
Step 18: Next trim the extra off each corner, and turn the bag right side out.
Step 19: Lastly, match the edges of the lining, pin, and topstitch across to close the hole in the lining.
Zip up your new clutch, and enjoy!
If you liked this project or enjoy working with oilcloth, check out these other fun projects to try:
How to Make an Oilcloth Wallet How to Make a Beach Bag Make a Quick & Easy Oilcloth Luggage TagGet in touch! Leave a comment or email editor@nationalsewingcircle.com.

Thank you for an excellent, thorough, well-presented video.
Very pretty pattern. Nice an simple. I really like the large pleats; they go very well with the polka dots. I am planning to mak it out of a nice feminine fabric (I don't have oil cloth). Thanks
Would really like to participate in this as I have not worked with oil cloth.
Very nice! Teaching a summer class in sewing will pass it on to my kids.
Isn't there a mistake in the width of the pleats? alterning 5" and 2" on a length of 13' ,leaves us with hardly 2 pleats!!
Made this today...in a way. The measurements quoted are incorrect- the video states a width of 11", and the written instructions indicate cutting to 9" , which makes the zipper too long for the opening.
This was a great video, and i am hoping to get the written instructions so i can get the needed supplies to make one. Thanks
I made an oilcloth purse combining a front pattern by Simplicity, which was designed for double faced quilted fabric, and designing my own back, lining and straps (I like the round straps) I also made it to convert to a clutch. The front has pleats and a contrasting top band which I made of pleather. I used dotted oilcloth for the main parts, and contrasted with a solid fabric, and used cotton for the lining, which has 2 pockets.