Many bag or tote patterns that you buy off the shelf have all the beautiful detail reserved for the outside of your bag. A lot of the time they do not incorporate any of that detail – specifically pockets – into the inside of the bag. Or if they do have pockets worked into the inside lining, they never seem to be exactly how I would want them. So, here’s an easy trick to making your own lined pockets!
The easiest way to add pockets either to the outside or inside of your bag is to add a patch pocket. This is my favorite method because I can customize the pockets to hold my favorite items, such as my cell phone, keys, lip gloss (in 3 colors, of course), etc. Now the bag is PERFECT for my needs!
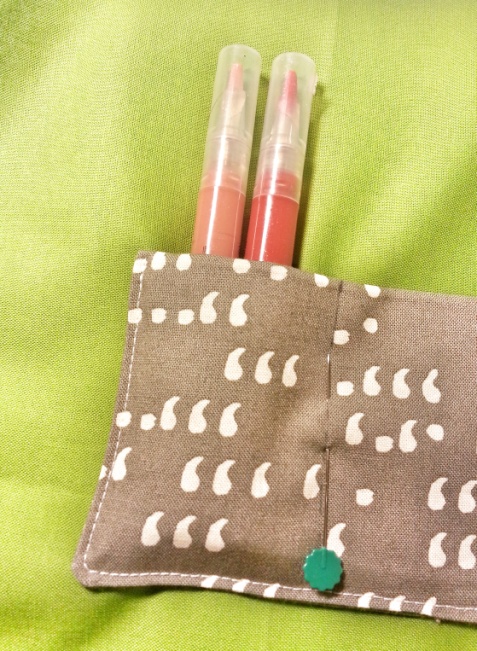 I made the pocket pictured here using Beth Bradley’s method. An extra tip here is to reinforce your pocket because there is going to be lots of stress on it by reaching in and pulling stuff out and stuffing stuff back in. To do this, simply back one of the fabrics with interfacing. Once you have topstitched the pocket to the lining of your bag (before you put the bag together, of course), tuck in the items you will be carrying (like your cell phone or lip gloss), and mark with a pen where the stitch line should go. Ta da! You have the makings of a custom pocket.
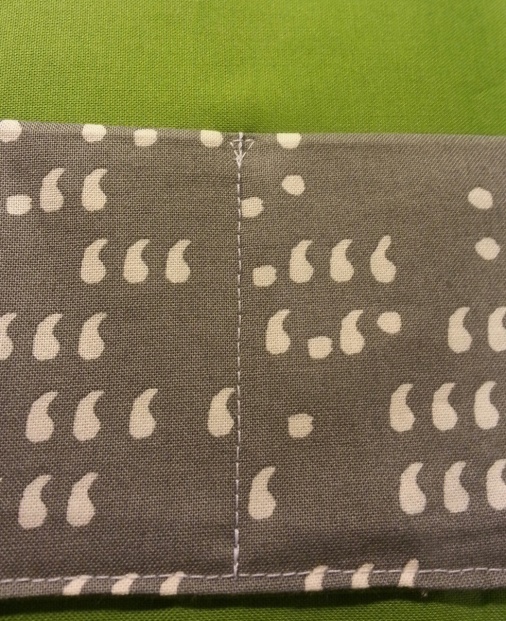 Then, go along this long pocket and separate them into more functional pockets. Don’t forget to leave a LITTLE room to make sure the item slides easily into the pocket. I am also going to reinforce the top edge of my divider stitches for security. This is also a great way to embellish a plain T-shirt that needs a bit of sprucing up. I’ve made a pocket using Beth’s method to make a beautiful finish using quilting-weight cotton and a light, slippery lining made from China silk.
I basted the pocket stitch lines on as Beth recommends, and then placed the pocket onto those lines and topstitched it into place. Look how much more visually interesting this shirt is now!
I’ve even used this cute shirt embellishment project for group events like bachelorette parties. Instead of making custom-printed t-shirts, each girl hands over a shirt that already fits perfectly, and we embellish with a pocket in a different fabric for each!
If the pattern you have chosen does not meet your needs in the pocket department, now you know how to customize them to make them pocket-perfect!
Happy sewing!
Related Video: Making Lined Patch Pocket Patterns
Get in touch! Leave a comment or email editor@nationalsewingcircle.com.
Want a hobby
I've done this for several years, because I like fabric purses better, (weigh much less than other types of purses), but they never seem to have pockets that are right.
Good to know new sewing technique
I really like this site. It is relaxing to put yuor ideas together & actually see it come to life.
Would like the pattern.
Very complete demonstration. Good job.
I don’t know how to make pockets for already made pants. I have to have pockets in all my clothes I need some help! Thank you
I LIKE THEIS
I love the tips you guys send out. Thanks!
I'm going to try your method when I get the information.