As the seasons change and the weather starts to get colder, many of us like to make changes around the house – warmer blankets on the bed, festive pillows on the couch, and other wintertime décor to deck the halls.
 Seasonal quilts are a great way to infuse some holiday cheer and seasonal charm into your décor. Unfortunately, full-size bed quilts or throws can get worn and dirty with use, can be bulky to store, and can take a long time to make. Especially if you’re not an avid quilter, you may not want to take all that time to make a seasonal item that will only be on display for a few months of the year!
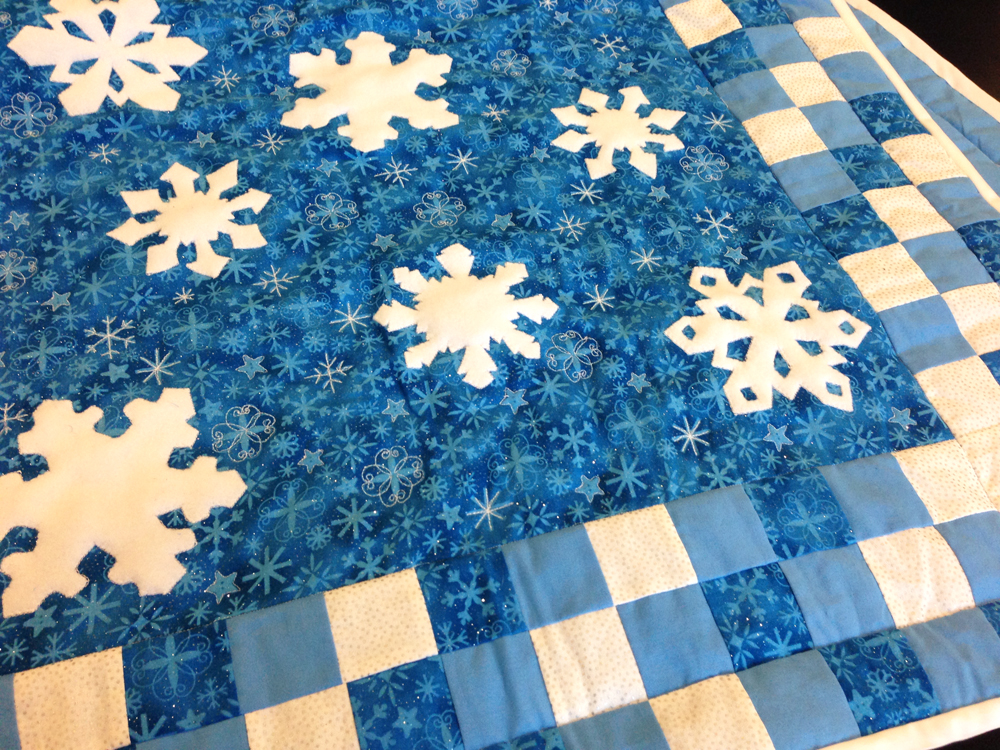 A solution? Try making a quilted wall hanging instead! This wintery snowflake quilt uses applique and looks stunning when hung up on a wall. It’s easy to put together and is a fun holiday project even if you’re not a regular quilter. This article will take you through the steps to make your own quilted snowflake wall hanging, just in time for winter.
(If you’re new to quilting, look for helpful tips and links scattered throughout this article. They will take you to new pages that explain the technique or topic in further detail.)
Here are the supplies you’ll need for the wall hanging project:
- 1 yard of a main background fabric, preferably something with a subtle design
- 2-½ yards coordinating accent fabric, used for the small squares, backing, and hanging tabs
- ¾ yard coordinating accent fabric, used for the small squares and large corner squares
- Approx. 5 yards of bias tape for binding, or fabric to make your own binding if you choose Fleece for the snowflakes
- Quilt batting
- Quilting thread for piecing as well as quilting
- Optional: freezer paper (makes cutting out the snowflakes much easier!)
- Snowflake template(s)
- From the main background fabric, cut one 24” x 42” rectangle for the quilt center and 60 2-½” squares for the borders.
- From the first coordinating accent fabric, cut 69 2-½” squares for the borders and three 4-½” x 7” rectangles for the hanging tabs.
- From the remaining coordinating accent fabric, cut 69 2-½” squares for the borders and four 6-½” squares for the corners.
- Attach one 6-½” square to the top and bottom of each side border.
- Attach the top and bottom borders to the top and bottom of the quilt centers.
- Attach the side borders to complete the quilt top.
Click the links below to download some snowflake templates. Use as many as you like for your pattern!
Let’s Get Started
Step 1: To start, choose and print the snowflake templates you want to use. Some of the snowflakes are harder to stitch on than other because of the smaller sections, so you may want to choose snowflakes according to your skill level.
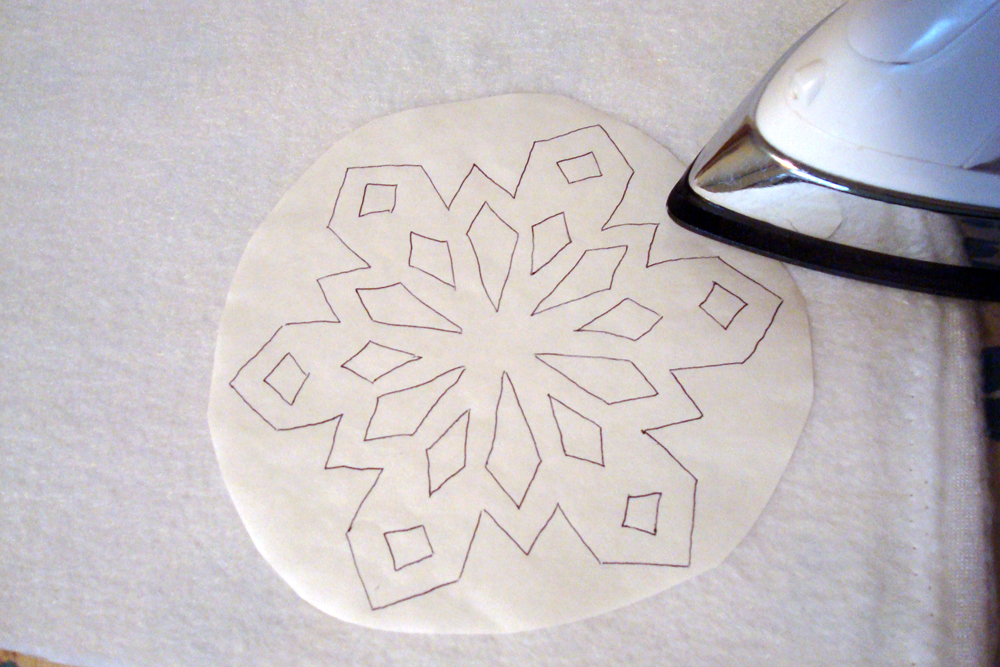 Step 2: Trace the snowflakes onto the dull side of the freezer paper, and then roughly cut out around the edges. Place the freezer paper snowflake shiny side down over the fleece. Using a warm, dry iron press the freezer paper onto the fleece until it sticks. This should only take a few seconds. Cut out the snowflakes on the traced lines and then gently peel off the freezer paper.
TIP: Using the freezer paper to cut out the designs makes the process much easier because you don’t have to draw on the fabric or use pins to hold the design in place. Also, fleece can tend to stretch and become distorted in such small pieces, so the freezer paper helps to hold everything in place.
Step 3: Cut out all the snowflakes you want to use and then set them aside.
Step 4: Cut your fabric according to the directions below.
That may sound like a lot of squares to piece together, but it is easy sewing, goes together fairly quickly, and makes for a really pretty border when finished!
Step 5: Now randomly arrange the small squares to make six strips of 12 squares and six strips of 21 squares. Once you have the strips lined up, stitch them together in sets of three to make the top, bottom and side borders.
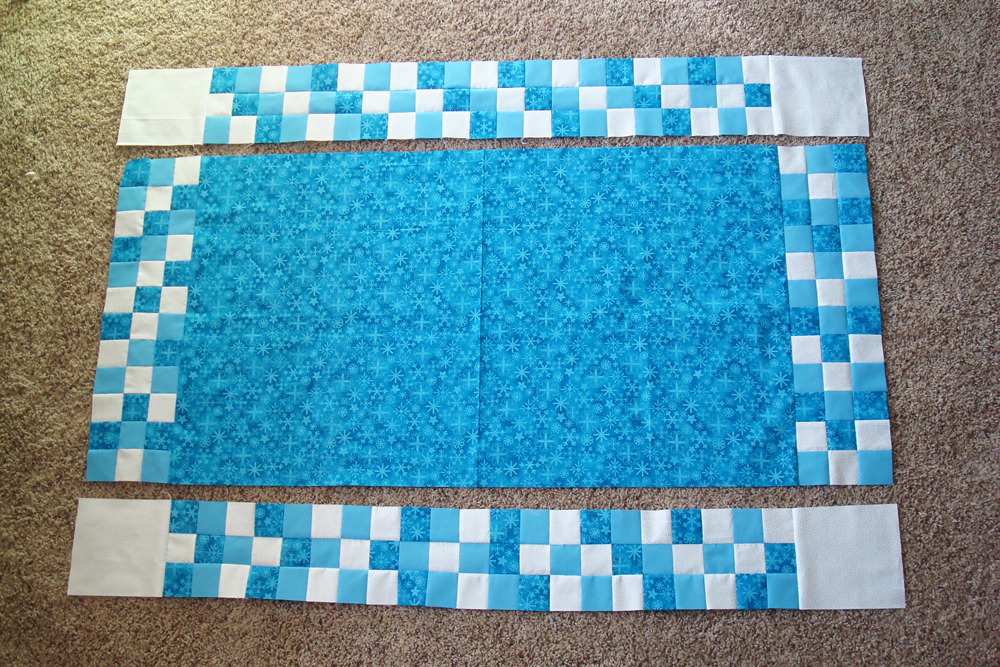 Step 6: Now attach your borders as follows.
Now that you have the quilt background and borders assembled it’s time to attach the snowflakes!
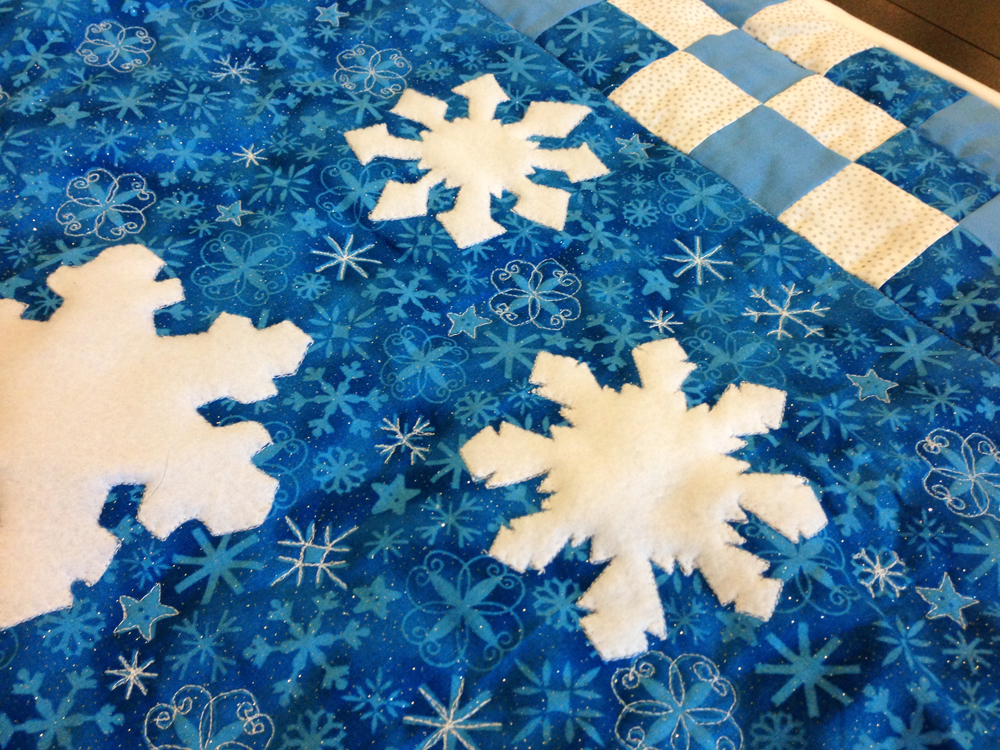
Step 7: Arrange and re-arrange the snowflakes over the quilt back until it looks the way you’d like, and then pin them in place.
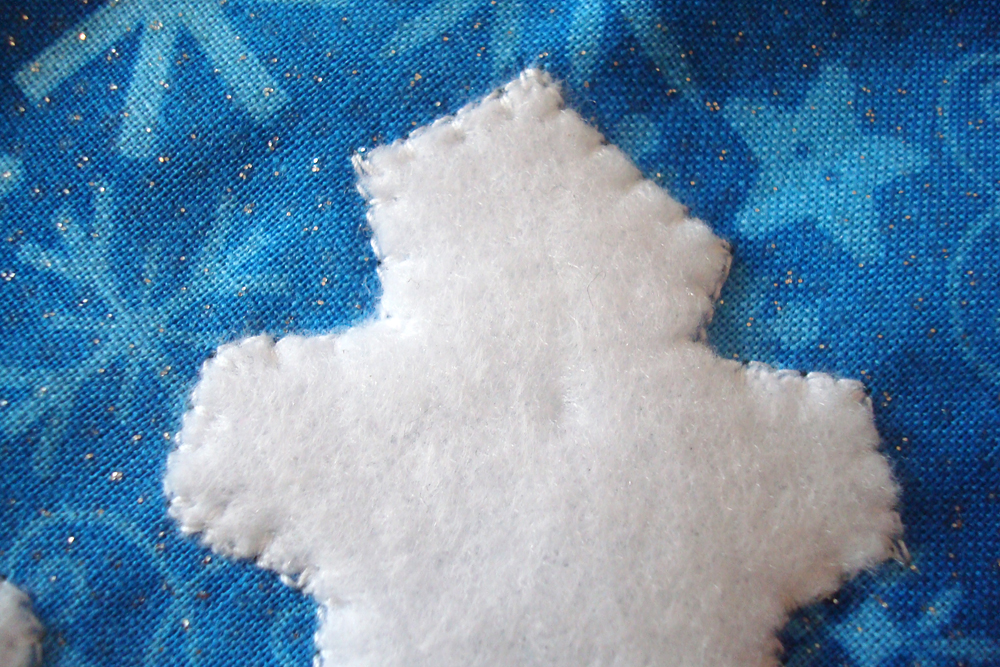 Step 8: Using a blanket stitch, applique the snowflakes onto the quilt.
If you’re new to applique, here are a few tips to make things easier:
Set your machine to be in the “needle down” position. This means that every time you stop stitching the needle will stop down in the fabric. This allows you to pivot around corners and points without the fabric moving when you don’t want it to.
Only stop stitching when the needle is in the background fabric, not the shape that is being appliqued on. Because the needle has to go onto the applique shape and then back onto the background fabric for the stitch to be complete, stopping with the needle on the applique shape can cause the stitch to not line up properly.
(Since this is a wall hanging quilt, there needs to be a way to hang it. If you are not planning on hanging your quilt you can skip this next step.)
Step 9: With right sides together, fold the 4-½” x 7” rectangle in half widthwise. Stitch the short ends together, then turn right side out and press. Tuck the raw edges ¼” toward the wrong side and press. Repeat with the remaining two hanging tabs, then evenly space the tabs along the top of the backing fabric near the upper edge. Stitch in place along the top and bottom.
Step 10: Assemble your quilt “sandwich” with the backing fabric on the bottom, the batting in the middle, and the pieced top on top. Use pins or safety pins to hold everything in place, and then baste around the perimeter. Quilt as desired.
 If you are new to quilting and don’t have a quilt design in mind you want to use, here are a couple options:
Stitch in the ditch quilting. This is quilting that is done in the seams of what has been pieced together on the quilt top, and in this case can be done all around the border.
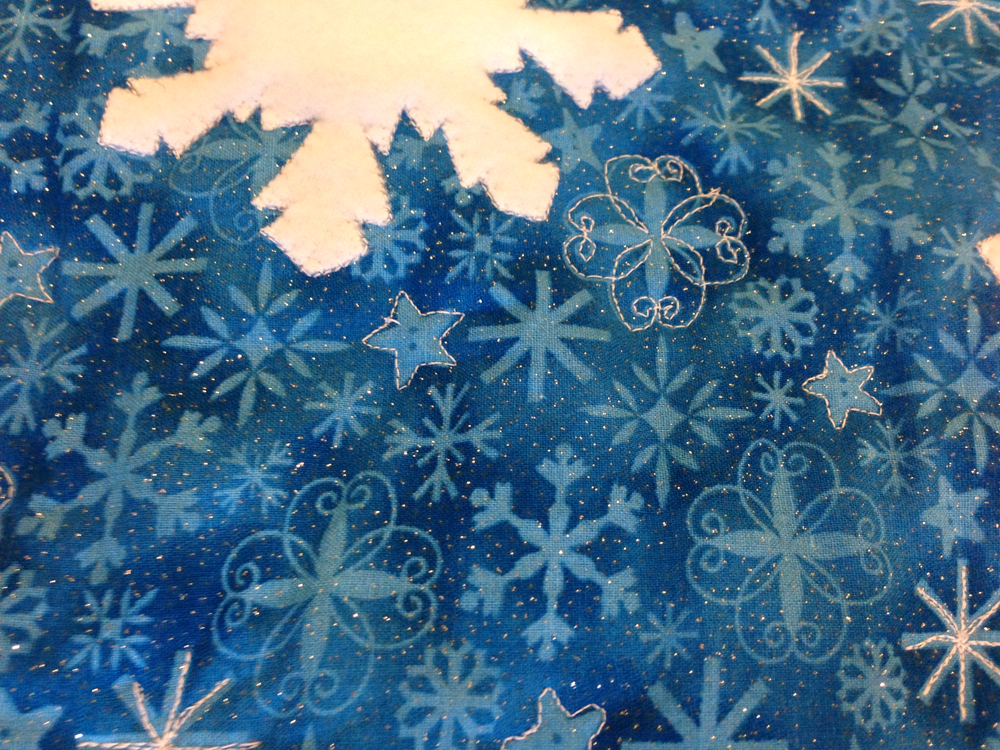
Free-motion quilting following the fabric designs (pictured above). This type of quilting is easy because you don’t have to draw any designs on the quilt; you just simply follow the design already printed on the fabric. Free-motion quilting allows you to move the fabric in any direction you need as you quilt, rather than just the forward and backward motions of regular sewing.
Step 11: After the quilting is finished, trim the backing fabric and batting to the same size as the quilt front.
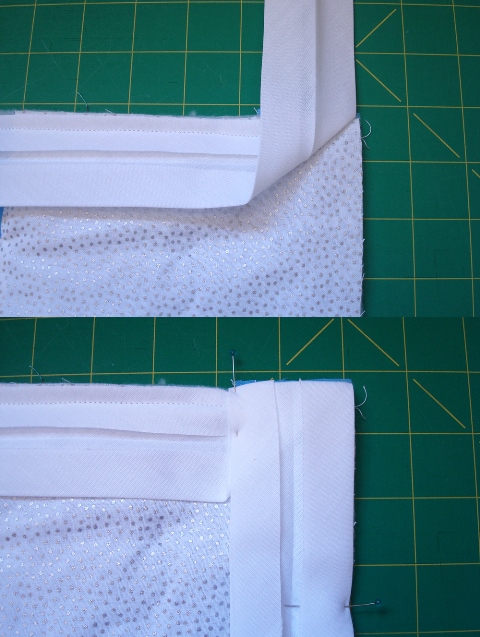 Step 12: With right sides together, pin your bias tape binding to the quilt front along one side. At the corner, fold the binding away from the quilt at a 90 degree angle, and then fold back down over itself to continue along the next side, creating a mitered corner. Repeat around all sides and corners to pin and stitch the binding to the quilt.
Step 13: Once the binding is attached to the front, fold the binding towards the back and pin in place. Hand or machine stitch.
 Step 14: Almost done! If you’d like to attach a quilt label or sign your finished quilt, now’s the time to do so. This is a popular step in the quilting community!
Step 15: Run a bar or hanging rod through the three tabs on the back and your quilt is ready to hang!
Now, display your finished quilt proudly on any wall of the house for an instant focal point, and enjoy the wintry charm all season long! Happy quilting!
Looking for more quilting information? Make sure to visit our sister site, National Quilters Circle, for tips, techniques, and video instruction.
Looking for more holiday projects? Try these:
- How to Make a Christmas Stocking
- Quick and Easy Applique Tea Towels
- Oh So Charming Quilted Mug Rugs
- Make Your Own Applique Quilt Patterns
Get in touch! Leave a comment or email editor@nationalsewingcircle.com.

What is the finished size?
Love this quilt.
LOVE to getdownloads
can't down load pattern I have just subsdcribed
can't open snowflakes or directions
Snowflake links are not working.