You will be so surprised how easy it is to sew a cute little pencil skirt with knit fabric on your serger. In this project, you will learn how to draft a pattern, add an elastic waistband, and hem your skirt. You’ll also get some tips for working with knit fabric, which can sometimes be a tricky fabric if you’re not used to it.
You’ll find that a knit skirt can be such a versatile (and comfortable!) addition to your wardrobe that you’ll want to make one in every color of the rainbow!
Related Video: How to Sew a Knit Pencil Skirt
Measure Skirt Length
Step 1: Measure from where you would like the skirt to rest on your hips to where you would like it to stop at the hem. I like mine right below my knees, which is 23” long for me.
Measure Hips
Step 2: Your hips are the widest part of the skirt, so measure around the widest part of your bottom! My measurement is 37”.
Make Pattern
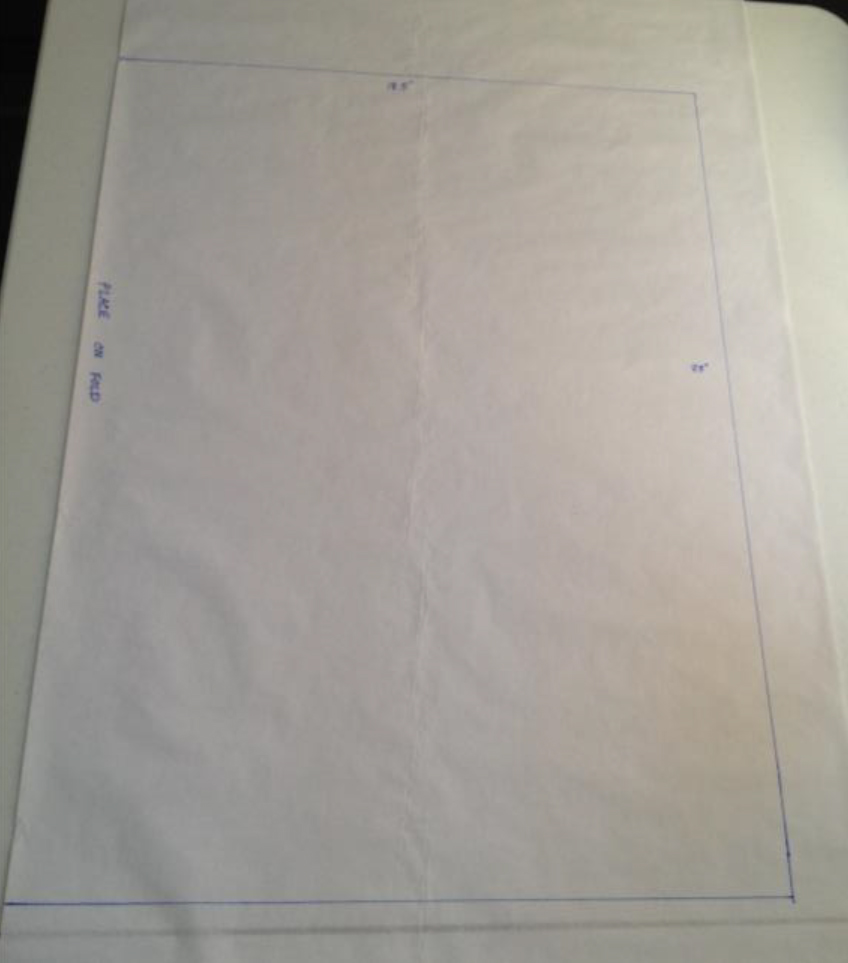
Step 3: Now we need to make our pattern piece for our measurements. We would like the skirt to stretch just a bit across our hips for a good fit, so we are going to cut a rectangle that is 37” wide. When we sew our seam up the back, we will LOSE about an inch, which will make the skirt 36” in circumference, and therefore, stretch a bit. This is called negative ease.
The rectangle should be 23” long, + 1” for the top waistband seam allowance, and 1” for the hem. So, the rectangle should be 37” wide and 25” long.
We are going to cut the fabric on the fold, so let’s also cut our pattern width (the hip measurement) in half. Our pattern piece should be 18.5” wide, and 25” long. Note I wrote “Place On Fold” on the edge to remind myself!
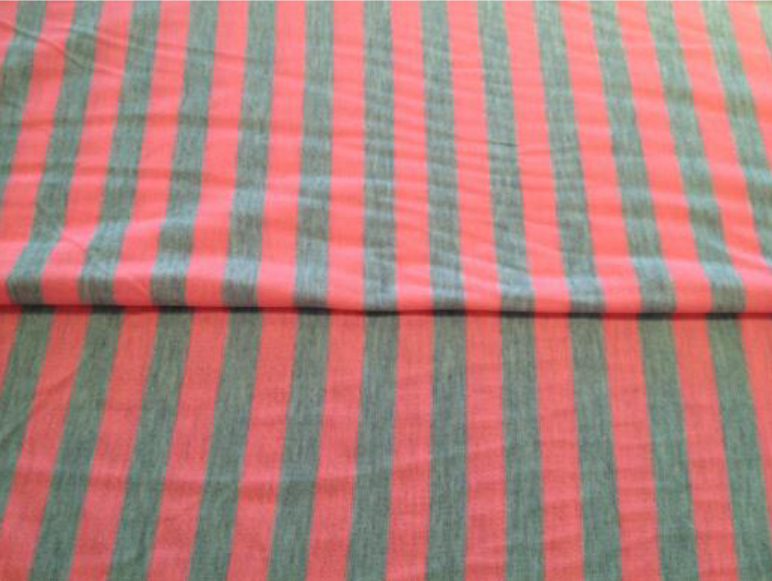
Notice how I matched up the stripes as I folded it. If you’re using a striped fabric like me, check out this video for some pointers:
Related Video: Sewing with Stripes
Cut Out Skirt
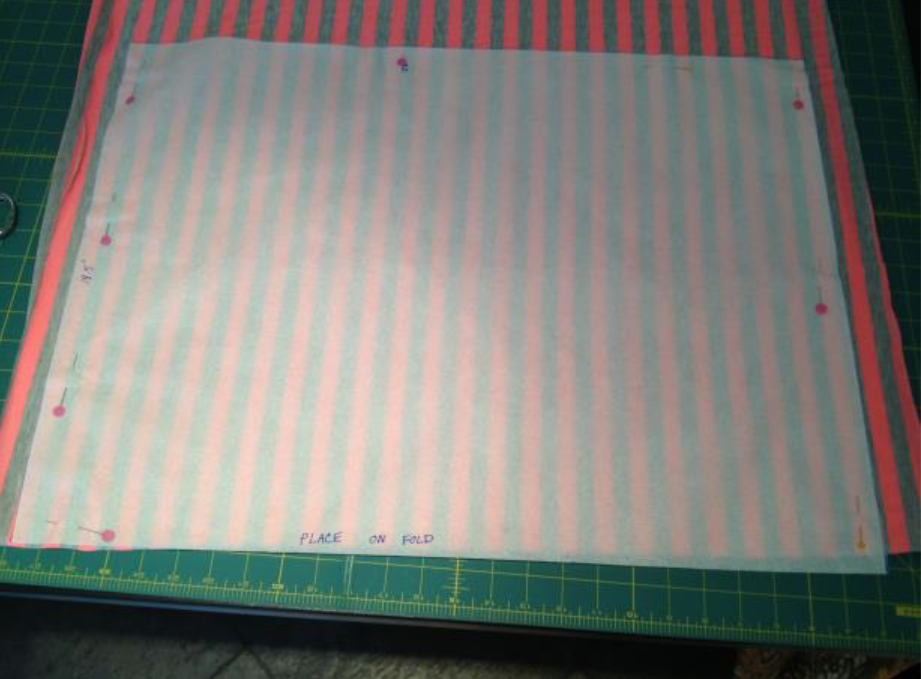
Step 4: Now it’s time to cut out your pattern. If this was a cotton, I would just use my iron-off pen to draw this pattern onto the fabric, but a knit is so shifty and stretchy, it is much better to pin a pattern to the fabric to keep it in place while cutting. Notice my edge is on the fold!
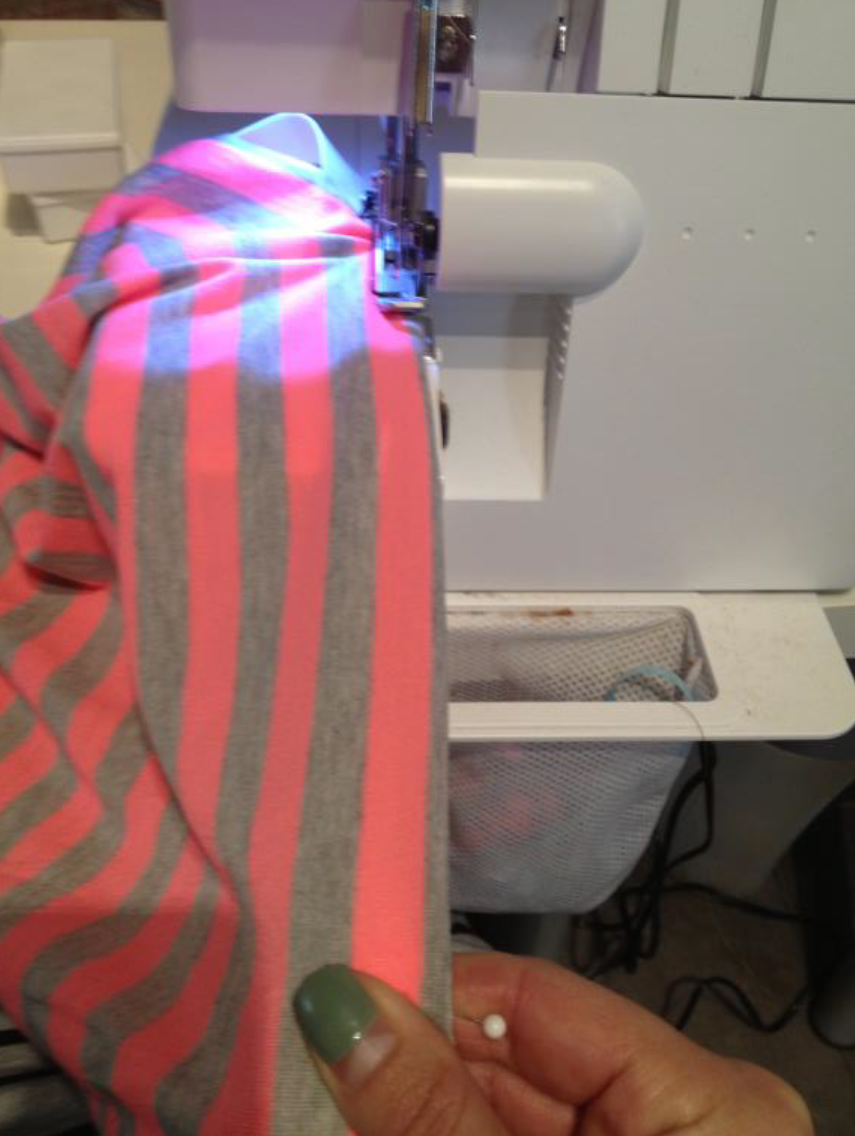
Sew Up Side Seam
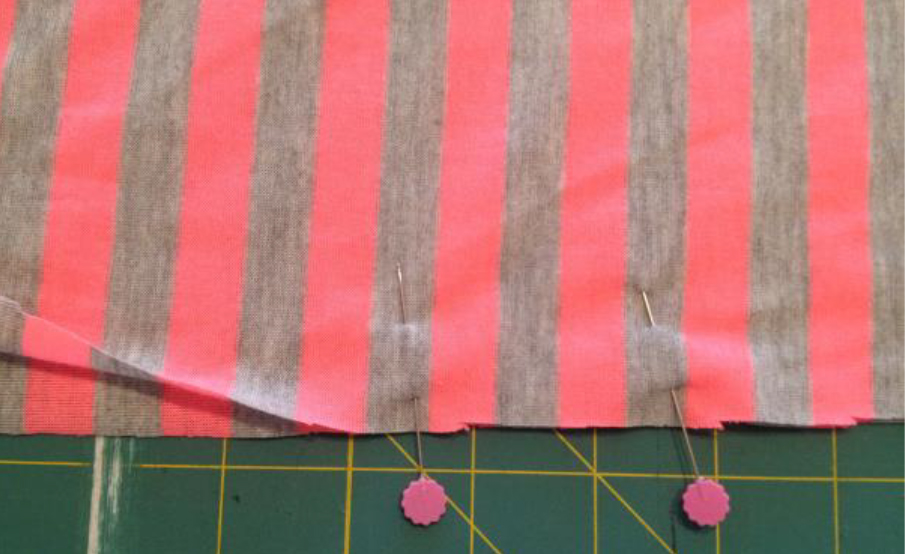
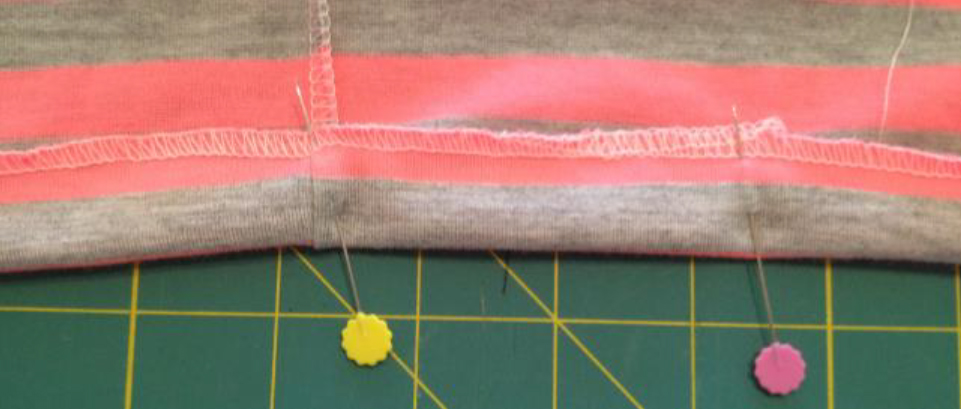
Step 5: Fold the rectangle in half, matching up the side seam and putting the right sides together. Pin in place. Since I have stripes here, I am doing my best to match up the stripes!
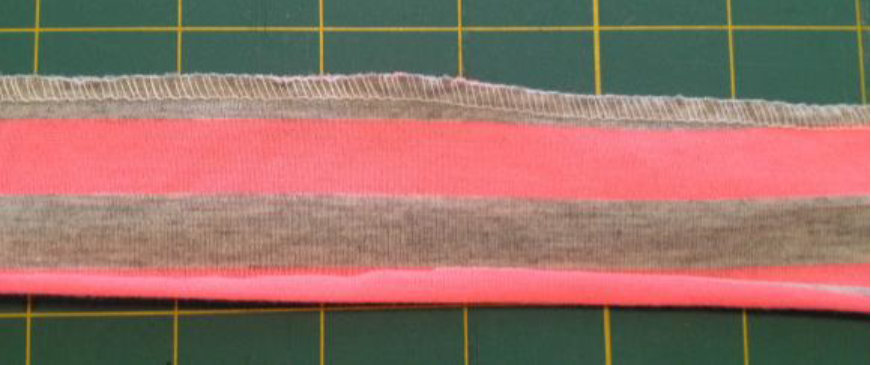
Step 6: Test a scrap of the fabric on your serger, and make sure that it doesn’t pull or ruffle; the seam should lay nice and flat. Adjust your differential if it is ruffling or gathering.
Related Video: What is Differential?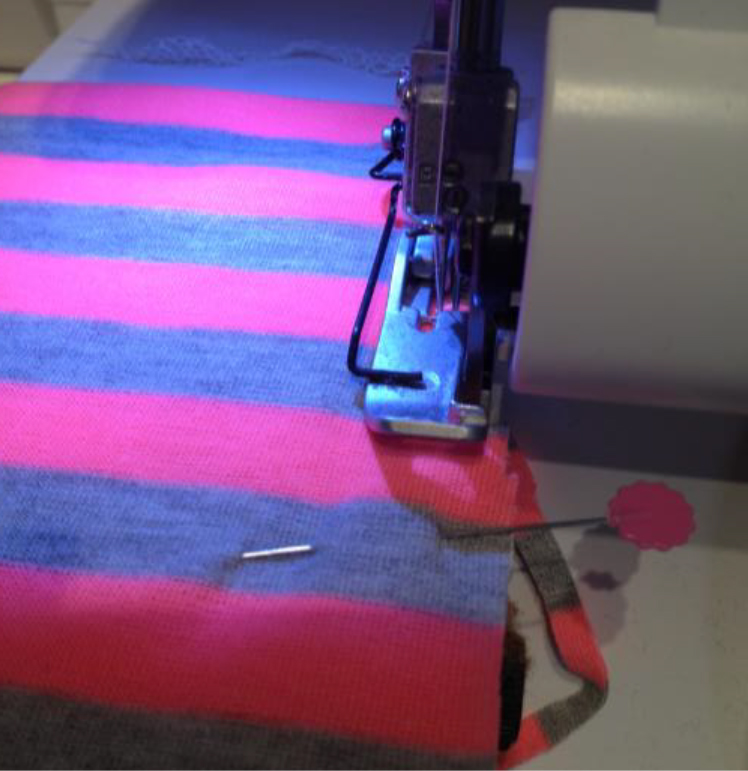
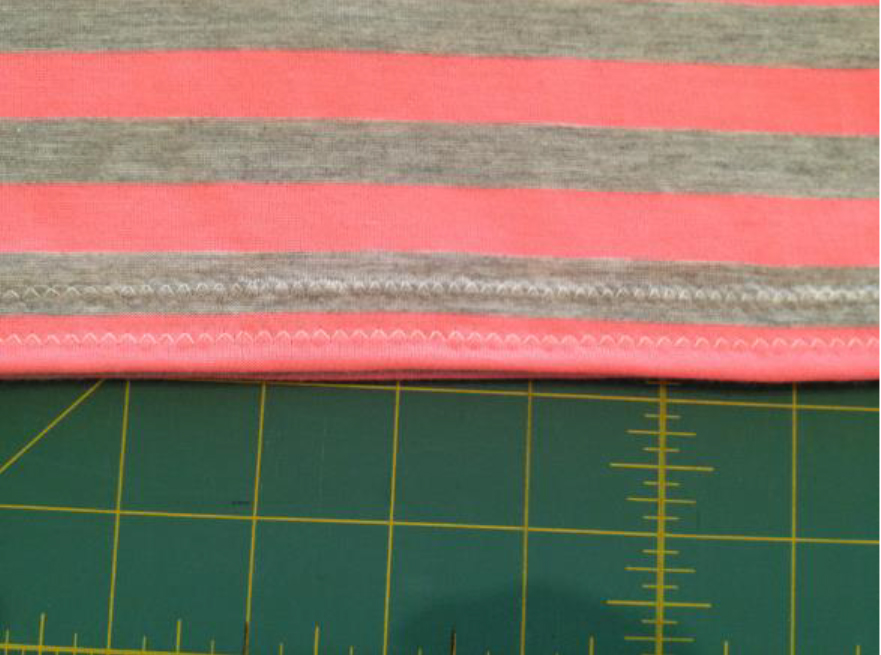
Step 7: Sew the side seam, making sure you always cut just a bit of the fabric off so the overlock stitch is perfect. Don’t run over the pins!
Try Skirt On
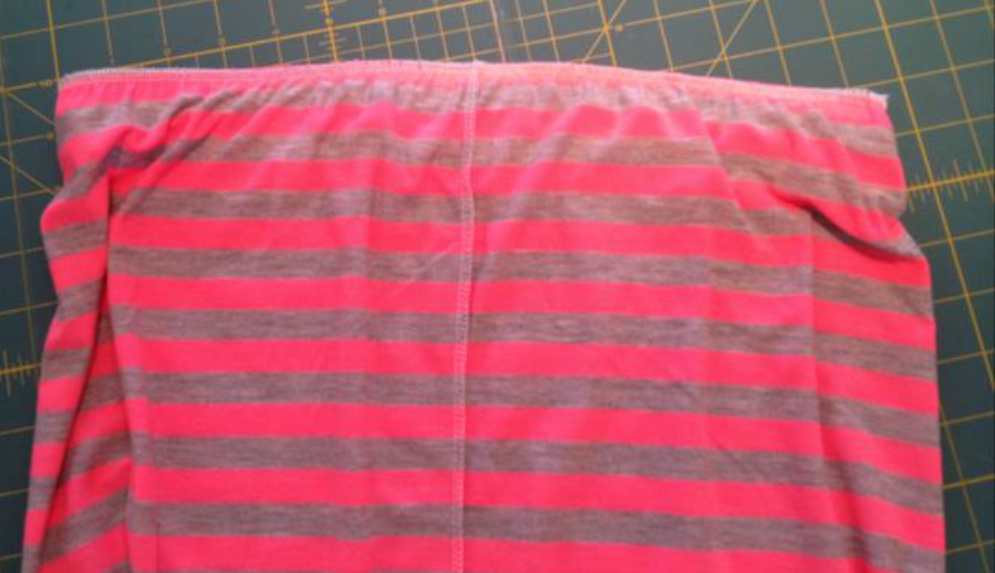
Step 8: Before you do the waistband, this is a good time to try your skirt on. It will pool around your waist area, but should fit nicely in the hips.
If it’s too big around the hips and you would like it tighter, run it through the serger again, cutting off the seam you sewed previously. Repeat this until you get a nice fit that you are happy with!
Related Video: Knit vs. Woven Fabrics
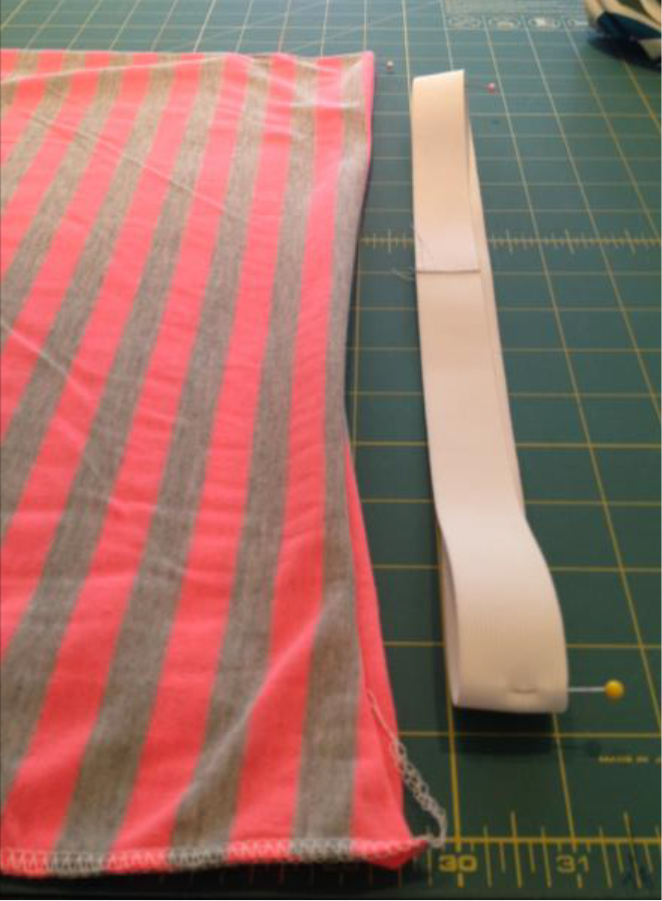
Pin Elastic to Waist
Step 9: Measure your waist, which is the smallest part of your middle. My waist measurement is 29”. I want my skirt to sit down on my hips a bit more, so I am going to add 1” to make it a bit bigger. My elastic piece should be 30” long.
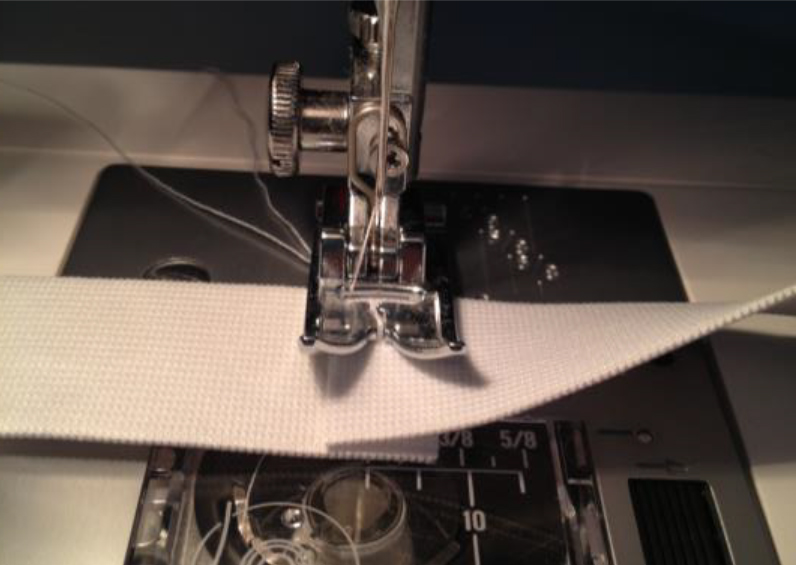
Now overlap the ends of the elastic by ½”, being careful not to twist, and zig zag back and forth across the overlap several times to join them in a loop.
Step 10: Lay your skirt flat with the side seam on one side. Mark the other side fold with a pin.
Then lay your elastic flat, and also mark those with pins. This will be your guide to pinning the elastic to the skirt.
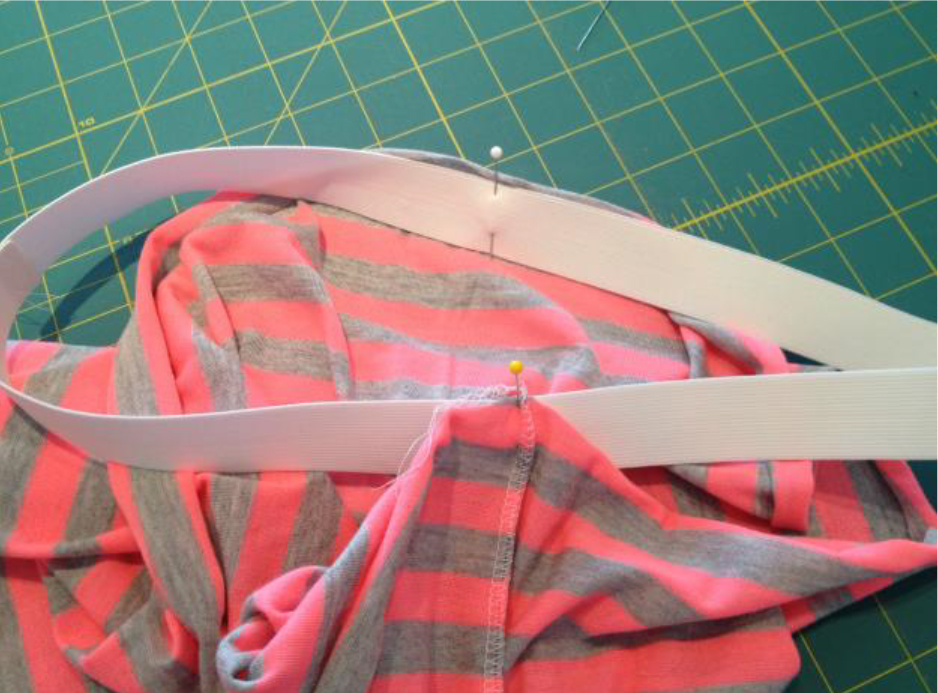
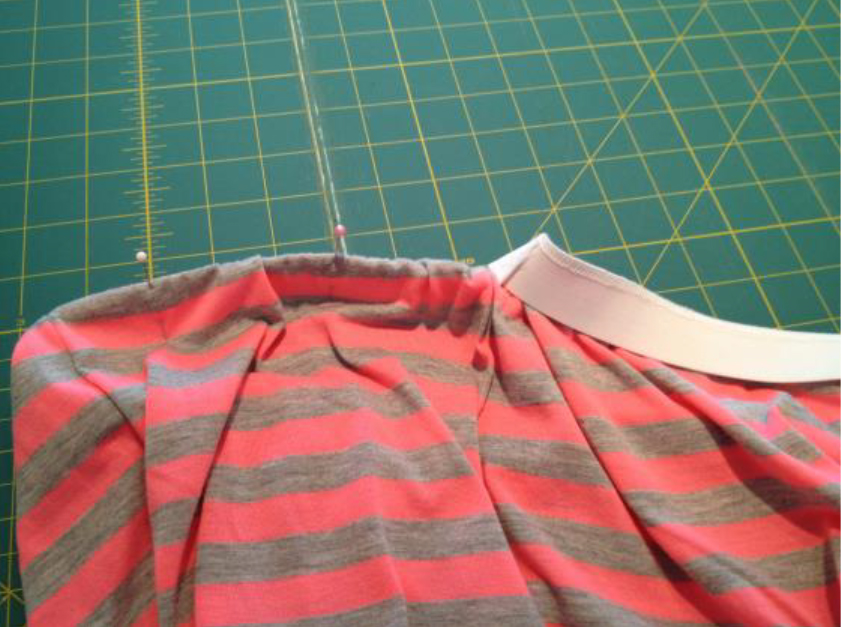
Step 11: Put the elastic ring inside the skirt (on the right side of the skirt). Match one of the pins with the side seam of the skirt and pin into place. Then, match the other pin on the elastic to the pin on the skirt. This will divide the elastic evenly across the skirt waist.
Step 12: Lay the pinned areas on top of each other, and repeat the marking process the other direction as well.
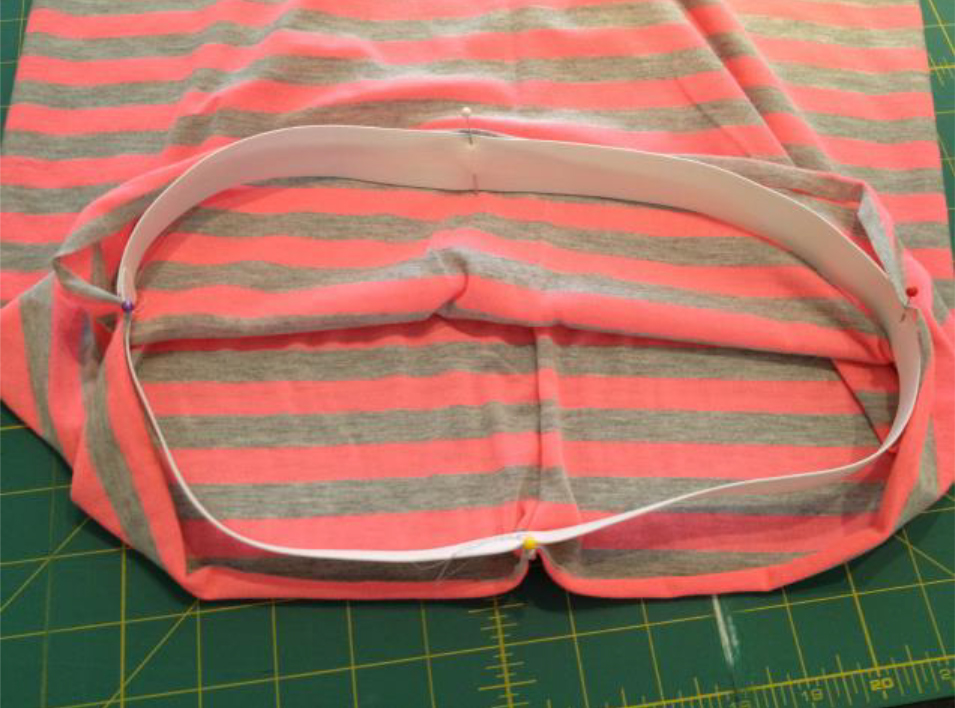
Step 13: You now have four even quadrants of the skirt pinned in four places. The skirt will be bigger than the elastic.
Stitch Elastic to Waist
Step 14: With the elastic underneath and the fabric on top, serge the elastic evenly to the skirt by pinching at a pin and PULLING the elastic toward you to stretch it out. Make sure and watch the fabric so you only pull the elastic enough for the fabric to lay STRAIGHT, not STRETCHED. Only the elastic should be stretching.
Step 15: Once you get all the way around, the elastic will relax and the top of the skirt will be just a bit gathered!
Related Video: Inserting and Sewing Elastic with Ease
Topstitch Elastic
Step 16: Now turn your skirt right side out. The elastic should now be on the OUTSIDE of the skirt. Turn the elastic back around to the INSIDE of the skirt, and pin it down that way all the way around. You will only need to pin every 5 inches or so, since we are going to stretch as we sew again.
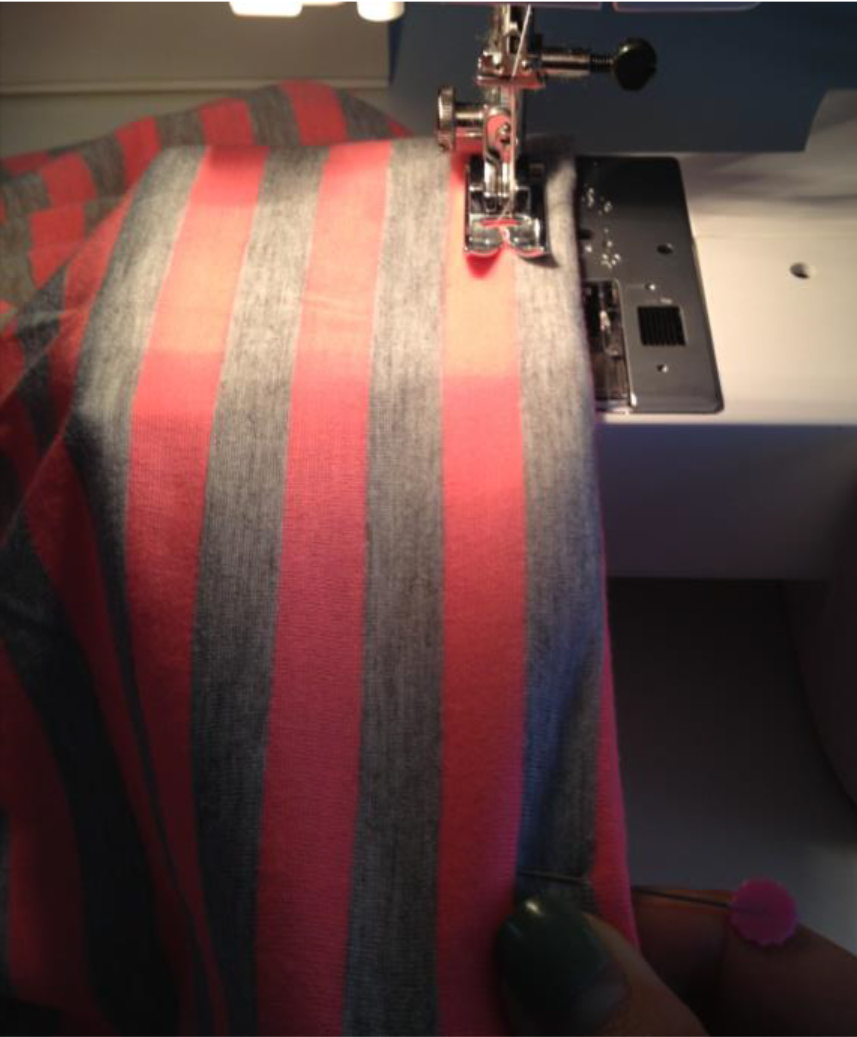
Step 17: The elastic around the waist is going to need to stretch, so use a zig zag stitch to keep it in place.
TIP: Remember that scrap we used to see if the serged edge was nice and flat? Do a zig zag down the middle, and then try to stretch the fabric. It WILL have a breaking point where the threads pop, but make sure you have plenty of stretch to get it over your hips, and the thread doesn’t break. Adjust by making your stitch length a little shorter, or your zig zag a little wider.
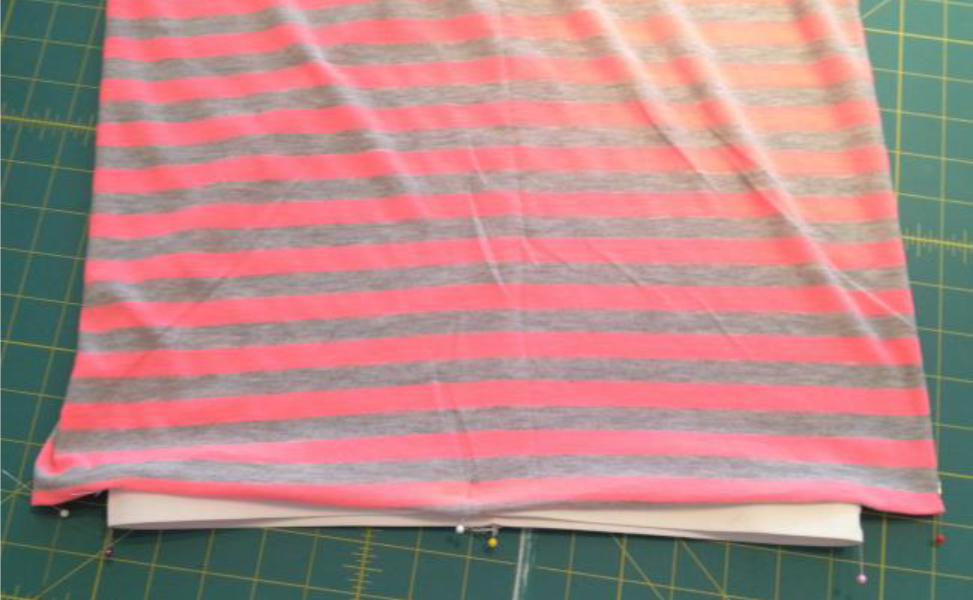
Hem Skirt
Step 18: Now, a knit does NOT have to be finished! If you look at many maxi skirts in the store, the edge is just cut right off, and there is no seam! Because it is a knit, it will not fray! So, you COULD be done at this point. Me? I like it to look pro, so let’s hem it.
Run your hem through the serger to finish the raw edge. This also helps it from curling when you sew your final hem. Fold your hem under an inch, and pin it into place.
Related Video: How to Hem a Skirt
Step 19: Using your zig zag again, stitch close to the fold on the front side. I like to do a second zig zag up a bit to help hold everything in place, AND I think it makes it look more professional.
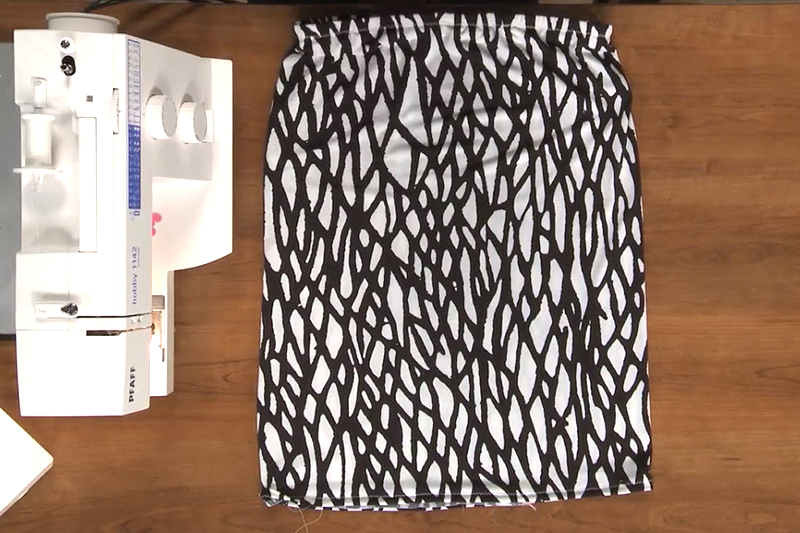
Once you’ve finished your stitch, your skirt is now ready to wear and show off!
If you’d like to learn how to sew the same skirt on a conventional machine, check out this video for specific instructions: How to Sew a Knit Pencil Skirt
Happy sewing!
Have something to add? Leave a comment or email editor@nationalsewingcircle.com.
Thank you for sharing! Great instructions and extra assistance in case needed🥰
Love this! Thank you!
Hi , if my waist is 42" , how long should i use elastics ,42 or less?
If you want a little flare on the bottom , slash about 4 evenly spaced to the bottom of the skirt and stretch out that part of the pattern a little 6-8" high should do it depends on how much flair you want.this was hard to explain. do a sample on paper.
I love to use a stretch twin needle on my knit hems/sleeves to get a ready made look. I set my zigzag to .5 to allow for adequate stretch. Also, don't forget to use a ballpoint/stretch needle in your serger and sewing machine. These needles slip through the fibers, rather than puncture them, eliminating needle holes and potential runs through your knits. A walking foot is helpful if all stitching will be done on your sewing machine.
<strong> Ticket 19649 I enjoyed your video and wonder if this could also be used for a thicker material that is stretchy but less than the thinner knit.
The instructions are great. All was awesome till I added the elastic. After serging and topstiching it even though I did all according to the instruction the elastic remained streched almost 10cm - from 85 till 94. And now the skirt is way too big for my weist. :(
I have been looking for a pattern like this. Thanks
Great easy to understand instructions! I really want to make a skirt that has a little flare to it instead of straight pencil. I’m thinking I could use these instructions and begin flaring it below the hip measurement. Does that sound doable to you? Thanks
Thank you for your instructions. I made my pencil skir, it fits perfectly.