E
Small Bust Adjustment
National Sewing Circle Editors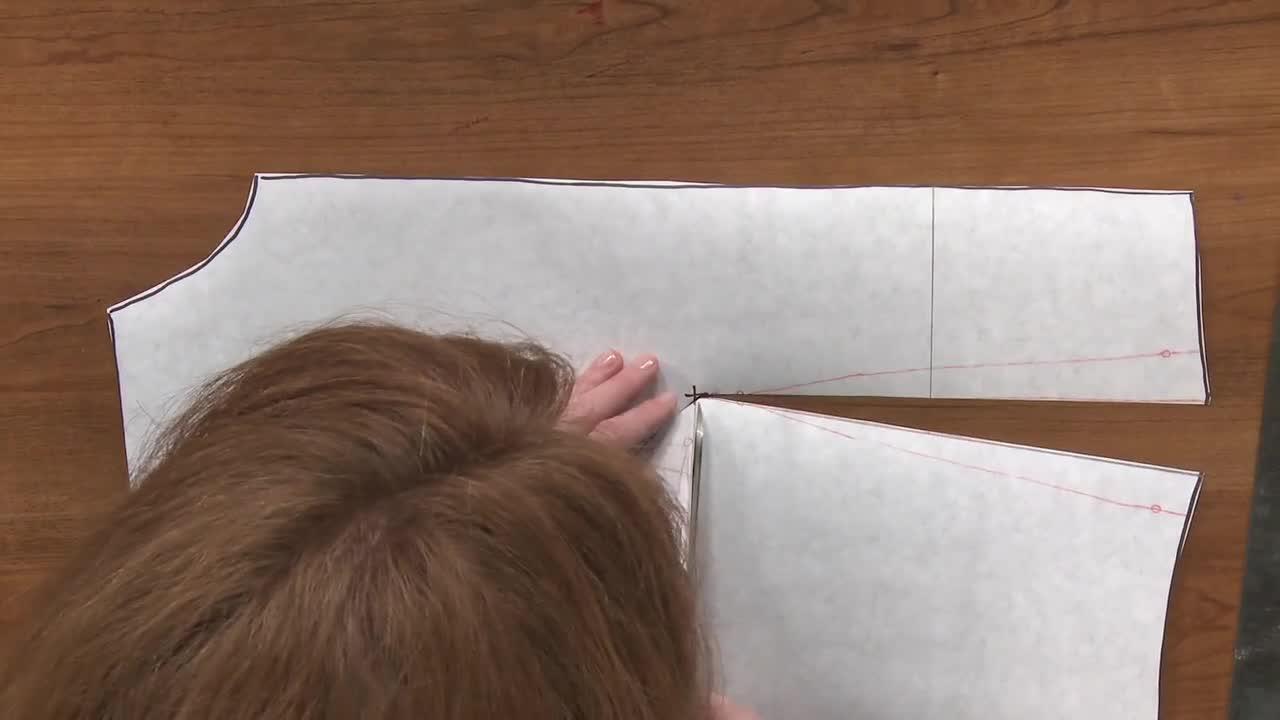
Video Player is loading.
Jill Case takes you through the process of making a small bust adjustment. Learn how to measure your bust size properly with two critical measurements. See what tools and/or materials you will need to make a small bust adjustment. Also, find out the importance of marking your bust apex point! Fit more comfortably in your clothes today by using these helpful tips for making a small bust adjustment!
[Lively Music] Most pattern manufacturers make patterns for a B cup bra size. So if you're an A cup and you find that your bodices don't fit well, you may benefit from a small bust adjustment. And the first thing, if you're unsure if you're an A cup, the first thing you want to do is take two measurements. One is the high bust measurement, which is about right here. And then the second measurement would be your full bust measurement, which is your full bust area, roughly there.
And then you would subtract the two measurements, and if the difference is an inch or less, than that means you are an A cup and you might benefit from a small bust adjustment. The second thing you want to do is you want to make a copy of your original bodice pattern and just so you can always have your original for future reference and to make other adjustments. And one of the important marks to put on your copy is the bust apex point, which is usually a cross or a circle with a X in it. And that one you definitely want to have onto your copy. And then when you make your copy, there's just four lines that we're gonna draw from it.
And the first one would be going up the center dart to the bust apex point. And then the second line you wanna draw is about a third up on the arm's eye, or the arm hole. And again, you wanna hit that bust apex point. [Draws Line] And then you wanna just continue that line through the center of the waist dart. [Draws Line] And then the fourth line is anywhere between the apex point and the bottom of the pattern, so anywhere.
[Draws Line] And so those are the four lines that you're gonna draw. And then you're going to cut your copy of your pattern. And I like to draw um... cut on the dart first, [Cuts] or the bust dart first, and I'm not gonna cut all the way through to the point, I'm just gonna, cause we're gonna hinge that natal and then cut up from the waste dart [Cuts] and then keep going up. And you don't want to cut through you just want to hinge it again.
So it just kind of slightly together maybe cut a little bit more. And if you end up cutting through you can just use a little piece of tape and tape it back. And then what you want to do is you want to you're going to close these the original dart to make it a little shorter and narrower. And if you want to eliminate the dart altogether you just bring the dart legs completely together. But if you want to keep a dart you just kind of overlap it just a little bit.
And then you tape, let's go back there tape to secure and then you're going to overlap again, this part and you're still what you're doing is you're just kind of shortening the darts and decreasing that width. So our original dart was this wide and now we're just going to make it a little bit narrower and then you want to tape to secure And then you have some little pieces out here. You can just trim those up. [Cuts] Okay, kind of tidy it up a little, same thing with this one. And then the, the last line is where [Cuts] I'm just going to...
even that up, so it's right in line with the bottom one. And then you would just tidy up your darts a little bit [Draws Lines] Draw a center, center line through your new dart. And then the same thing goes for your, your bust dart [Draws Lines] And then after you get your, your new darts drawn you want to definitely make a muslin of your new adjustment and just to make sure the fit is good or if you need to make more adjustments you can always just peel off the tape back and move it to where it'll fit better. And hopefully um... you only need to do it once but you may need to do fittings um...
a couple times just to get the fit, right. And that is a small bust adjustment.

Share tips, start a discussion or ask other students a question. If you have a question for an expert, please click here.
Already a member? Sign in
No Responses to “Small Bust Adjustment”