E
Inserting and Sewing Elastic with Ease
National Sewing Circle Editors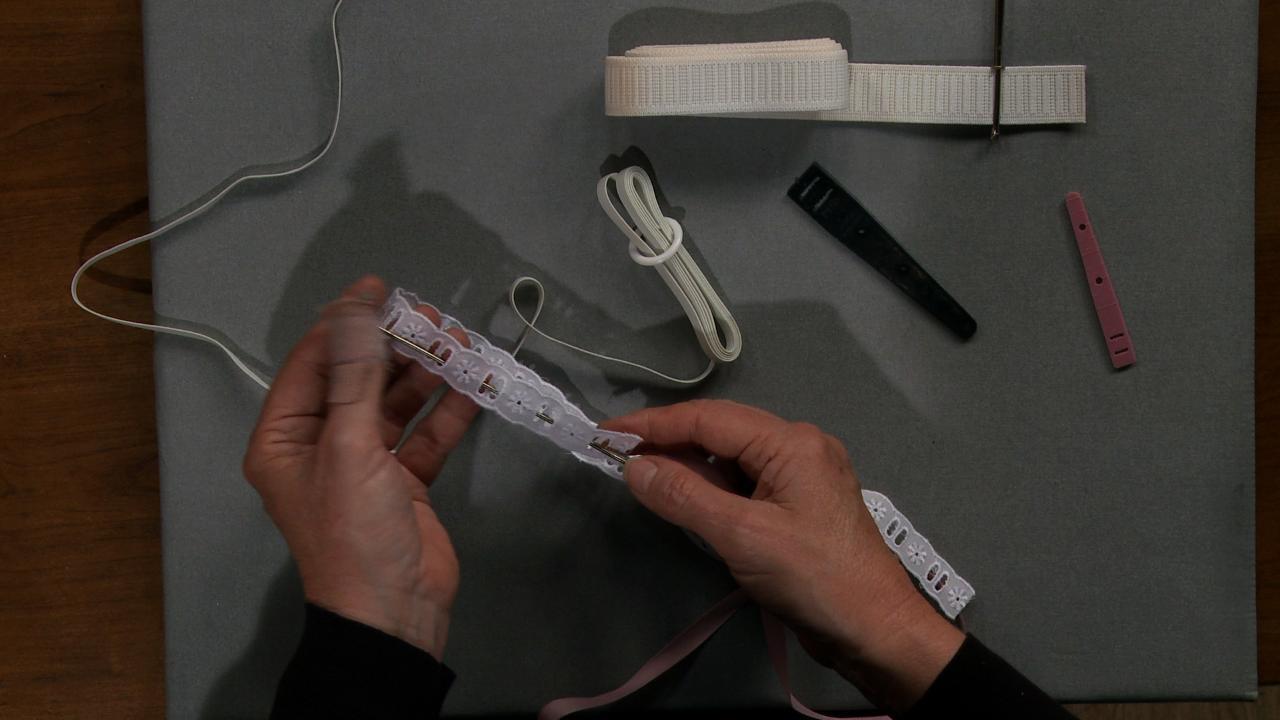
Video Player is loading.
Whether in the waistband of pants, around the bottom of a sleeve, or on any home décor item, inserting elastic can be tricky. ZJ Humbach teaches both old and new methods to make inserting any size of elastic easy. If you don’t have any tools on hand, a safety pin can help you slide the elastic through a casing. If you’ll be inserting a lot of elastic or just want to make things even easier, a bodkin is the answer. This tool is fairly inexpensive and comes in a variety of shapes and sizes, as well as in both plastic and metal. ZJ Humbach explains how each tool works and even shows how to use it in other ways with ribbon and trim for an embellishment!
Depending on the type of bodkin you have, they can also serve different functions. A bodkin like the first shown in the video, sometimes called a “pull” bodkin, can come in handy if a drawstring slips into a waistband or hood of a sweatshirt. Rather than pulling the drawstring all the way out in order to feed an end through a bodkin or secure with a safety pin, simply insert the pull bodkin teeth side first into the casing opening, grab the drawstring by pinching the bodkin and securing with the metal ring, then pull it out! This type of bodkin can also be used to turn straps or other narrow casings right side out.
Today I want to show you some tools to help you easily get elastic through a casing. And the oldest method, at least the one that I was taught when I was in Home Economics, was the safety pin method. And to do the safety pin method, let me undo some elastic here, you would simply attach the safety pin to your elastic and you would take the other end and pin it off of the casing so that it would hold it, like that. And then you simply take the pin and fight with it a little bit to get it in through the opening. And then you just work it through the casing all the way down until it comes out the other end.
So this is the, should we say, improvisational method where you don't have to go buy any kind of a tool and your elastic will indeed go through the casing in a very nice, neat manner. But let me show you some other tools that make life a little bit easier. And it doesn't matter what width elastic you have there are different tools for it. These two items, actually all three, are called bodkins. And bodkins are wonderful for getting the elastic through the casing very easily.
And they're only a few dollars but they're worth every penny. So this particular one, you simply move the little round metal piece down. You put your elastic in. Or rather I, let me do this a little bit differently. I go ahead and slip my elastic in here to where I want it.
And it then can adjust for the size of my elastic. And then I would simply slip this through the casing and you can see being metal, it just slides very, very easily. Another one is the ball point bodkin. And you would go ahead and put your elastic or whatever you have to thread through the hole in the back. And then this slides through extremely easily.
This is a plastic bodkin and you will usually find them in a pack of three different sizes or more. And this is a wonderful little tool. I've already got one threaded up. This is for the quarter inch elastic and you simply run your elastic through both holes. If you want, you can go ahead and pin it but if you put enough through, it's not going to come out.
And then you simply put it into your casing and then pull it through and you can see that this is a lot easier to push against and pull than if you use the safety pin. And I wanna go ahead and get this through so you can get a better idea here of what it will look like when we're finished. Now, typically a casing is going around a sleeve. As you can see, it comes right off. It comes around a sleeve or maybe a waistband and you just pull this as tight as you need it and sew off your ends or sew the two pieces of elastic together and you have your elastic in the casing.
These can also be used not just for elastic in a casing but if you want to put ribbon through your trim instead of trying to force the ribbon through, you simply put it through your bodkin. And then run your selected bodkin, you have to get it the right way though, so this way it starts down, and then just come up through here and as you can see, your ribbon would then take the place of the metal here and thread through. And you'd have this beautiful trim, which is wonderful on little girl's dresses or on home dec items. So again, remember your poor man's method which are the safety pins, or for a few dollars more you can go ahead and choose one of several different type bodkins that will make getting that elastic through the casing much, much easier.
Why is this video still on your platform. The use of the adjustable bodkin shown here is just plain WRONG. You grab your elastic at the teeth end of the tool and push the tightening ring up to secure it, then pull it through your casing. You would have a hard time pulling fairly wide elastic through a casing with the elastic at right angles as wrongly shown in the video.