Make a USA Map Quilt from Your Quilt Scraps
Ashley Hough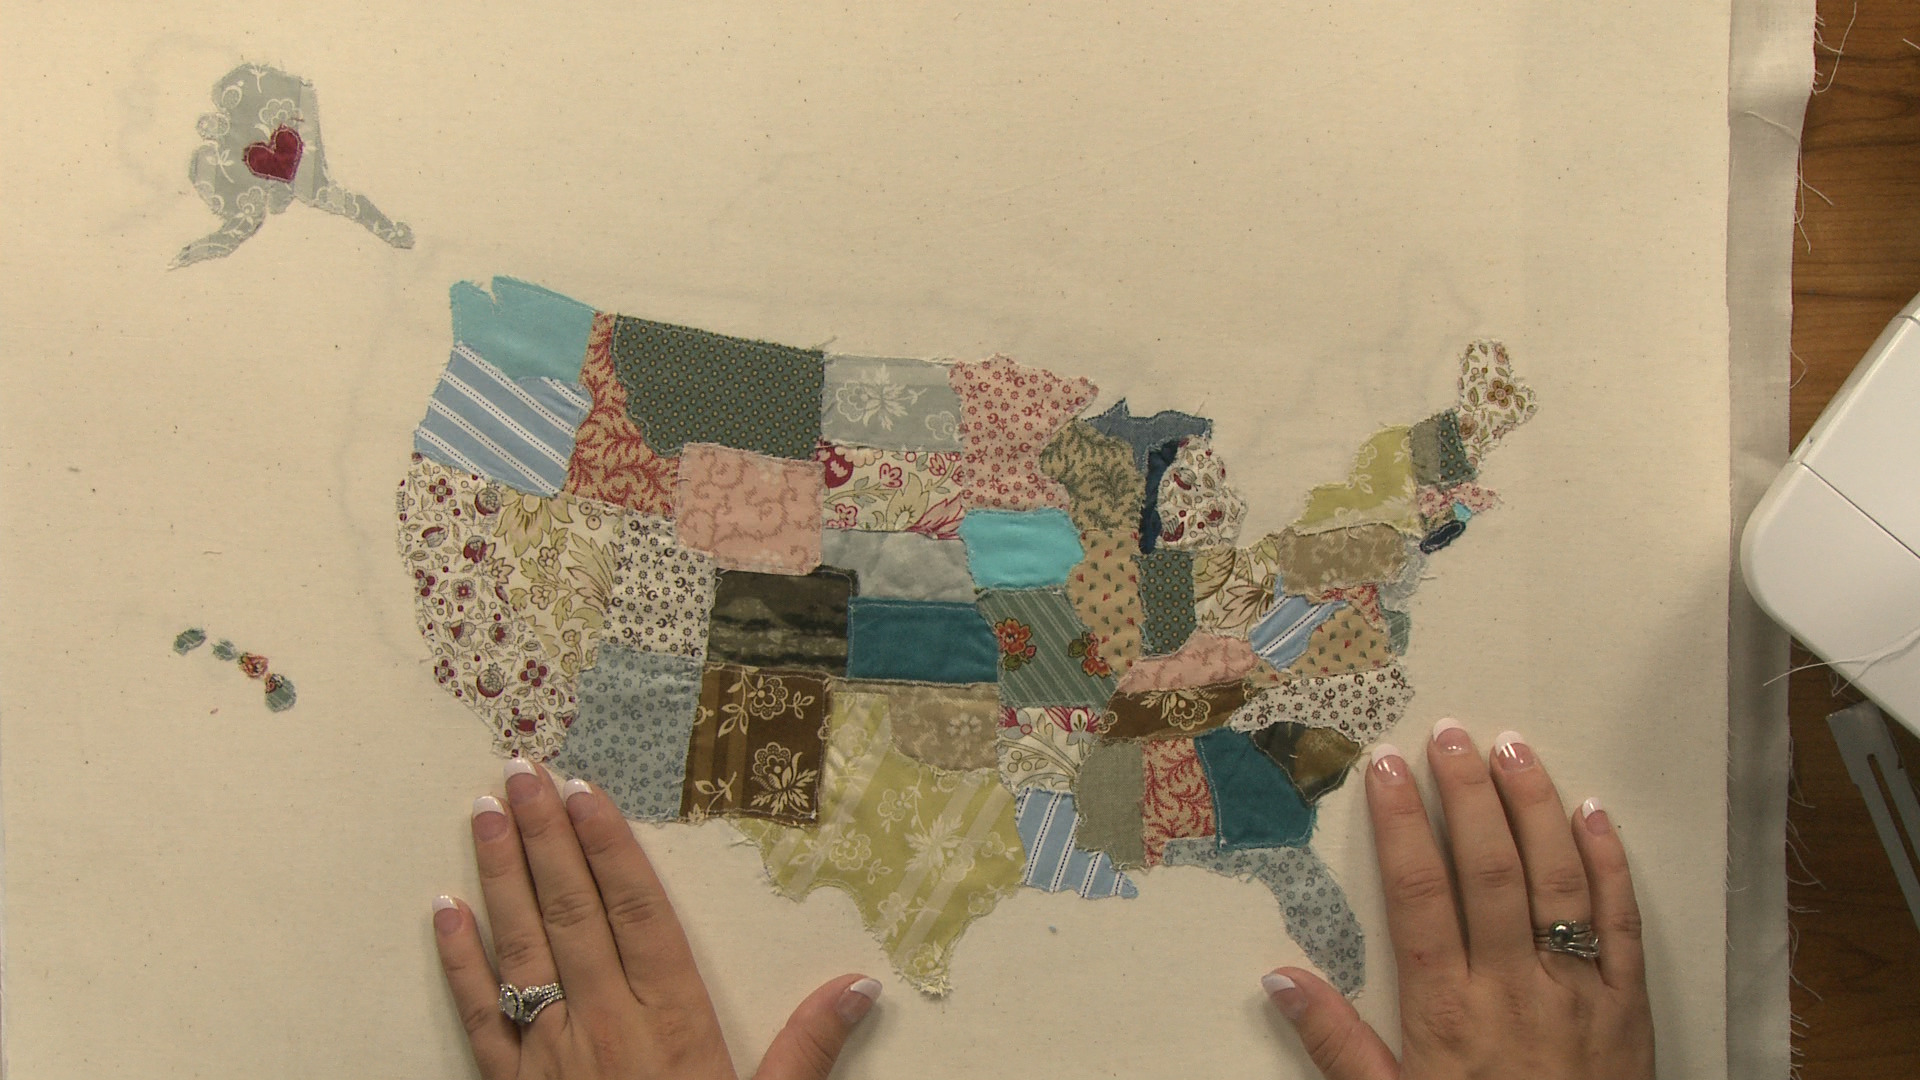
Video Player is loading.
Using up small scraps of fabric can sometimes be tricky. Odds are they aren’t all from the same project, so they may not match. In this map quilt project, see how to use fabrics of all colors and prints together in one fun quilted home decor piece- Ashley Hough shows you how.
Find a Map to Quilt
The first step in creating a map quilt, no matter what size you plan to make it, is to find a map. You can photocopy a map from an atlas you may have on hand or print one from the computer. It is helpful to find a map that has only the outlines of the states with no other detail lines to get in the way.
If you want to make a wall hanging the size of the one featured in this tutorial you will need to enlarge it, which Ashley explains how to do. After you have a map the size that you want your finished project to be you need to trace it onto fabric.
Sewing Your Map with Fabric Scraps
After the map has been transferred to the background fabric you can begin sewing on the small fabric scraps. Ashley shows how to place the fabric scrap over the state being stitched, pin it in place and stitch from the wrong side. She stitches using a free motion foot with the feed dogs lowered, allowing her to easily move the fabric around the outline of the state.
Once the fabric scrap has been stitched, the excess fabric can be trimmed away. Ashley explains how to repeat the process for the remained of the map quilt and gives a fun idea for personalizing the map. Once all of the states have been stitched, you can adhere the piece to a heavy weight interfacing backing, or layer and quilt it to create a quilted wall hanging.
