E
Making Lined Patch Pocket Patterns
National Sewing Circle Editors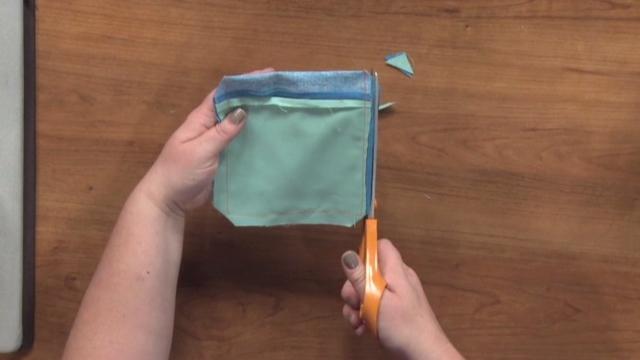
Video Player is loading.
Beth Bradley helps you finish your garment with a lined patch pocket that is as detailed as the rest of the garment. This is not just a one layer pocket that can easily rip. You will learn how to add lining, make the right measurements and match the pattern you have created or that was already made.
Related Article: How to Sew a Lined Patch Pocket
If you got to the trouble to make a lined garment or a lined accessory like a bag, then you wanna make sure that your details and your finishes are just as nicely done as the rest of the garments. So one area that you can make really nice and professional is a patch pocket, for example, that goes on the outside of the garment. If you just use one layer of fabric and apply it as in the normal patch pocket method, it can stretch out and it can look unprofessional over time. So one way to improve that is to add a lining to the pocket that matches the lining of your project. And that's easy to do.
You can make your own pattern for that or you can use the ready-made pattern that the pocket that's come with your pattern and just make a lining for it. So you can see that on this bag, I've used the lining fabric to make a really nice clean finished pocket for this bag. And I've actually matched up the print because another thing with a lined pocket is that it doesn't have a lot of stitching lines along the top. So it's a fun way to match up a print or a plaid without disturbing that with a lot of extra stitching. So to make a pattern for a pocket, you can create your own pocket pattern or you can use a pocket pattern that comes with that's ready-made with the pattern.
And if you're going to make your own to add to a coat or a jacket, then you just need to determine the final finished measurements that you're going to need for the pocket, and then draft your pattern. I like to use a non-woven interfacing when I make my own patterns. Just because it's nice and rigid and it also doesn't rip or tear easily but you could use pattern paper or anything else that you like to make the pattern. So in this case, the finished pocket that I'm going to end up with is gonna be 5X6 inches. The length of the pocket is going to incorporate the seam allowances along the lower edge.
And then also a one inch fold over at the upper edge. So that's ends up with a seven inch length through the pattern. And then the width of the pocket is just six inches to accommodate both the half inch seam allowances on the side edges there. So to make the lining, you could do this with your pocket pattern that you've created or the ready-made, just fold over the upper edge along the fold line. And then the lining it's going to have an overlap of just a quarter inch here because you're going to sew this with a quarter inch seam allowance along the upper edge of the pocket.
And then it's going to have the same width as the finished pocket. So six inches. And then it's five and a quarter inches long because it needs to be an inch and three quarters shorter than the outside pocket pattern. So I've cut out my pocket pieces from the fabric that I'm gonna use. And so this is the outside pocket pattern which is in kind of a stiff linen fabric.
And then the lining is the same that I would be using for my garment or my bag, whatever I'd be making the pocket for. So it's lighter weight. You can add some more body to the pocket if you need to by using some feasible interfacing. You could add some more rigidity, that'll keep it crispier. But in this case, this linen fabric is stiff enough that it'll make a nice crisp corners after I've turned the pocket right side out.
So you're just going to line up the upper edges of the pocket and the lining with right sides together. And then stitch the upper edge using a quarter inch seam allowance. So it's a short seam, so I don't need to pin it necessarily. You can pin it if you want to, but it's a straight edge and it's just going to be a quarter inch seam allowance along the upper edge here. So go ahead and lower your presser foot and just stitch the upper edge.
And the thing to remember is that you need to leave an opening for turning your pocket right side out. So I'm going to leave about a one and a half or two inch opening in the center of this seam. And I like to back stitch when I'm leaving an opening because that allows that to be nice and secure as the stress of turning your right side out is happening. So it doesn't need to be exact but just around one and a half or two inches. So I'll just start again in the same seam allowance and finished stitching the seam.
Now you've got your upper edge stitched. So we just have to press this seam open. And I'm just gonna use a medium setting on the iron. And this needs to be nice and open and flat to have a nice crisp edge at the top. And it also pressed the opening edges away.
So we'll be able to slip stitch those when we need to. Okay. That's nice and flat. And the next step is to fold the lower edge with right side's facing still. And you're gonna match up the pocket lower edge with the lining lower edge.
And this will create that fold along the top. That'll be the actual pocket upper edge when it's finished. So we'll line that up really well. And next we're gonna stitch the rest of the pocket perimeter So in this case, we're going to use a half inch seam allowance and just stitch from one upper edge to next, going around the corners. We'll just stitch each side.
So I have a finished one here. So once you've finished, you need to grade the seam allowances and also clip the corners because that'll make it nice and crisp and square once you've turned it right side out. If you're making a curved pocket, then you can clip the curve the same way that you would do on a collar or any other curve. So I'm gonna go ahead and just clip to, but not through, the stitching line as close as I can get to the corner to reduce all of that bulk. So I'll do that on each edge.
And then I'm gonna grade the seam allowances, which means that the upper seam allowance is going to be the shortest and more like an eighth of an inch. Sometimes it's easier to use a smaller trimming scissors when you're grading the seam allowance, if you can. So I'm gonna go ahead and do that along every side. The lowest seam allowance, the outside seam allowance can just be slightly wider and this just creates a nice, clean, rolled edge when you have those layers staggered like that. So I would go ahead and do that along each side.
And then I have my opening ready to turn the pocket inside out. So I would clip this as well. And then I'm just go ahead and turn it outside through the opening. And when you're poking out the corners, I usually use the tip of my scissors if they're not too sharp, but you can also use like a chop stick or a point turner anything that you have handy for making those corners turn out really nicely. And then you would of course press it really nicely as well.
And when you're pressing then you wanna make sure to roll the seam under a little bit toward the back because that will prevent the lining from showing on the garment outside. So I've already pressed this pocket and it's ready to have the opening sewn close. So I'm gonna use a slip stitch which is a really handy invisible stitch to know. I've just knotted the end of a single strand of thread. And when you do a slip stitch, it just stitches the two folds.
You could also do a ladder stitch here but you are actually just going right along the folded edge and budding them together so that you end up with a nice invisible seam. So I'll just do that along the entire edge to close that pocket opening. And I have a finished one here that has been sewn shut. And so this pocket is all finished and ready to be stitched onto the backing fabric. I've marked my backing fabric the pocket placement using a basting stitch which you can do.
That's a nice secure way to mark the pocket placement but you could also use a removable fabric marker. if you prefer or you could use pins, whatever marking method you prefer to give yourself a guideline for placing the pocket. It's important to place it in the right place and it's gonna be on the outside of your garment so you always wanna be very precise. And the pockets ready to be put on. The method I like to use for putting a pocket on is a washable basting tape which is very handy because you can sew right through it with your needle.
It won't gum up the needle and it also will wash away after you've washed the project. It's water soluble and it's not fusible. So it's different from a fusible web because it's works just like tape for your garment. So I'm going to put a little bit of basting tape along each side. Just enough to glue it in place while it'd be with before I stitch.
And I like this method also because then I don't have to take a lot of pins out and stop and start as I'm going around edge stitching. Because edge stitching can be a little bit tricky and the less you have to stop, then the more precise you will be. So I'm gonna add it just along that final edge. You could also base your pocket in place before you edge stitch. If you don't wanna use tape, if you have a fabric that might respond poorly to the tape like a napped fabric or a velvet that might get too gummy, then you could use basting.
So now my pocket is ready to tape down. So I'm just going to place it directly over my basting stitches. And it's ready to edge stitch on. So when you're stitching a patch pocket, it's really important to reinforce the upper edges because that's the part of the pocket that gets stressed the most as you're using it. So whether you're stitching a patch pocket or any other pocket that goes on the outside of the garment, then just decide a method that you like to reinforce the upper edges.
You can stitch a little bar tack at each edge or you could stitch a little triangle which I'm going to do on this particular pocket. And that will just keep it nice and secure there so it doesn't rip off or stretch as you're using it. So I'm just gonna use a straight stitch again and if you have an edge stitch foot that can be really handy for this type of stitching, when you're doing top stitching and it keeps the stitching very close. You can mark a little line on your presser foot, if that helps. It just makes your top stitching really, really nice and clean since it's actually going to be on the outside of your garment.
So I'm going to start and I'm gonna count the stitches actually as I go to make the little triangle so that it'll be even on both sides. So I'm gonna sink down the foot and the needle and count one, two, three stitches and that will leave the needle down so I can rotate it. And then I'm gonna count one, two stitches across and sit my needle back down so that I can pivot. And then I'm going to edge stitch the pocket and just go along each side. So I'm going to stitch just really, really close to the pocket edge, like a 16th of an inch a way.
And then when I get to the lower pocket corner, again I can slow down and take it really slow and easy to make sure that I end in the exact right spot to turn it. And then rotate it. And stitch the lower edge on this side. Again, just keeping it nice and even and close. And since I don't have pins and it makes it really easy to just keep going and not lose momentum by having to take the pins away.
So again, I'm just rotating it to go nicely around that corner. And then I would stitch the triangle again using the same count of stitches that I used to stitch that little triangle on that side. So I have a finished pocket here that I've done in the matching threads. So it's much less conspicuous than the bright orange thread. And I've made sure to stitch two small triangles at each corner.
And that again, it's just very super secure. It won't rip out. It won't stretch a lot as you use the pocket and it has a nice double layer to it. So it's a lot sturdier and doesn't flop open as you use it. And nice edge stitching along the edges.
And so you can see that it's got this nice lining inside and it makes a really nice finish for bags or for coats or any garment that has a lining to it. Then this adds a really nice, durable professional looking finish.
Share tips, start a discussion or ask other students a question. If you have a question for an expert, please click here.
Already a member? Sign in
No Responses to “Making Lined Patch Pocket Patterns”