E
How to Use a Serger and Serger Techniques
National Sewing Circle Editors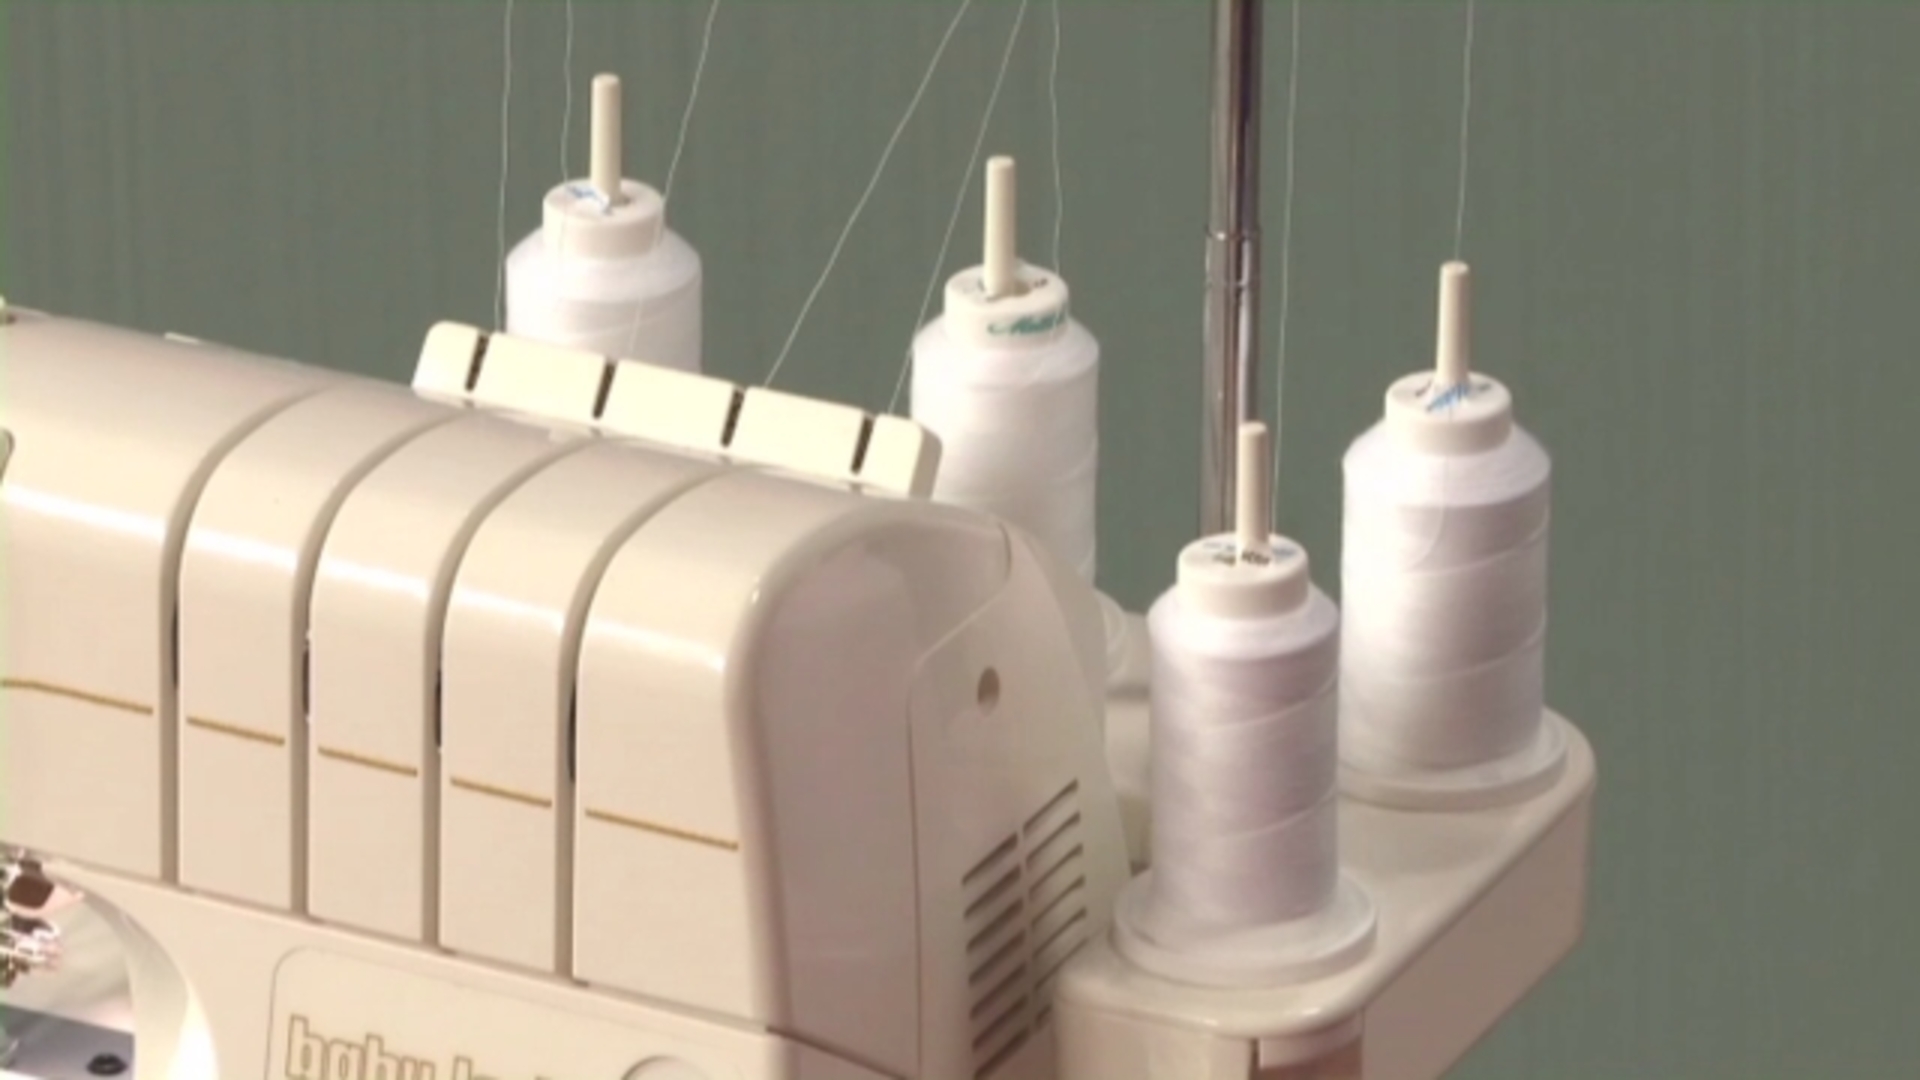
Video Player is loading.
Beth Bradley teaches you how to change the settings on a serger so you can use it in more fun and creative ways. You will learn the differences between a sewing machine and serger and how you control the length, width, knife, and type of stitch within the serger. Beth also covers basic uses for a serger and shows how to perform a correctly formed over-lock stitch.
Many sewers are intimidated by changing the settings on their sergers, but actually the more familiar you get with changing the settings and all of the different moving parts of the serger, the more fun and creative ways you can use it. So I'm just gonna start by going through the different parts of the serger. And a serger differs from a sewing machine because it actually has multiple threads rather than just two. So we have this serger here which is set up for four thread serging. So we've got all four pins that are ready to go with thread.
And then the next thing that's different about a serger is that it has two different sets of feed dogs. So the feed dogs are controlled right here. And on a regular sewing machine it just has one set of feed dogs. And the feed dogs are the little bars underneath the sewing machine presser foot that actually move the fabric backward. So we can control that here on the serger using this little lever here.
And next we're gonna look inside of the serger. And you can see that most sergers come with some kind of a guide to show you the thread paths that each thread needs to follow as well as the order that you need to follow to thread the machine correctly. And it also has a control for the width of the stitch and the length of the stitch. So when we're controlling the width of the stitch you can see that the little edge of the machine comes outward for a wider stitch and then recedes for a narrower stitch. And then you can also control the length of the stitch that the serger makes.
So on this particular machine, you can control both the length for a standard stitch and for a rolled hem stitch. So we'll talk about a rolled hem stitch a little bit later. And so you can just change that dial as well. And then the other thing right here is the control for the knife. So the knife cuts the fabric actually as you're serging, which is nice because it finishes the edge and stitches it all in one piece.
But if sometimes you don't want the knife to cut you can actually lock it in place and disengage it. So just depending on the application that you're doing you can play with that knob as well. Then on this machine you can select the type of stitch that you want to use. So depending on if you're doing an overlock stitch, or if you're doing a rolled hem, then you can adjust this knob here. So right now we have it all set for a four thread overlock stitch.
And one of the pieces that creates the overlock stitch are the loopers. So the loopers you actually thread. And the thread pins are usually typically on the right side of the machine right here. So they're kind of a little finger type of mechanism that the thread comes out of and helps form the stitch. So there's usually an upper and a lower looper.
So you can see the lower looper here comes out as as I'm turning the hand wheel to form the stitch. And so next we're gonna talk about some of the very basic uses for a serger and how to create the correctly formed overlock stitch. So I'll just bring my serger over here. And the most basic stitch usually that you're probably familiar with for a serger is to do an overlock, which is a good way to finish seams because it cuts the fabric and also stitches it all in one piece. So you can use that application, obviously, on any kind of fabric, but a woven works as well as a knit.
So we have both a woven and a knit here, and you can tell that the stitch is balanced correctly, and that the serger is threaded correctly, because the different parts of the stitch are all balanced and they're not wavy. So we're gonna test out right now and make sure before we start working on a project just that all of the threads are working correctly and serging the way that we want them to. So I have the knife engaged. I'm going to set the width of the stitch to a 3.5 which is just right in the middle. And then I'm gonna have it ready to go on a standard stitch.
And I'm just gonna put it at about a two length. So I've got it just set to a medium stitch length and medium stitch width. So I have a 3.5 width and a 3 millimeter length. So as you can see, the serger always continues a thread chain right off the edge of the fabric. So I'm just gonna snip that close to the edge and check my stitch and see that it is indeed forming correctly.
All of the loops are forming right there on the edge of the fabric. And I can see the parts of the stitch that I need to on the right side. And then the wrong side looks correct as well. So another thing that is really useful with the serger is to use it to sew knits. So you actually might even be at an advantage using a serger versus a sewing machine when you're sewing knits.
And that's because the serger stitch includes stretch. So you can see, I have a very stretchy jersey knit here. And when I pull it, you can see that the stitch just stretches right along with the fabric. So that keeps it from popping when you're wearing it and just keeps the seams really nice, and they aren't wavy when you're wearing it, and it looks very professional. And so that's another instance where the differential feed, the difference between the front and back feed dogs, actually is helpful because you can alter the speed that they go in case a knit seam is turning out wavy.
So I'm just gonna go ahead and serge the other edge of this piece and we can see how easily it sergers a knit fabric. Just trim that off. Another thing, if you ever do want to seal off the edge of a serged seam more completely, you can always put a little drop of seam sealant right at the end and that will keep the thread tails from fraying, or you could also always tie a knot. So we can see here that the stitch is forming correctly on the knit and it's stretching and not popping. So that would be great and ready to go to start a knit project as well.
So next we can start talking about some of the fun things you could do with the serger just by changing up the settings. And one of the fun things that you can do is actually gather fabric, which saves you a lot of time, versus doing it on a sewing machine where you have to sew the basting stitch, and then gather it manually. This will actually gather the fabric all in one step and it'll be nice and even, so you won't have to be changing and making sure that it's all distributed correctly. So we're going to take advantage of the differential feed function again. And instead of having it on the neutral setting, which is kind of the base setting when you're making any other kind of project or finishing a seam, we're actually going to turn it up.
So we're going to turn it up to two on this machine. And that will actually make the back feed dogs will be going slower than the front feed dogs. So the fabric will get crowded underneath the needle. So that's what will form the little tucks and gathers as we're serging. So I've gathered one edge here, but I'll just go ahead and gather the other edge so you can see how quickly and easily that happens.
And I'd also recommend always making a test sample whenever you're gathering on the serger because you wanna make sure that it gathers to the length that you want it to. So usually most sergers gather about a two to one ratio but you can always make a little sample and measure the before and after to make sure that you're cutting the right length for a ruffle strip whenever you're using it for a garment or another project. So I've turned up the differential feed and it's ready to go. So we'll just go ahead and serge here. And you'll see how it's actually getting trapped and crowded under the needle and forming that little tuck and ruffle.
So that worked really well. And again, you can, if you wanted to, you could tie these off. But if you did wanna adjust the gathers at all, you can kind of play with that a little bit before you tie off the threads. But that's a really handy way to gather fabric without having to go to the extra trouble of sewing it, and then gathering it, and then stitching it again. So it's nice and secure and ready to go for a project.
So next I'm gonna talk about doing rolled hems and all of the different fun things you can do with that. So I'm gonna be changing up some of the serger settings and we'll look at some of the applications for a rolled hem. So now I've changed up the machine settings to be ready to stitch a rolled hem which is a really useful hem for lots of different applications. And it just takes a few different clicks and changes here to make the machine ready to do that from an overlock. So I've removed actually one of the thread spools because I'm gonna be using only three threads to do a three thread rolled hem.
And I've also taken away one of the needles because we started with two needles to do the four thread. So I've just unscrewed the needle and left it with the one on the right. And so I'm also making sure to refer to what's in my machine manual to make sure that I'm setting it correctly. So always be sure that you're checking yours as well to make sure the specific settings for your machine. So on this machine in particular, I have to select the D stitch, and that can vary too from machine to machine, but I'm making sure that it's set to D because that's for a rolled hem.
And then I'm also making the stitch length very short because I want all the stitches to be very tight and close together and inconspicuous. And then I've made the stitch width kind of a medium stitch at 3.5 just so that it picks up enough fabric as it's stitching, but I don't want it to be wider than that because the idea is to keep it very nice and tiny along the edge. So the rolled hem is a really handy stitch for a napkin, or a tablecloth, any projects like that. It's a really easy and fun way to make it look very professional. And it just forms this very small, rolled edge and it actually rolls the fabric as you're stitching all in one step.
So the machine will fold it as it's going and then stitch it in place using this really small, close together stitch. So I'll just go ahead and do that on the other side of this piece of fabric. I've got the differential feed set to neutral because we don't want it to be gathering or stretching the fabric. So both sets of feed dogs will be going at the same speed. So it's just gonna go ahead and fold the edge just a tiny bit as I'm stitching, which is great.
And I'll just go along the whole edge, just cutting off a little tiny bit of fabric. I'll just let that serge right off the edge and trim it up close. So you can see how close those little stitches are going together and how it rolled really nicely to the back of the fabric. And this would also be a really nice application for any kind of lightweight garment. So if you're using a very lightweight silk then you could use this to finish the edge.
You could use a matching thread color. I'm just using white right now so it's easy to see, but to make it extra invisible you could use a fabric and a thread color that match. And it'd also be great for a silk scarf. So that'd be a really easy and quick way to finish up the edges of a silk scarf. And again, it's really nice because it's very fast.
So when you're making a large tablecloth, or a lot of napkins all at once, then it's a really nice way to finish those off without having to do a lot of pressing, and folding, and stitching. So there's also a few fun things that you can do with a rolled hem besides just edging. So I'm gonna show, first of all, that you can use it to add lace to the edge of a garment or any other project. So this would be pretty even on, like, a pillowcase, or a skirt for a little girl, or anything like that. And it's really nice because the rolled hem is just so tiny that it barely shows up and it doesn't compete with the lace and it's not bulky.
So it's nice and lightweight. So I'll just show you quickly how you can do that. So I'm just going to apply my piece of lace to the fabric right side, so I'm gonna put them right sides together. And then all lace has this little edge at the top, it can vary in the width, but you can call this the header of the lace. So I'm gonna match the header of the lace right up next to the raw edge of the fabric and just make sure those are nice and aligned.
And I'm not gonna use pins because usually the serger is stitching so fast that I think it slows you down and you kind of risk stitching right over a pin if you have them. So I think it's easier sometimes just to hold the fabrics together rather than pinning them. So I'm going to go ahead and line the header of the lace up exactly right here with the needle so that I know that the needle is gonna stitch right into it, and I'll be able to fold and turn that to the right side when I'm done serging. So again, it's rolling the fabric and the lace to the wrong side as I go, which is saving me lots of steps which is always nice. And I'm just making sure to keep it aligned myself rather than using pins.
So I'm just guiding it. So I'll just trim that off there. And as you can see, it's just created this really nice narrow seam for the lace which I can just go ahead and I'm gonna press that toward the wrong side so you won't even be able to see the seam. And it'll make the lace stand out and not compete with any kind of bulky edges or hems. So just go ahead and press that toward the fabric wrong side.
And when it's all finished, then you just have this really nice clean edge for lace that you can use on any kind of project. So the last thing I'm gonna show for using a rolled hem is to do a lettuce edge. And a lettuce edge is just a pretty common finish that you might see on a lot of ready-to-wear clothes and wondered how they created that. And it's actually really easy to do with the serger and a rolled hem. Sometimes it's also called a merrow edge.
And so it creates this little ruffle along the edge as you're stitching. And this is created by controlling the differential feed in the opposite direction than we did when we were gathering because instead of crowding the fabric under the needle, it's actually gonna stretch the fabric as we stitch because the back feed dogs will be going slower than the front. So, yeah, so we'll go ahead and surge the other side of this so you can see how to create that ruffly edge. So I'm gonna go ahead and turn down the differential feed as low as it'll go. And again, this is a good thing to test out always before you add it to a project because it will cut off the edges as you're serging.
So you don't wanna cut it off before you're aware of the effect that it'll create, so always try it out first on a test piece. You're gonna go also and make sure that you're serging in the direction that's the greatest stretch for the knit. So I'm going across the knit because that's the stretchiest part. And the stretchier the knit, then the more that it'll actually create that lettuce edge, that wavy edge, as we're serging. So I'm gonna go ahead and get it started.
And once it starts to grab the fabric, I'm just gonna be actually stretching it slightly as I'm stitching from the front and the back. And the more that I do that, the more that the lettuce edge will form. So you can kind of see that as I'm going, it's creating that lacy effect. So that's a good thing to test before you start to see how much the fabric is going to ruffle up that way. So I'll just go all the way down to the end and we'll see that we have created that nice lacy edge.
And that would be a cute application for a girl's skirt, or any kind of, you can use it on home dec also. You could also use it, it works best on a knit fabric, obviously, because it's the stretchiest, but you could also do it on the bias grain of a woven fabric. So you can test that out too if you wanted to try it on a woven instead of a knit. So next, I'm gonna talk about some of the fun and decorative threads that you can use for a serger. There are lots of fun ones to use, and we'll look at a couple of decorative ways to use them.
So next we're just gonna take a look at some of the fun, decorative threads that are available for when you wanna use your serger for a decorative effect, either on a seam, or maybe for a decorative stitch, just to add a fun element to a garment or another project. So there are several different types of decorative threads that are available to use for sergers. And one of the most common that you'll see is called textured nylon thread. And this thread is made of nylon and it's got kind of a stretchy texture to it that is really strong. So you can use this when you're using really stretchy fabrics, like a swimwear knit, or a dance wear type fabric.
So that works really well for that. And it creates a really nice, strong, soft seam. So it's very soft against your skin also. There's also lots of different variegated threads that change color throughout the course of the spool. So those are really fun also you're doing something decorative like a decorative seam, or you can even use it on a rolled edge, like we were looking at before, just for a cool little element at the edge of a garment.
So there are several different fiber contents for variegated threads. So here's a cotton one. So that's more of a matte look. And then we've got a couple of synthetics, so rayon thread, so that would make a shinier look. So if you wanted to have a little sheen on the decorative stitch that you're doing.
And then we've also got metallics. So these are a variety of metallic threads that you can use to also do a decorative seam or do a decorative stitch on the fabric. And so we've got a variegated example of that. And then this is actually a woolly nylon, a textured nylon thread, that has a metallic thread throughout it. So you can experiment with any of those and just always be sure that you're trying out the settings on your machine to make sure that the tension is forming correctly on the serger stitch.
And one tip to have when you're doing that, you can thread different thread colors through each of the thread paths. And when you do your test stitching, then you can easily identify which thread is maybe not set correctly and not forming the stitch correctly. So I'm gonna go ahead and I've got the machine set up to do a ladder stitch, which is kind of a fun stitch that you can do when you want to do a decorative seam or you can just use it to make a decorative element on the fabric. So it creates just this. You're just going to only need to use two threads for this.
So you can use your decorative thread in the needle because that's what will show on the right side of the fabric. And then you can just use your regular standard serger thread in the looper, which you'll only see on the back of the fabric. So I've got this metallic thread ready to go in the machine to create kind of just this little sparkle along these seams. So you could use this especially on fabrics that don't ravel. This would be great for if you were sewing a seam with those because the seam edge does end up right in the middle there, But it does, it actually is working pretty well on a plain woven fabric.
It holds everything in place. And it's very flat too. So if you're using a bulky fabric like a felt, or a boiled wool, then this would work well for that too because the seam is actually really flat on both sides and it doesn't create a lot of bulk in the seam allowance. So I've got my machine ready to go, to do the ladder stitch. And for that I actually had to follow a different thread path for the needle.
So I'm threading the metallic thread, which is what I want to show on the right side of the fabric, I've threaded that actually through the path for the looper, which is a special setting for this machine, so you always wanna check your machine manual to make sure that you know which thread path to follow so that the ladder forms correctly on the right side of the fabric. And I've also changed my needle out. So I've got a top stitching needle instead of a universal needle. So most sergers just use exactly the same type of needles as a regular sewing machine but you just wanna make the same considerations for the type of fabric that you're using and for the type of thread. So in this case, this metallic thread is slightly wider than a regular serger thread.
So I've got the top stitching needle in there, it's a size 90/14, and that just has a slightly wider eye. So it'll make sure to accommodate the width of that thread as we're stitching. So I'm just gonna go ahead and I'll line up two pieces of fabric with right sides together, and I've got the knife engaged, and I've got all the settings for doing the ladder stitch. And you can change the width of the ladder stitch as much as you'd like. So if you want it to be wide, like the one on the sample, then you can set it to the widest setting.
But if you just wanted it to be more subtle, you could also make it a narrower width. So I'm just gonna go ahead. I've got the differential feed set on neutral because I don't need the feed dogs to be running at different speeds. And I'm just gonna go ahead and serge along that edge and trim off the raw end as I go. So it kind of looks like a regular stitch on the wrong side, except that we were only using two stitches instead of three or four.
So then when I open it up, you can start to see the little ladders that form. So we'll just gently spread those apart and use that. So, yeah, so that's a fun way to decorate something or create just a little highlight, of a seam that you wanna show on a garment, or just add kind of a little touch of sparkle to something for a fun effect, like a scarf. Or you could use it on home dec garments as well, on a pillow it would look cool with one of these variegated threads. You could also do it on any kind of ready-made garment too because you could set the knife not to cut.
So those are just some of the fun things that a serger can do. Just as soon as you get comfortable with all of the different moving parts, and all of the different functions of a serger, there are lots and lots of ways to use it beyond just finishing seams. So you might actually find yourself turning to your serger more often than your sewing machine.
Great video - thank you! Was hoping you would also show how to use fusible thread for serging a binding onto a quilt. Maybe on your next video.