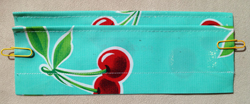
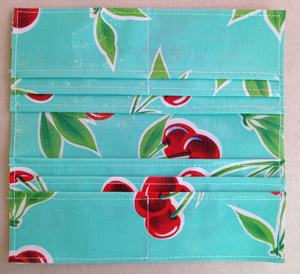
 Oilcloth is a great material to sew with. It’s more affordable than many of the cottons out there today and comes in a wide variety of fun patterns and colors. Unfortunately it can be a little bit stiff to work with, but this pattern for a cute wallet is perfect for oilcloth because you don’t have to turn the pattern inside out at all.
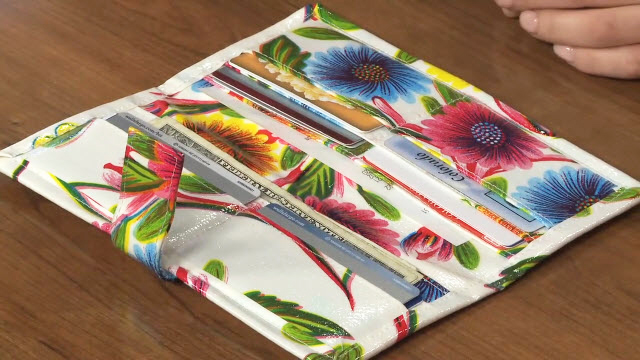
Follow these steps to make a fabulous little wallet or oilcloth clutch complete with slots for cash and credit cards, a zippered coin section, and a hand snap enclosure.
Pattern Download: Oilcloth Wallet Pattern
Related Video: How to Make an Oilcloth Wallet
Supply List:
• ¼ yard oilcloth
• Magnetic snap
• 7” zipper
• Binder clips and paper clips
Tips Before You Begin:
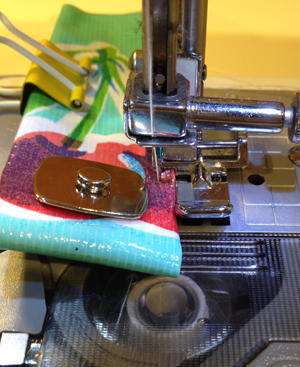
• Before you start, put a piece of Scotch tape or masking tape on the bottom of all the feet you will be using. Otherwise, your foot will stick to the oilcloth and won’t move!
• Use binder and paper clips. Oilcloth is tough to pin through, so clipping works great.
• Use a stitch length of 3.5. Because oilcloth is heavy duty, no need to use a smaller stitch length.
• Turn your tension to a higher number to get through the thicker parts.
Assembling the Pieces
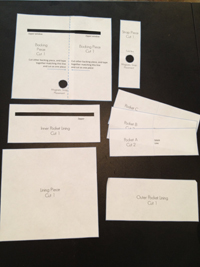 Step 1: Cut out the pieces of your pattern. Cut the zipper windows and the snap placements from the pattern.
TIP: DO NOT CUT the zipper windows or snap placement from the actual oilcloth pieces unless told!
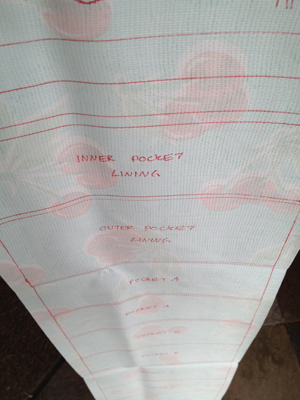 Step 2: Trace all of the pieces onto the back of your oilcloth. Remember not to cut out the zipper windows or snap placements!
Label them with their names as well. I used a Sharpie here for photographs, but I recommend a pencil. That won’t show through on lighter colored oilcloth.
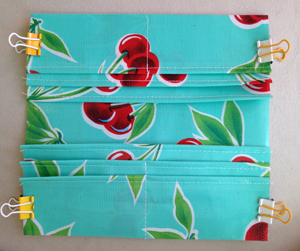
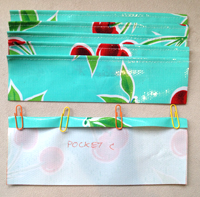 Step 3: Fold one long edge of each A, B, and C pocket pieces over ½ inch. Press the crease with your fingers, paper clip, and top stitch close to the folded edge.
 Step 4: Stack one piece B on top of piece C lining up the bottom long edges, and clip together. Stitch ¾ of an inch seam along the raw edges of these pieces. This will prevent cards from slipping down too far into this pocket!
 Step 5: Now stack piece A on top of sewn pieces B and C, lining up the bottom raw edges, and clip them at the sides.
Mark the middle line with pins, then use a sticky note to connect the two (since chalk pencils don’t work well on oilcloth). Starting at the bottom raw edges, sew right along the edge of the sticky note, stopping to backstitch at the finished edge of pocket piece B (no need to sew all the way through C to the top!). Set pocket stack aside.
 Step 6: Then, take another piece A and piece B, leaving OUT the C this time, and stack them together. (By leaving out piece C, you get the perfect sized pocket for cash! If you want more credit card pockets, then follow the previous steps.)
Mark the middle line as in step 3 above, sewing to the top of pocket piece A. (No need to sew all the way through B to the top.)
 Step 7: Take the C piece that is left and stack the stitched A and B on top of it, matching up the bottom raw edges, and clip it on the sides to hold them all together.
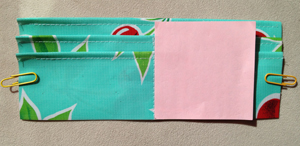
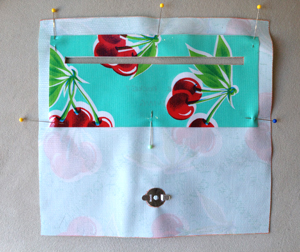
Now, lay out the lining piece right side up, and lay each pocket stack on top of the lining piece, matching up the bottom raw edges of the pocket stacks with the raw edges of the lining piece. Clip together with binder clips.
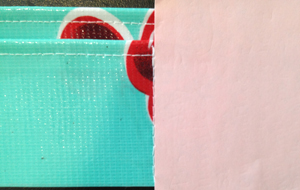
 Step 8: Baste around the edges with a long stitch length VERY close to the raw edges to hold everything together as one entire piece.
Installing the Snaps
 Step 9: On the backing piece, you will have traced a circle where the snap should go. Using the metal piece that came with it, trace the two lines onto the fabric and seam rip them.
Then, insert the female part of the snap through the slits, put the metal back on, and open the legs like a brad so they lay nice and flat.
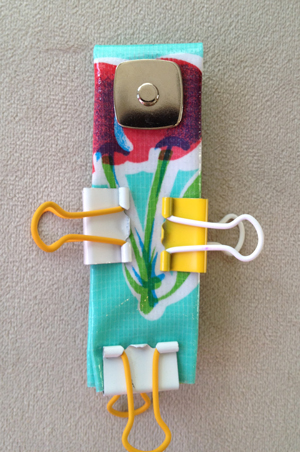
 Step 10: Repeat this process on the handle with the male side of the snap. This time, turn the legs of the brad inward instead of outward, as shown.
By turning them inward, there is no risk of us breaking a needle since we are going to sew very close to this snap.
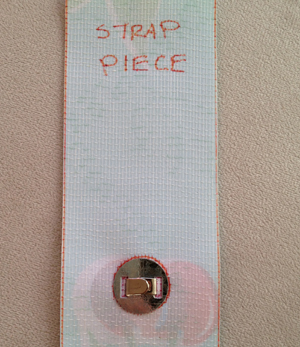
Making the Strap
 Step 11: Fold down each long edge of the strap ½”, fingerpress, and clip edges.
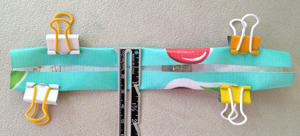
 Then fold in half and secure with a binder clip.
 Step 12: Topstitch around the entire edge of strap. Notice here I had to cheat a bit with my zipper foot so the foot does not drive on top of the snap. I moved my needle as far left as it would go to sneak around.
You might find that when the needle pulls out while sewing, sometimes it takes the handle with it! Feel free to hand walk the needle around the tough parts using your machine fly wheel on the side to get this part perfect.
 Step 13: Cut out the zipper windows that you traced onto the backing and inner pocket pieces.
With the backing piece wrong side up and inner pocket lining right side up, line up the zipper windows so they match perfectly.
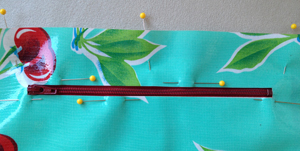 Step 14: Put your zipper face up on the table, flip your backing piece over so it is right side up, and lay it on top of the zipper so the zipper is centered in the little window. Pin into place.
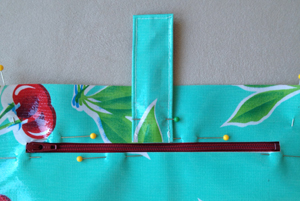 Step 15: Lining up the raw edge of your strap with the top raw edge of the zipper window (snap face down), center the strap on the zipper window, and pin into place.
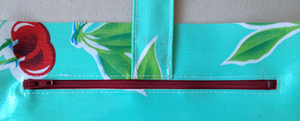
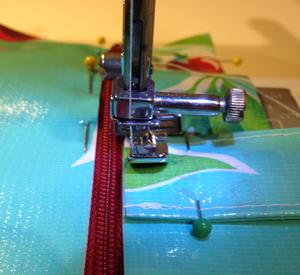 Step 16: Topstitch around the zipper window, which will also sew the strap into place.
 TIP: Don’t try to sew around the zipper head, which will make your seam wonky. Just put your needle down, lift your presser foot, unzip the zipper a little way so the head is out of the way, lower your foot, and continue!
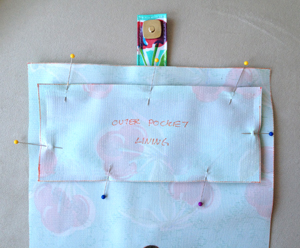 Step 17: Place the outer pocket lining on the inner pocket lining, right sides together (trim the zipper tape if needed). Pin on all four sides, and sew into place.
TIP: Make sure that you are folding the backing piece out of the way so you only sew around the pocket edges!
 Step 18: Lay the backing piece wrong side up. Center the pocket panel on the top, right side facing up.
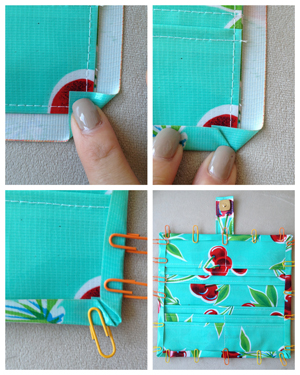 Step 19: Fold the edges over to bind on all sides and paperclip. Feel free to make mitered corners as you go!
 Step 20: Topstitch all the way around the binding. As you are going, be sure to leave the strap in the path of the needle (as shown) so you stitch it to the wallet a second time.
TIP: If you are getting a little bubble that travels along in front of your foot, just stick a pin through it and into the wallet, then sew over the pin, and it should sew the bubble down. Here is where you will need a high on your tension!
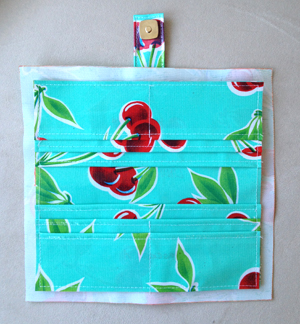
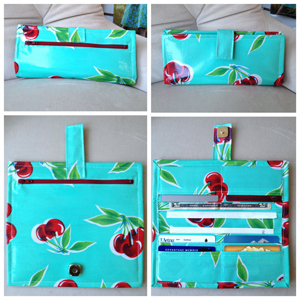 Step 21: Now fill up your new wallet with all the essentials, and you are done!
Happy sewing!
Get in touch! Leave a comment or email editor@nationalsewingcircle.com.

Lookng forward to making this wallet.
I am able to download the instructions but I cannot find a place to download the pattern pieces for the oilcloth wallet. Can you help?
What are the dimensions of each piece. Measurements would be very helpful.
What are the Measurements of the pieces??? There is nothing saying how big the pieces need to be how do I know how to start this project if there are no measurements per piece for the wallet????
This instructor is very good.
I love this project..
can't get the pattern pieces for this wallet. I love it, have the perfect fabric and want to make it for myself. Please help
Can I get a PDF of the instructions sent to my email?
love your wallet
I had been thinking of making this with old leather, but I didn't know how to make the pockets. thanks