 Who doesn’t love a fun skirt? When I saw Ellen March’s video about making a strip skirt, I immediately realized I needed one in my life. The best thing about this skirt project is that it’s totally customizable. Instead of a maxi skirt I made one that falls to the knee. I didn’t have any fold over elastic on hand so I made a drawstring waist and I added some super cute patch pockets. You too can make a skirt that’s one of a kind – read on to learn more!
Related Video: Make a Strip Skirt
First Things First
Be sure to watch Ellen’s video on how to make a strip skirt. This article covers her basic concept with a few changes to finishing techniques such as a drawstring waistband and blind hem. I definitely recommend watching the video in full before proceeding into this project.
Here are the materials and supplies you’ll need to complete this project:
- • Cotton or cotton-blend fabric (yardage determined by measurements)
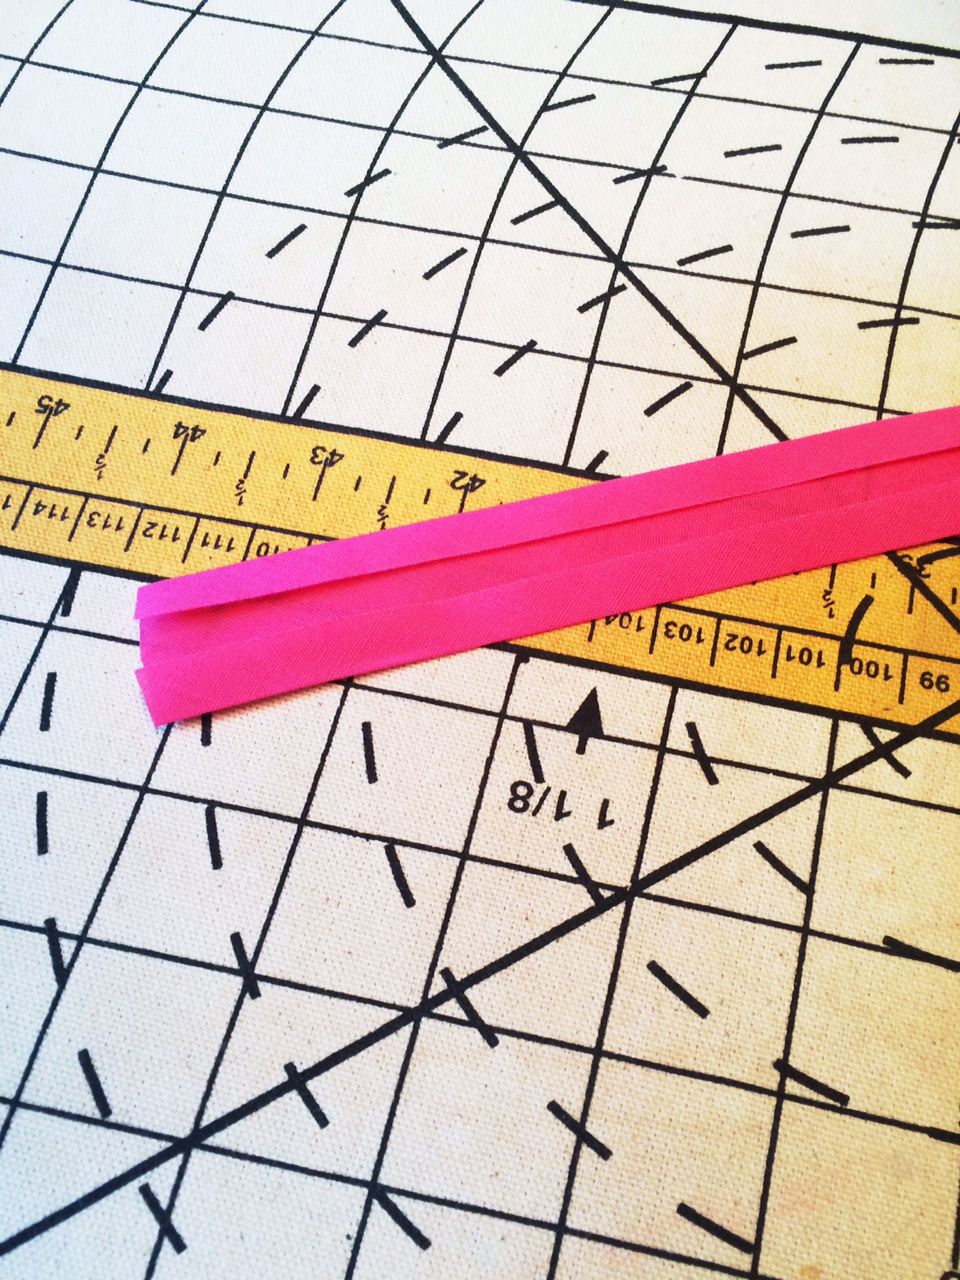
- • Extra wide double fold bias tape (yardage determined by measurements)
- • Ribbon or twill tape (yardage determined by measurements)
- • Two 1” buttons (optional)
- • One 5/8” button
- • Matching all-purpose thread
- • Blind hem foot
- • Long ruler
- • A large sheet of paper (roughly 22” x 32”)
- • Pencil
- • Marker
- • Measuring tape
- • Safety pin
Measuring
Step 1a: Measure your waist. For this skirt, measure where you want the waistband to rest. If you prefer to wear the skirt lower than your natural waist, take the measurement there. Record the measurement as waist.
Step 1b: Add 2” to the waist measurement for ease. Then divide the measurement by 6 to allow for the gores in the skirt. Take the result and add 1” for seam allowances. Record the result as waist. For instance, if you have a 34” waist, you’ll add 2” and the result will be 36”. Divide that result by the number of gores in the skirt; in this case there are six, so the result is 6” (36 divided by 6). To that result you must add seam allowances, so add on another 1” resulting in 7”. This will be the upper edge width on the pattern piece you create for your skirt.
TIP: While you’re measuring yourself, take your hip measurement as well. Place the measuring tape at the widest point of your hips. Divide the result by the number of gores in the skirt. Record as the hip measurement.
Step 1c: Determine the desired length of the skirt. Ellen makes a maxi skirt that goes all the way to the floor. I decided a knee-length skirt would do just fine. I measured one of my favorite knee length skirts to determine the desired length. Record as the length measurement.
Step 1d: To the length measurement add 1-½” for the hem and ½” for the waist. If you intend to use fold over elastic as Ellen suggests, do not add ½” for the waist.
Step 1e: To determine the hem width, take the resulting waist measurement (in the example above this would be 7”) and add between 5” and 7”. Ellen suggests 5” in the video, but I wanted a very twirly skirt and decided to add 6-½”. It’s up to you! Just note: the wider the hem measurement, the looser the skirt. No need to worry about adding additional seam allowances. The result is the hem width, and record as such. The hem width for the example above would be between 12” and 14”.
Drafting
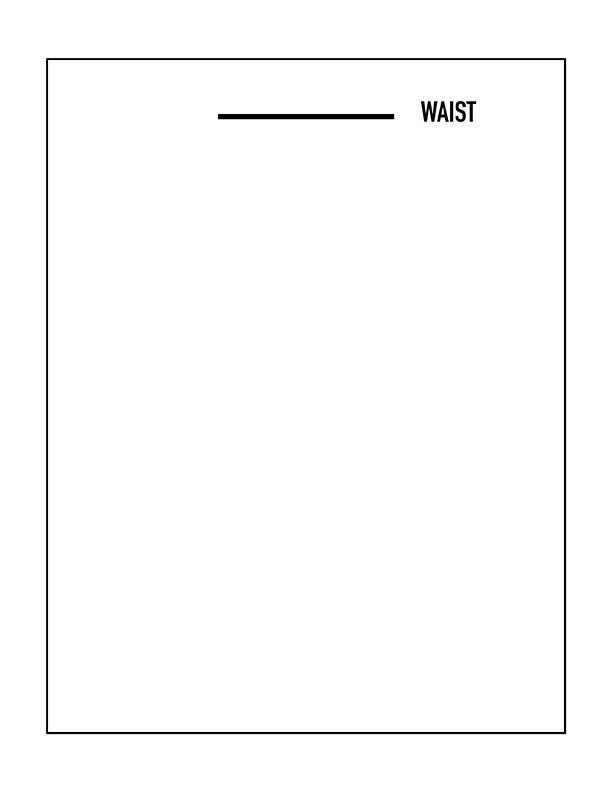 Step 2a: Using a pencil draw a line at one end of the paper that matches the waist measurement. In the example above this would be 7”. Label this as the waist.
Click here to download this image as a PDF.
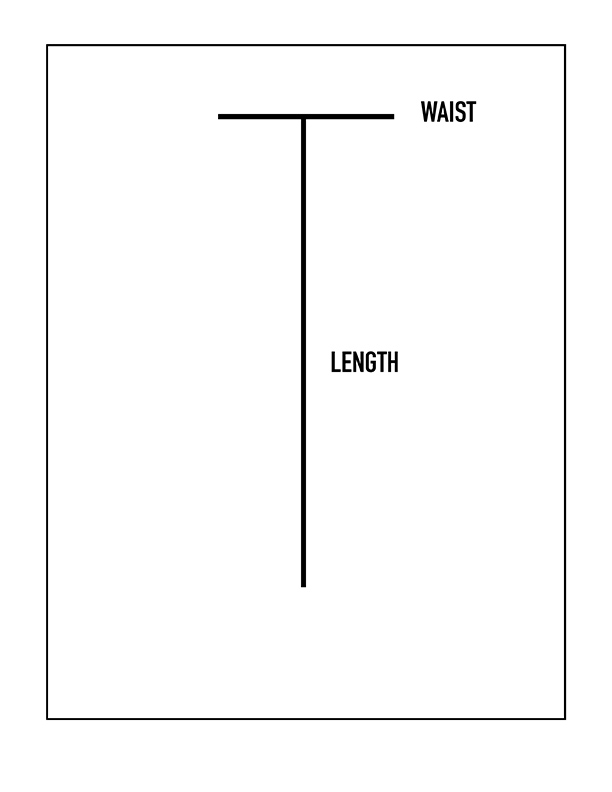 Step 2b: Find the center of the waist line and from it draw a straight line down matching the length measurement. Label this as the length.
Click here to download this image as a PDF.
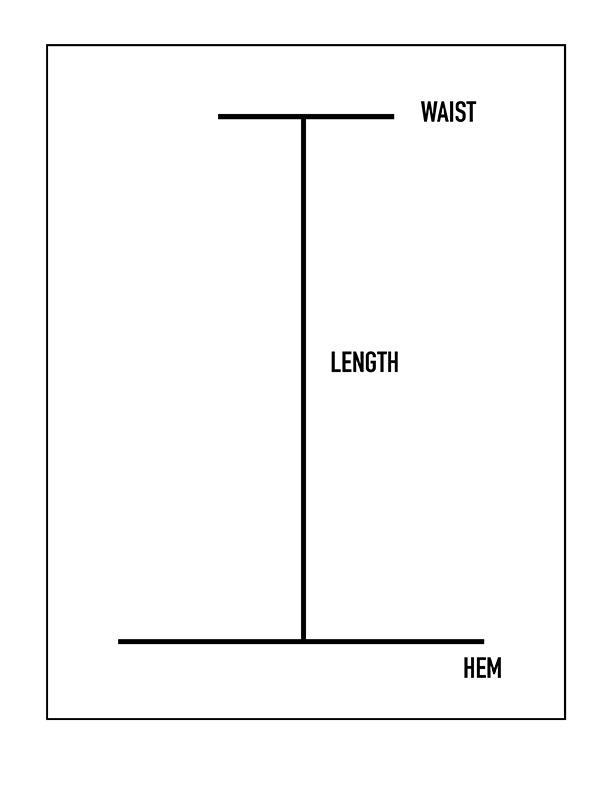 Step 2c: Using the length line as a center point, draw the hem width measurement perpendicular to the length. Label this as the hem.
Click here to download this image as a PDF.
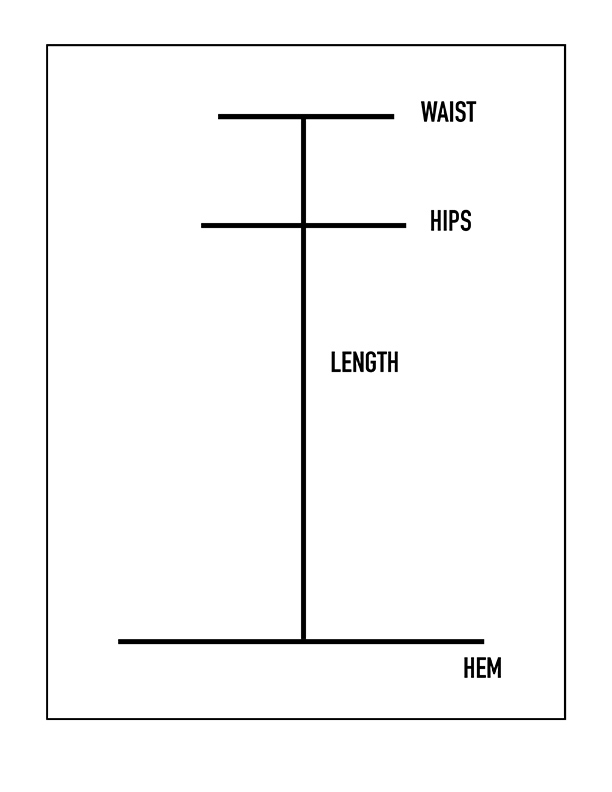 TIP: If you took your hip measurement, measure 6” below the waist measurement and draw a line matching your hip measurement. When you draw the diagonal lines to complete the gore pattern piece you can check to make sure your hips will fit inside the skirt. If the hip measurement shows that your hips won’t fit, add to the hem width measurement to widen the gore.
Click here to download this image as a PDF.
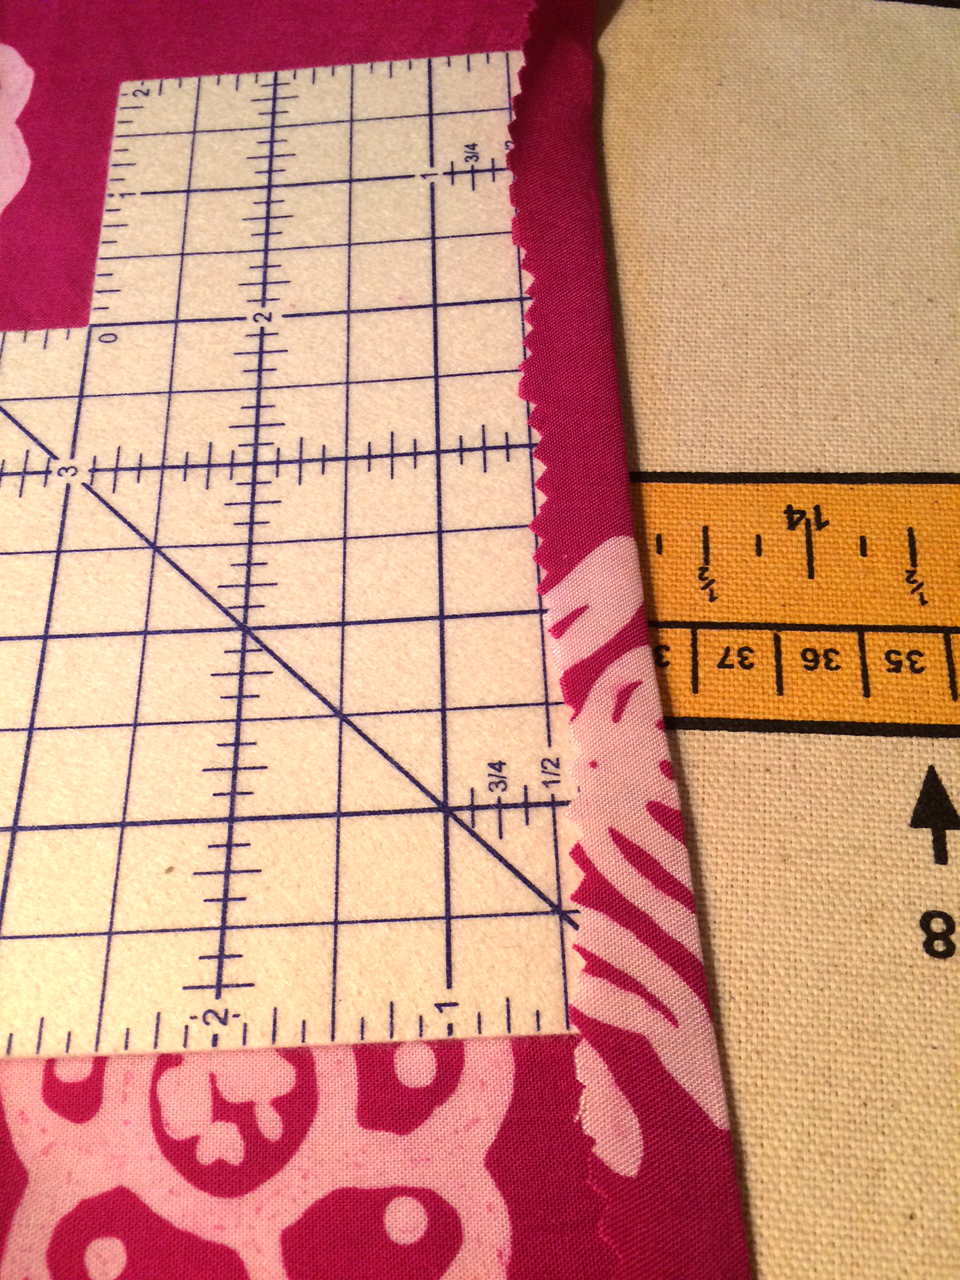
 Step 2d: Connect the end points of the waist line to the end points of the hem line using straight diagonal lines.
Click here to download this image as a PDF.
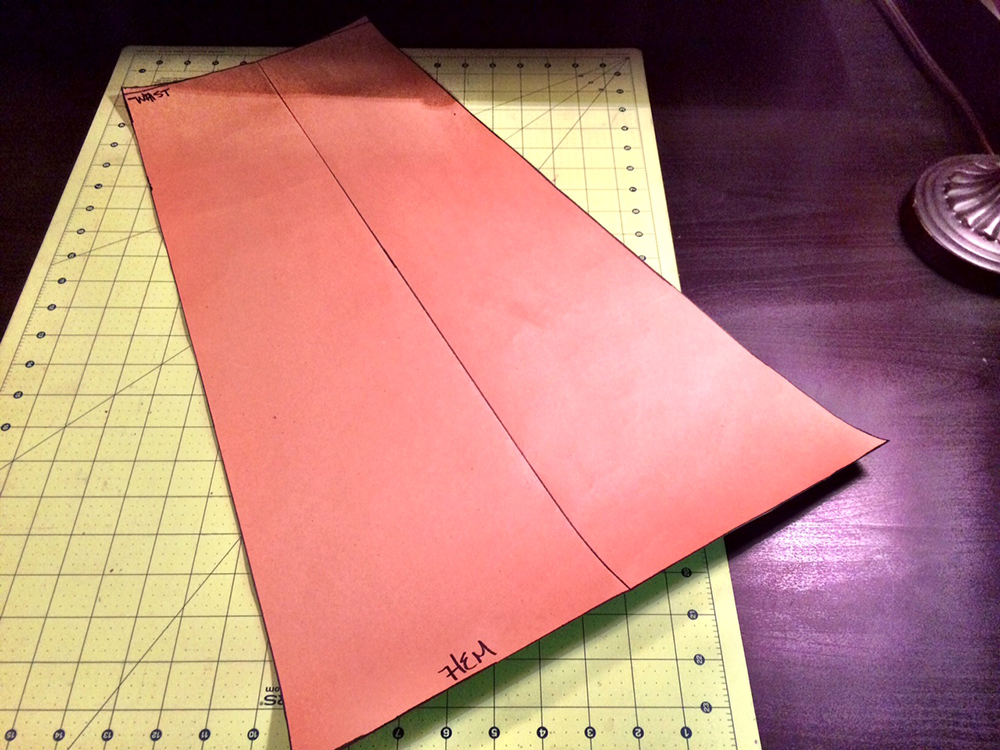 Step 2e: Trace over the pattern with a marker to make the lines bold. Cut out the pattern and label it “Six Gore Skirt Pattern.” You may want to write down your waist measurement on the pattern piece as well. If you decide to make another one in a few years you can check to see if the pattern will still fit simply by measuring your waist.
Step 2f: Take the pattern with you to purchase fabric. Alternatively, lay out the pattern on fabric you already own. You will need to cut out the pattern six times to complete the skirt. Don’t hesitate to use different fabrics for the gores of the skirt. It’s a fun way to vary the look!
Pockets & Skirt Construction
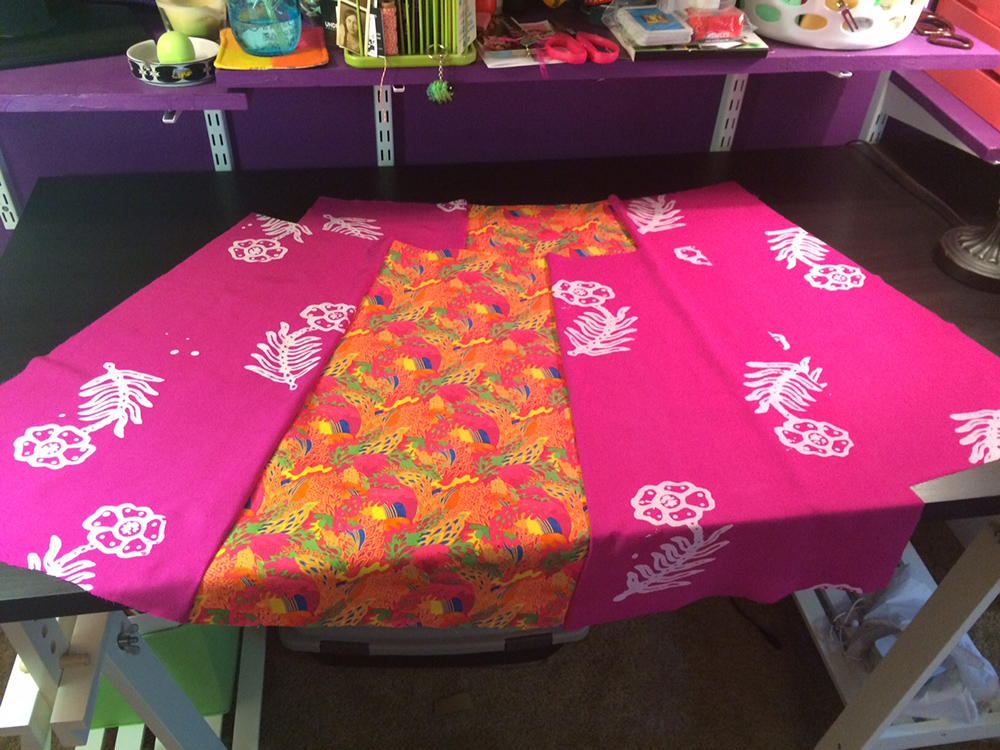 Step 3a: Using ½” seam allowances, stitch together the three front and three back panels. Be sure to keep the panels in the preferred order if you’re using various fabrics. Press seams open as you go.
Step 3b: For the pockets cut out four 6-½” x 6-½” squares.
Related Video: Making Lined Patch Pocket Patterns
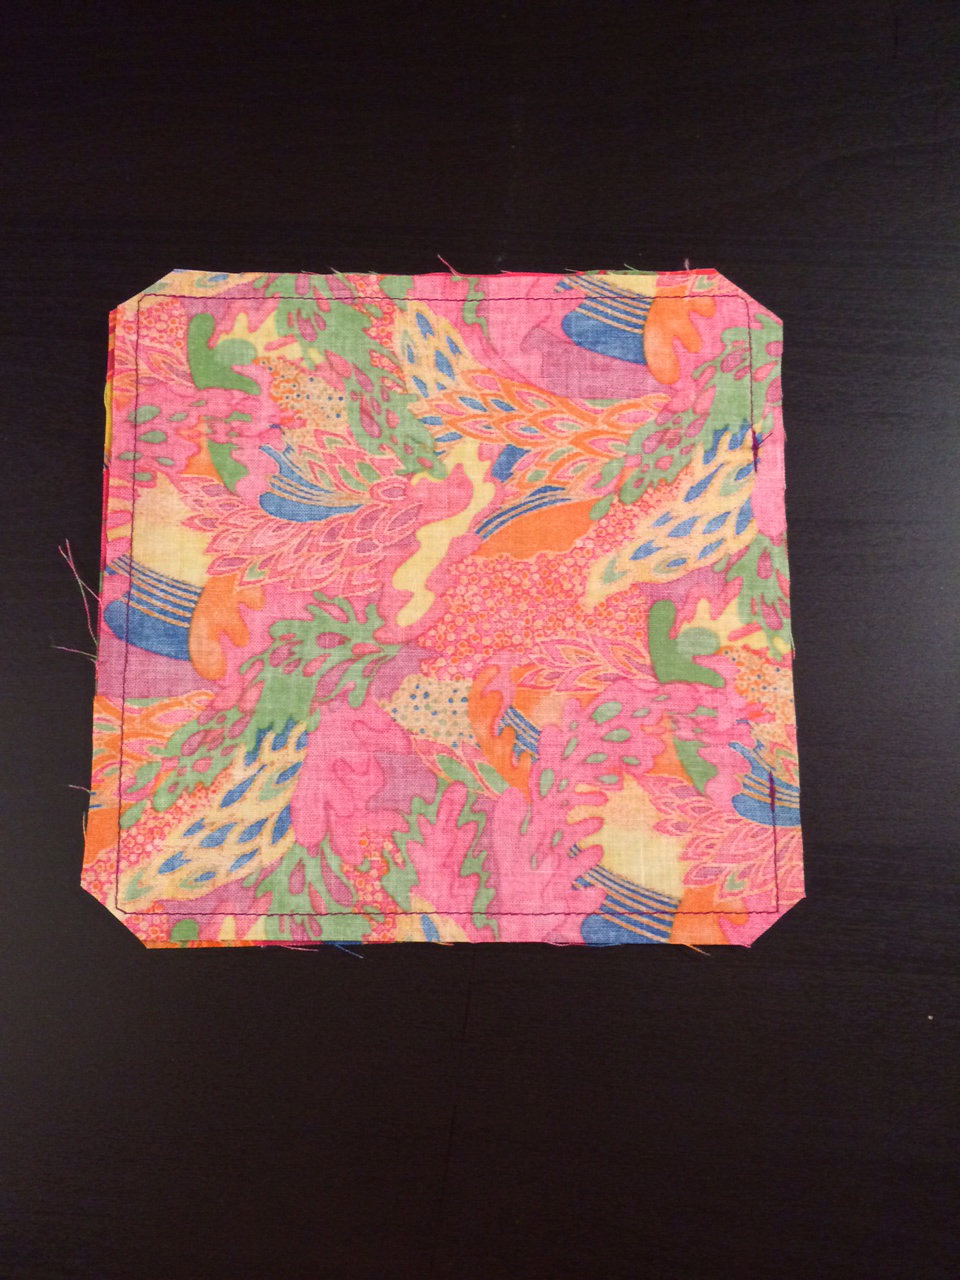
Step 3c: Place two of the squares right sides together. Stitch around the perimeter leaving a 3” opening. Trim the corners and turn right side out through the opening.
Step 3d: Tuck the opening’s raw edges in, and press the pocket. Stitch 1/8” from the edge catching the opening and sealing it in the process.
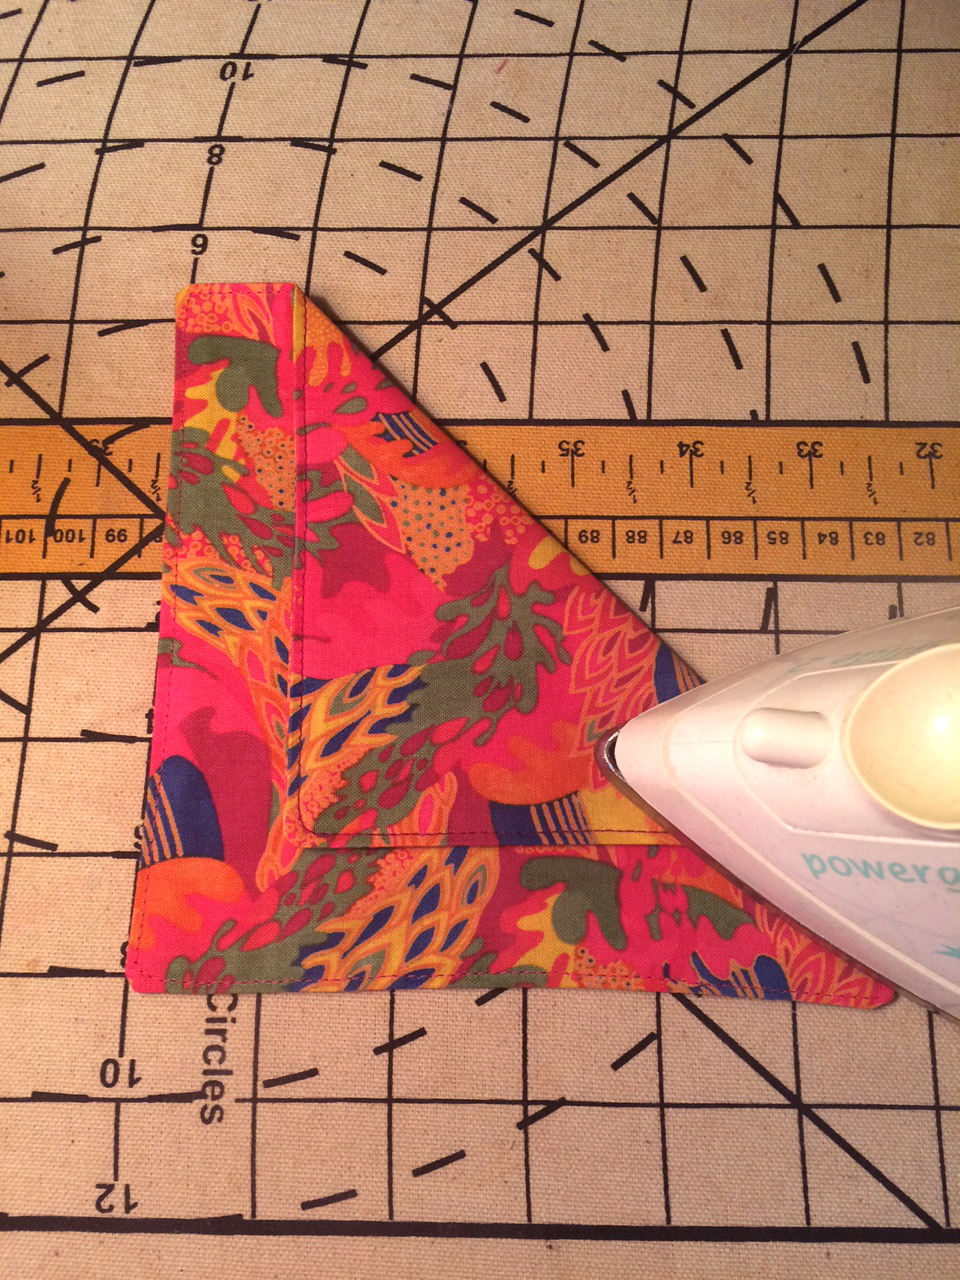 Step 3e: Fold the pocket corner diagonally across leaving at least 1-½” between the diagonal corners, and press. Repeat these steps to complete the second pocket. For deeper pockets that are more functional, only fold the pocket’s corner over 1” to 2”.
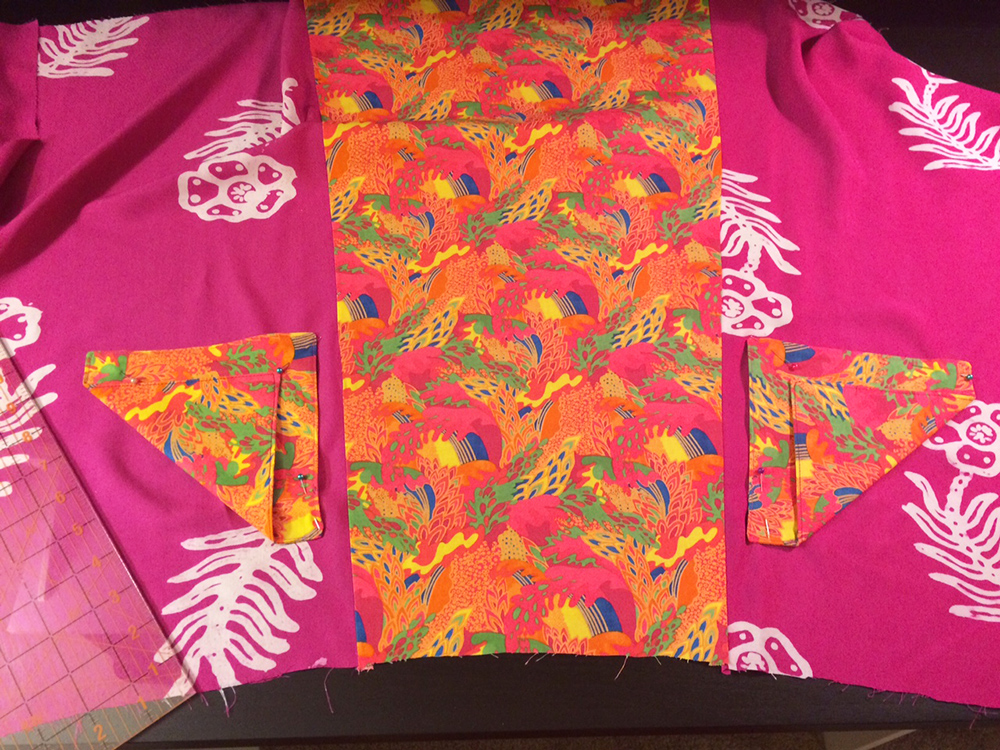 Step 3f: Place the pockets on the skirt. The pockets should be roughly 3” from the waistband. Evenly space them using the gores of the skirt. Pin in place.
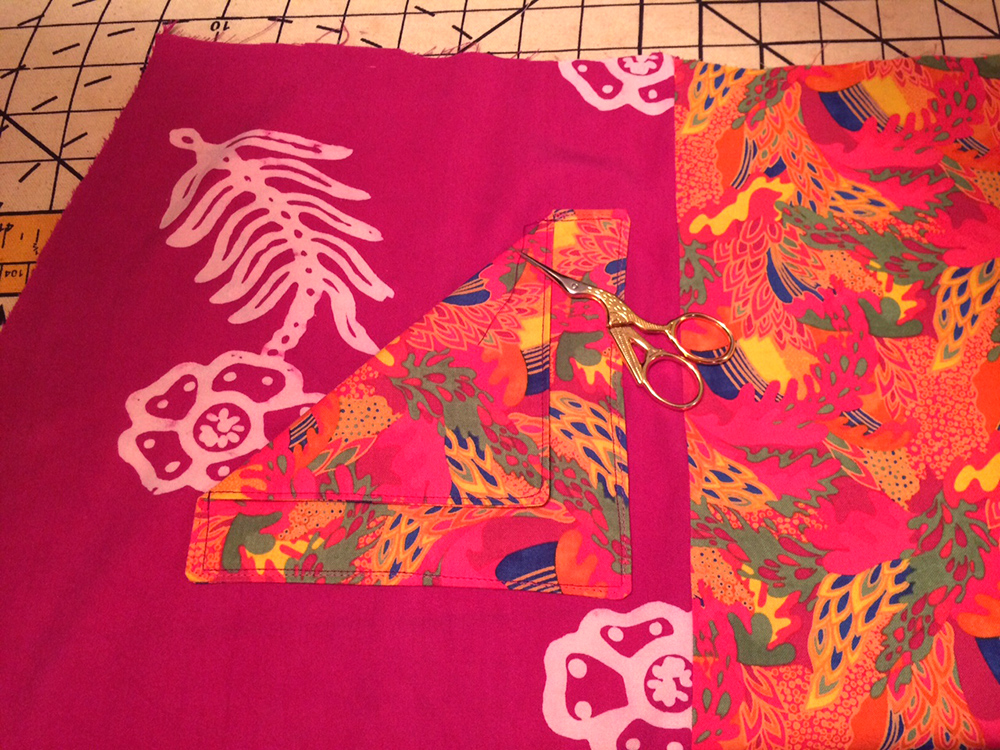 Step 3g: Topstitch the pockets to the skirt; line up the needle 1/8” from the top stitching as you go. Do not stitch across the diagonal fold.
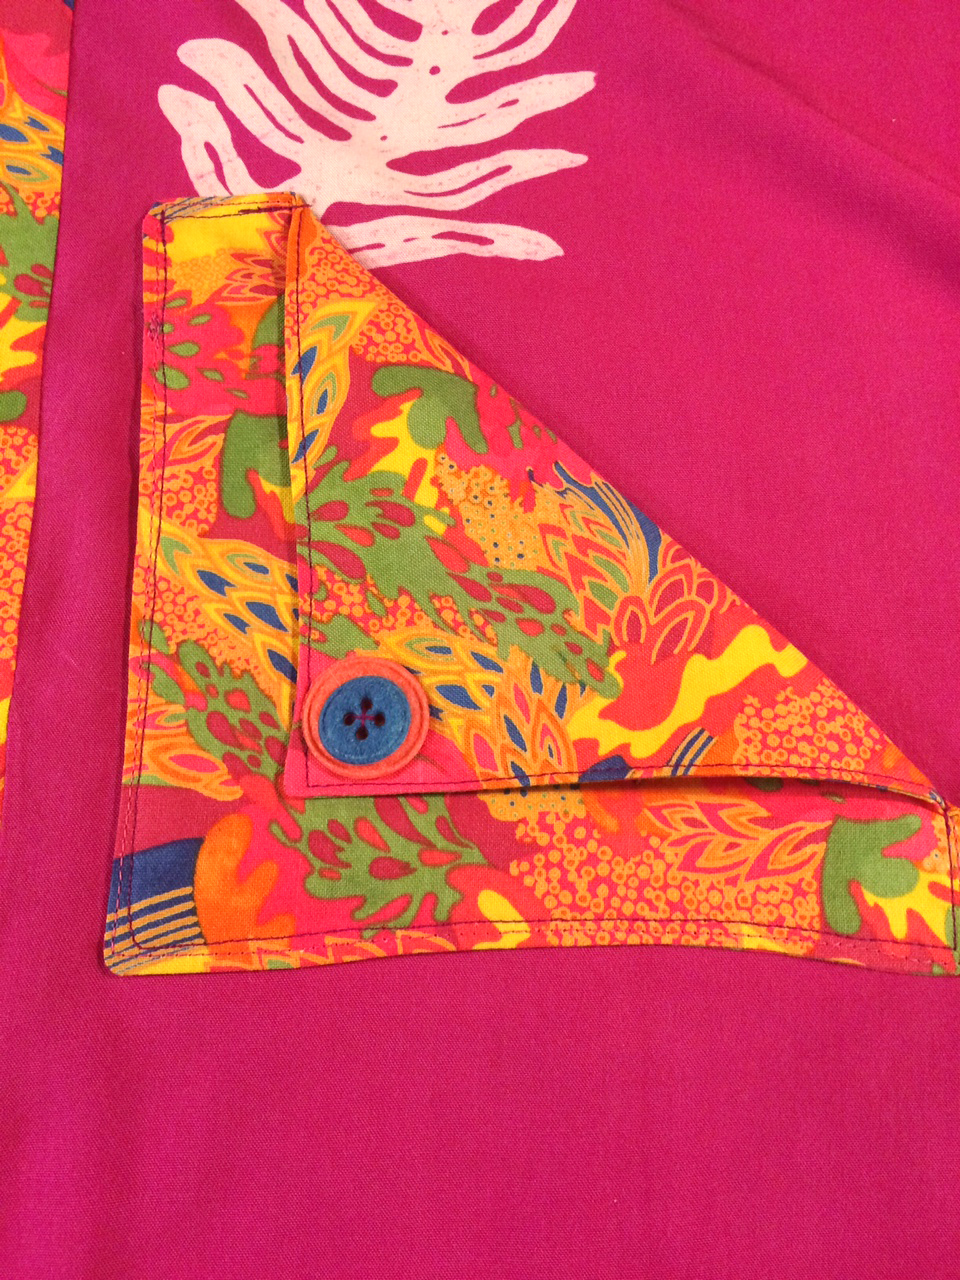 Step 3h: Hand stitch one 1” button to the tip of the folded down pocket. For added flair stitch a second button atop the first. Repeat to complete the second pocket.
Step 3i: Stitch the front and back panels together completing the skirt. If you would like to have a zipper closure, add it into a side seam at this step. Press seams open. Be sure to check the fit of the skirt. The most important part is that it fits over your hips. If the waist seems exceptionally too big adjust the side seams.
TIP: Pink the seam allowances, waistband, and hem for added security. If you don’t have a serger, this is a great way to reinforce the seams.
Drawstring Waistband
 Step 4a: Fold down the waistband ½” to the wrong side and press. If you have a pressing ham, be sure to use it while pressing the curved waistband.
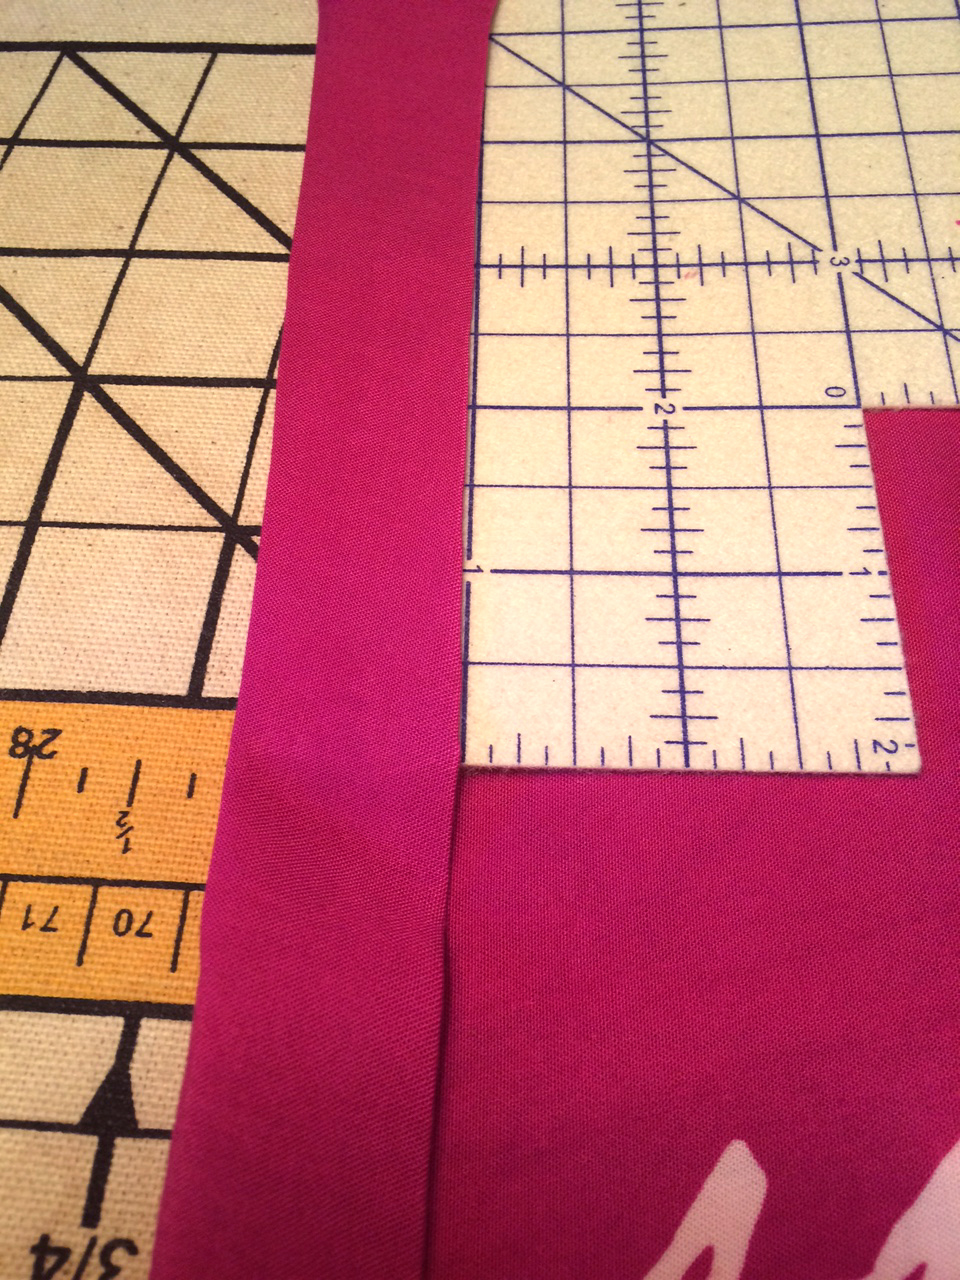
 Step 4b: To create a drawstring waistband with ties on the sides, line up the extra wide double fold bias tape with the waistband. Cut a length of tape 1” wider than the front three gores. Cut a second length of tape 1” wider than the back three gores.
 Step 4c: Open the bias tape and press flat. Remove the center fold but leave the two smaller edge folds in place. Also fold in the short edges ½” of both pieces of tape and press.
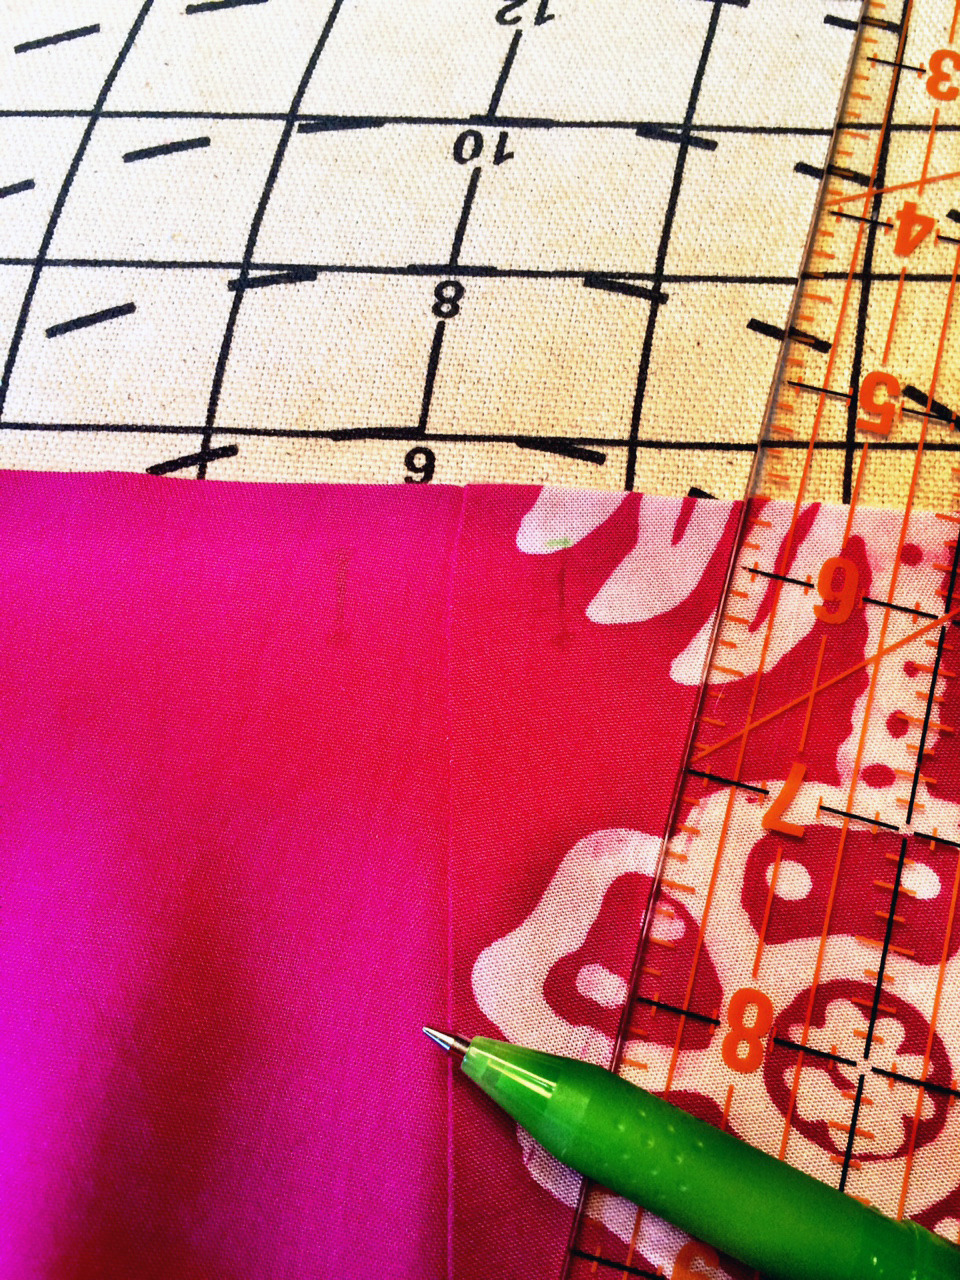 Step 4d: Roughly ½” to each side of the skirt’s side seams mark placement for two buttonholes. The buttonhole should be 1/8” to 1/4” from the waistband.
Related Article: Tips for Selecting Buttons and Button Holes
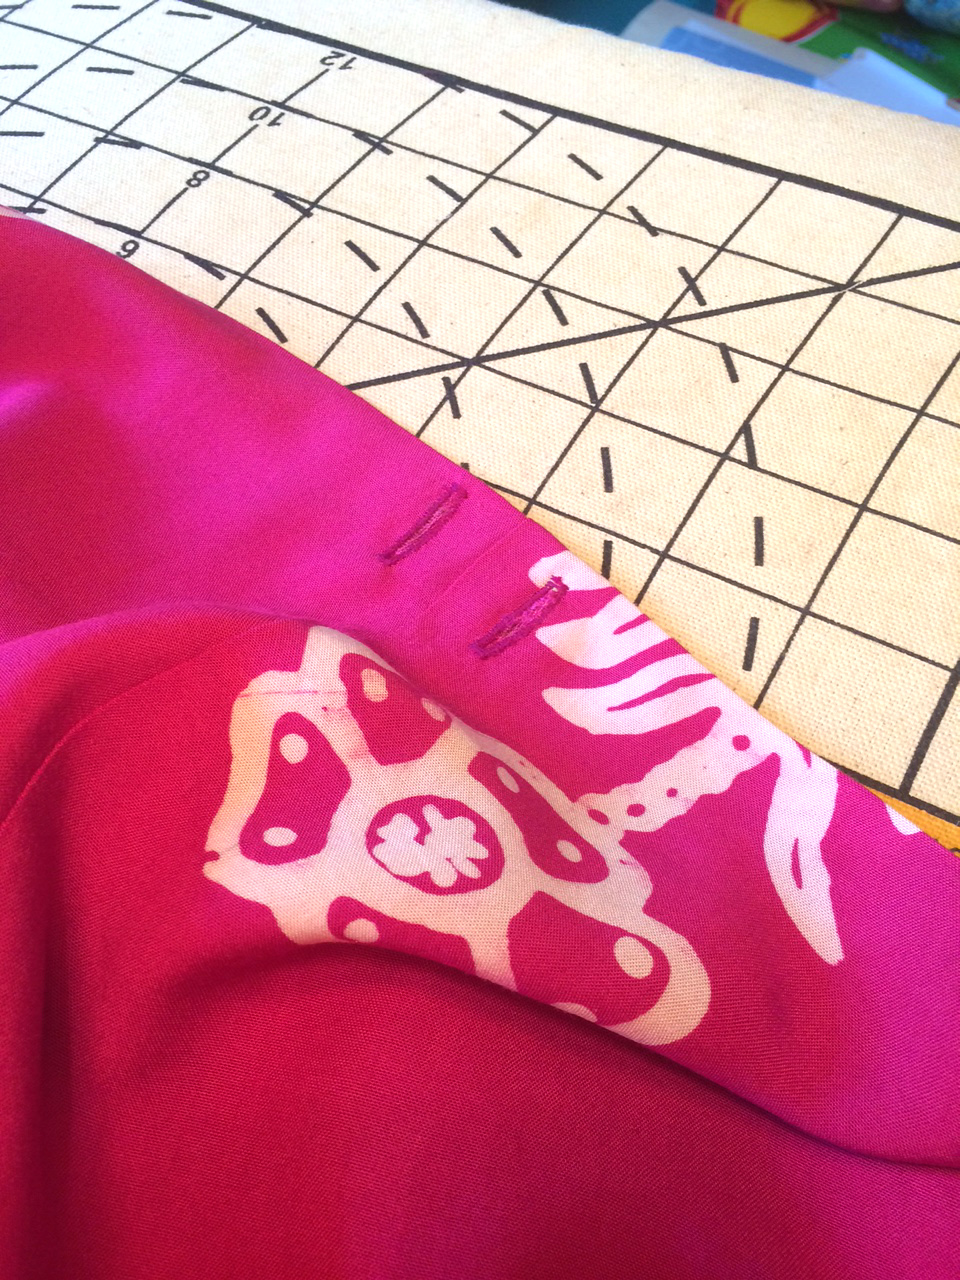 Step 4g: Place the 5/8” button in your buttonhole foot. Select a basic buttonhole stitch on the sewing machine. Beginning at the mark nearest the waistband, stitch out the buttonholes. There should be four buttonholes in total, one to each side of the two side seams.
Step 4h: Cut the buttonholes open. If you’ve never tried out a buttonhole cutter, it might be a tool you’ll enjoy using. Check out this link for some tips:
Related Video: Using a Button Hole Cutter
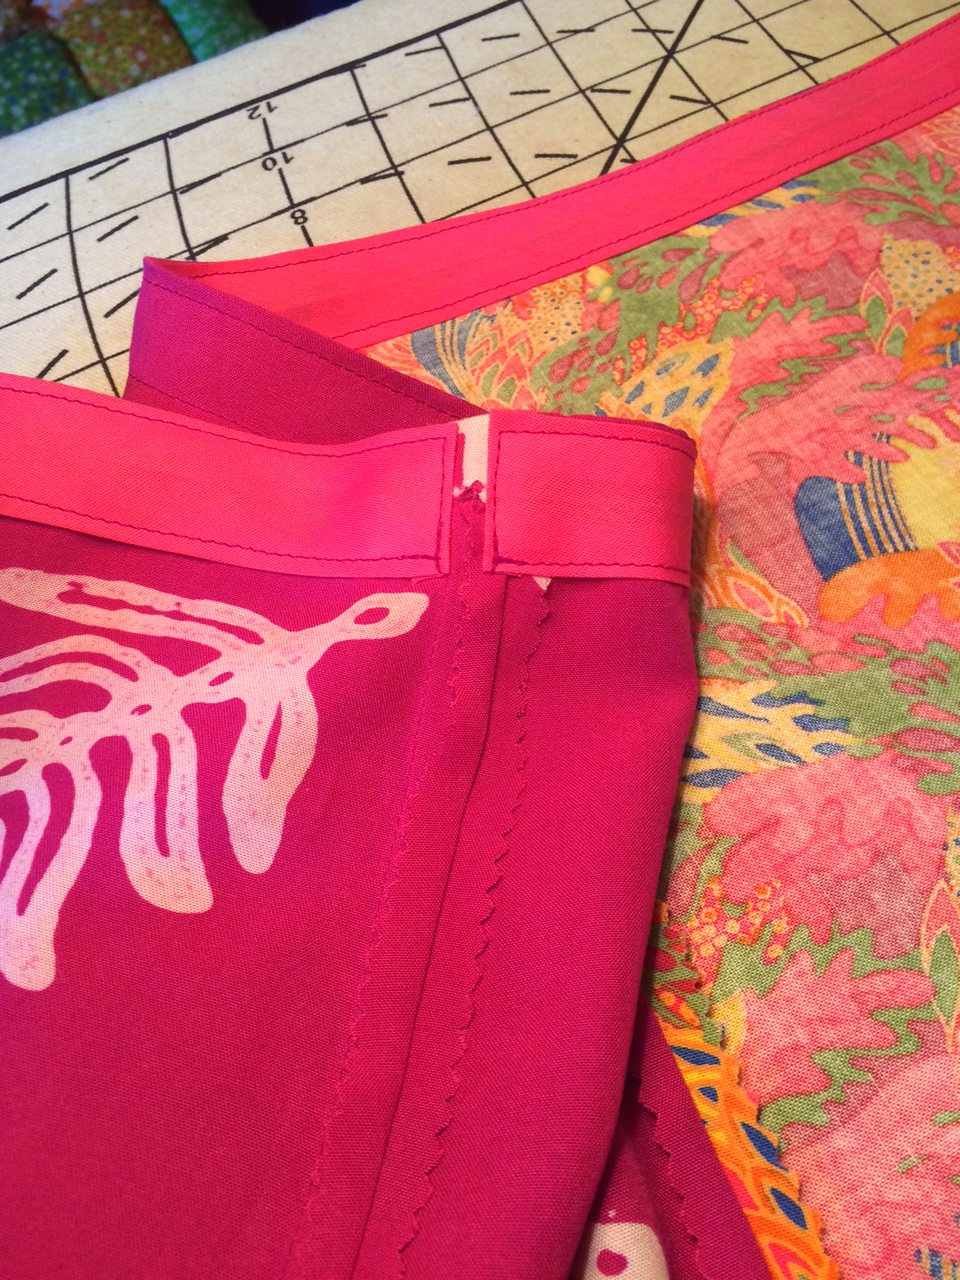 Step 4i: Pin the bias tape to the waistband’s wrong side. Stitch up the short edge, pivot the fabric, and stitch along the waistband creating a casing. Repeat to stitch the remaining bias tape in place.
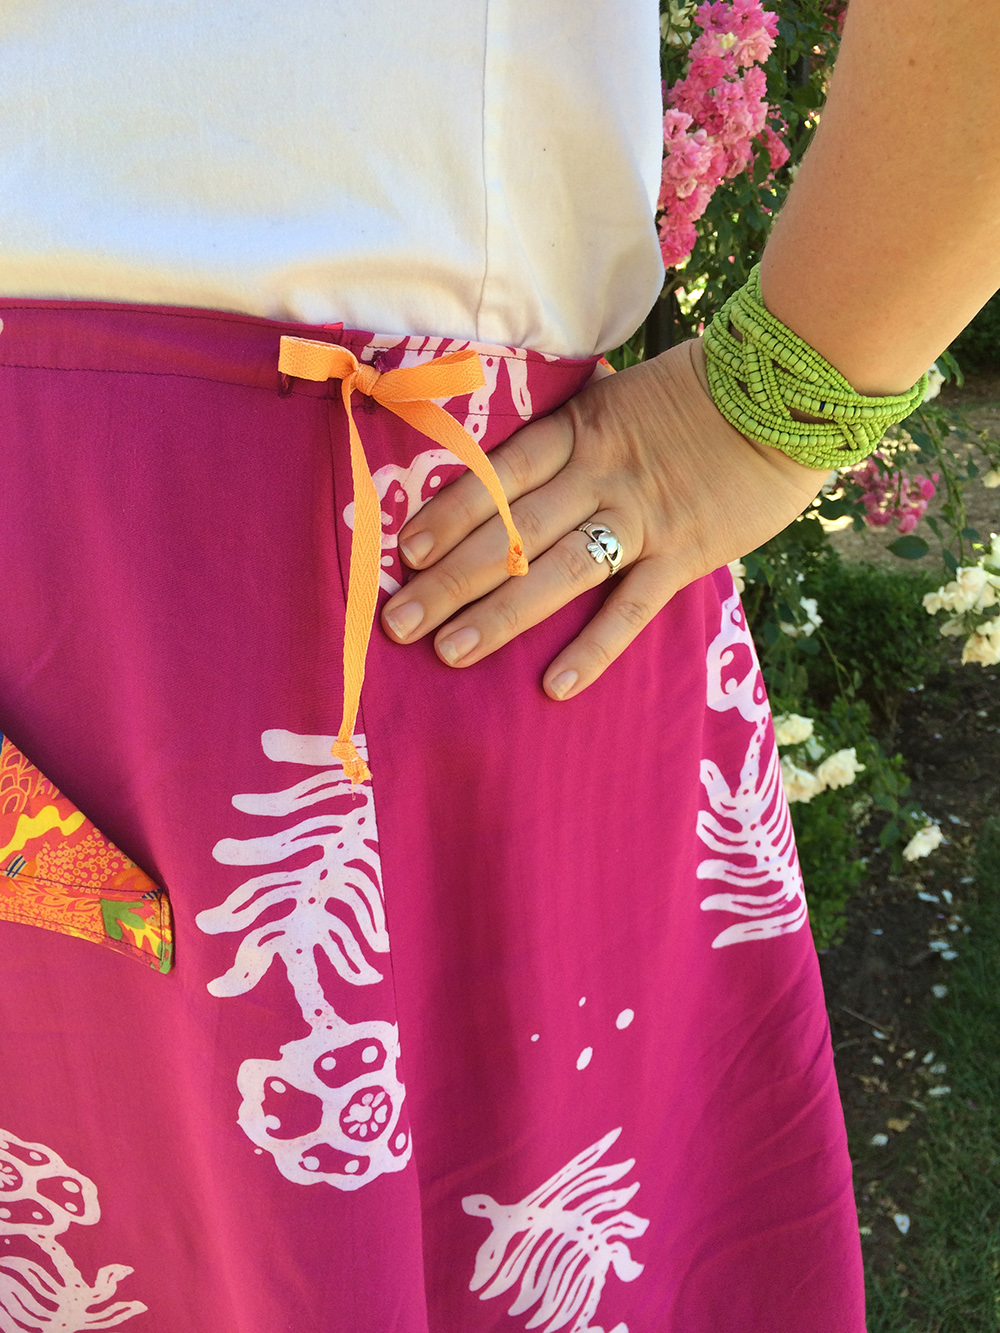
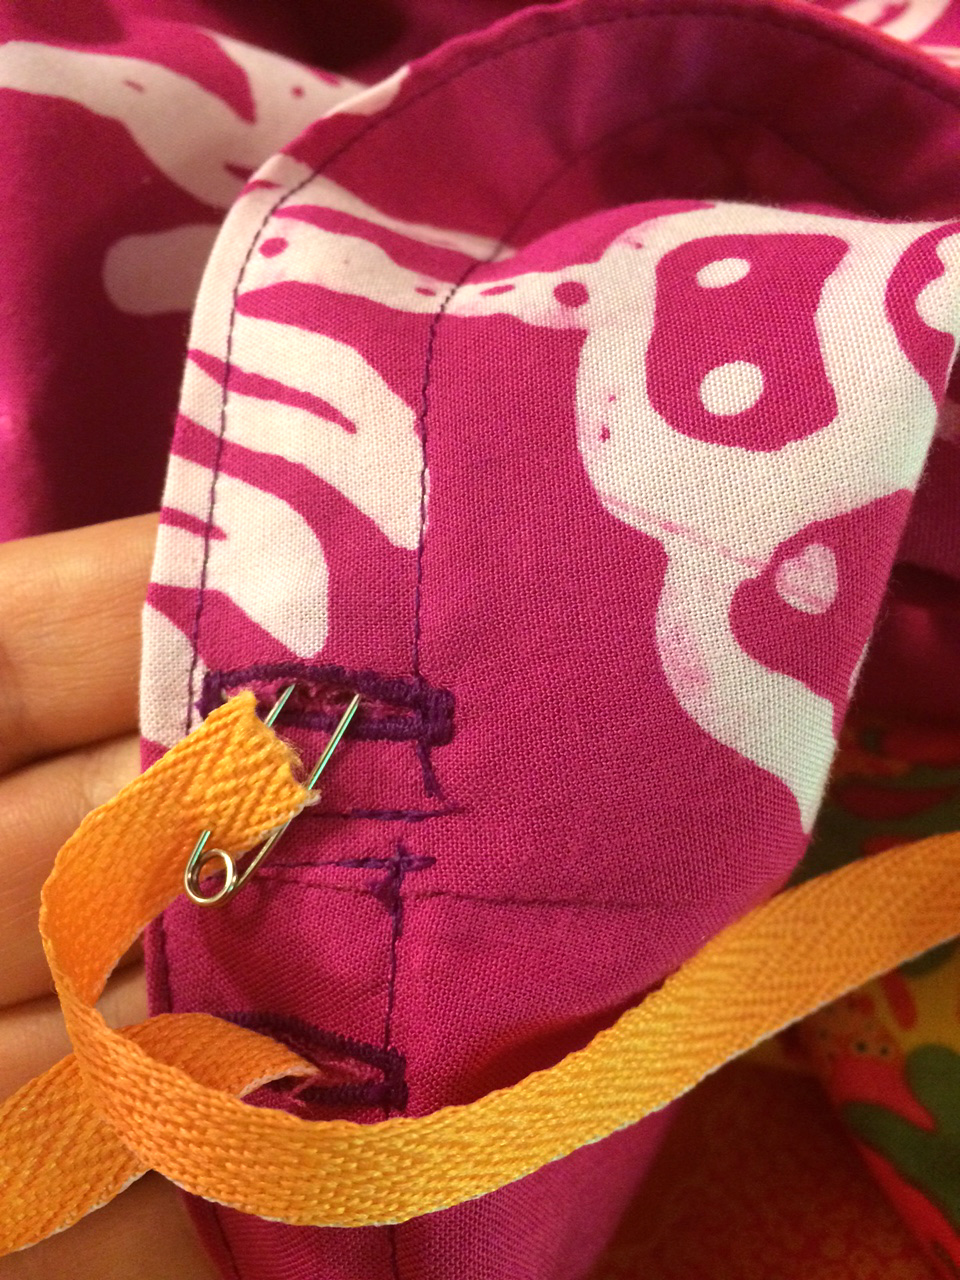 Step 4j: Pin a safety pin through the ribbon’s end. Feed the ribbon through the waistband casing until it emerges out the opposite side. Trim the ribbon leaving 9” on each side. Repeat to feed the ribbon through the remaining casing.
Step 4k: Tie a knot or two in each end of the ribbon.
Blind Hemming
 Step 5a: Press the entire hem line to ensure there are no wrinkles. Then fold the hem ½” to the wrong side and press. Allow the hem to cool. Here again, using a pressing ham is advantageous.
 Step 5b: Fold the hem up another 1” to the wrong side and press.
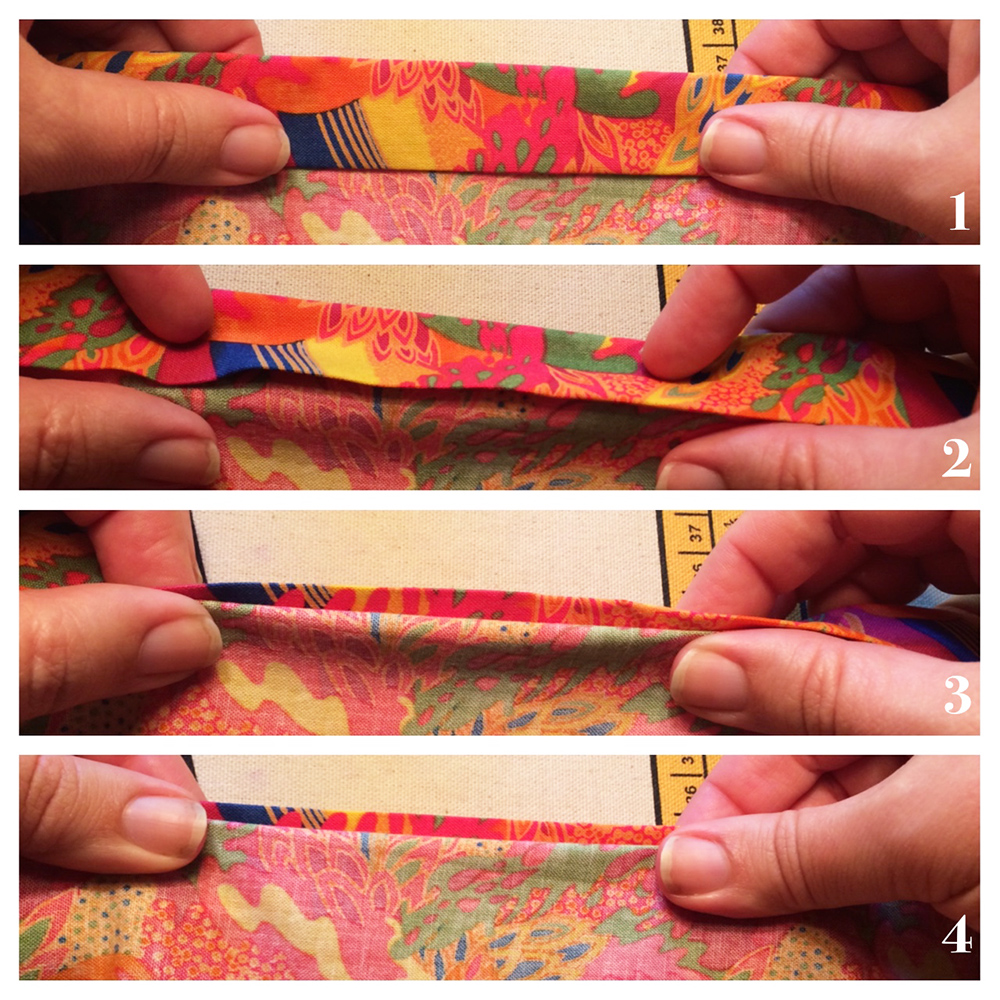 Step 5c: Fold the hem so that 1/8” of the pressed up fold shows, and pin. This is the trickiest part of blind hemming – getting the fold just right. This image here shows the steps of folding. (For a live action demonstration watch Aurora Sisneros fold the hem in the video linked below.) Feel free to pin copiously. As the hem is wider than the skirt portion you’re pinning to you will need to distribute the extra fabric evenly. Be sure to match gore seams as you pin.
Related Video: How to Blind Hem
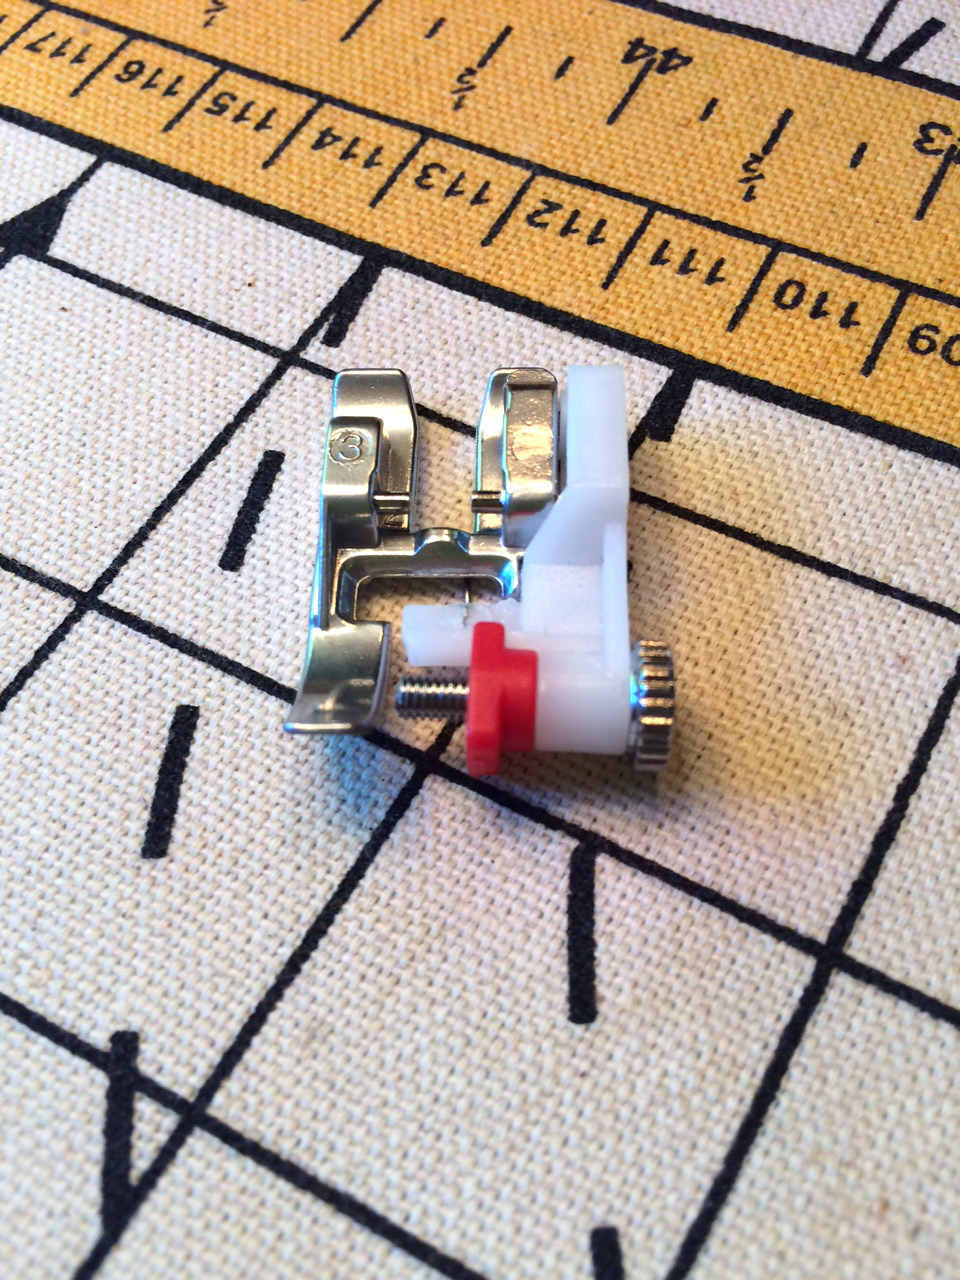 Step 5d: Attach the blind hem foot to your machine. The blind hem foot will have a bar in the middle and should have a screw to allow you to adjust the width. I’m setting mine rather wide to let the stitches show up in the photos. However, you should set your width as you see fit. If you’re unfamiliar with blind hems test out the stitch on a fabric scrap.
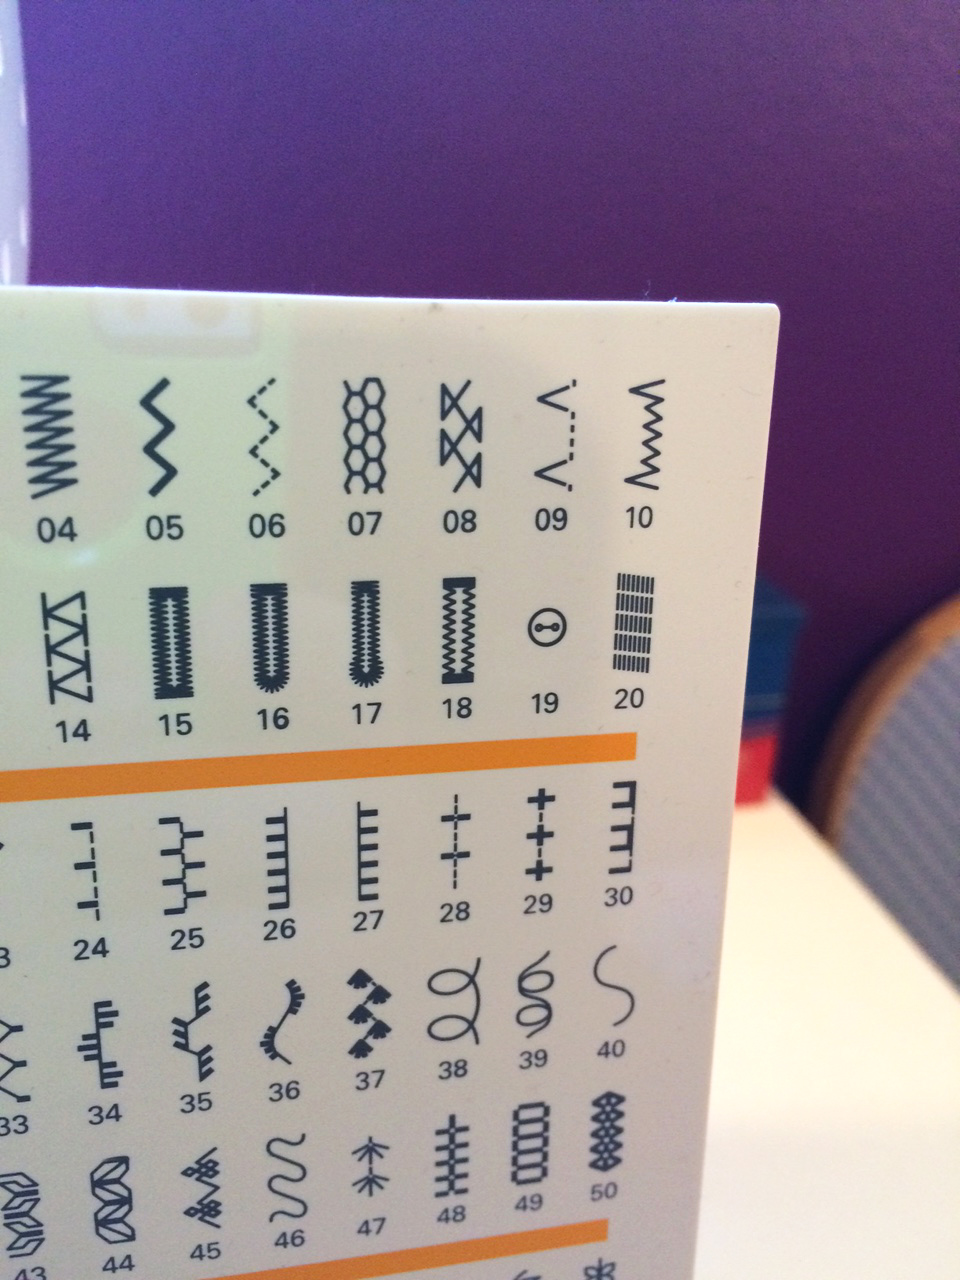 Step 5e: Select the blind hem stitch on your machine. On my machine it is stitch 09; refer to the image here (or your user’s manual) to find the correct stitch on your machine.
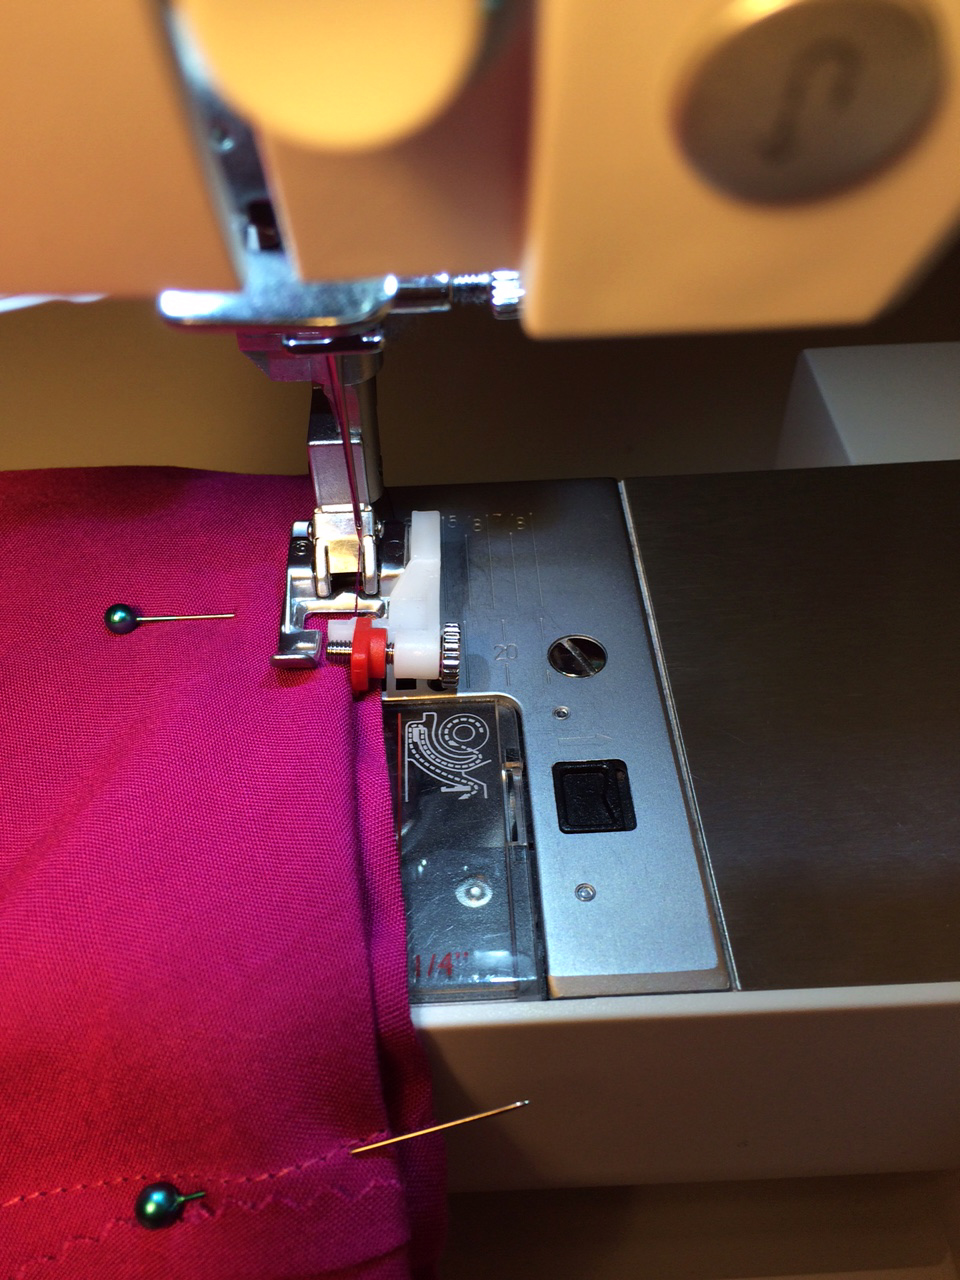 Step 5f: Place the fold against the bar on the foot and lower the needle into the folded over hem. Stitch the hem keeping the fold against the bar the entire way. Back stitch a bit at the end.
 Step 5g: Pull down the hem extending the stitches along the fold. Press to finish.
 A blind hem may require a few extra steps, but it provides a truly professional finish. Now that your skirt is finished be sure to wear it out for a special event! Your friends are sure to notice the hard work and designer details.
Related Videos:
- Make a Strip Skirt
- Making Lined Patch Pocket Patterns
- Tips for Selecting Buttons and Button Holes
- Using a Button Hole Cutter
- How to Blind Hem
Get in touch! Leave a comment or email editor@nationalsewingcircle.com

I appreciate the alternatives provided. Well done. I would add a zipper or elastic even if I were to do the draw string. It would just allow the top of the skirt to be smooth and not gathered. I agree with adding the hip measurement. It is needed otherwise the skirt would not fit a hippy person.
[…] of our favorites is a fun, stylish strip skirt with simple, A-line design. This skirt offers a nice, easy drafting and sewing experience that can […]
Enjoy the easy projects. Thanks!
Beautiful and trendy. Would to try.
I'm going to try this out. I suggest that before sewing by machine do a lot of pinning and basting. Much easier to pull out basting than machine stitching.
Love the colors you chose and your bright fun smile is fun too!. The drawstring is cool
Nice project but I believe the measurements are wrong. If you make a skirt without a zipper, adding only 2" to the waist measurement is not enough to allow the skirt to pass from your hips. In other words if the difference between the waist and the hip measurement is more than 2" you will not manage to wear the skirt unless you put a zipper.
What great work in such fun colors! These are helpful instructions.
Nicely done.