How to Sew a Blind Hem Stitch on a Sewing Machine
Nicki LaFoille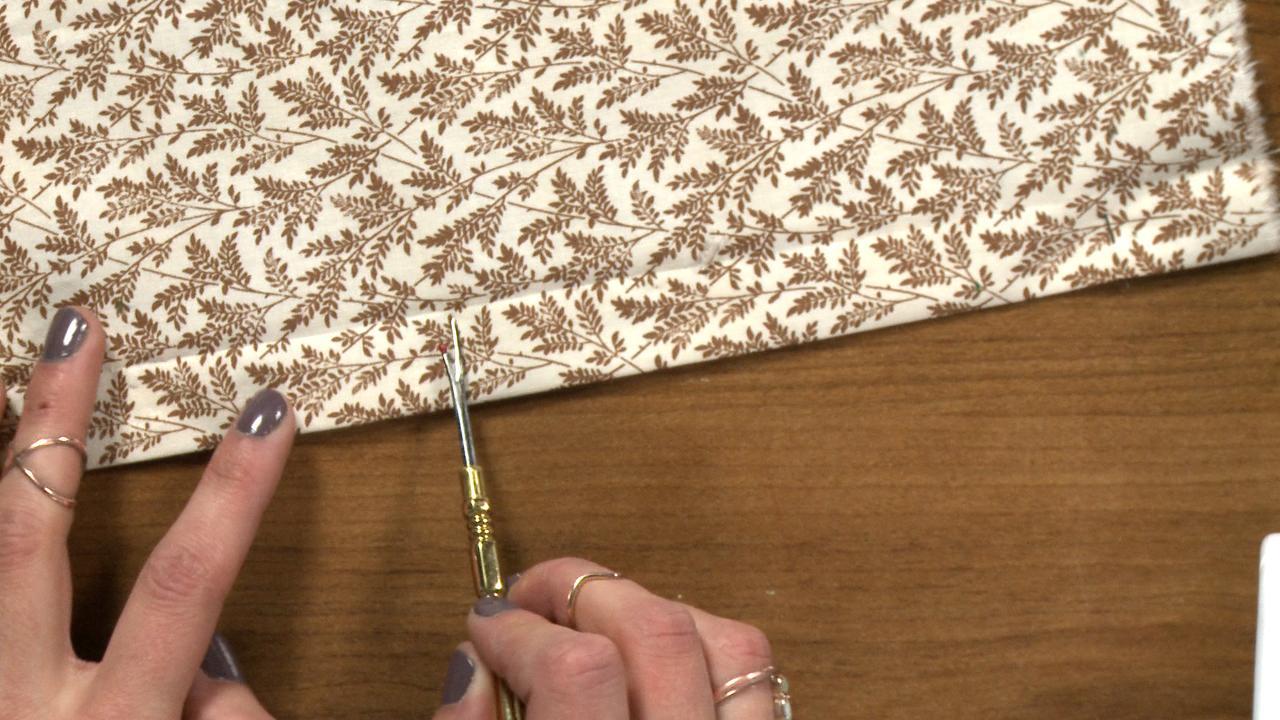
Video Player is loading.
A blind hem stitch, used in combination with a blind hem foot and proper folding of the fabric, can create a nice blind hem on your next project. In this video, Nicki LaFoille shows you how to accomplish this.
Tools and Preparation
Using a blind hem stitch on your machine can be a simple way to create a blind hem on a project, whether it’s the hem on a pair of slacks or the lower edge of a curtain. When it comes to creating a blind hem most of the work is done in the preparation of the fabric. Nicki shows how to prepare the edge to be hemmed with several folds and pins. Folding the fabric in the correct direction is very important in ensuring that the hem turns out.
Nicki also shows what foot is required for this hem finish, which is a blind hem foot. This foot has a small flange on the underside that runs along the edge of one of the folds that has been created in the fabric. Using this foot helps to ensure that the blind hem stitch stays right along the edge of the fold. All blind hem feet will have some kind of flange on the underside, however they may not all look the same depending on your machine brand and model. Nicki shows two different feet, one that came standard with her machine and another that was purchased separately.
Once the fabric has been prepped and the foot inserted onto the machine, Nicki shows how to use the blind hem stitch to sew the hem. She explains how the stitch is formed and how it is nearly invisible on the right side of the fabric. Whether you use a blind hem stitch and foot or other techniques for sewing blind hems, the outcome is a very professional finish.
For projects where you want an invisible finish on the hem, you don't want to have that top stitched look, a blind hem can be a really great option. You can do a blind hem by hand or you can do it on the machine, which is way quicker. So on your project, fold up your hem as you normally would. Double fold your hem usually if you're doing curtains or something, and pin so that the pin is facing down. And to do a blind hem, you want to have a blind hem foot.
So here are a couple of options of blind hem feet. They can look slightly different. This one came standard with my machine and this one was purchased separately, but they both have this flange in the center on the bottom and that flange is going to run right along our fold. So I'm going to put this one on my machine. So we folded our hem as we normally would, pins facing down.
And we're just going to flip this hem under again. Fold it under so that about a quarter inch of the hem allowance is showing and the rest of the project is facing the left. So we're going to be stitching right along just through the hem allowance. And then our blind hem stitch is going to take a little bite into the project fabric to attach that hem allowance. So the blind hem stitch, it looks just like a couple of straight stitches going down and then a little zigzag stitch taking a bite out of this fold.
So I'm going to select my blind hem stitch. And place my fabric under so that the little flange is aligned with this fold on the project fabric. Remove your pins as you go. So it's stitching just through the hem allowance and then taking a little nip out of the project fabric. So it's going to show just a tiny little stitch on the right side.
And if you choose matching fabric, it's hardly gonna show at all. Once you know how to fold the fabric up, this stitch is really easy. So my stitch is running along my hem allowance and taking a little bite out of the project fabric. That was just the end of my thread that got caught in my stitching. And then on the right side, the little bite out of the project fabric is nearly invisible.
You can see it a little bit right there on the brown of the print. But if you give this a little press to get rid of that crease, that hem finish is nearly invisible on the right side.
Thank you, I've just learnt something and doing alterations this is going to speed up my process and save my hands :). I do agree the camera angle would have been better from the other side and contrasting thread, but still a great skill to learn thanks.
What is the white plastic with a thumb screw for?
Thank goodness I wasn't a complete beginner watching this video - the instructor did not even tell you which stitch to select on your machine!
Too bad that the video does not show the work of the needle, nor the adjustment of the foot, which is essential for the use of this foot. I don't think this video can help someone who does not know this technique.
great video...learned something new today. What "Brother" model are you using in this video?
Just as the camera is angled to show hand stitching the camera should be angled at the front of the machine so the needle can be seen as it sews. Fortunately I am not a beginner so I know what the machine is doing but for a novice not seeing the needle stitching is not helpful. Thank you.
I think a solid color fabric with contrasting thread would show the stitching more - a little hard to see with the printed fabric.
Am unable to view the hemming video. What can I do to see this?