Here’s an example of how you can incorporate flawless bias tape into a home décor project.
You’ll often see these types of details on very expensive couture garments and home decor. But this is the challenge: it has to be flawless! The width of the bias tape must be consistent and the stitching lines must be clean and crisp. But here’s the good news, after 50 plus years of sewing, I have developed a technique that guarantees a perfect finish to your bias tape. (Bonus: it’s easy!)
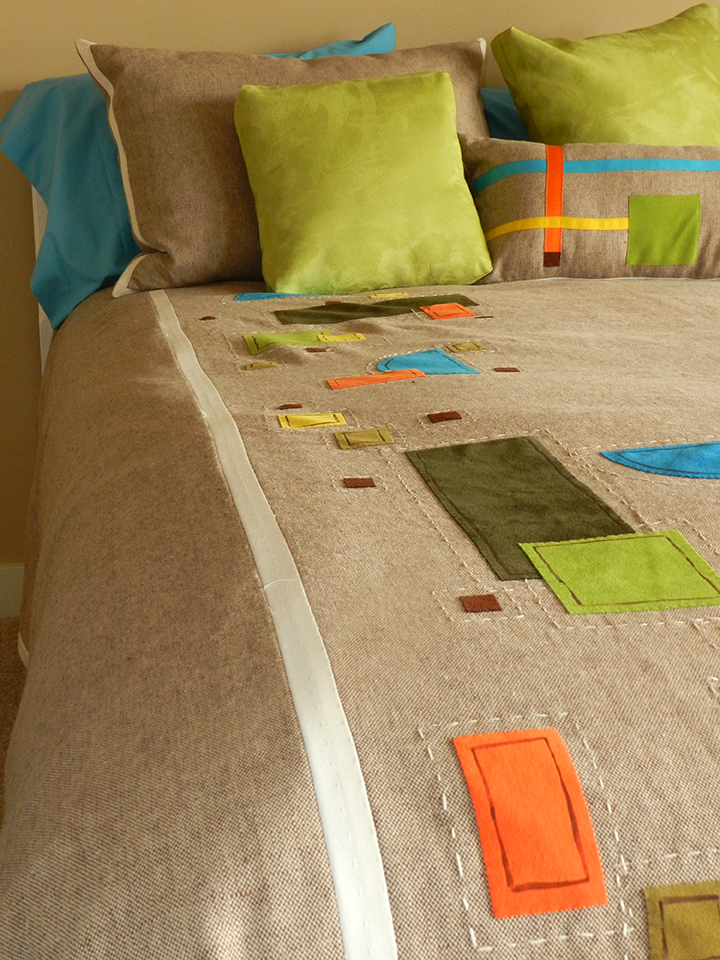
The following instructions will create a 5/8 inch bias tape as shown on the comforter and in the chest seam of the dress.
Tips Before You Begin
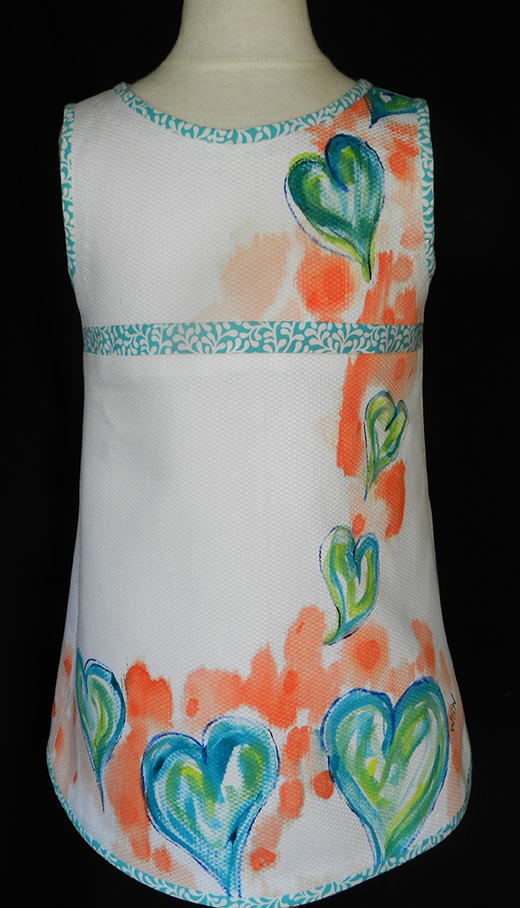
To make this project more interesting, I hand-painted the fabric to complement the bias tape.
If you are using light fabric against dark fabric, test the bias fabric to make sure the main fabric will not show through the bias fabric.
Before you head to the sewing machine, you will want to decide where you want the trim to be placed on your project. Because the fabric is cut on the bias, it will work on areas that are curved as well as straight lines. I normally place the trim on an area where I want to draw attention. If you are easing fabric such as the bust line, I would recommend placing the bias embellishment on the center front pieces rather than the piece that is to be gathered or eased.
Creating the Bias Tape
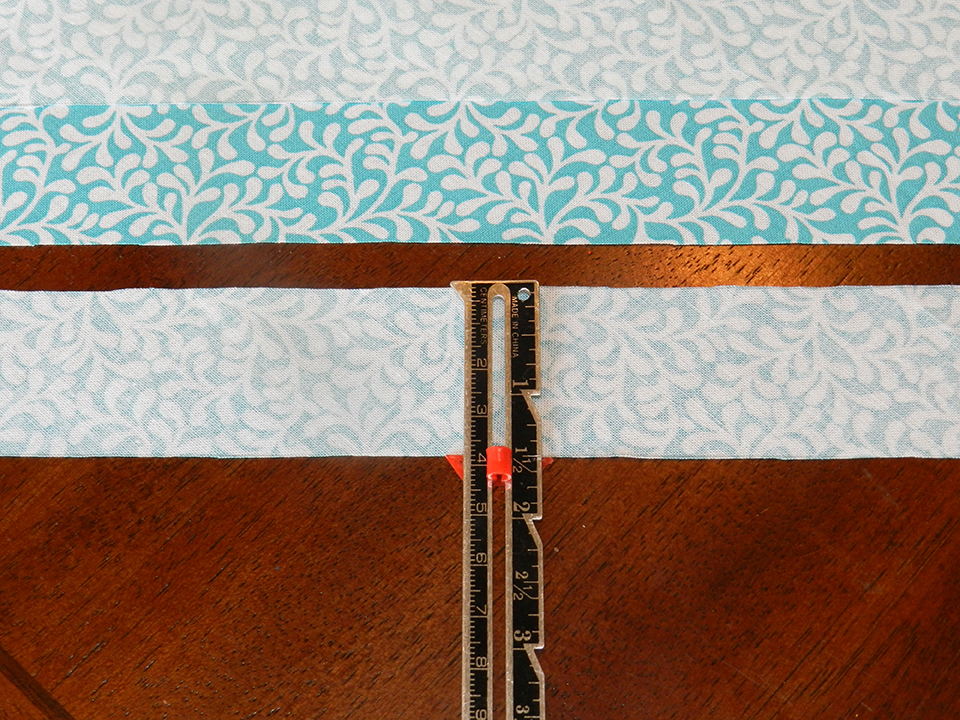
Step 1: Start by folding your fabric on a 45 degree angle. With a straight edge cut the fabric in 1½ inch strips.
Step 2: Next place the bias fabric on the main fabric with the pretty sides facing each other. Using a sewing gauge, position the bias fabric 1” from the edge of the fabric.
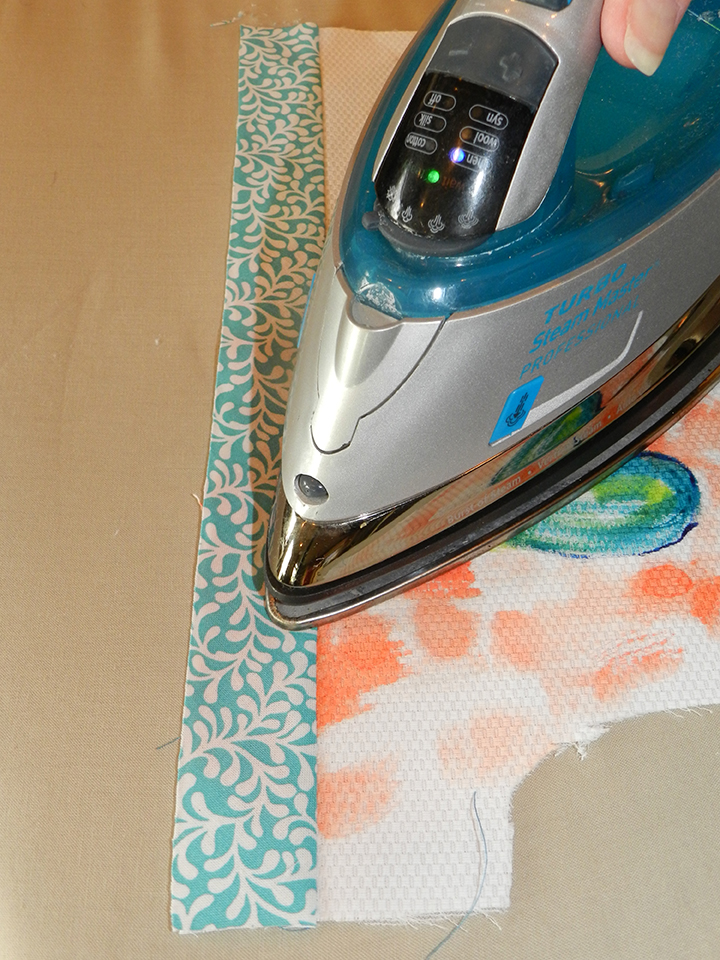
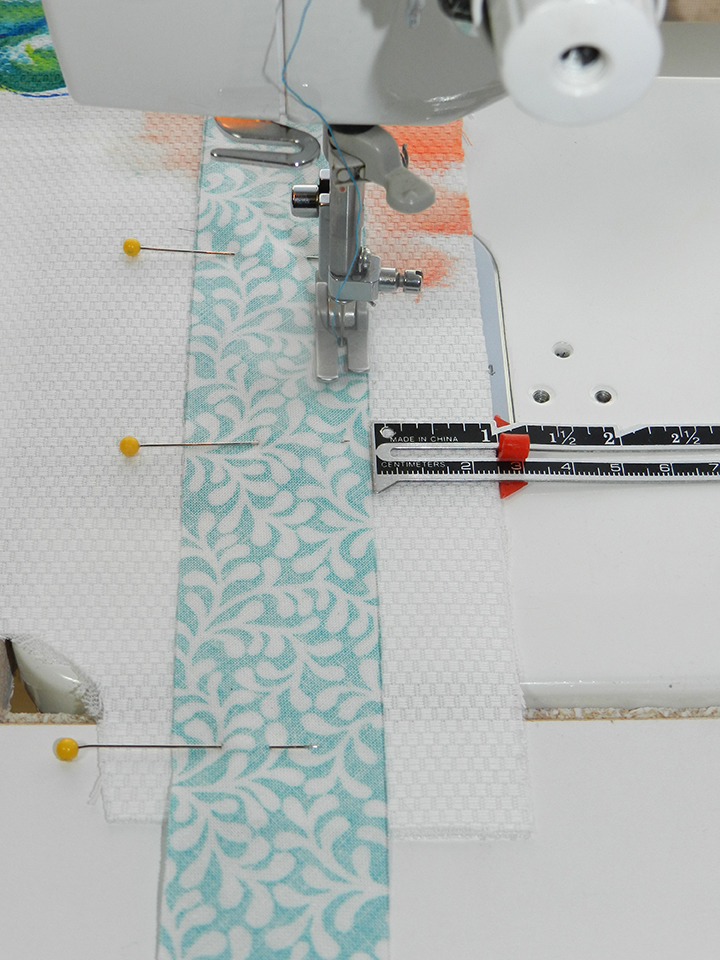
Step 3: Next, fold over the bias tape and press toward the edges of the garment or project. Top stitch or baste the raw edge of the bias tape to the main fabric. Stitch about ¼ inch from the side of the main fabric. This keeps the bias fabric from slipping or moving.
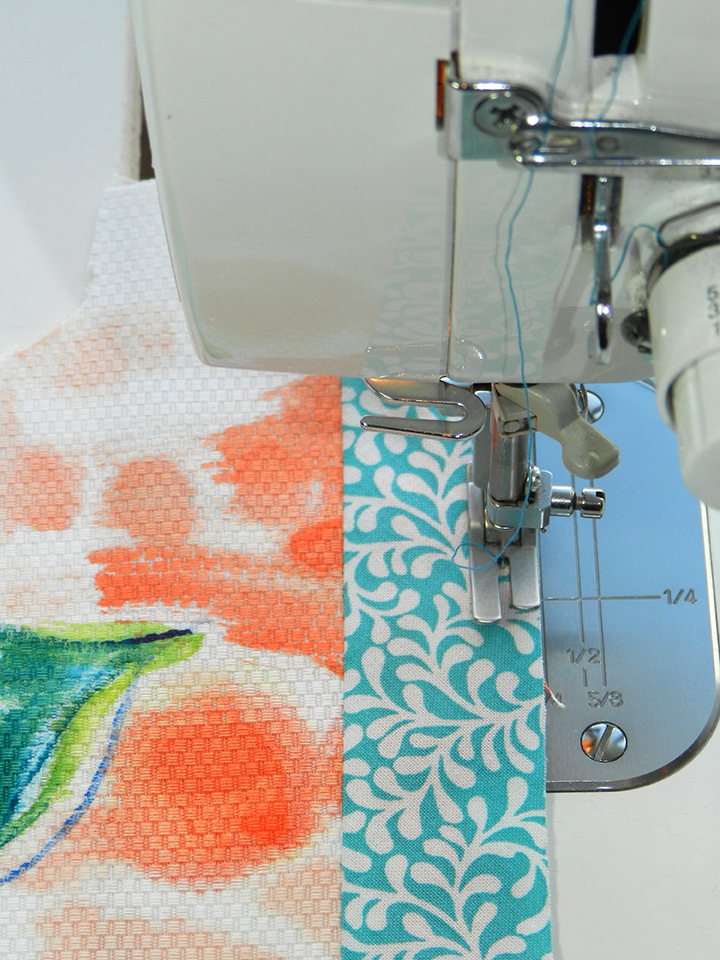
Step 4: Now using the edge of your presser foot, follow the edge of the bias fabric. This should give you about a ¼ inch seam line. If it’s not exactly ¼ inch, that’s okay as long as you are consistent with the use of the presser foot.
The next step is to sew the seams of the garment or project. Pin the two pieces together.
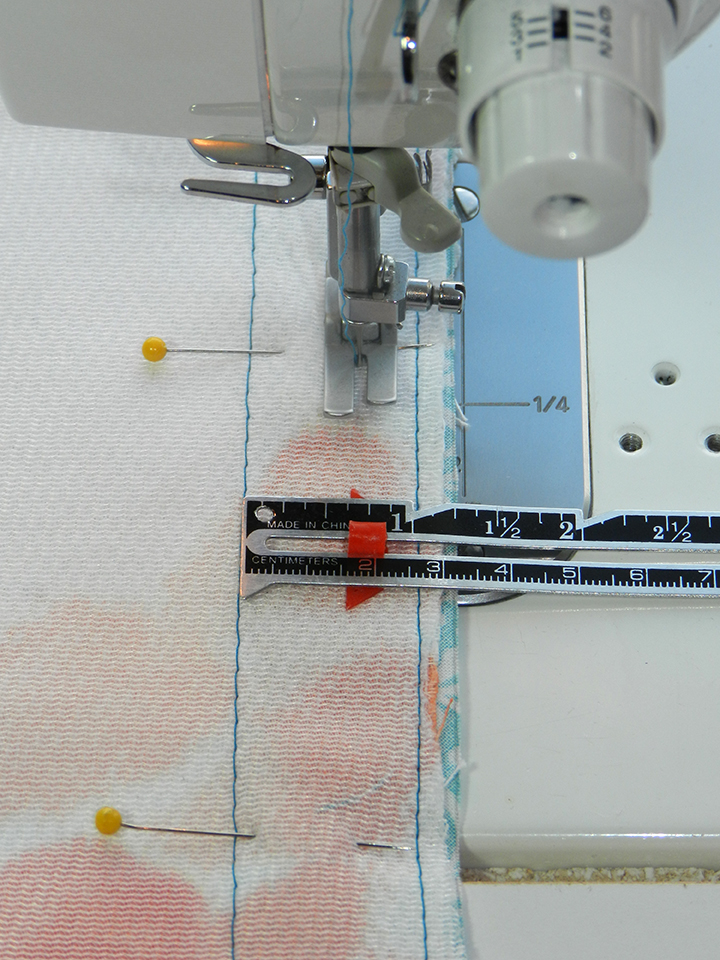
Step 5: Before sewing the main fabric together, flip the fabric pieces over so the first stitching line of the bias tape is visible. Instead of stitching 5/8 from the edge of the fabric, follow the previous stitching line exactly 5/8 of an inch. In theory, if this is done correctly, you will end up with a perfect bias tape and a 5/8 seam!
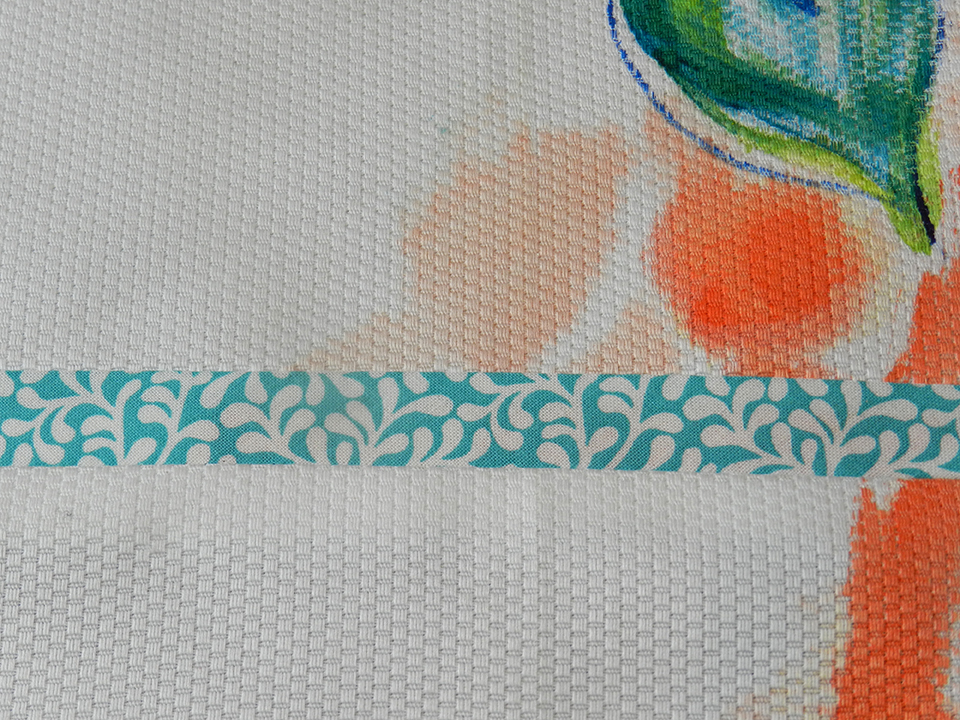
Step 6: Now open the seam and press as recommended and… voila! Perfect!
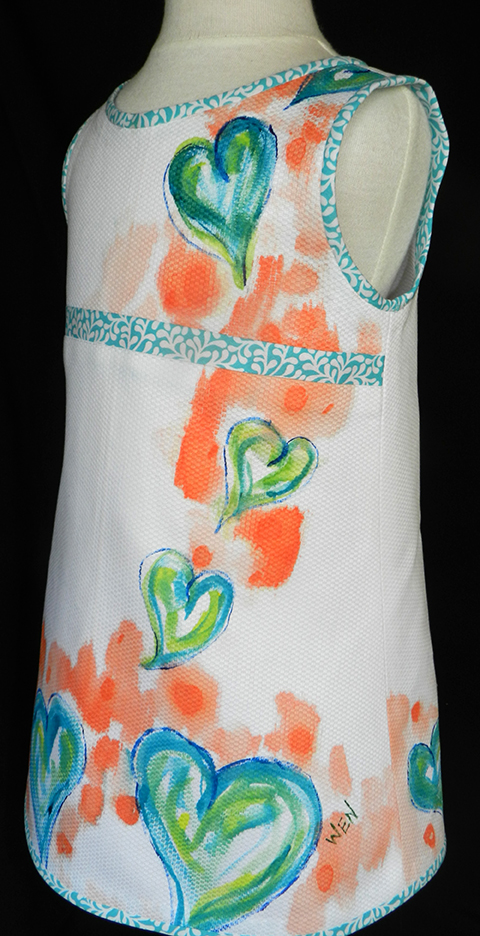
This bias tape when placed on the chest seam is the perfect accent to finish this dress. There are loads of ways you can incorporate this technique into your own projects and designs though. So what will you make using your own flawless bias tape? Let us know in the comments!
You might also be interested in:
Creating Continuous Bias BindingApplying Bias Tape to Edges and Mitering Corners
The Ins and Outs of Bias Tape
Neatly Finished Bias Binding
Using Bias Fabric Grain
Wendy Haight Scribner is a quilter, designer, inventor, and entrepreneur living in Hidden Springs, Idaho. She began sewing when she was just 8 years old. Her passion for all things fabric has and will always be the central focus of her life. You can connect with Wendy on Facebook or visit her Etsy shop, Wendy Haight Create, to see her hand-painted apron kits and other one-of-a-kind treasures.
Get in touch! Leave a comment or email editor@nationalsewingcircle.com

I have started using iron tape to the reverse side of the bias and do not get the rippling I have had in the past. This works very well with fabric that is slippery.
I'm sorry, I don't like to criticism but I do find it hard to follow and I have been sewi g for years. I thi k it would be better understood in "premium" video. Maybe it's just me but I u derstand much better if is actually watch and hear an explanation.
Very interesting and well-informed guidance.
Very good instructions
good
Not easy to fillow
I can't wait to use the bias tape insert. Karen
This tutorial is very confusing...can't figure out what we are suppose to do!
I agree with the others who found this confusing. There should be no assumptions when teaching a technique...ie the 45 degree fold should have been shown.
Sorry, but I need to rant about the complaints here. I understood what she has written and the pictures were easy to see. I so wish people would be grateful for the hard work that many of these contributors add to this website. Whatever happened to the Golden Rule: do (say) unto others as you would have them do (say) to you! Thank you for this information!