Cushions & Covers Session 3: Barstool Cover
National Sewing Circle EditorsDescription
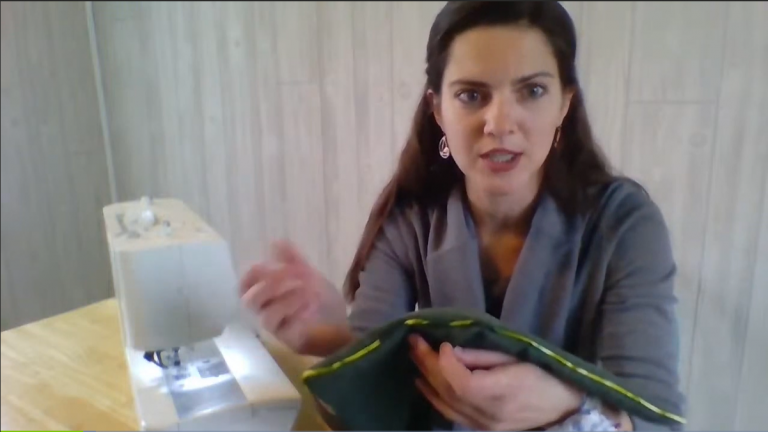
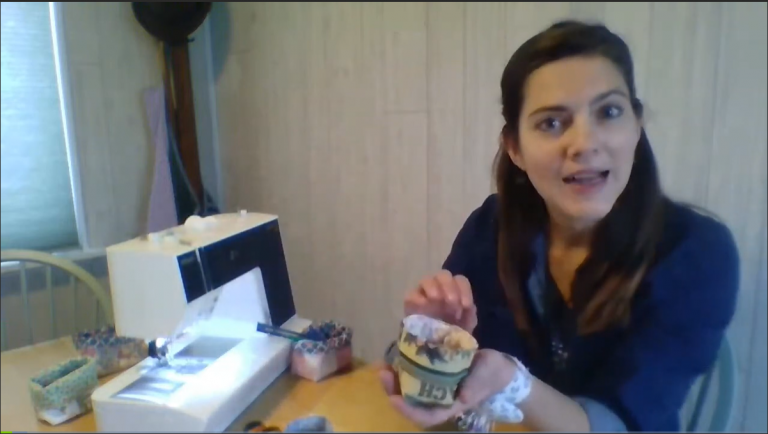
So the first cushion and cover we're going to work on is for a round barstool. So I have a miniature little barstool here and I'm gonna show you how to take all of the measurements and make a cover to fit a stool that's this size. But then you can also use all of the same techniques to measure and make a cover that fits whatever round stool size that you have. So I'm gonna make two different kinds of covers for the round barstool. This is a straight cover that has some cording at the bottom.
And then I'm going to show a second cover that has some piping at the top and some pleats that go down the side for a little extra decorative touch. So for this one, we need to take some measurements for our foam as well as for our fabric. So I'm just gonna take this apart so you can see that I have just a basic, plain, solid top stool. And then I put my piece of foam on top and then I had my cover. So to cut the foam, you can take measurements.
So you could use your ruler or your flexible measuring tape and you can measure your circle and then make a template and try and cut that out exactly. Or if at all possible, just take your foam, lay it flat either on your surface or on your floor if you're using a much smaller. Or sorry, a much larger stool and just lay it upside down on your piece of foam and then trace the outside. One thing that you might want to take into consideration is whether or not your stool has a beveled edge to it. When I was making the cover for mine, mine does have a beveled edge but I'm essentially taking away that edge when I'm putting my foam on top.
Because I didn't wanna try and continue that bevel into the foam that I cut out. So when I trace my stool, I'm just going to go right around the outside of the straight edge. So I'm gonna go straight down from this edge onto the foam when I trace it. So I'll do that right now, I'll just set it right here in the middle. And use any kind of marking pen or pencil that you want.
You just wanna make sure that it shows up on your foam and you're just going all the way around the perimeter of your stool. So I have my pen, I'm holding it straight down around the outside edge. And so you can see, as I go around, this dark blue line appearing around the outside edge. It is right outside the edge of my stool. So I didn't go straight down.
So you can see the bevel would have gone in, probably about another quarter of an inch. I went straight down and that's the line that I wanna cut on. When I do that, I have one that I've already cut. So I'll set this one aside. When I do that, you can see here is my blue line around the outside edge.
It is going to make my foam fit right along the side, straight down the side of my cushion. Having that little bit of overhang, if you will, is going to make it so that when you put your cushion on, it is going to compress the foam just a little bit. It's gonna help it stay on there tighter. It's not going to wiggle when anyone sits down. And also you will not see any sort of indentation between the foam and the stool, even if yours has the same sort of beveled or rounded-top that mine did.
So that is the quick and easy way to cut your foam. So no matter what kind of, or what size of stool you're using, if it's just a round stool like this, just flip it upside down, trace it and go ahead and cut out your foam. Now to cut out your fabric, we are going to need to do a little bit of measuring and a little bit of math. So for the top, we're obviously going to need to cut a circle. So again, I mentioned you can use either a flexible measuring tape if you have that or you can use just a flat ruler.
And we wanna measure across the center of our barstool. Again, we're going to take into consideration those beveled edges. So you're gonna bring the edge of your ruler out, until it is flush with one side. And then you're gonna look down and see where it's flush with the other side over here. And ours is, or mine that I'm working with right here, is 10 and three quarters.
So that's the measurement that I need to remember or write down for how large the top of my barstool is. Now for the top of the cover, we're obviously cutting just a round circle. But for the outer edge that goes all the way around, we need to do a little bit of math to determine how big to make that. So I have a trusty little calculator here. You will want to use this unless you're really good at some mental math.
But you need to take that number that you just measured. So ours was 10 and three quarters and you need to multiply that by PI or 3.14. And that is going to give us the amount of fabric that we need to cut to go all the way around our barstool. So for me, we have 33 and three quarters. Now with this, we need to add in our seam allowance.
I'm going to use a half inch seam allowance on all of the cushions and covers that I'm making because it makes the math much easier. You can simply just add one to whatever number you have and now you know how long you need to cut your strip of fabric to go around the outside of your barstool. So for me, 34 and three quarter. I will probably just go ahead and round that up to 35 when I'm cutting and then I can trim that down afterwards. So that is how long you need to cut your cover piece.
But when it comes to how wide, that's going to depend entirely on personal preference. So you need to decide how far down your stool you want your cover to hang. So mine is only about three inches down from the bottom of the stool, because you need to take into consideration how thick your stool is plus how thick your foam is. And then that's how much extra fabric you have hanging down. So if you're going to write everything out, what you want to do is just on a little piece of paper somewhere, you want to write out how thick your stool is.
You wanna write out how thick your foam is and you wanna write out how much you have that you want to hang down. And then add your one inch seam allowance to that and then that's gonna give you a final number. So for me, I have my 34 and three quarter inch strip all the way around and I'm gonna cut that by five inches. And that's going to be how wide I cut my strip of fabric to go all the way around the outside of my cushion. An easy way to keep things organized is to write it all down.
And go ahead and cut out your foam and then cut out your strip of fabric that goes around the outside of your stool. And then we need to cut out our circle that goes on top of the stool. So again, if you wanna make a template, you can do that. An easy way that I find to cut out a circle is to sort of just draw my own template as I go. So mine was a 10 and three quarter, was how far across my stool was.
I am going to add an inch to that. Again, we have our one half inch seam allowances that we're using, which gives me 11 and three quarters. To make this a little bit easier to show, I'm gonna round that up to 12 and I'll show you how to cut it out and make it back down to the number you want. So we need to cut out a 12 inch circle. So on my ruler here, I'm going to note where the zero is on my ruler and where the 12 is over here.
I wanna make sure that when I rotate my ruler around, the zero and the 12 are always on my fabric and I know I have a big enough piece of fabric to cut the circle that I need. I'm then going to pick a center mark somewhere in the middle of my fabric and just put a little mark. I'm gonna make this much larger than necessary, so hopefully you can see it a little bit. If you are doing this for real on your fabric that you're using, either don't make a mark that big or don't use a pen that's going to soak through the fabric that's not a removable pen. But I wanna make sure that you can see it a little bit better, so I'm making it a little darker.
If you're at all worried about whether or not your mark will come out of your fabric, rather than using some kind of marking pen use just a straight pen and mark your center that way. I just have my little dot that I've drawn. That is my center, so that will be six inches. I will put my six inch line right at my center. And then I'm gonna mark my zero and I'm gonna mark my 12.
Then I'm gonna take and just rotate my ruler about an inch. And again, mark my 12, mark my zero. And I'm gonna continue doing this all the way around and this is how I'm going to be drawing my circle to make it easier to cut out. You can go every inch, you can go every couple inches. And all we're doing is putting in little dots that we can then go back and connect.
So I have some that I've already started drawing here, so I can just go back in with my pen and I'm just connecting those dots all the way around. I can do a few more over on this side. Again, I have my six inch mark right at my dot. Mark my zero, mark my 12. Rotate this around and continue going.
Now if you are making, say a set of stool covers, you have multiple and you wanna make sure that everything is 100% exactly all the same size, then you may want to use this same technique but on a piece of paper or maybe a piece of cardboard template and cut that out. That way, then when you want to cut out all of your barstool covers, you know they are all 100% the same. But if you are just making just one cover, you can do this method here. You can also even just do this method, cut this out and then use this fabric as your template for all of your future pieces. So you can see, I have my marks on my fabric and I'm just going around connecting those dots with sort of a gentle curve.
If you don't feel confident in your ability to draw that curve line going between the points perfectly, the closer together you space your points, the less you sort of have to sketch in those marks. So then once you have your circle all drawn, you would just need to cut this out. When you're cutting this out, it's up to you whether you want to use a pair of scissors or a rotary cutter. I know a lot of people who have a 100% sewing background as opposed to any kind of quilting background always want to use their scissors for something like this. And you absolutely can do that.
I wanna give you a couple little tips if you decide to use a rotary cutter, if you are cutting out a circle like that, like this one here. And that is that we are going to just start on one side of our square rectangle of fabric and then cut into our line. And then as we're cutting around our line, don't hold the fabric down on the mat where it doesn't move. If it moves a little bit with your cutter as you're going around the circle, just let it move naturally. That's gonna help avoid the fabric from puckering at all and you won't get any sort of little dog ears or anything on your fabric.
So when you're cutting out circles, sort of let the fabric move on its own as you go around the circle. And that will make your circle that much smoother. Same thing if you're going to be using your scissors. Again, we definitely want a nice, smooth cut all the way around. So you wanna make sure that you're using the entire length of your scissor blade as you go around, as opposed to making any sort of short or choppy cuts like this that might make that edge not as smooth.
Making sure this is cut out nice and smooth in the beginning is going to make it much easier to handle when you're adding the rest of our components to our barstool cover. So here is mine, cut out like this. Now I mentioned that I rounded mine up to 12 inches just to make the math a little bit easier when I was making my marks at my zero and my 12 around my fabric. So for this, it's going to be either a little bit looser fitting or what I wanna do now is just go in and cut about a quarter of an inch inside this line and that will bring it in to that 11 and three quarter that I need. But for this example, I'm just gonna leave it at my 12.
But just know that if you are making your cover a different size, that you can round up to make making your marks much easier with your ruler and then trim it down afterwards. So your main components that you're going to need, you have your circle already cut out. You have your rectangle of fabric that you've cut out that is the width that you want it, plus by the length that we've determined that will go all the way around our barstool cover. And then you will need your cording. This is the cording that I'm going to be using on the bottom of this example.
It is a very thick cording, it's one of the thickest diameter cordings that I could find. This is one that I recommend using at the bottom of a cover. So I used it here at the bottom of the cover, as opposed to up here at the top because it is very, very stiff. So that's good because it helps give some shape and stability to the bottom of the cover. But it makes it kind of hard to work with in trying to put it between two layers of fabric, like up here.
So that's why I chose to use a thicker cording at the bottom. If yours is thinner, you can get away with putting at the top and the bottom if you'd like. So the first thing we're going to need to do is turn our long rectangle strip into a round circle that we can then attach to this. This is a very simple part, all we're going to do is take and fold our fabric, right sides together. Go ahead and align these edges here.
I'm gonna go ahead and put just a couple pins in to hold it. And then I wanna take it over to my machine and I'm going to stitch. Now when we did our math for our calculating how far around our barstool we needed to go, we added in those one half inch seam allowances. So whatever you used to calculate your measurement, you wanna make sure that you do use that when you stitch. So I'm gonna go ahead and stitch using a one half inch seam allowance.
I have already put the zipper foot on my machine because that's what I'm going to be using when I'm stitching with piping. A zipper foot can be used for just standard sewing as well. You may not wanna use it for all of your sewing but if you're going to be doing just some quick stitching like this, you can still use that presser foot and do your regular stitching. So I am removing my pins as I get to them. If you are gonna use your zipper foot for regular stitching, obviously if you're used to lining up your fabric off of your presser foot markings, you're not going to be able to do that with this foot.
So you're gonna wanna use those markings on your throat plate. Or if you are unsure about what those markings are, you can take your ruler and just mark your seam line ahead of time. Once we have this stitched into our round section that's going to go on the bottom of our barstool, we need to actually put this onto our top. When you're sewing something that is straight going on to something that is round, it's much easier if the round is on the bottom and then this is on the top when you're stitching. Because this has a lot of extra fabric that we're going to need to sort of manipulate or ease in around our circle.
And it's much easier to do that if it's on top where you can see it. So what we're gonna do is quarter mark our circle. We're gonna do that by folding it in half. Go ahead and finger press here. We're gonna open it up.
And then where our finger press markings where, I'm gonna go ahead and put a pin so you can see where those are at. Now, I'm gonna take and fold it in half the opposite direction. Go ahead and mark either my creases that I just made or those pins that I put in. We're going to finger press on this end as well. And then go ahead and open it back up and then put some pins in this as well.
Doing this technique is going to allow us to evenly distribute our fabric around the round edge of our barstool. We're gonna do the same thing with this, we're gonna quarter mark it as well. Obviously we have a seam on one end, so I'm just gonna fold it in half. We have our other end here. It may already have a crease in it but if it does not, go ahead and put a pin in it.
And now we do the same thing, we're gonna line up that pin that we just put in with the seam. And go ahead and straighten out these edges, like this and now finger press or put pins in these creases as well. And now this has been quarter marked, just like our round top of our cover. And now when we pin these two together, we have reference points of where to match them up. So I'm just gonna take one of my pins from my straight edge here and match it up with one of my pins on my round cover.
And go ahead and remove them and then just go ahead and use one of those back in here. And I'm gonna do that with my four quarter marked sections first and then I'm going to ease in the rest of the fabric between those pins. Doing this makes it so you don't start pinning in one section and work your way all the way around and then when you get to your end or your beginning, you have a lot of extra fabric or maybe not enough fabric. When it comes to the seam allowance, it's your choice as to whether you want to put it to one side or the other. I like to finger press mine open, there's just a little less bulk that way.
So I'm gonna go ahead and put one pin on one side to hold that down and one pin on the other side. Once you make your cushion, you'll give it a good press afterwards so you can repress this line if you want. But this fabric, a good quality cotton fabric, really takes well to finger pressing and that just lays nice and flat. Continue coming around, matching our last pins, like this. And now we're going to ease in between the pinpoints.
So you can see, now we have a much smaller section to work with than before. Even still within our little pin sections, I like to start in the center and sort of go, then the center between those centers and sort of work your way into little sections, making sure that everything is staying nice and flat. And we'll just put some pins all the way around. When you are working with round covers like this, it's definitely better to err on the side of more pins than less pins. Just because it's much easier to make a small correction between two pins than it is to just sort of free-hand it between two pins than it is to just sort of free-hand it and try and go all the way around the circle.
And then realize at the end, that you need to make a big adjustment and end up with some kind of pleat or crease or something in your fabric. So you can see here, I have a little bit of fullness and what I can do is known as easing. So you can sort of stretch this outer, the one on top just a tiny bit, then use your fingers underneath to smooth out the round circle. Pin in the center of that. And then if you find that you still have any extra, you can go back and make even smaller adjustments within between the pins and add an additional pin like this.
And then all of that, that looked like it was extra is now laying nice and flat. The fabric is together we don't have any extra bulk. Quarter marking is one of those techniques that's used a lot with anytime you're doing something that's in the round like this. So maybe even if you're making other round cushions, round pillows, even something like inserting elastic, you can use quarter marking. And it's definitely something that you want to do.
So you wanna make sure that you have a nice, smooth seam with no gathers or puckers. When you are easing between your pins, you wanna make sure that you are not over-stretching the fabric. So we're just slightly pulling on it to make sure that it will lay flat underneath the presser foot. But I'm not pulling so much that I'm actually distorting the fabric or breaking apart any of those fibers at all. I'm just gently pulling on it.
Down to almost our last section here. Making sure I'm going in the center of my quarter marks first and then working to either side of it. Also, it helps with pin placement if you put your pins the way I am placing them with the head of the pin out of the fabric. That way you're not taking an extra big bite into the fabric that would just potentially cause more wrinkles in your fabric. It also makes it a lot easier especially if you're right-handed to remove those pins while you're sewing, as we go around.
Almost here at the end. It may take you extra time to pin it but it is important to have it all pinned flat before you try and sew it to avoid having to make any last minute corrections. And then we have one last little section here. Go ahead and pin this and then we'll be ready to sew. Let me go ahead and adjust this one so you can see.
If you have any area like this where you have this little gap where you can almost stick your finger down in between there, that might be too much fabric between the pin. And what's gonna happen is while you're sewing, you're then going to hit that next pin and it's gonna cause a fold in the fabric. Now when you're pinning it, that's on the bottom and you think you might not see it but in reality, this is the top of our cushion. So we wanna make sure that that seam is nice and flat and none of those puckers occur there because that's gonna be the first thing you see when you complete your cushion. You can see I missed one little section in pinning here, so I'm gonna add a couple right here and then we will be ready to stitch this in place.
Again, we've calculated this using our one half inch seam allowance. You wanna make sure that you are using that when you're sewing this in place. And once you have your pins all the way around, close enough that you're confident that when you stitch this, you won't have any puckers, then you can take it over to your machine. It doesn't really matter where you start on your circle because we are going to be going all the way around and just overlapping our seam line. So I'm just going to pick an area, right here in between my pins.
I'm gonna go ahead and do a couple of stitches to begin and then remove my pins. I did just put my machine in the needle-down position, which is something that I recommend when stitching around a curve like this, where you may be making a lot of adjustments as you go. Having the needle down sort of helps secure your fabric when you stop, so that no little movements happen and nothing gets out of place. So I'm just gonna continue around my circle. I'm stopping to remove my pins when I get to them, which gives me the opportunity to sort of readjust my fabric as I go.
Make sure that everything is continuing to lay flat and I'm not having any puckers. Obviously, I can see the top side of my fabric. I can't see the underside but what I can do is feel it. And I can feel that everything is laying flat and that there are no puckers or wrinkles happening underneath. I'm gonna keep going.
So what you're gonna find is that you are having folds of fabric out here and that is fine. You want the folds to happen, sort of in the width of this rectangle that's gonna go around the outside of our barstool. You just don't want any of those folds happening at the top, where they will be noticeable. Continue all the way around, like so, just making all those little adjustments as you go. Another reason why it's a good idea to put multiple pins in there, it sort of gives you an excuse to have to stop and make any adjustments you need as you go around.
And just keep moving it as you go. If you find that you do have any wrinkles underneath, you can slip your finger between the layers a little bit there and make sure it's laying flat before continuing on. And just go all the way around your circle. Making sure your edges stay aligned on the outside, which can be difficult because you essentially have this long rectangle that you're turning into a circle. So you just wanna make sure you keep everything as aligned as possible.
Taking those pins out. So doing this with our half inch seam allowance is going to give us more than enough seam allowance that we can choose a variety of finishing methods for it when we get to that. For one, you can choose to do nothing with it because it is the inside of a cushion. It will be covered up by your foam, by everything else and you won't actually see it. Or you can choose to do a zigzag stitch, you can use a surger, you can do any kind of seam finish you want on it.
That's another reason why that half inch seam allowance is a good choice. And we're coming up on our beginning. So we're just gonna keep stitching all the way around and when I get to where I started, I'm just going to overlap my stitches. So I didn't start with any back stitching and I won't end with any back stitching but I will go ahead and overlap those stitches by at least three or four to make sure that it's nice and secure. So at my last pin, it's right here where my finger is.
This is where my stitches began so I'm going to make sure I go directly on top of that, overlap it by three or four stitches and then I can go ahead and clip my threads. Now if you had all of your pins spaced evenly, if you kept it nice and even while you were sewing, then when you turn this right side out, you should have a nice, smooth edge between our circle and the part that hangs down over our barstool. We don't have any puckers or gathers as we go around and it lays nice and flat, right like this. Now this is an area where if you want to check your measurements, make sure that your circle was cut the right size, make sure that everything fits. You can go ahead and take your piece, turn it upside down and then just insert your foam to make sure that it's going to fit.
And you will be able to easily tell whether your circle is too big or too small. And so our foam is gonna fit in there nicely, so we know we're on the right track. So this could be a very simple cover. You could essentially just hem the lower end and be done and this could be a very simple round cover. Or if you want to add some extra decoration to it, you can add some cording to the bottom.
And so that is what I'm gonna do with this one here, is add some cording. So cording, as I mentioned is just a decorative trim that you can get that will look very nice as sort of the bottom edge of your cover. It goes under it like this. And it needs to go onto essentially, the right side of the fabric and then be folded under. So while this does have a nice finished edge, it sort of has this ribbon, if you will, that you attach it with.
You don't necessarily wanna see any of this part, the only part that you want to see is the cording. So you're gonna hide this ribbon area within what will be the hem of your barstool. So to attach this, it's very easy. All you have to do is first, you wanna make sure that your cording doesn't have any kinks or folds in it. A lot of times these come either wrapped up in a package or maybe even wrapped on something that you can get cut by the yard.
And you wanna make sure that it's laying as flat as possible. You can take this over to your iron and hit it with the iron just a little bit to sort of warm it up and make it a little bit more malleable. But then just sort of pull on it a little bit and then it will sort of straighten right back out. So when you're gonna attach this, you're going to take and you're just going to lay it onto the right side of the fabric, like so. And we're going to stitch it in place, as close as we can to this cording.
And that's why we're going to be using a zipper foot. So now I just have a length of cording here that I know is plenty long enough to go all the way around. And I'm just going to begin pinning it in place and work my way around our barstool cover. I'm leaving about a five or six inch tail off to the side, that I will address when we get to finishing it. But I wanna start about five or six inches in.
Again, we're just gonna put pins in. And I want to put quite a few pins in this as well because it's a heavier cord, compared to the weight of our fabric. But you don't need to put in as many as we did when we were going around the top of our barstool. I'll put a couple more. This also helps make sure that you don't have any twists or kinks in your cording as you go, by putting these pins in.
But they can easily be taken out or adjusted, it's sort of just to lightly hold it in place as we stitch it around. Go ahead and put one more. And then I'm gonna leave the ends undone so I can wait until I've stitched those in place and I'll show you how to finish them. So we have our cording pinned in place. I'm going to start just a little bit in front of that first pin that I put in place.
Again, I have my zipper foot in place. So I know I'll be able to stitch close to that cording. I'm gonna go ahead and lower it. One thing I do wanna do is actually even adjust my needle position as far to the left as I can go, without hitting that zipper foot. So I wanna make sure I'm stitching as far to the left as I possibly can.
And then go ahead and just stitch. I'm using this hand here to push on my cording, to make sure that it stays up against that zipper foot. I don't want it slipping away at all. Again, this is a heavier cording so it can be a little bit trickier to stitch than maybe a lightweight one. And I'm just gonna go all the way around the edge.
I can readjust my fabric as I go, realigning the edge of my fabric and the edge of my piping. As I push that piping in towards the presser foot with my left hand here, it's sort of curling in that ribbon. So if you can see on the backside, it's not quite lined up with my edge of my fabric anymore. And that's fine, as long as it was to begin with and you're consistent all the way around. That way you know that you're not going to have one section of your barstool that is longer than the other, around the cover.
As you work, you're gonna just continue to move this around so everything is staying lined up. When you get to where your seam was on your rectangle, you wanna make sure that your seam allowance is however you wanted it to be. So me, I had mine pressed open, so I wanna make sure that mine is open. And then continue all the way around. We're reaching close to our end, so we're at our last pin that we put in.
I'm just gonna readjust my cording as I go, making sure that my edges are aligned. And I want to continue to attach my cording until I am about four or five inches from where I started. So I'm gonna go just a little bit further. Like so, a couple more stitches here. And then I'm gonna take this off of my machine and we're going to work on covering up our edges.
I'm gonna show you how you can secure these edges so that it doesn't ravel or look untidy. So the first thing you need to do is determine how much you need to trim off of both ends. So you can see here, we have obviously plenty on both ends. So what I wanna do is take and just trim one. Then I'm gonna take my scissors first.
And I wanna come in between sort of the braids of the cording. So to do that, I'm gonna sort of twist it apart like this and this just makes it so I can cut through one of these at a time. And I don't have to try and fight with cutting through both of them at the same time. Even though it's a little bit tricky with a heavier cording, but I got through one. Now I'm gonna come through the second one here, like so and then I can cut away this sort of ribbon casing.
Now I'm gonna set this aside because I'm actually going to unbraid this a little bit and use some of this, these fibers that cover up the cording to sort of cover up those ends. So you wanna keep just even a little tiny piece of it when you cut it away. I'm now going to realign my edges and go ahead and put a pin in place here, so I know exactly where this end stops. Go ahead and put a couple to hold it. And now I can bring this in over and I can see, right where they're going to overlap is right here.
So I know that's where I need to cut this next one here. So I can do the same thing, sort of unbraid it a little bit so I can cut it one at a time. Or if you feel like you can cut them both, just go ahead and cut through both of them like so. And now I'm going to realign the edges of this one, like so. And then I'm gonna go ahead and take this back to my machine and I'm going to stitch along these edges that I have not stitched.
So now you might be thinking, it's looking a little bit ragged on the edges, but we are going to cover all of those up. Now when it comes to thinner cording, there may be other ways that you can sort of finish off these edges without raveling. But when you have thicker cord, this is sort of a fun way, an easy way that I've found to make sure that it looks nice and finished when you're done. So I'm not necessarily worried about the cording part, right now I'm just worried about stitching the ribbon section down. I got to the end of one.
One thing that you might find that could happen is depending on the foot that you're using, I have these little sort of teeth on my zipper foot and they did get caught on the ribbon. So I'm just gonna lift it up, move past where it got caught and then go ahead and continue stitching. Go ahead and overlap the stitching end with my beginning by three or four stitches and go ahead and trim these. So now we have these two ends that need to be sort of braided back together. And what I'm going to be doing is I'm going to find where the end of one is.
And I want to sort of unravel some of this fibers over the top, just a little bit and same on this end here so I can see where they're at. And I'm going to layer them one on top of each other, like this, to continue that braiding motion. So the braiding motion is one going over the top of the other. And then what I'm gonna do is grab a hand-sewing needle and thread and I'm going to stitch these back together. When you're doing this, you want to use a somewhat coordinating thread if you can.
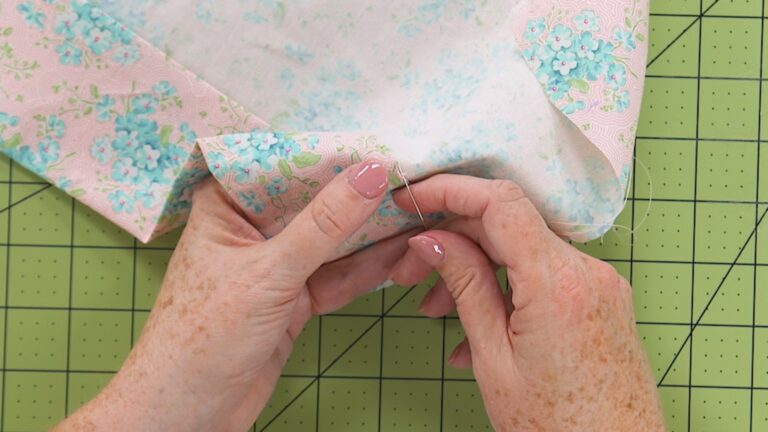
That way you can hide some of your stitches. If you don't have a thread that matches very well at all, you can use an invisible thread and that will work well. So I'm gonna grab a hand-sewing needle and thread, get that threaded and then I'll show you how to begin putting your cording back together. So once you have your needle threaded, what you wanna do is bring it through from the wrong side of where your cording is at, just anywhere to get it started. And then we're essentially going to be doing some whips stitches back and forth from one edge of the cording to the other, just to secure our ends together.
Now we picked our coordinating thread or you're using your invisible thread. It should be blending in or you shouldn't really be able to see it. But even if you can see a little bit of the stitches, it's okay because we're going to be covering it up in just a minute. So you're just gonna keep going back and forth until you sort of bring these edges of our braid together. Like so, so I have one edge that I have brought together and now I have my other edge under here that I need to just sort of tuck under and stitch this guy in place because it is the area of the braid that should be going under.
And you just continue to do this. So you're gonna be doing a lot of little hand stitches, all the way around to sort of make this braid come back together. So you would continue doing that. And once you feel like you have that covered pretty well to where when you pull on it, those edges are not going to come undone at all, you wanna go ahead and tie a knot. To do that, I'm just gonna insert my needle into the cording until I have a little loop.
Put my needle through the loop and then pull tight. I'm gonna do that a couple times, like so. Then I'm gonna take and I'm gonna feed my needle into one of these pieces of cording, about a half inch or so. Go ahead and bring it out and then I can go ahead and clip this thread over here. And I know it's not going to come out at all because I've sort of buried it in there.
Now we have these edges that we need to cover up. So remember when I said to keep a little bit of the cording that you cut off because we're going to be using it, that's because we're actually going to unravel our cording. So you want to unbraid it as far as you can. You may have to cut your cording away from the ribbon just a little bit. It's usually just stitched down in several places.
So you can sort of unbraid it. You're gonna be taking these fibers off the top of your cording and then you're going to use these to then cover back up those edges. So I've taken and just trimmed a little bit off. You'll see when you pull it apart, that it comes in many different strands. Usually four to six strands in one little section that you take off.
Just use one or two at a time, depending on how big the eye of your needle is. And then go ahead and thread that through your needle. Once you have this through your needle, you're gonna do the same thing that you were just doing. Only we're going to be wrapping these fibers back around our piping like so, to cover up the edge that we just created. So you can see, you just continue to go around and around.
And depending on the length of these fibers that you started with, you may have to wrap around it several times but you're just gonna continue to go in that manner until it lays nice and flat and it is seamless going into the next edge of your piping. So I'm gonna bring in the cover that I already made and there is the edge. It's good that you have to look for it because then you know that it is not gonna be as noticeable when you put on your final cover. So here is the edge where I've joined my two pieces together. I've done my whip stitches and then I just covered up the edge of that cording with those fibers that I took off.
And then it's a nice finished, seamless edge. The last thing that you're gonna wanna do on this is to secure your piping or sorry, your cording up underneath your cover so it doesn't flip under at all. It is pretty stiff cording, so it does kind of have a sort of a mind of its own and actually stays under where you want it to. But even if you're using this or a much thinner piping, you're going to want to do some top stitching. So you've stitched this to the right side, all you're gonna do is fold this under.
You can go ahead and press or put some pins in. Make sure you have a nice folded edge right along the edge of your cording here. And then you're just going to top stitch. You can do that again, with either your contrasting or coordinating thread. Or if you don't wanna see it at all but wanna make sure that your cording stays in place, that's where you can use that invisible thread.
So if I bring this cover back in real quick, you can see that I've done my top stitching just using a coordinating thread that matches both my fabric as well as my cording. And so, this is how you make a very simple barstool cover. Once you have this made, you can just take and insert your foam back into your cover. When you are putting your foam into your cover, I am pulling my foam in so my foam is on the inside of my seam allowance. And that way I know that I am making sure that my cover is nice and evenly distributed.
Within my cover that I made, my foam is nice and flat all the way around. And I'm not gonna have the extra bulk of that seam allowance laying flat on top of my cover at all. And once you have that on your foam, you can just put your cushion right here on top. Go ahead and pull it down. And if you need to here, if your iron has steam, give it some steam so it lays nice and flat.
So this is how you make a flat barstool or a flat cover around the edges for your barstool. I just wanna show another fun little option where you can actually add some pleats. And it's essentially the exact same thing, I just wanna show you the pleating process. So I'm gonna set this aside and bring in our pleated cover. So here is essentially the same cover.
We've cut the same center circle and now rather than having a straight edge that comes down with cording at the bottom, we have these fun little pleats and we have piping at the top. A cover like this obviously is a little bit more flowy and does not fit onto the stool as much as a straight one does. So you need to have some kind of method to attach your cover to your stool. And I've used just little ties of fabric. So I'm gonna go ahead and switch out covers real quick, so you can see what this one looks like on our stool.
We're using our exact same piece of foam, same measurements for all of that. And you can see with this cover, we're just going to drape this over the top. Again, you wanna make sure that your foam is sitting right inside your seam allowance at the top, like so. And then we have our ties that are on the sides, like here. And each one of these ties, I've just positioned underneath my cover, right in between the seam allowance of my top circle and my pleated edge.
And these will simply just tie around the legs of your barstool. So you just add these for however many legs you have on your barstool. Now to make the pleats, obviously your measurements are going to change just slightly. So here is what a pleaded edge would look like for our barstool. We'll finish at the same measurement, so we had our 34 and three quarter measurement.
But it needs to start at a much larger measurement if we're going to be able to add our pleats in and still have enough to go all the way around our barstool. So for me, I took that measurement and I doubled it so I could do pleats every inch. So you take your measurement that you had and just multiply that by two and then go ahead and cut another rectangle. I have just a smaller rectangle here to show. But to do your pleats, what you're gonna do is you're going to take and lay your strip out.
And if you have a cutting mat like this, that has your one inch markers on it already, it makes it much easier because we need to be placing pins at our inch marks and then folding them to one another. So I'm gonna start right here at one inch in, like so, place a pin. Put one right here at two inches in. Then I'm gonna take and fold one pin over to the previous pin, like so. And I've created a little half inch pleat.
Go ahead and remove one pin so I can pin my layers together. And now I'm keeping this pin here. It's right here at my one inch marker. I can now take and go over to our two inch and our three inch. Now I can take and fold my three inch pin mark, down to my two inch.
And I'm just creating these pleats all the way across the top. Obviously, as I put in this next pin to hold my layers, I can remove my little inch marking pins. We don't need extras in there. But you're just gonna continue along. So now we can go at four and five and then just fold back onto itself, like so.
And you would just do this the entire length of your rectangle. And then the assembly process is essentially the same. This becomes a long rectangle that you're going to attach to your circle that you've already cut. Again, you're gonna cut out your circle using the template you've created or the same method where you measure with your ruler and make your marks and go all the way around. The one change that you may want to make with this one is that rather than putting cording at the bottom, you may wanna consider putting piping at the top.
Now the reason you would wanna add piping to the top of this, as opposed according at the bottom is because we have pleats. It would be very hard to try and add an embellishment or a trim to the bottom edge of this and keep with those pleats. So that's why you need to add it to the top instead. So to do that, it would be the exact same method as if you were inserting your cording. You would take your cording or piping, whatever it is you want to put at the top.
And you're first going to align your raw edges and stitch this in place to your circle. And then go ahead and align your edge that's going to hang down with this as well. Put in more pins and stitch right around the outside edge. I'm gonna step away and put some pins in so you don't have to watch me do that whole process. And then I'll show you what that looks like, while I stitch it.
So now I've got most of this pinned in place. So you can see I've started to pin my piping in place first. Doing this is much easier to be able to make sure that your edges of your piping are aligned at the edge of your cover, without having to sandwich it between your two layers at the same time. Once you have pinned all of your piping around the outside of your top cover, you can then layer on your pleated section that's going to hang down and put pins in this as well. So you can see that by the time you get all the way around the outside edge of your cover, you're going to have quite a lot of pins in place.
And that definitely helps to make sure that everything stays nice and flat. One thing I wanna show before I show how to stitch is how to overlap the ends of your piping. So I'm going to lay these two flat here. It's gonna be a lot easier to see than in our round example. But we're going to pretend that this is the beginning and this is the end of our piping and they need to come together.
Now with our cording, obviously we did some creative stitching to get our ends back together and make sure that they were nice and finished. With piping, since it's covered with fabric, it's much easier. What we're going to need to do is open up the piping on one of the ends. It doesn't matter whether it's the beginning or the end but you just need to remove a couple stitches. Open it up so you can get to the cording that is within your fabric.
You wanna expose about a half inch or so and go ahead and just trim this off, like so. Now we're going to take our fabric of our piping, go ahead and fold it under to the wrong side, like so. So we have a nice, folded, finished edge. We now want to take our end of our piping, go ahead and place it within the folded edge and then fold everything back like this. And then you could just put a pin in place, I'll just hold it with my finger but you can see here, now we have the beginning of the piping, a nice folded, finished edge and the ending of the piping.
Because we trimmed away that cord section, our two pieces of cord butt up against each other and we don't have any extra bulk right there. And we have a nice finished edge. So when you get to that section in pinning on your round cushion, be sure and do that so you have a nice finished edge here and nothing is gonna fray. So once you have everything pinned in place, you're just going to take this over to your machine and stitch. I'm just gonna stitch a small section of it for you so you can see what this is gonna be like underneath your machine.
It again, does not matter where you start. You just want to pick a position between your pins and you're going to have to sort of start by feel. I'm gonna put one finger on one side of the piping, one finger on the other. And so I can sort of feel where the edge of that piping is and that's right where I want my presser foot to go down. I wanna make sure the edge of my presser foot is again, up against that piping as far as it'll go.
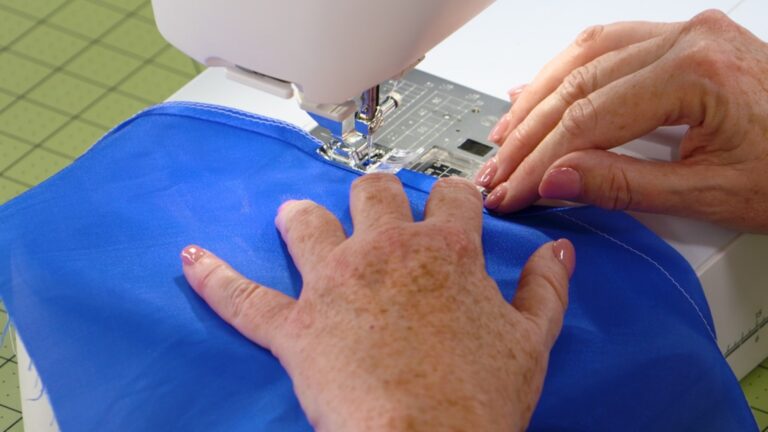
I want to make sure that my needle position is as far over to the left as it can possibly be, without hitting that zipper foot. And then I'm just going to stitch. Obviously there's a lot of pins in place on this one. I'm holding our piping in place, holding our pleated section onto our piping. So we wanna make sure that we are removing those stitches, I'm sorry, those pins as we go.
And with the pleats, you definitely wanna make sure that everything stays flat underneath your presser foot as well, as you are moving around. And you're just going to continue stitching. You're going be going about an inch or so at a time, before you have to stop and remove a pin, so it's gonna be a little bit slower than our previous cushion. But when you go all the way around the edge, then you're going to get a nice, clean, piped finished look. So just continue to go all the way around the perimeter of your cushion, making sure the edge of your piping stays right on the edge of your presser foot and just stitch around.
When you get to the end, you're gonna overlap the end of the stitching with the beginning of the stitching just like you did with all of your other cushions. And when you are finished, you're going to have a nice, piped edge between the top of your cushion and the pleated section that goes underneath. When you are putting your foam into this cushion, just like as with our previous one, I like to flip it upside down. Make sure that my foam is within my seam allowance, so I don't have any extra bulk of that seam allowance on top. I can flip it back over and I can lay it down on top of my barstool.
From here, I want to then figure out where I need to put my ties where my legs are. And so that's as simple as putting your cover on your chair. You're then just gonna sort of look to the side, find where the leg of the chair is. So right here, and then I can just take and use a pin. I'm gonna try using the one farthest away from me here.
Find where the leg is, you wanna come up to the seam allowance right above where your leg is and just put a pin mark. Now in theory, if you have four legs on your stool, all four legs should be evenly spaced around. So you should be able to put a pin here and then one directly across, fold it in half and sort of quarter mark, just like we did. If you have a three legged stool or maybe you don't want to do those measurements, you can do the same thing. Sort of looking, finding where each leg of your stool is and putting a little pin mark and then you just need to make a tie.
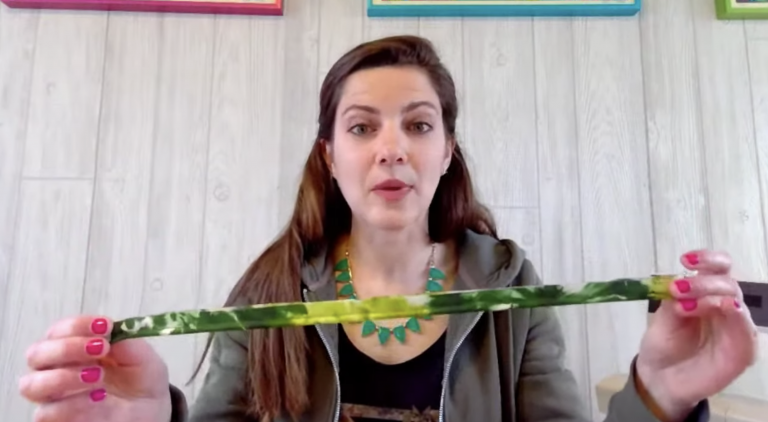
For me on my stool, I made a very simple tie. I took just a two inch strip of fabric, went head and folded it in half and then folded in half again to stitch it. So I have nice even edges all the way around the outside edge, nice finished edges. And then just went ahead and stitched this. If you didn't wanna make one out of fabric to match your barstool, you could use extra cording, extra piping, you could use ribbon.
You could use whatever you want and then you need to make it long enough that you can fold it in half, sew an inch of the seam allowance. And then once your cushion, your cover is on your barstool, you can simply take your ties and tie them to your barstool, right like this underneath. And now, once all four are tied in place, when somebody sits on this barstool and it's covered, it's not going to move. So definitely if you are making the pleated cover, you need to add some kind of tie like this to your cover so it doesn't shift. But if you make the straight one with the cording, especially that really thick cording at the bottom, it's going to fit nice and tight over your barstool and it's not going to move at all.
So if you've got those barstools at your kitchen island, go ahead and make some fun covers for them. Add some pleats, add some cording, piping, have some fun with it and add some fun covers to your barstools.
Share tips, start a discussion or ask other students a question. If you have a question for the instructor, please click here.
Already a member? Sign in
No Responses to “Cushions & Covers Session 3: Barstool Cover”