E

Window Treatments Simplified Session 4: Simple Valance

National Sewing Circle Editors
Duration:   48  mins

Description

Learn how to make a classic valance in less than an hour. Once you’ve mastered the basics, you’ll be able to transfer these construction skills to numerous other styles of valances and even draperies.

Share tips, start a discussion or ask other students a question. If you have a question for the instructor, please click here.

Make a comment:
characters remaining

No Responses to “Window Treatments Simplified Session 4: Simple Valance”

No Comments

Now it's time for the fun part, our bonus project. And today we're going to make a very simple yet classic valance. And I promise you will learn all the construction tips that you need to not only make valances but also to do draperies and even curtains. It is very easy, and I know you're gonna have a lot of fun with it. Valances typically are 10 inches to 18 inches, and today I'm going to make an 18 inch valance that's going to fit in a 15 inch window.

And I like for my own use when I'm doing curtains or valances for clients or for my own home I like to sketch out, and I'm not a very good artist so bear with me but I like to sketch out the project. So if this is my valance here. And I've got, let's see that's my rod pocket. Now we're coming across this way and this way. Okay, so this is my rod pocket where it's going to be all nice and gathered as it shirrs on the rod.

And as you can see I've got a two inch return, okay. And that means over here I have a two inch return. And again this is just a quick sketch. So now this is my header. I'm going to have, the header is three inches.

The rod pocket is two inches, and then I need turn under for the hem is 1/4 inch, all right. And then this whole thing here is 18 inch length, all right. So what that means is I've got 18 inches in length. I've got three inches on the back for the header. I've got two inches for the turn, or for the rod pocket.

I'm just doing this again so you can follow my logic. And a 1/4 inch for the turn under. And then I've got a six inch hem, okay. When I add that up, 23, 29 1/4 inches long. That's how long I need to cut my fabric to equal an 18 inch finished valance, right.

Now I've got, this way I've got a 15 inch window. Remember that was our A on our diagram. Then I've got two returns, each one is two inches, so 2 times 2 is 4 inches for the return. And then I have to have, that's 19 inches finished. And then I need to go times my fullness.

I'm doing a 2.5 inch fullness because I'm using a rather moderately heavy fabric. So that is 47 1/2 inches. And then I need to add in my sides, and my two sides are six inches. So my cut size will be 53 1/2 inches, and that would be how much fabric I would buy. So you can see if I'm getting 54 inch fabric, ooh, it's gonna be real close.

I can probably fudge it if I'm off just a little bit, maybe within an inch. I would go ahead and buy it without having to seam it, especially depending on the room and the use, I think that'll be just fine. And so I need 29 1/4 inches long. I'm not having to worry about repeats or seaming it, so if I bought 7/8 of yard or even a yard I'd have more than enough. Now again as you look at the pattern you may want to be aware of where your repeats are falling and buy a little extra like we talked about the starter part where it's already cut off the bolt, and then up to where your actual bottom of the repeat would be, and then add that to your 29 1/2 inches.

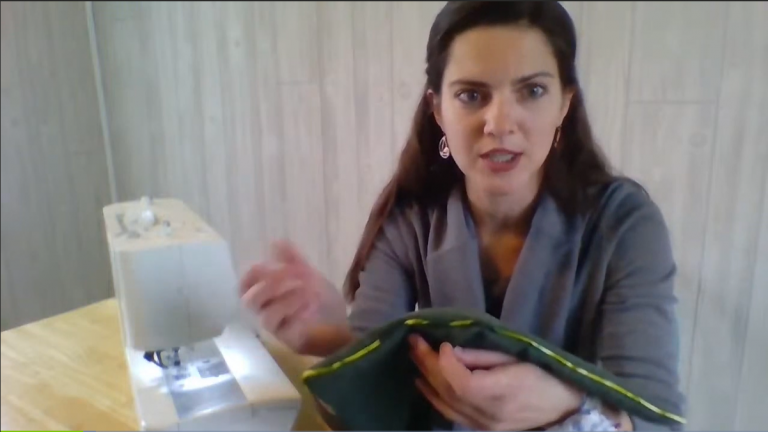
So now I know what I'm working with. The fabric I've got today I actually cheated, this was a pair of curtains that my son and daughter-in-law had in their last house and they were full length draperies. Thought it was rather pretty. So this was the hem that was already put in by the manufacture, so I'm cheating starting here. And as you can see the repeat isn't too bad.

They did get it at the bottom, so it should look pretty nice. And when this is folded down that five inches it should balance out fairly close. So by cutting off the excess they wanted it to go right to the edge of their window 'cause it was going behind a couch in their TV room. I saved the fabric, and I'm glad I did because they've recently moved into a new home, and this is going to be perfect in their laundry room, which has the 15 inch window. And these were brand new curtains so I'm glad that they're being repurposed.

Unfortunately they had to leave the main body of the curtain at the house, the new owners wanted it. So I've already got the hem in, which is nice. And as you can see it's a nice narrowly hem, they just turned it under and stitched it. If you're a new sewer and you don't feel comfortable just turning under a hem you can always stitch it, stitch the quarter inch down, and then turn your hem, and then stitch again on top of it. For the sides I've already got one side done so I'm gonna, not quite done but I'll show you the process.

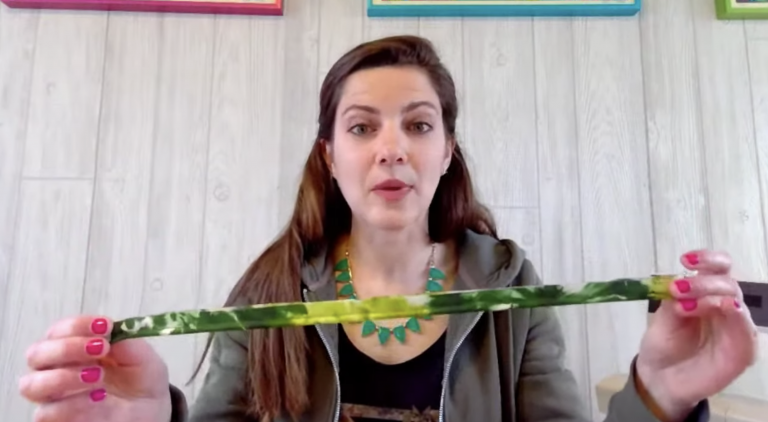
There's a couple of tools that like to use. The first one I wanna show you is this wonderful tool by Dritz, it's called the Ezy-Hem. This is particularly used in clothing construction for measuring hems, and it's a nice easy guide. This is typically where the hem would be, and so as you're coming up like here I wanna come up an inch and half. I just come into that inch and half measuring point.

And typically you would go ahead and make sure you good all the way along. And because this is metal you can actually press right on top of the metal, and then you'll have a nice, the metal gives extra heat to the iron so you get a really, really nice finished edge. So for something like this where I wanna come along I can come up to that inch and half mark. And in fact let me just go ahead and do that with the iron to show you how well this works. The only word of caution I've got is the metal gets hot, so be advised you can get burned.

So we're gonna come an inch and half on the side, and you just put your, make a sandwich with your fabric, and then just iron right on top of that. And I always like to give a shot of steam. And then you just keep coming on down with your little, oops, I'm on my cord, with your metal ruler until you get to the end. It's a very, very fast, accurate, easy way to do hems or sides of draperies like this is. So now that we know that that's an inch and half, it's nice and square, now you're going to fold it over again.

If you don't have one of these or don't want to invest in it, the other tool I love is my quilting ruler. I'm a professional quilter, so I have like a million different types of rulers. And this one I love for home deck because it's exactly three inches, and three inches is what we use for hems as you recall, and so it's just really nice. So the other thing I can do is measure along the inch and half mark, and hold it down, and then press. You don't wanna press on that though because it is acrylic, it would melt.

But those are two tools you will really find come in handy. So then we just press this over, turn it over one more time, give it a press. Make sure that it's not getting bunched under there. And what you can do is just, you're gonna wanna double check, is just come back and make sure that you're at an inch and half. And as you can see it is off a little bit.

And you say, "So what's the big deal?" Well, guess what? Your curtains aren't gonna hang as nicely as they could, as if you got it for an inch. And that's kinda what I get for hurrying, and cheating, and just folding it in half again, rather than measuring it and making sure of my dimension. And there I can see that I'm at an inch and a half. Press that down.

You know it doesn't take that much longer to do something right as to not do it right, and maybe have to go back and fix it or not be happy with the results. And this is all what goes back into having that professional look as opposed to a homemade look or a hack job, if you will. Now when you get to the bottom here we're gonna be stitching this with the, a straight seam. You can leave the end over like that where it just is flush with the bottom or you can, and this is what I like to do because sometimes when you're stitching fabric moves and sometimes this will get off a little bit, and now all of the sudden you're seeing your side hem hanging beneath your hem, and again it doesn't look professional. So you can come back here, and you're going to simply fold this back to the line, so that the edge of the hem is even with that folded line from pressing the three inch mark, and give it a really good press.

This is a 45 degree, so it will have a mitered look. And I like to steam the heck out of it. And then you turn that back over, and I think you can see where that's going to give a really nice finish to your curtain, or to your valance, as the case may be. Now one thing that you can do when we do the curtain like that you can either just continue your seam all the way down or you can stop it here, whatever you preference is. If you really want to you could do this by hand.

I wouldn't recommend it because nobody's gonna see it, and especially if it's on a return the extension going back into the wall, it won't be seen. You could turn this back and put it on your machine, and do the blind hem stitch, which I've done before, that can look very, very nice, so that you'll only see just a little tip of thread there, just a very little dot, if you will. That's another way to do it. What I typically do is because I believe in speed, and I'm trying to get projects done, and I usually don't have a lot of time, I will just finish it at that point, and then go ahead and hand stitch that. And while I'm not a big hand stitcher that's a good place to do that.

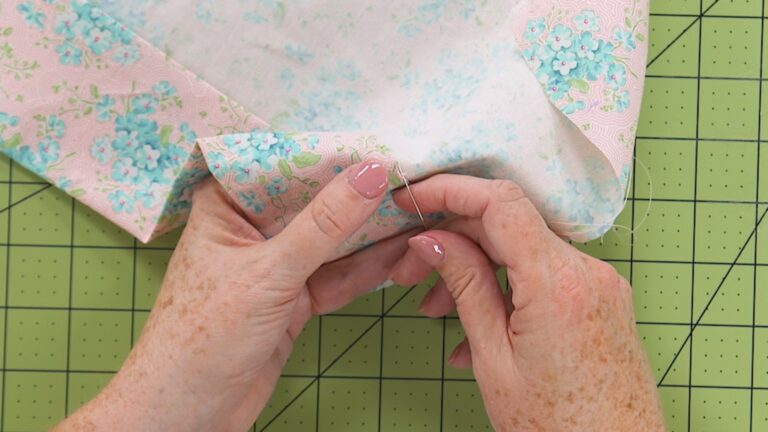
It just needs a couple of little whip stitches. The other place you can finish it and actually, I actually prefer this, the best is I will end it even with the hem, so that on the front side all you see is the side coming down and into the hem and that gives a very, very neat look. And then all you have to do is just tack your corner there for your miter. The nice thing with this turn under method, with it being turned under twice I don't have to finish any seams, everything is encased. You won't have any raw edges.

You notice I'm pinning, it's a short amount. Yes, I could definitely stitch that, and not have to pin it, and with that nice pressing it will hold firm. But the reason that I pin is I don't want this to get distorted at all or get out of shape. So by just taking those extra few seconds and pinning I know that everything is going to stay where I want it to stay. And then we'll just real quick come over here, and pin this side.

That's the nice thing about valances, they're quick and easy. The worst part, probably the longest part of the whole process is measuring your window and figuring your yardage. Once you've got that done the valance is easy. Like I said, "You will literally make this in less than an hour." Actually before I pin this I just wanna show you if you were doing a lining, lining's are a little bit different. This is gonna be unlined, but if you wanted to do a lining you would do a piece of fabric that is going to be an inch shorter than your, inch to an inch and half shorter than your curtain.

Actually an inch, let's go an inch 'cause I like it to come down and really give a lot of body. So an inch shorter on the hem. It only comes depth wise to the top of the curtain because it's going to be underneath here, and the header and rod pocket will encase your lining fabric in there. So in that case you would be, it's an 18 inch valance minus the inch, you're looking at 17 inches finished. So if you have 17 inches and you need 3 1/4 for your hem you need 20 1/4 inches of fabric, cut fabric to make your valance.

Then coming the other way it's the same, you're gonna have the same width except you are, with a valance, or rather with a lining, instead of six inches here, or turned under twice, you're only going to turn it under once. You're going to sew your valance after it's hemmed. You will sew it to the side so that it turns inside right, and then you will see this much fabric, the three inches will be fabric, and you'll have a seam here. And then your valance will come across and be captured inside. So it's really not that much work.

They're really quite simple. But for today I just wanted to show you a quick and easy basic valance to get you started. So, so I guess you're getting a bonus to the bonus 'cause now you know how to do a valance. That's lined I should say. Okay.

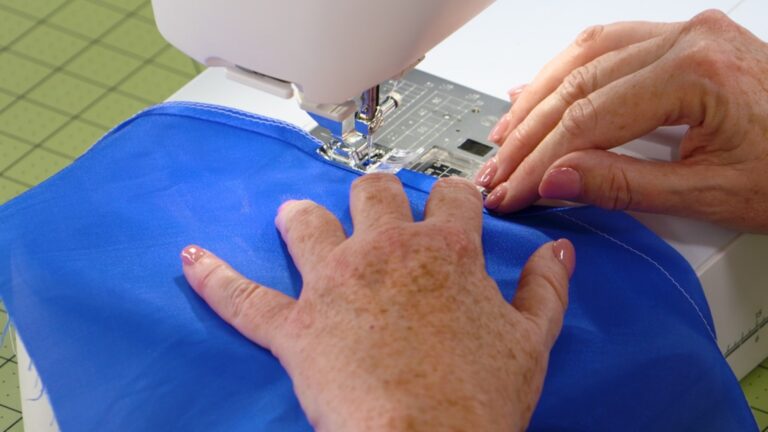
So just a few pins to hold it. And when we come back I'll show you how to sew this. All right, we're all set to sew our side seam here. I've got it set up for a basic straight stitch. And, and I like to set my machine, this is just my preference, for needle down, that way things don't shift.

If you want you can backstitch, not totally necessary because you've, this will be turned under as part of your header. But make sure, my little soapbox is do not ever, ever, ever sew over pins. People tell you, you can. What happens is you can break a needle, more importantly you can throw off the timing, which is an expensive fix on your machine. You can damage other parts.

And if the needle breaks it can actually fly up and cause damage to you, especially if it hits your eye. So I do not like to sew over pins, it was a lesson I've learned the hard way over the years. So on this particular foot I've got a nice little guide. I can just stitch to the inside of my left portion of the foot here, I've got that running along. And as you can see it is doing a nice professional stitch right on the edge.

For the other side I'm gonna show you another tool that you might like, that I use quite a bit, and that is our narrow edge foot. I'm just going to end it right here. Now if you wanted to you could actually, let me show you this first. You can see where the seam ends right there and it's a logical stopping point, and that looks nice. And then we're going to hand tack down here.

You could technically, especially if you're using matching thread, I used the white thread, one, because that's that the manufacturer used, but more importantly I wanted you to be able to see the stitching lines that you need to do. If this was in a tan colored thread that matched the fabric better, you could actually come down here, and just do a little tack stitch with your sewing machine that probably wouldn't be seen. Just tack back and forth a couple of times if you didn't wanna hand stitch it. But I'm gonna go ahead and hand stitch that. The other thing you can do in this area is you can buy weights at the fabric store, they look like little metal doughnuts except they're flat, and you can put that inside of this little pocket here, just stitch it in, and close that up.

And it gives just a little extra weight to keep everything hanging nice and even and you put them in the corners. So that's another option you can do. I really think because of it just being a valance, and not a lot of length, and given the weight of this fabric I think it has enough to hang well on its own. So for the other side I want to show you, this is what we call a narrow edge foot. And the narrow edge foot has a little projection.

Maybe you can see it better this way. There's a little projection that runs right down the center of the foot. Your needle is exactly behind it. And so by adjusting your machine left or right of center to exactly where you want it, now as you sew you're going to keep that foot right on the edge there, and it helps you stitch perfectly on that seam without wavering because it's gonna come along down there. This is also a wonderful tool, I usually don't buy sewing feet unless I can get multiple purposes out of them.

This is a wonderful tool for when you wanna stitch right on the edge close like that on collars for top stitching or on cuffs, anywhere that you need to do a top stitch. It also is fabulous for stitching in the ditch around your facings on necks or sleeveless shirts. It's also wonderful for any kind of stitch in the ditch work with quilting. So I think they usually run anywhere between oh, about 15 and $30. It is worth every penny you will spend on it.

This is a foot I highly recommend, it's called the narrow edge foot. So let me go ahead and put that on, and then you can see how it works. So I just, in my case I just press the button and the foot drops off, come over, and set it, set it down, press the button, and click I've got a new foot on. So don't be afraid to have accessories for your machine. They go on lickety-split, and there is nothing like having the right tool for the job.

Now let's see if I can get this to, as you can see my needle is moving left and right. So I want to come down here, and get this lined up, so that my foot will ride, take my pin out, so it will ride right on the edge of the fabric. And then I want to adjust the needle over so that it is just catching the fabric. Whoops. And with that in place you can really start speeding with confidence because that needle's not going anywhere, it's riding right behind that little guide.

All you gotta do is watch the guide in the front, keep your fabric next to it, and you're off to the races. And as you can see we're getting a beautiful, beautiful edge stitch there, that couldn't be anymore perfect. You also don't wanna sew over pins when you're using this foot because you can actually knock it out of alignment. And the last thing I wanna do is bend one of my guides. All right, I'm gonna leave pins in.

So now you can see how our edges look. They're all stitched. And we're ready for the top part, so what I want to do is bring in my iron. I am firm believer in pressing. It took me many years and my home ec teacher harping on me to slow down and press.

And it was years before I realized the wisdom of her words, that when you press things go together better, and they look more professional, and you will be a much more accurate sewer, so always press as you go. And I have since learned the joy of steam. And I like to go ahead and just press both sides. Pressing sets the seam, sets the stitches down into the fabric, and it also gets rid of any little puckering that you might have in the fabric from the stitching. And it just makes everything crisp so that it'll hang nicer.

All right, so now the next thing we need to do is before, normally I would come back and square this up, and by squaring, remember we had that extra one inch header. I didn't put it on this one 'cause I'd already cut it to size. But when you come back you wanna make sure that your hem is perfectly even at the top. So I'm flush here, and I'm flush up here so I'm good. If I was off a little bit then I would definitely wanna square it up and make sure that we were good to the length.

And a lot of times I will put my two edges together, and then come to the middle, and make sure the hem at the middle and at the top match. And then sometimes I'll do it even more if it's on a really long or really wide drapery. But everything looks good here. Now I could go ahead and do my quarter inch seam but I don't like to do that. I wanna make sure that we've got an accurate five inch header, so what I'm going to do, and I should of brought my wider ruler.

I've actually got a nice quilting ruler that's six inches wide and 18 inches long or 24 inches long, but I didn't do that, I forgot it today. So what I'm going to do is I'm going to come along here, and I'm going to measure 5 1/4. And when you measure make sure you're flush to the edge and flush at the top or your measurement will be crooked. Not having it flush here is a mistake that a lot of people make. It's easy to do and it can throw everything off.

I'm not going to pin this yet, all I want to do is get my measurement set for the top, get that creased in. Just like I repurposed these draperies you'd be surprised at some of the nice draperies and fabrics that you will find at thrift stores. That you could go buy a pair of curtains and repurpose them into a nice valance, probably for a fraction of the cost that you could go buy the fabric at the fabric store. I have a friend of mine, Pam Rocco, who's a fairly well-known quilter out of California, and she loves to go to the thrift stores for her quilting fabrics, she finds quite bit there. But more importantly she's gotten hooked on linen, and she does a lot of linen quilts.

And she finds all kinds of linen at the thrift stores by looking at clothing, and more importantly by looking at draperies, and even table linens. So it's kind of interesting to see how people's imagination works, and the different creative things that sewers will do. A quarter, okay. Now the steaming is nice because sometimes fabric will stretch a little bit on you. This was a little bit wide here, and with a burst of steam it will draw the fabric in and actually shrink that little excess fabric, which is nice, so that everything is going to come out even.

Just a little trick of the trade that I find works. All right, now you need to turn this under a quarter of an inch, and you can measure it very easily. And there are little rulers, in fact I didn't bring it with me, but it's a quarter inch ruler for quilts, and it has a ridge where the quarter inch mark is, and you can just line that up, and press, and you'll be all set to go. I'll be honest I've, I'm not gonna say I'm always perfect, but I've been doing this enough years that I can pretty much gauge with good accuracy a quarter of an inch, so I'm just gonna do that today. Okay, so now I've got my quarter of an inch.

And when I pin I usually will try to pin ever so slightly, not by much, but just ever so slightly back from the edge so that the heading doesn't show beyond the fabric. Now if you want you can come back and double check your measurement that you are indeed at the five inch mark. Valances are fairly forgiving if you are off just, this is the critical one, this measurement in your hem to make sure that all the way across that would be your finished length, the 18 inches in this case. The header, while it's important it's not as critical because your fabric's going to be all bunched up, and you're going to be probably within an 1/8 of an inch at the most on your turn under, so I find that if you wanna measure it you can. Sometimes as you eyeball it you can see where you got off a little bit, but most times I find it's pretty dead on.

And I'm, oops, I am coming down here so that I can work my way in, and compensate for that teeny little bit that I came in on the edge. I can just steam that in, and ease it in. I didn't line this one because I wanted to show you an unlined fast and easy valance. More importantly I know that they will probably be changing these out in a few years, and it's on a north-facing window so it doesn't get a lot of sun, it's on the second floor, and it doesn't face a neighbor, so nobody's gonna see that it doesn't have a lining. All right, let me put this away, and when we come back I'm gonna show you some tricks on sewing your header.

All right, now we're ready to sew down our header. I've still got my narrow edge foot on so we can just get started. I like to definitely back tack this edge on both ends because this is where your rod is going to go through, and as you're pushing it through it can put tension on that seam, and you don't want it to come apart. When you are measuring for your seam for the rod pocket I should have mentioned it needs to accommodate the circumference of a round rod or the width of a standard rod plus the depth of the rod. And realize that because the rods slide together because they're adjustable, one side is thicker than the other side, so make sure you're measuring based on the thickest.

And then I like to allow maybe a little bit extra wiggle room, maybe an extra 1/8 of an inch or so. So keep those in mind as you're doing your calculations. Make sure we take our pins out, and here we go. Now if you notice I am not pulling my fabric through the machine, I am guiding it at the front and the side. I am letting the machine do the work.

My hand is just barely guiding that fabric. You don't need to pull. I see so many seamstresses pulling, and what that does is it distorts the needle, it causes skipped stitches, it an break the needle, and you are not getting accurate sewing. Do not pull, let the machine do the work, you just kick back and enjoy the ride. The other reason you wanna take the pins out is that where it goes in, hopefully you can see this, it pushes the fabric down just a little bit, it's not much, but there's a little imperceptible divot there where it's pushed down.

And, so if you take it out you can see where the fabric snaps back, and you will get a more accurate hem that way. Your hem will be where it needs to be for the stitching. Where if you sew over the pin you're gonna have little divots all along your hemline. All right, wanna trim your threads. So you can see where we pulled that back, just that little teeny tiny bit, now we have a nice crisp edge on the outside of our header.

Oops, got a little bit of a thread buildup there. One way to avoid that thread buildup, and I should have, in fact I'm gonna take that off because that really looks terrible. I'll show you how you can avoid that. Sometimes when we pull our threads back and we just start to sew you do get that buildup. So what you can do is go ahead and find your needle thread.

You see my thread is pulling so I know I've got the needle thread, hold it, and as the thread comes up don't take a full stitch, as the thread comes up you're going to pull up the bobbin thread. All right, see how that just pulls up. Now I've got both threads on top. I need to pull it back. So both threads are now on the top, I don't have anybody on the bottom to give me a thread nest.

Then go ahead and do your stitch, do your back stitch. And tie it off. Oops, I actually noticed I got off. If you notice that you've missed a few stitches you can just come back and pick them up. And I've got another little area up here where I got talking and I missed them, so I'm just going to go through and double stitch over it.

And because of the gathers you won't see that that was doubled stitched. And if you're very carefully with your stitching, and you stitch exactly over where it was you really won't notice it. I didn't get quite so lucky, but I was also in a hurry. If it bothers you, you can come back and pick those out. Like right here I would probably take that one out, and that one out.

And these little nips are wonderful for getting your threads out without ripping your fabric or tearing it. Anyway, so that is your first line of stitching for the header. Again, we're gonna go press it, and when we come back I'm gonna show you a neat trick for how to make sure you've got an evenly spaced row of stitching for your rod pocket. And while we were gone you can tell that I did a modification to my machine. I put a fence along here or a guide for stitching in my rod pocket, and that's because I needed three inches for my header, and I don't have a three inch mark on my machine, it only goes up to 3/4 of an inch.

And even if I wanted to use the edge here as a guide that's only about an inch and 3/8. So what I did is I take a small ruler, you can use a stack of Post-its. You could even just put a strip of tape. But I like the ruler because it has a lip on it and then I know that the top of the drapery or the bottom of the hem, whichever I might be sewing is not going to slip on me. So it's kind of a awkward little situation to get it on there, but I find a spot, I put my needle down, I measure it from the needle over.

And in this case I actually fudged a little. I wanted a three inch header but then I remembered I figured my rod pocket at two and I wanted to give just a little bit more, I wanted to go an 1/8 of an inch more for my rod pocket, so I've now adjusted that to be three, or 2 7/8. Let me double check that measurement. Yes, 2 7/8. Better to always check your measurements before you start sewing so you don't have to spend time ripping it out.

I also have put some pins perpendicular to the header line and that's just to keep everything from shifting. And I've got one down real close to where the rod pocket stitching is going to be. Again, I wanna make sure that fabric doesn't move at the edge so that it'll look nice and neat on the outside. These pins I'm not so much worried about, my stitching's gonna be down here so I don't have to remove those as I sew, but I need to move that. So just a couple more little tricks of the trade to help you out and make sewing a little bit easier for you.

So I'm going to, again because I'm starting at the edge I'm going to go ahead and pull up my thread. Another thing you can do is you could actually start sewing on a little scrap of fabric that you butt up next to this, and then go right into your, edge of your drapery, and that way you're, you won't get those little thread nests. But pulling it up is just, just as easy for me, so we'll do that today. All right, get ready to sew. Remove the pin.

I wanna make sure I back tack. Again, this is the top of the rod pocket where it will have a lot of stress on it. I just run this right along the edge there. I don't even have to look at my needle, all I'm checking on is to keep that fabric straight. Keep it pedal to the metal.

Oops. And if your pins do like that then you may wanna go ahead and take them out. These particular pins are called flat head pins, I love them because they do lay flat, and they're very easy to grab to take out. You can't press over them though they'll melt, so that's why the glass head pins are nice. This is a glass head pin, and I can actually press that, and steam it and it won't melt.

You wanna make sure it's a glass head though and not a plastic head because the plastic will again melt. And if it's in your fabric the dye can discolor your fabric. This is a great, great, great sewing project for beginning sewers. Kids love to do these. It's just, you know especially if they're about maybe 10 to 12-years-old is a great time to start sewing something like this.

It's a great way to teach basic sewing skills. And it gives, oops, I don't like how that went back, it gives literally immediate gratification, which is a good thing for young sewers. All right, so we're just gonna trim that off, trim this. Take out our last two pins. All that remains is to give it a press.

And guess what? Just that fast you've created a beautiful, beautiful valance. The only thing you have left to do is hand tack the little tip down there, put your rod in. And when that gets gathered up I think you can see how pretty that will be. Your rod will be in the pocket, and you have this beautiful little ruffly gather up top that gives it a nice finished look, rather than having the rod pocket up here where it just hangs flat and straight, this gives it one more decorative element, it's a very professional touch.

And I think you're gonna find you'll be very pleased. Again, it's a giant rectangle. Go have fun with your giant rectangle, and be inspired to create even prettier valances than this.

Get exclusive premium content! Sign up for a membership now!