Ashley Hough

Dress Shirt Session 4: Yoke & Shirt Back

Ashley Hough
Duration:   21  mins

Description

Learn what a yoke is and where it goes. It’s time to find out some fun ways to customize and embellish the yoke as well as how to attach it to the shirt. You’ll also get the chance to alter a pattern or to leave it out if it’s not your style.

Share tips, start a discussion or ask other students a question. If you have a question for the instructor, please click here.

Make a comment:
characters remaining

No Responses to “Dress Shirt Session 4: Yoke & Shirt Back”

No Comments
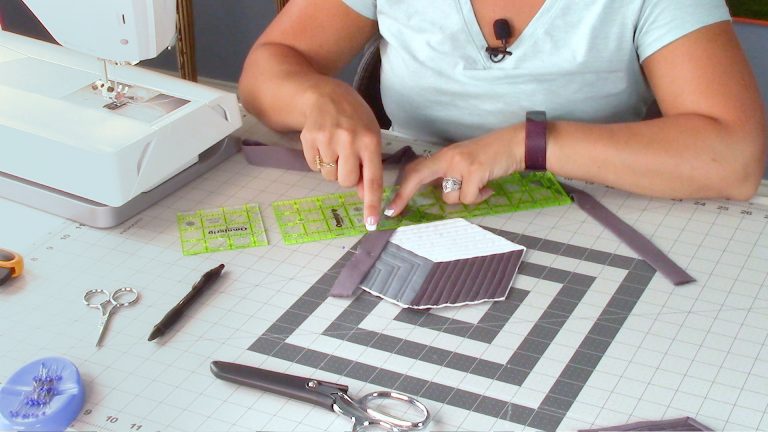
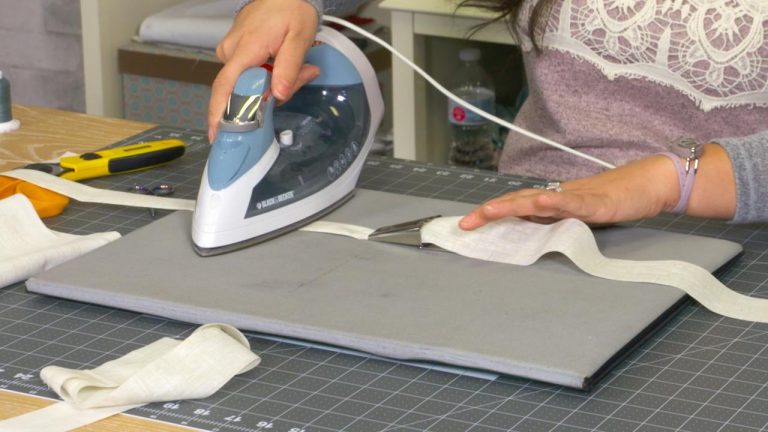
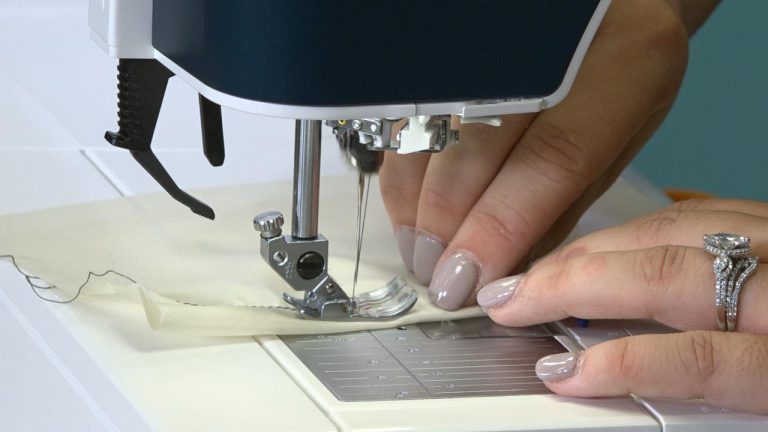
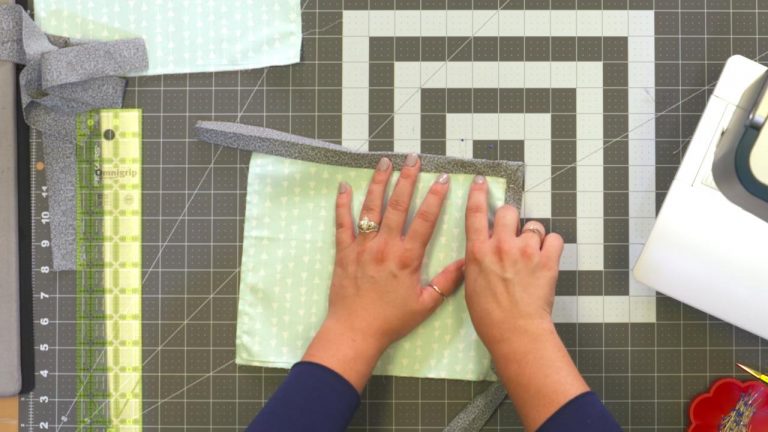
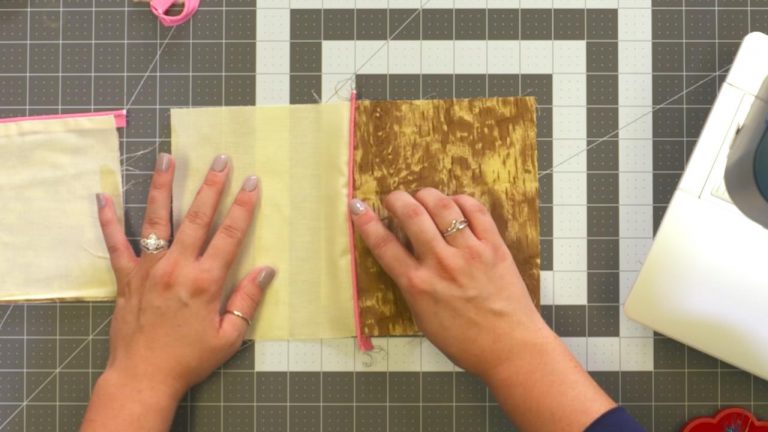
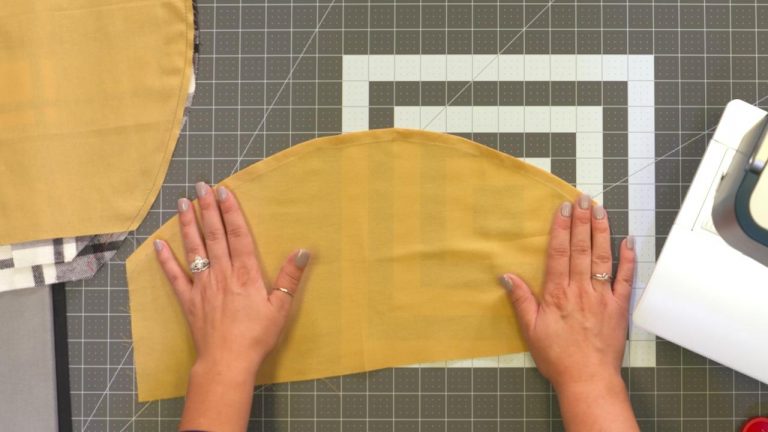
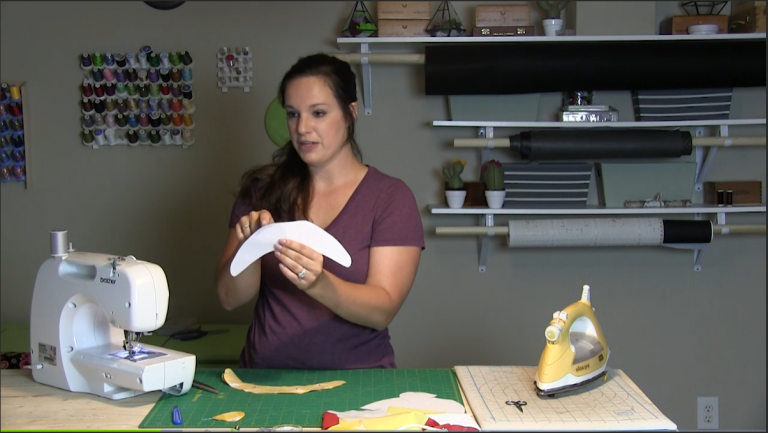
Now that we have our pocket in place and our shirt fronts ready to go, we have another option where we can add some customizing to our shirt front. And that is what's called a yoke. That's this little section here. Sort of an extra piece is added just to the upper shoulder section of the front of our shirt. Now this is something that you can add on both the front and the back. Generally, if you have one in one place, you'll wanna have in the other. That way your shirt looks balanced no matter which side you're seeing it from. And also with this, if you're using a really heavy fabric, you may want to sew on your yoke and then trim away some of this excess fabric in the back and finish it. Because it is going to be two layers of fabric once we stitch it in place. And that could be really bulky if you're using a heavier fabric. But I'ma show you how you can do it both layering as well as cutting away the fabric. So again, this is just the top section that we're going to be working with here on our front. So if your pattern already comes with a yoke, it's going to be a small little piece that looks like this. And it's gonna look a lot like just the front top section of your pattern front. And you would just cut these out and that's what they would look like. Just like this. You have your yoke. Now, if your shirt doesn't come with a yoke piece already and you want to add one, there's a really easy way you can do it. As you can see, it's really just the top of the front and it comes down to a point. So you could take the top of your front piece here. Take a pencil and decide that you want your point to come down to right around here. You'll then just take that mark, get a ruler, and extend it out to the corner of your pattern piece. Like, so all the way out and do the same thing and we're actually gonna extend it over to where these marks are. That would be about where with line up if your piece had a yoke with it. So we can take, just draw a line. We'll line it up with the one on the outside edge there. The 38 and draw it like that. And then we could trace that and you can see we have our yoke piece. But if I wanted to customize even more maybe I didn't want it to be so high up. I really wanted a drastic V to come down the front of the yoke. I can move this line all the way down to here. Especially if I don't have a pocket on this side or even if I want no pockets and I just want a really drastic yoke on the front. Bring that mark all the way down here and then have some really pronounced V's coming down the front of the shirt. So this is definitely an area where you can customize what you want that to look like. You can also go a step further and do some embroidery on the yoke, both front and back sections. And it's really common in a lot of nicer sort of western wear shirts. They have large scale embroidery on them. So again, another place that you can really make the shirt your own. So either one whether your shirt pattern comes with it or if you're making your own. I'm gonna show you how you prep it and then attach it to your shirt. Set our pattern pieces aside. And we have our shirt front here that we did from the last step and we have our pocket on. And we want to make sure that we are pressing the right side of our yoke. Because of the fabric I'm using here is just a basic cotton, so my right and my wrong sides look pretty similar. So if I wanna make sure that I'm getting the right side pressed, I would go ahead and just layer it over my pattern piece like that. And I can see that everything lines up. If I were to lay it like this, I can see that it doesn't line up. I have some extra hanging over here and I would be putting the wrong sides together. So again, make sure it's lined up. Then we wanna take it over and we're gonna do some pressing. So this is my right side. I'm gonna flip it so I have wrong side up, and we're gonna press under the edge just like we did with the pockets. Gonna be really easy. So fold under right a little bit like that and press it. So hold a little bit, make sure you're nice and press in place. And then do the same thing on our other side here, and fold it, and press it in place. Just like sew. Use a little steam if you're using a fabric that it's okay to use steam on. If I'm using nicer like a silk or something maybe no steam. It's okay to use steam here. And then I like to put it on this side and give it one more final press. 'Cause I am using steam, it's gonna heat that fabric up a little bit. So before I move it, I'm gonna let it cool down so I don't just undo the pressing I just did. Let it cool just a little bit. And now we want to actually put it onto the front of our shirt. So again, I'm just gonna lay it on there. Just how I did when I was auditioning to make sure I had the right side up. Make sure my edges are all lined up. It should look like there's just one pattern piece. I shouldn't be able to tell that there's another piece of fabric behind there. So I have it lined up. And put a couple of pins right here. One at the point make sure I have that in place, and the other one along the other side. And we're going to stitch. Now, all I need to do is stitch this in place, is just do some edge stitching right along our folded edge again. Now, this is very similar to the pocket. Now, especially if you're going to be doing sort of some decorative stitching, kind of like what I'm doing here with the black fabric and white thread. If I've picked a amount that I've gone in from my fold to do my stitching on the pocket, I need to use the same amount on this yoke here. Because they're so close to each other, If I have different widths of my edge stitching here, it's gonna be noticeable. Now, if I was using black thread on black fabric, you wouldn't really be able to see it. So it'd be okay. But if you are using the contrasting colors, you wanna make sure you keep it the same. So what I'm gonna do with the rest of my shirt is sort of just fold and roll it up. Because I don't want it to get in the way of my machine here when I'm actually doing my stitching. Put it under my presser foot, line it up, just like I did with the pocket. And all we're gonna do is edge stitch this in place. So it's very easy. Again, I have my needle down when I'm stopping in order to take out my pins. Right along the edge. And just like when we were doing the pocket and we had to turn the corner, at the corners of the pocket, we wanna stop with our needle down and pivot. Now I'm gonna pivot here like that. And I can see that I have too much fabric to the right of my needle. That means I didn't go far enough stitching this direction. So when I turn, I don't want my stitching to be uneven. So what I'ma do is go back to where I was, do one more stitch and then pivot again. And now I'm perfectly lined up. So it's okay to do that. If you've gotten all the way to the end and you realize you haven't gone far enough, then go ahead and stop, do one more stitch and make sure you're lined up before you start down the other side of your yoke piece. Move our last pin and I'm gonna stitch right off the edge. I'm not worried about doing any back stitching here because the areas where my stitching is starting and stopping are along the edges of the actual shirt. And that will get caught in our seam while we're, when we're actually assembling our shirts. So I don't need to worry about doing any back stitching there. So now this is how the front would look and how it would look if you have two layers, your front and your yoke. I'm gonna show you the back yoke section now and show you how it will look a little bit different if you don't want those two layers of fabric. So I have my back section here. Bring that around. Okay. And what I've done is I've actually have two separate pieces, the yoke top and the back. If you notice, the back sort of looks incomplete because it doesn't have the top part, which is what the yoke is. So that's what I've done here is I've cut them apart and made it to where there are two separate pieces now. That way I'm not just cutting another yoke and layering on top, but I'm actually going to sew these together and it will become one piece. So let me show you how I do that here. I have my back and I have my yoke. And you can see once I were to stitch these together that I would have my completed back piece. You can also see now I've cut these sort of drastically large, our notches here, to make sure that you really see how important the notches are and how they really play a big role in lining up your fabric. I have a little bit smaller notches here on my back but you can see that no matter what size you cut them, you can always trim them down later if they're too big but you need to have them there. So with right sides together, I would layer my fabric like this. And I'm just gonna put some pins in place. And the way I like to do my pins is I like to start at the edges because I find that that's an important place to make sure you have lined up. Go ahead and make sure my edges are aligned. Like so. And put in a pin. Then move all the way to the other side and make sure that this side is lined up as well. Because if you've cut out all of your pieces according to your patterns, you really should have your edges match up perfectly. Next area that I'm gonna do pins is right at our notches because those should also match up. So I can go ahead and put a pin on this notch. And again, over here on this notch. Like so. And then I can go ahead and disperse pins throughout the rest of the area if I need to. Or in an area like this where there's not that much space between, I don't actually need any more pins. But here, I can go ahead and just put another pin in. Right here. Make sure everything is laying nice and flat. I really feel like the more pins that you put into your fabric, the better. You really wanna make sure that everything lays nice and flat. It really does you no good to use only one pin, two pins, stitch it, and then something didn't line up at the other end. So it may take a little bit of extra time if you really are meticulous and go through and put your pins in place. But in the end, it'll save you time because everything will be nice and flat. So now we have a pin and we can go ahead and just stitch. Now, this is the first time we're actually going to be doing construction stitching on our shirt. So when you're making any sort of garments, you wanna use a five eighth inch seam allowance. That is what is already written into all of your pattern pieces. So that's the seam allowance that you wanna use. So I'm gonna go over here, line up my fabric for my five eighth inch seam allowance. And this machine will automatically do a couple stitches to back stitch to secure before you get started. If yours doesn't have that feature, you do wanna add just a little backstitch here. Because again, we're getting into construction stitching versus just decorative or top stitching. So we really wanna make sure that it stays in place where we want it to. I'm gonna remove my pins as I get to them. And we're just gonna stitch right along. This is a very easy seam. It's just straight across. I'm gonna pause right here 'cause I can see my notches are coming up. And you might think, all right, I have my lines that I'm lining up my fabric with on my throat plate but I can't see them because my notches are here. Most times, I fold this back a little bit, on your throat plate, they'll actually extend these lines out onto the plastic bobbin case cover. That so you can actually see around your notches. So when you're stitching, I can see my lines extended right here. So even though I can't see it back here underneath my notch, I can still see it right here. Now, if you think that if yours doesn't have that or if you're having trouble seeing it. Once you have everything pinned and lined up, you can go ahead and just clip all your notches off and then they're not in your way at all when you get to stitching. Pause, take my pin out and then we can just continue. The rest of the way down. So. Again, I'm coming up to my end here. I'm gonna go ahead and add a couple of back stitches 'cause I want this to be nice and secure. Don't want anything coming out. And cut my threads. So now I have my completed back piece just like this. And I'm gonna press that in a minute. But what I want to show you is say you don't want to have the seam here. You don't wanna have the back yoke. You just want one completed piece but the pattern you got came with a yoke piece already existing. Well, it's really easy to just tape your pieces together. The one thing that you are gonna wanna take into account is again your five eighth inch seam allowances. Because this is something that is already built into your pattern pieces, you wouldn't wanna just line up these edges and tape like that. Because then you're going to be too long. So you're gonna wanna overlap, account for your five eighth inch seam allowance, and then tape them, and then you can go ahead and just cut it out as one piece. And you wouldn't have the seam across the back. So now that we have that stitched, we're gonna talk a little bit about seam finishes. And this may seem a little bit early to start talking about seam finishes. But when you're making a shirt like this, especially a formal dress shirt, you really wanna make sure that the inside of your shirt looks just as good as the outside. You really want it to be comfortable. You don't wanna have any areas where you might have something rubbing on anybody. And more importantly, you just don't wanna be able to see this area of your shirt. So you need to do something like seam finishes. And in some cases it's easier to do the seam finishes as you're doing the steps with your shirt. With the example of this back piece here. We're gonna finish this seam. Now, if I didn't finish this seam and I left it like this. And then we went ahead and we stitched our back to our sleeves. Well, this area here is gonna get caught in that same allowance. And then there's no way I can finish that little area. It's already caught in another stitching and it's just going to be sort of a mess of fabric there. So you want to do finishing as you go along some steps. So we are going to do what's called a flat felled seam. That's how we're going to finish this. So if I've just taken my fabric off and I've just stitched it, the first thing we need to do is press. So I'm gonna put it this way. And what I wanna do as you can see I have my seam allowances here. And then I'm just going to fold up my piece. So my seam allowances are going to the top of the shirt or towards our yoke piece. To give this a nice press, you want to lay nice and flat. Like so. And then we'll turn it back over and we'll work on the backside here. So in order to do a flat felled seam, what entails is you're going to trim one of these sides and then you're going to use the other side to fold over and encase that raw edge. So I have my scissors here and it's really important to know which edge you're cutting off. So since I've pressed it this way, like so. I'll hold it and see. It's facing this way. This is now my top. I need to cut off this bottom seam piece. So I'm just gonna take my scissors and I'm trimming close to the stitching line. Not too close that I'm gonna accidentally cut any of my stitches. But just trimming this off like this. Take it down at least half or maybe even a little more than half. Go right on. And it's really, I find holding it like this is a lot easier when you're cutting. Because I'm holding this flat back, so I know I'm not accidentally gonna cut this. And I've also folded under back here, the other part of our shirt. So we know I'm not accidentally gonna catch that and cut that either. 'Cause if you do that in either place, you're probably going to have to start over unless you want your new shirt to have a patch in it already. So we're going right across. Okay, we have that. And now, because we're going to be doing some folding on the top, I now don't want those notches there. They're gonna add extra bulk that I don't need. I don't need them anymore because I've already stitched. So I can just go ahead and cut them off. Don't need them. Okay. Now we're gonna fold our shirt back out. And we're gonna do the folding part. That is what makes the flat felled seam. And then take the remaining intact seam allowance, fold it over the edge we just trimmed and press it. I'm gonna press it just like that. 'Cause I folded it under and I'm gonna press. And once you kinda get the edge going, you can just work your way across folding under. Impressing. If you wanna stop and move your fabric over, get centered again and then fold and press. Everything folded like that. Okay. Press it in place again. Again, we're gonna move over a little bit more. Fold and press. Now you could just right off the bat, fold it, put some pins in it, and then take it over, and stitch. I like to press things first, especially when I'm using a fabric like this cotton that is easily pressable and it stays once you press it, some fabrics tend to unfold as soon as you're done pressing them. But if it stays and it really helps hold everything in place, it's just a little extra security there. So why not use it? So now that I have pressed, I could go ahead and put a couple pins in again. Or if your fabric is staying, you wouldn't need any. But just to show, I'm gonna go ahead and put a pin in. I would just make sure I have my flap there secured. And then it's really up to you as to which side you wanna stitch this from. In my case, my bobbin and needle thread are the same color. So it doesn't really matter which side the thread shows on and which side the bobbin shows on. Now my personal preference is to stitch from the right side, And I do this because I really want the outside to look good. So I'm most worried with making sure that my stitching is consistent in the distance from this fold. Now, if I was doing it stitching with the wrong side up, I could still do that but it's a little bit harder to see this line of stitching because of where your bobbin and needle thread here, you can't really see it that well. But I like to do it from the top and keep my stitching consistent against that fold. So again, I have folded my seam towards the top. So that means that that's where I need to be stitching at. You don't wanna stitch down here on the bottom because that's not where your fold is. You need to be holding this fold in place. So I'ma lineup my foot right along the fold here that I wanna line up on. And I know I'm stitching on my red line. So that gives me just a very small area of space between my stitching and the yoke and back fold. Go ahead and go right along and I'll just stitch a little ways and then show you what this looks like. So again, I'm going pretty slow. I didn't put any pins on the back because I pressed everything nice. So I don't have to worry about stopping to take anything out. And really when you're doing edge stitching or something where you're really needing to concentrate on keeping your foot lined up, the less you can stop, the better off you are. 'Cause when you stop, you see your fabric shifts a little, you have to sort of realign yourself and then start again. So the less stop you can do the better. So let me show you what this is going to look like here. See, we have our nice even stitching right along here and it lines up. There's even distance between our stitching and this fold here. And on the back, we have cut our fold and we have fully encased that seam. So you can see, I'll just unfold this one for comparison. You can see how much nicer the inside of your shirt is going to look if you've got a nice, finished, flat felled seam here versus what it would look like if you have just you know, fabric that can ravel. You don't really wanna be seeing that on the inside. So definitely, it might take some extra time to finish all your seams, but it's really something that you wanna do. And it really gives your shirt the nice professional, finished look that you want to have. So again, in this case, it made sense for us to finish this step as we went. And moving forward, I will let you know when those places are relevant, where you'd wanna finish as you go, and what you can save and finish at the end. But this was definitely one we wanted to finish here. And now that we have our yokes in place, that means our front and our back are pretty much ready to go. And we can move on with our shirt.
Get exclusive premium content! Sign up for a membership now!